
Grow Coral Bells from Seed and unlock a world of vibrant foliage right in your own backyard! Have you ever admired the stunning array of colors and textures that Coral Bells (Heuchera) bring to gardens and thought, “I wish I could do that”? Well, you absolutely can! This isn’t just another gardening article; it’s your personal guide to propagating these beauties from the very beginning – from seed to spectacular plant.
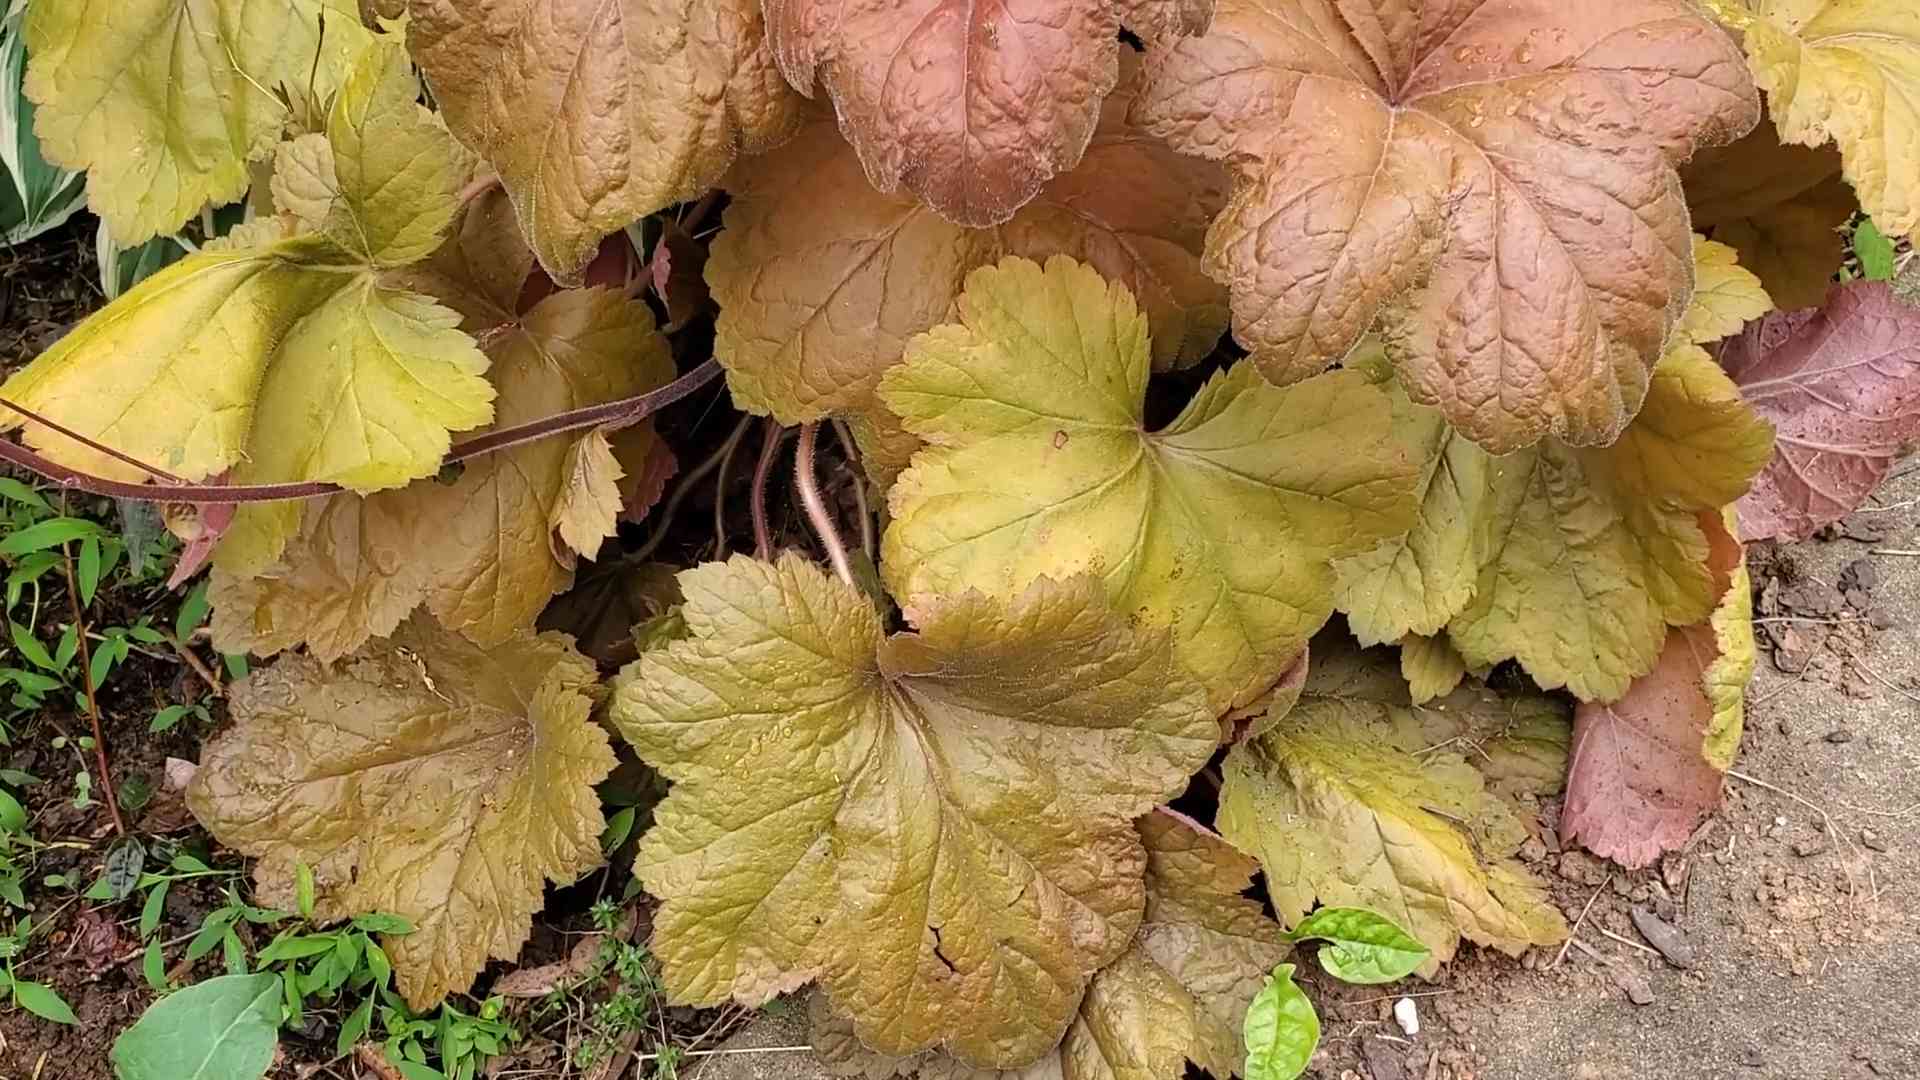
Coral Bells, native to North America, have a rich history of gracing gardens with their unique charm. They were initially appreciated for their medicinal properties by indigenous peoples, but their ornamental value quickly took center stage. Today, they’re a staple in modern landscaping, prized for their resilience and the kaleidoscope of hues they offer, from deep purples and reds to vibrant greens and oranges.
Why should you bother learning to grow Coral Bells from seed? Simple: it’s incredibly rewarding, cost-effective, and allows you to cultivate rare or unique varieties that might not be readily available at your local nursery. Plus, mastering this skill empowers you to expand your garden exponentially and share the joy of these captivating plants with friends and family. I’m here to show you that starting from seed isn’t as daunting as it seems. With a few simple tricks and a little patience, you’ll be well on your way to creating a Coral Bell paradise!
Growing Coral Bells (Heuchera) from Seed: A Complete DIY Guide
Hey there, fellow gardening enthusiasts! I’m so excited to share my experience with growing Coral Bells (Heuchera) from seed. It might seem a little daunting at first, but trust me, it’s incredibly rewarding to watch these beauties sprout from tiny specks. Plus, it’s a fantastic way to expand your collection without breaking the bank!
This guide will walk you through every step, from preparing your seeds to transplanting your seedlings. Let’s get started!
What You’ll Need
Before we dive in, let’s gather all the necessary supplies. Having everything ready beforehand will make the process much smoother.
* **Coral Bells Seeds:** Obviously! Make sure you get them from a reputable source to ensure good germination rates.
* **Seed Starting Trays or Pots:** I prefer seed starting trays with individual cells, but small pots work just as well.
* **Seed Starting Mix:** This is crucial! Don’t use regular potting soil; it’s too heavy and can hinder germination. Seed starting mix is light and airy.
* **Spray Bottle:** For gently watering the seeds.
* **Clear Plastic Wrap or Humidity Dome:** To maintain moisture levels.
* **Grow Lights (Optional but Recommended):** Coral Bells seeds need light to germinate, so grow lights can significantly improve your success rate, especially if you’re starting them indoors during winter.
* **Heat Mat (Optional):** Coral Bells seeds germinate best with slightly warmer soil temperatures.
* **Small Tweezers or a Toothpick:** For handling the tiny seeds.
* **Labels:** To keep track of which variety you’re growing.
* **Pencil or Marker:** For labeling.
* **Well-draining Potting Mix:** For transplanting the seedlings later.
* **Small Pots (2-3 inch):** For transplanting the seedlings into individual pots.
Preparing Your Coral Bells Seeds
Coral Bells seeds are notoriously tiny, which can make them a bit tricky to handle. But don’t worry, I’ve got some tips to make it easier!
1. **Check Seed Viability:** While not always necessary, you can perform a quick viability test. Place a few seeds on a damp paper towel, fold it over, and put it in a plastic bag. Keep it in a warm place for a few days. If the seeds sprout, you know your batch is viable.
2. **No Pre-Soaking Required:** Unlike some seeds, Coral Bells seeds don’t need to be pre-soaked. They’re ready to go straight into the seed starting mix.
Sowing Your Coral Bells Seeds
This is where the magic happens! Follow these steps carefully to give your seeds the best possible start.
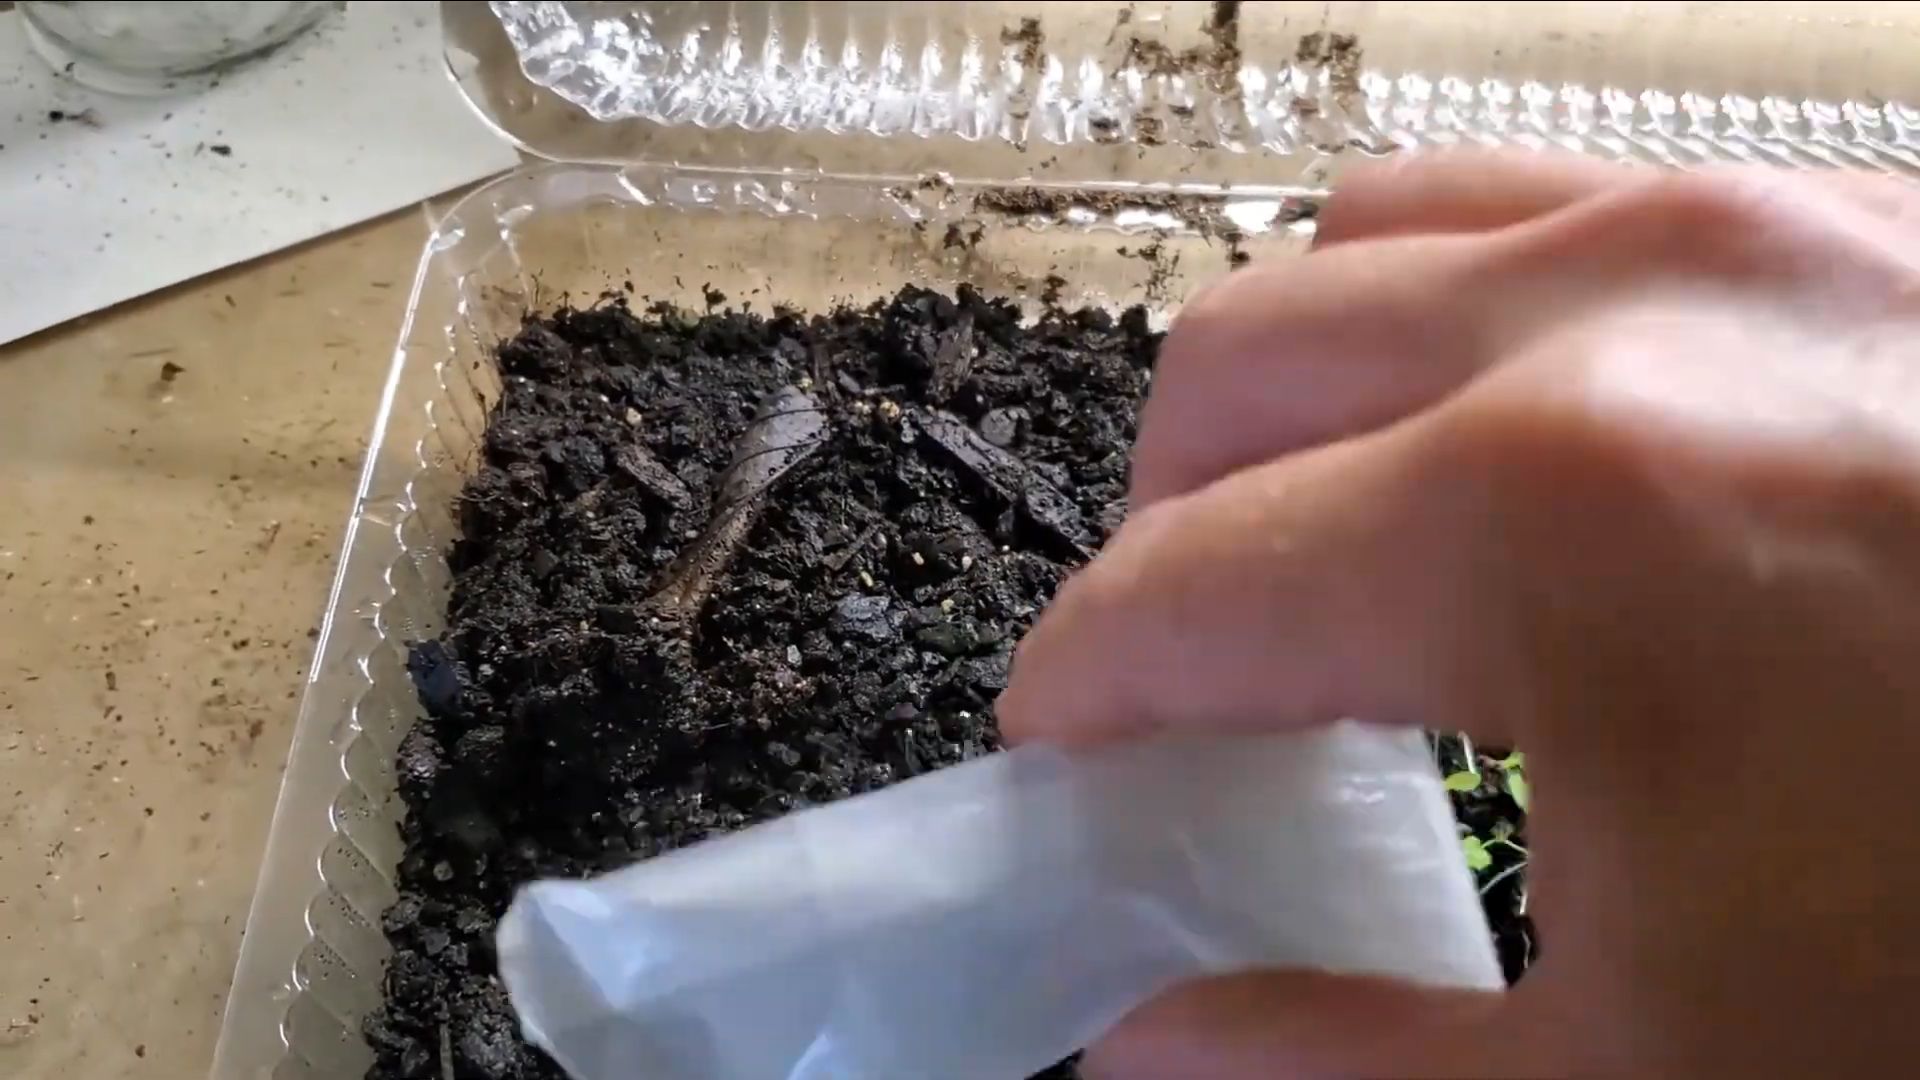
1. **Moisten the Seed Starting Mix:** Before filling your trays or pots, thoroughly moisten the seed starting mix. It should be damp but not soggy. I like to do this in a large bowl or bucket.
2. **Fill the Trays or Pots:** Fill your seed starting trays or pots with the moistened mix, leaving about half an inch of space at the top. Gently pat down the mix to remove any air pockets.
3. **Sow the Seeds:** This is the trickiest part because the seeds are so small. The goal is to sow them thinly on the surface of the mix. I find it helpful to use a small piece of folded paper to gently tap the seeds out of the packet. You can also use tweezers or a toothpick to pick up individual seeds. Aim for about 2-3 seeds per cell or pot.
4. **Don’t Cover the Seeds:** Coral Bells seeds need light to germinate, so don’t cover them with soil. Simply press them gently onto the surface of the mix to ensure good contact.
5. **Label Everything:** This is super important! Label each tray or pot with the variety of Coral Bells you’re growing and the date you sowed the seeds. Trust me, you’ll thank yourself later.
Creating the Ideal Germination Environment
Coral Bells seeds need consistent moisture and warmth to germinate successfully. Here’s how to create the perfect environment:
1. **Mist with Water:** Gently mist the surface of the mix with a spray bottle. Be careful not to dislodge the seeds.
2. **Cover with Plastic Wrap or a Humidity Dome:** Cover the trays or pots with clear plastic wrap or a humidity dome to maintain moisture levels. This will prevent the mix from drying out too quickly.
3. **Place Under Grow Lights (Recommended):** Place the trays or pots under grow lights. Position the lights a few inches above the surface of the mix. If you don’t have grow lights, you can place them in a bright, indirect light location, but germination rates may be lower.
4. **Use a Heat Mat (Optional):** If you’re using a heat mat, set it to a temperature of around 70-75°F (21-24°C). This will help to speed up germination.
5. **Monitor Moisture Levels:** Check the moisture levels daily. If the mix starts to dry out, mist it gently with water.
Germination and Early Seedling Care
Germination typically takes 10-21 days, but it can sometimes take longer depending on the variety and environmental conditions. Be patient!
1. **Ventilate Regularly:** Once you see seedlings starting to emerge, start ventilating the trays or pots by removing the plastic wrap or humidity dome for a few hours each day. This will help to prevent fungal diseases.
2. **Keep the Mix Moist:** Continue to keep the mix consistently moist, but not soggy.
3. **Thin Out Seedlings (If Necessary):** If you have multiple seedlings growing in the same cell or pot, you may need to thin them out. Use small scissors to snip off the weaker seedlings at the base, leaving the strongest one to grow.
4. **Fertilize Sparingly:** Once the seedlings have developed their first true leaves (the leaves that look like miniature versions of the adult plant’s leaves), you can start fertilizing them with a very dilute solution of liquid fertilizer. I use a balanced fertilizer diluted to half strength. Fertilize every 2-3 weeks.
Transplanting Your Coral Bells Seedlings
Once your seedlings have grown large enough to handle, it’s time to transplant them into individual pots. This will give them more space to grow and develop strong root systems.
1. **Harden Off the Seedlings:** Before transplanting, you’ll need to harden off the seedlings. This means gradually acclimating them to outdoor conditions. Start by placing them outdoors in a sheltered location for a few hours each day, gradually increasing the amount of time they spend outside over the course of a week.
2. **Prepare the Pots:** Fill small pots (2-3 inch) with well-draining potting mix.
3. **Gently Remove the Seedlings:** Carefully remove the seedlings from the seed starting trays or pots. Use a small spoon or fork to gently lift them out, being careful not to damage the roots.
4. **Plant the Seedlings:** Plant each seedling in its own pot, making sure the top of the root ball is level with the surface of the mix.
5. **Water Thoroughly:** Water the seedlings thoroughly after transplanting.
6. **Place in a Bright Location:** Place the transplanted seedlings in a bright, indirect light location.
7. **Continue to Water and Fertilize:** Continue to water and fertilize the seedlings as needed.
Caring for Your Young Coral Bells Plants
Now that your Coral Bells plants are growing in their own pots, it’s time to provide them with the care they need to thrive.
1. **Watering:** Water regularly, allowing the soil to dry out slightly between waterings. Avoid overwatering, as this can lead to root rot.
2. **Fertilizing:** Fertilize every 2-3 weeks with a balanced liquid fertilizer diluted to half strength.
3. **Light:** Coral Bells prefer partial shade, so avoid placing them in direct sunlight, especially during the hottest part of the day.
4. **Pest and Disease Control:** Keep an eye out for pests and diseases. Common pests include slugs and snails, while common diseases include powdery mildew and rust. Treat any problems promptly.
Transplanting into the Garden
Once your Coral Bells plants have grown large enough and the weather is warm enough, you can transplant them into the garden.
1. **Choose a Location:** Choose a location that receives partial shade and has well-draining soil.
2. **Prepare the Soil:** Amend the soil with compost or other organic matter to improve drainage and fertility.
3. **Dig a Hole:** Dig a hole that is slightly larger than the root ball of the plant.
4. **Plant the Coral Bells:** Gently remove the plant from its pot and place it in the hole. Make sure the top of the root ball is level with the surface of the soil.
5. **Fill in the Hole:** Fill in the hole with soil and gently pat it down.
6. **Water Thoroughly:** Water the plant thoroughly after transplanting.
Conclusion
So, there you have it! Growing Coral Bells from seed might seem a little daunting at first, but with a little patience and the right approach, you can unlock a world of vibrant foliage and stunning colors in your garden. This DIY trick isn’t just about saving money; it’s about experiencing the joy of nurturing life from its very beginning and having complete control over the varieties you cultivate. Think about it: you can select seeds from your favorite Coral Bells, ensuring you get exact replicas or even experiment with cross-pollination to create entirely new and unique hybrids!
Why is this a must-try? Because it empowers you to become a true gardener, connected to the natural cycle of growth. It allows you to access rare or hard-to-find cultivars that might not be available at your local nurseries. And, let’s be honest, there’s a certain satisfaction that comes from knowing you grew those gorgeous Coral Bells from a tiny seed.
Consider these variations to personalize your experience. Try using different types of seed starting mixes to see which one works best for you. Experiment with different light levels during germination and early growth. And don’t be afraid to get creative with your containers – recycled yogurt cups, egg cartons, or even repurposed plastic containers can all work beautifully.
For a truly unique display, consider grouping different varieties of Coral Bells together in a single container. The contrasting colors and textures will create a stunning visual impact. You can also use Coral Bells as ground cover, edging plants, or even in rock gardens. Their versatility makes them a valuable addition to any landscape.
Growing Coral Bells from seed opens up a world of possibilities for your garden. It’s a rewarding experience that allows you to connect with nature, save money, and create a truly unique and personalized landscape.
We encourage you to give this DIY trick a try. Don’t be discouraged if your first attempt isn’t perfect. Gardening is a learning process, and every failure is an opportunity to improve. The key is to be patient, observant, and willing to experiment.
Once you’ve successfully grown your own Coral Bells from seed, we’d love to hear about your experience! Share your tips, tricks, and photos in the comments below. Let’s create a community of Coral Bell enthusiasts and inspire others to embark on this rewarding journey. What varieties did you grow? What challenges did you face? What successes did you celebrate? Your insights can help others achieve their gardening goals.
Remember, the beauty of gardening lies not just in the final result, but in the process itself. So, get your hands dirty, embrace the challenge, and enjoy the journey of growing your own Coral Bells from seed. You might be surprised at what you can achieve!
Frequently Asked Questions (FAQ)
What is the best time of year to start Coral Bell seeds?
The ideal time to start Coral Bell seeds is typically late winter or early spring, about 8-10 weeks before the last expected frost. This allows the seedlings enough time to develop before being transplanted outdoors in the spring. Starting them indoors gives them a head start and protects them from harsh weather conditions. However, you can also start them in late summer or early fall for transplanting the following spring, especially in regions with mild winters.
How long does it take for Coral Bell seeds to germinate?
Coral Bell seeds can be a bit slow to germinate. You can generally expect germination to occur within 14-21 days, but it can sometimes take longer, even up to a month. Maintaining consistent moisture and warmth is crucial during this period. Be patient and avoid disturbing the seeds too much.
What kind of soil is best for starting Coral Bell seeds?
A fine-textured, well-draining seed starting mix is ideal for Coral Bell seeds. Avoid using garden soil, as it can be too heavy and may contain pathogens that can harm the seedlings. A mix of peat moss, vermiculite, and perlite is a good option. You can also purchase commercially available seed starting mixes from your local garden center. Ensure the mix is sterile to prevent fungal diseases.
Do Coral Bell seeds need light to germinate?
Yes, Coral Bell seeds require light to germinate. They are very small and should be surface-sown, meaning they should not be covered with soil. Gently press the seeds into the surface of the seed starting mix and mist them with water. Place the container in a bright location, such as under grow lights or near a sunny window, but avoid direct sunlight, which can scorch the seedlings.
How often should I water Coral Bell seedlings?
Keep the seed starting mix consistently moist, but not waterlogged. Waterlogged soil can lead to fungal diseases and root rot. Mist the seedlings regularly with a spray bottle to avoid disturbing the delicate roots. As the seedlings grow, you can gradually reduce the frequency of watering, allowing the top of the soil to dry out slightly between waterings.
When can I transplant Coral Bell seedlings outdoors?
Transplant Coral Bell seedlings outdoors after the last expected frost and when the soil has warmed up. Harden off the seedlings for a week or two before transplanting by gradually exposing them to outdoor conditions. Start by placing them in a sheltered location for a few hours each day, gradually increasing the amount of time they spend outdoors. Choose a location with well-draining soil and partial shade.
What are some common problems when growing Coral Bells from seed?
Some common problems include damping off (a fungal disease that affects seedlings), overwatering, underwatering, and lack of light. Damping off can be prevented by using a sterile seed starting mix and avoiding overwatering. Ensure the seedlings receive adequate light to prevent them from becoming leggy. Monitor the seedlings regularly for signs of pests or diseases and take appropriate action if necessary.
Can I collect seeds from my existing Coral Bells?
Yes, you can collect seeds from your existing Coral Bells. Allow the flower stalks to dry completely on the plant. Once the seed pods are dry and brown, carefully cut them off and place them in a paper bag. Gently crush the seed pods to release the seeds. Separate the seeds from the chaff by sifting them through a fine-mesh sieve. Store the seeds in a cool, dry place until you are ready to plant them. Keep in mind that Coral Bells can cross-pollinate, so the seeds may not produce plants that are identical to the parent plant.
What are some good companion plants for Coral Bells?
Coral Bells pair well with a variety of other plants, including hostas, ferns, astilbes, and bleeding hearts. These plants all prefer similar growing conditions (partial shade and well-draining soil) and create a beautiful and harmonious garden display. The contrasting colors and textures of these plants can add visual interest to your garden.
How do I care for Coral Bells after transplanting them outdoors?
After transplanting Coral Bells outdoors, water them regularly until they are established. Apply a layer of mulch around the base of the plants to help retain moisture and suppress weeds. Fertilize them lightly in the spring with a balanced fertilizer. Deadhead spent flower stalks to encourage continued blooming. Coral Bells are relatively low-maintenance plants and are generally resistant to pests and diseases.
Leave a Comment