
Grow Swiss Chard Indoors? Absolutely! Imagine fresh, vibrant Swiss chard gracing your plate, even when the snow is falling outside. Forget those sad, wilted greens from the grocery store – with a little know-how, you can cultivate your own delicious and nutritious bounty right in your home.
For centuries, leafy greens like Swiss chard have been a staple in diets around the world, prized for their health benefits and versatility in the kitchen. From hearty soups to vibrant salads, Swiss chard adds a pop of color and a boost of vitamins. But what if you don’t have a sprawling garden or the perfect outdoor climate? That’s where the magic of indoor gardening comes in!
I know what you’re thinking: “Indoor gardening sounds complicated!” But trust me, it doesn’t have to be. This DIY guide is packed with simple tricks and hacks to help you successfully grow Swiss Chard Indoors, regardless of your experience level. We’ll cover everything from choosing the right containers and soil to providing adequate light and water.
Why should you bother with this DIY project? Because fresh, homegrown produce is simply better! It’s tastier, healthier, and more sustainable. Plus, there’s something incredibly satisfying about nurturing a plant from seed to harvest. So, let’s ditch the store-bought greens and embark on this exciting indoor gardening adventure together!
Growing Swiss Chard Indoors: A Beginner’s Guide
Hey there, fellow plant enthusiasts! Ever thought about growing your own vibrant, nutritious Swiss chard right inside your home? It’s easier than you might think, and trust me, the satisfaction of harvesting your own greens is totally worth it. I’ve been growing Swiss chard indoors for a while now, and I’m excited to share my tips and tricks with you. Let’s get started!
Choosing the Right Variety
First things first, let’s talk about Swiss chard varieties. While all Swiss chard is delicious and nutritious, some varieties are better suited for indoor growing than others. Here are a few of my favorites:
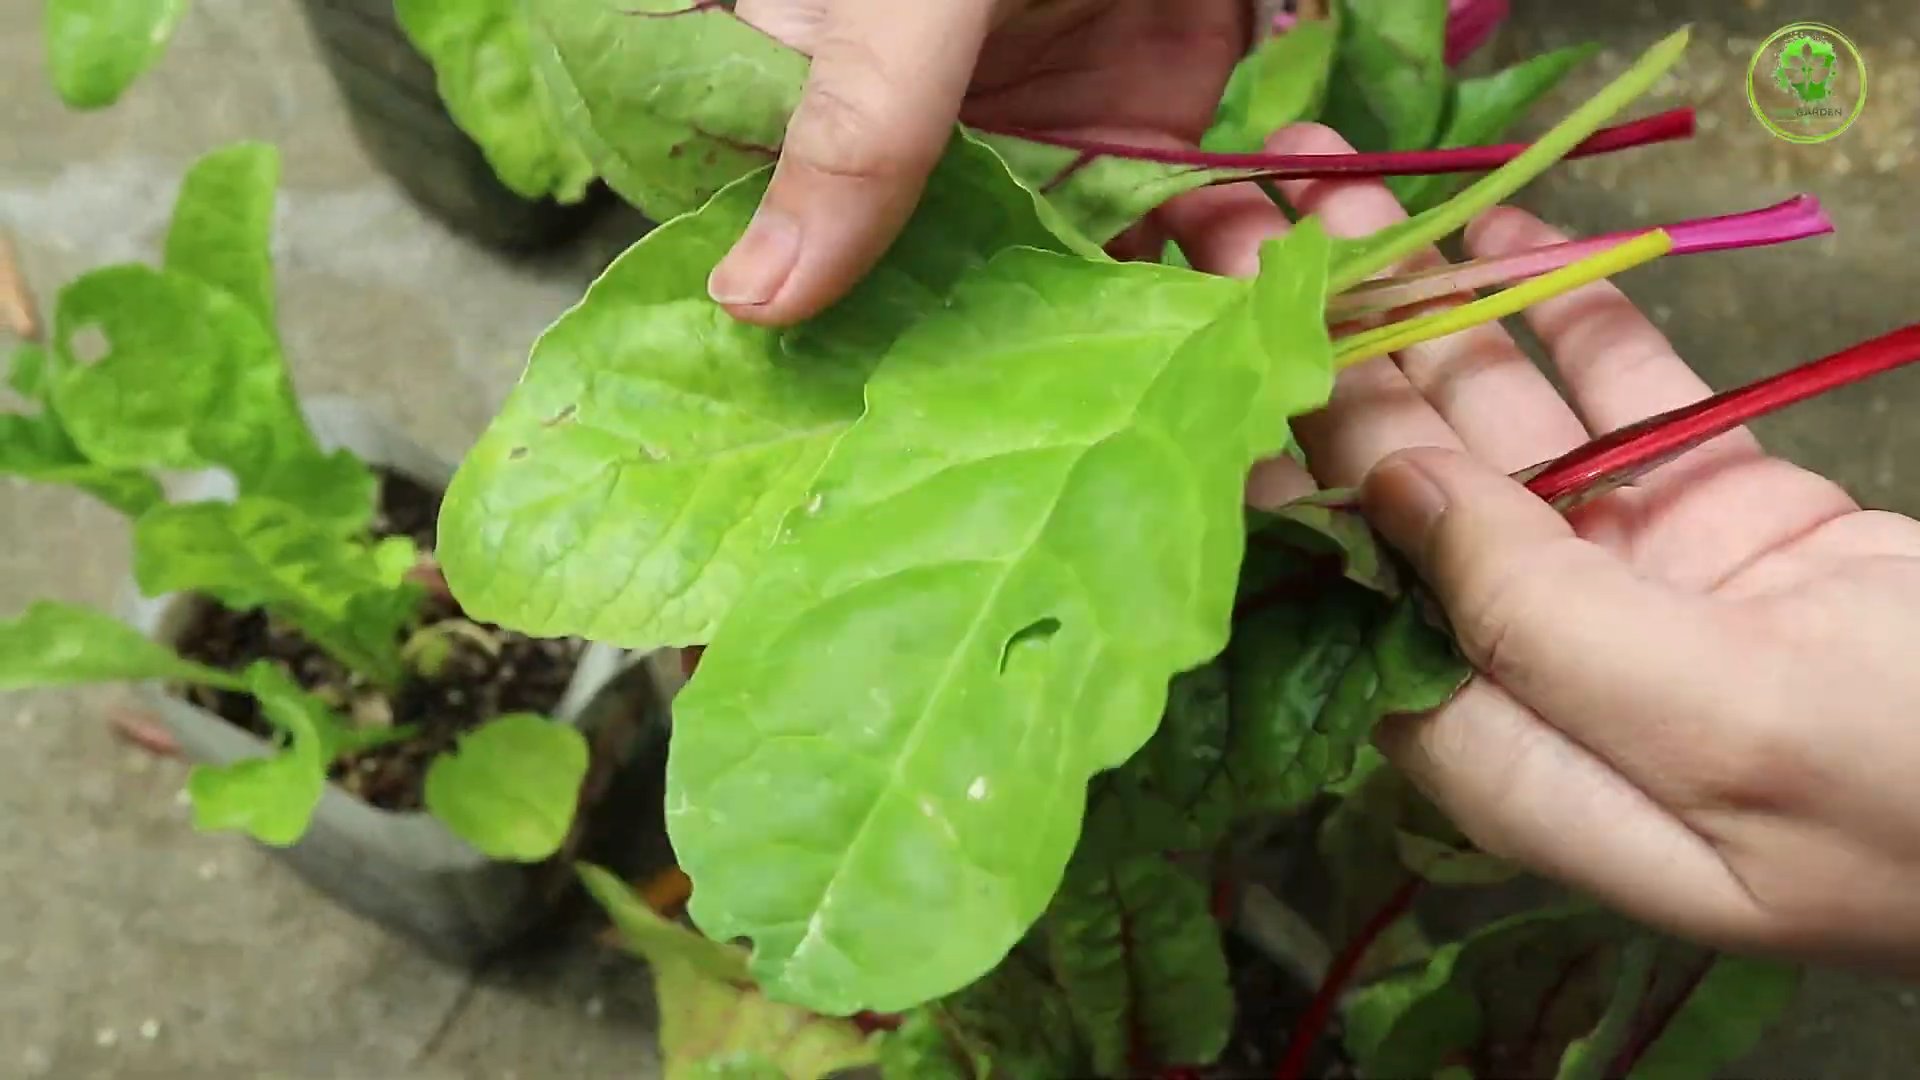
* Bright Lights: This variety is a showstopper with its rainbow of colorful stems – red, yellow, orange, pink, and white. It’s not just pretty; it’s also quite compact, making it ideal for containers.
* Fordhook Giant: As the name suggests, this variety can get quite large, but you can easily manage its size by harvesting regularly. It has dark green, crinkled leaves and thick white stems.
* Lucullus: This is a classic variety with light green, heavily crumpled leaves and thick, juicy stalks. It’s known for its excellent flavor and productivity.
Gathering Your Supplies
Before we dive into the planting process, let’s make sure you have everything you need. Here’s a checklist:
* Seeds: Choose a high-quality seed packet from a reputable supplier.
* Containers: You’ll need containers that are at least 6-8 inches deep and wide. I prefer using pots with drainage holes to prevent waterlogging.
* Potting Mix: Use a well-draining potting mix specifically formulated for vegetables. Avoid using garden soil, as it can compact and hinder drainage.
* Grow Lights (Optional but Recommended): While Swiss chard can tolerate some shade, it thrives under bright light. If you don’t have a sunny windowsill, consider investing in grow lights.
* Watering Can or Spray Bottle: For gentle and even watering.
* Fertilizer: A balanced liquid fertilizer or slow-release fertilizer to provide essential nutrients.
* Seed Starting Tray (Optional): If you prefer to start your seeds indoors before transplanting.
Planting Your Swiss Chard
Now for the fun part – planting! You have two options: direct sowing or starting seeds indoors. I usually prefer direct sowing because it’s less work, but starting seeds indoors can give you a head start.
Direct Sowing
1. Prepare Your Containers: Fill your containers with potting mix, leaving about an inch of space at the top.
2. Sow the Seeds: Sow the seeds about ½ inch deep and 1-2 inches apart. You can sow a few extra seeds per container to ensure good germination.
3. Water Gently: Water the soil gently until it’s evenly moist but not soggy.
4. Provide Light: Place the containers in a sunny location or under grow lights.
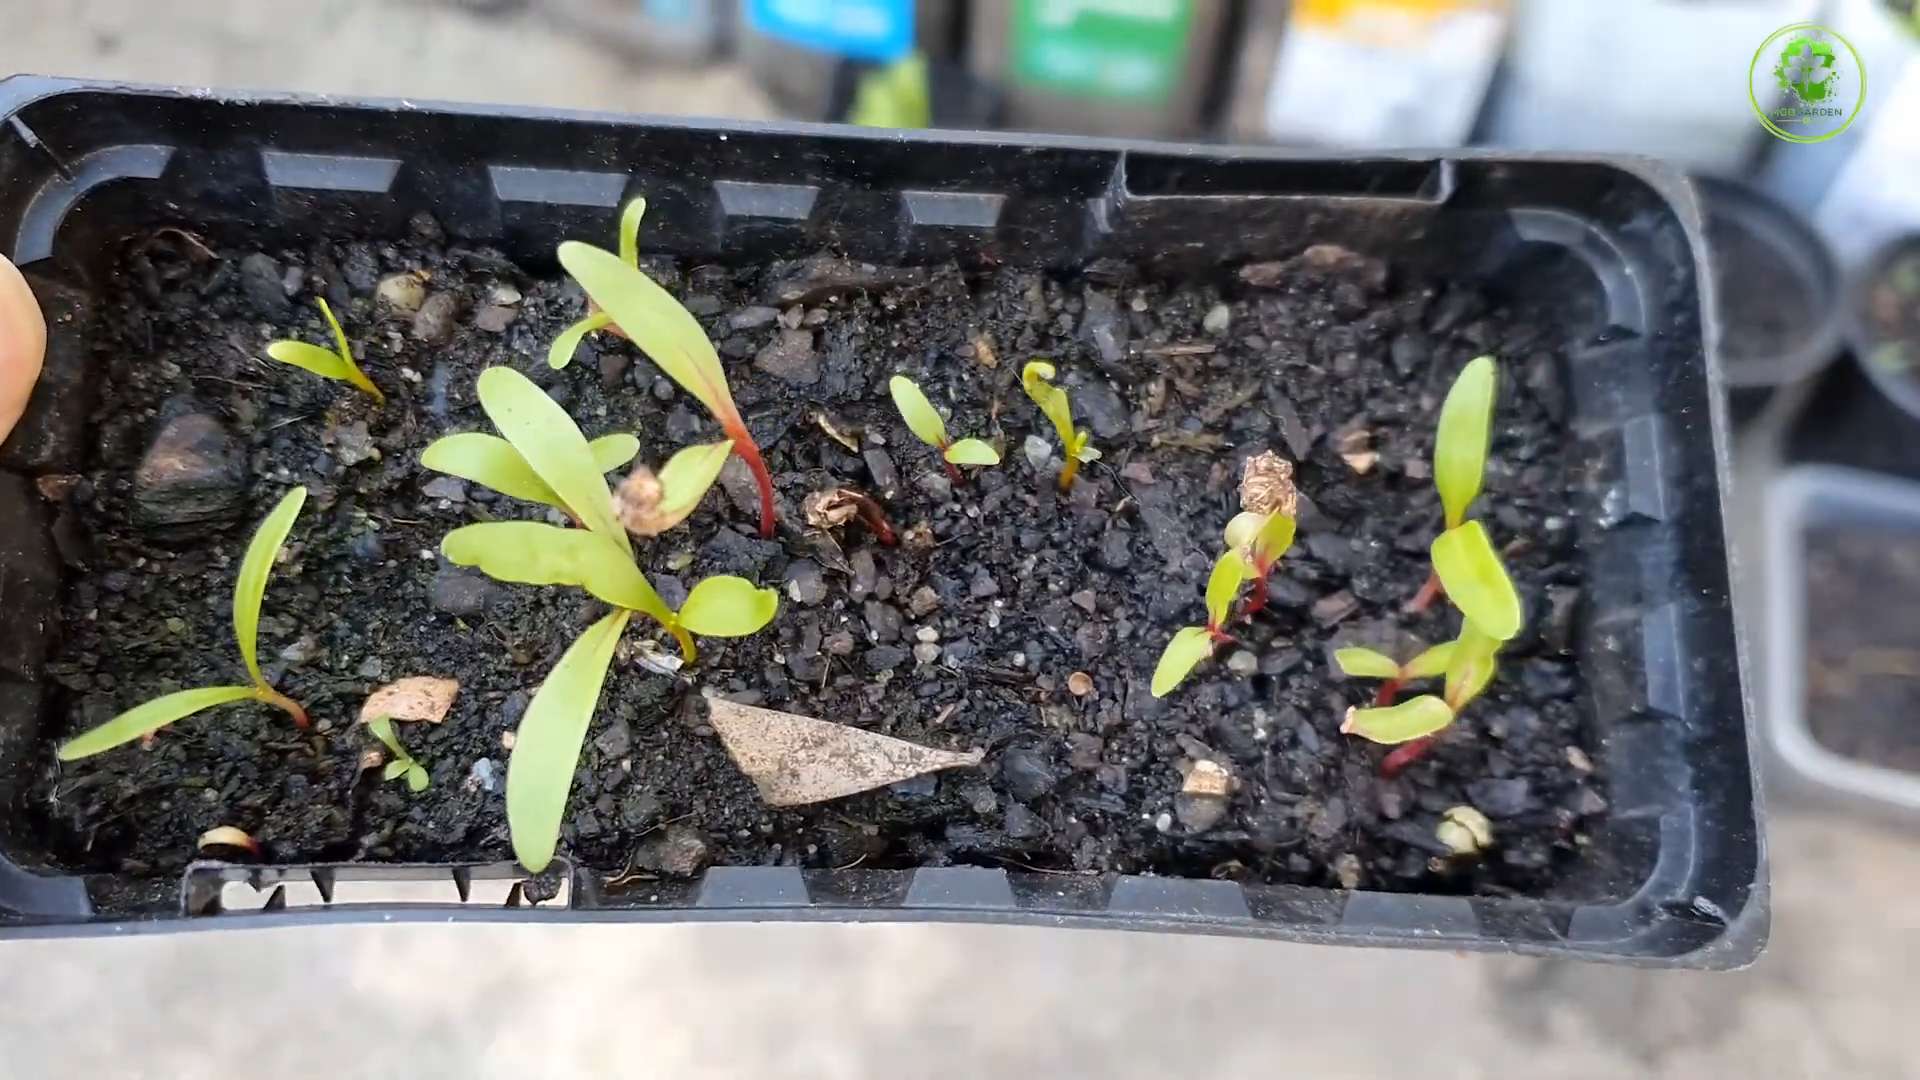
5. Maintain Moisture: Keep the soil consistently moist until the seeds germinate, which usually takes 5-10 days.
Starting Seeds Indoors
1. Fill Seed Starting Tray: Fill your seed starting tray with potting mix.
2. Sow the Seeds: Sow the seeds about ½ inch deep in each cell of the tray.
3. Water Gently: Water the soil gently until it’s evenly moist.
4. Provide Light and Warmth: Place the tray in a warm location (around 70-75°F) and under grow lights.
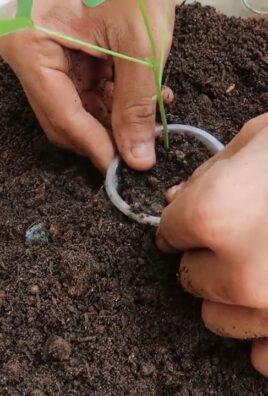
5. Transplant Seedlings: Once the seedlings have developed a few sets of true leaves (usually after 2-3 weeks), transplant them into your containers. Be careful not to damage the roots during transplanting.
Caring for Your Swiss Chard
Once your Swiss chard seedlings are established, it’s time to provide them with the care they need to thrive.
1. Watering: Water your Swiss chard regularly, keeping the soil consistently moist but not waterlogged. Check the soil moisture by sticking your finger about an inch deep. If it feels dry, it’s time to water.
2. Lighting: Swiss chard needs at least 6 hours of sunlight per day. If you’re growing it indoors, supplement with grow lights if necessary. I use LED grow lights and find they work great.
3. Fertilizing: Feed your Swiss chard every 2-3 weeks with a balanced liquid fertilizer or slow-release fertilizer. Follow the instructions on the fertilizer package.
4. Temperature: Swiss chard prefers temperatures between 60-75°F. Avoid exposing it to extreme temperatures.
5. Air Circulation: Good air circulation is important to prevent fungal diseases. Make sure your plants have enough space between them and that the air is circulating well in your growing area. A small fan can help with this.
Dealing with Pests and Diseases
While Swiss chard is relatively pest-resistant, it can occasionally be affected by aphids, spider mites, or leaf miners. Here’s how to deal with these common pests:
* Aphids: These tiny, sap-sucking insects can cluster on the undersides of leaves. You can remove them by spraying the plants with a strong stream of water or by using insecticidal soap.
* Spider Mites: These tiny mites create fine webs on the leaves and can cause them to become yellow and stippled. Increase humidity around the plants and spray them with insecticidal soap or neem oil.
* Leaf Miners: These insects tunnel through the leaves, leaving unsightly trails. Remove and destroy any affected leaves. You can also use row covers to prevent leaf miners from laying eggs on your plants.
As for diseases, Swiss chard can sometimes be affected by fungal diseases like powdery mildew or leaf spot. To prevent these diseases, ensure good air circulation, avoid overwatering, and remove any affected leaves promptly. You can also use a fungicide if necessary.
Harvesting Your Swiss Chard
The best part of growing your own Swiss chard is, of course, harvesting it! You can start harvesting the outer leaves when they are about 6-8 inches long. Simply cut the leaves off at the base of the plant, leaving the inner leaves to continue growing. This cut-and-come-again method allows you to harvest Swiss chard continuously for several months.
Important Tip: Don’t harvest more than one-third of the plant at a time, as this can weaken it.
Enjoying Your Harvest
Now that you’ve harvested your Swiss chard, it’s time to enjoy it! Swiss chard is incredibly versatile and can be used in a variety of dishes. Here are a few of my favorite ways to use it:
* Sautéed: Sauté Swiss chard with garlic, olive oil, and a pinch of red pepper flakes for a simple and delicious side dish.
* In Soups and Stews: Add chopped Swiss chard to soups and stews for extra flavor and nutrients.
* In Salads: Use young, tender Swiss chard leaves in salads for a slightly bitter and earthy flavor.
* In Frittatas and Quiches: Add chopped Swiss chard to frittatas and quiches for a healthy and flavorful twist.
* Steamed: Steam Swiss chard and serve it with a squeeze of lemon juice and a sprinkle of salt and pepper.
Troubleshooting
Even with the best care, you might encounter some challenges when growing Swiss chard indoors. Here are a few common problems and how to fix them:
* Yellowing Leaves: This can be caused by overwatering, underwatering, nutrient deficiencies, or pests. Check the soil moisture, fertilize your plants, and inspect them for pests.
* Leggy Growth: This is usually caused by insufficient light. Provide more light by moving your plants to a sunnier location or using grow lights.
* Slow Growth: This can be caused by a variety of factors, including poor soil, insufficient light, or nutrient deficiencies. Make sure your plants have well-draining soil, adequate light, and regular fertilization.
* Bolting (Premature Flowering): This can be caused by stress, such as extreme temperatures or inconsistent watering. Try to maintain consistent growing conditions and avoid exposing your plants to extreme temperatures.
Extending Your Harvest
To extend your Swiss chard harvest, you can succession sow seeds every few weeks. This will ensure that you always have a fresh supply of greens. You can also overwinter your Swiss chard by bringing it indoors before the first frost. With proper care, your Swiss chard can continue to produce leaves throughout the winter.
Growing Swiss chard indoors is a rewarding experience that allows you to enjoy fresh, nutritious greens year-round. With a little bit of effort and attention, you can easily grow your own thriving Swiss chard plants right in your home. Happy gardening
Conclusion
So, there you have it! Growing Swiss chard indoors is not only achievable but also incredibly rewarding. Imagine having a constant supply of fresh, vibrant greens right at your fingertips, ready to be tossed into salads, sautéed as a side dish, or added to your favorite soups and stews. Forget those wilted, overpriced bunches at the grocery store – with a little effort and this simple DIY trick, you can cultivate your own thriving Swiss chard patch indoors, regardless of the season.
This method is a must-try for several reasons. First, it offers unparalleled control over the growing environment. You can regulate temperature, light, and humidity, ensuring optimal conditions for your Swiss chard to flourish. Second, it’s a fantastic way to reduce your carbon footprint by minimizing transportation and packaging waste associated with store-bought produce. Third, it’s a deeply satisfying experience to nurture a plant from seed to harvest, connecting you to the natural world in a tangible way.
But the best part? The possibilities are endless! Experiment with different varieties of Swiss chard, from the classic ‘Bright Lights’ with its rainbow-colored stems to the deeply ruffled ‘Lucullus’ for a more traditional flavor. Try different potting mixes to see which one your Swiss chard prefers. You can even explore hydroponic systems for an even more efficient and space-saving growing method. Consider companion planting with herbs like basil or parsley to deter pests and enhance the flavor of your Swiss chard.
Don’t be intimidated if you’re a beginner gardener. This DIY trick is designed to be accessible and straightforward. Start small, be patient, and don’t be afraid to experiment. The key is to provide your Swiss chard with adequate light, consistent moisture, and well-draining soil. With a little care and attention, you’ll be harvesting your own delicious, homegrown Swiss chard in no time.
We wholeheartedly encourage you to give this indoor gardening project a try. It’s a fun, educational, and ultimately delicious way to bring a touch of nature into your home. And once you’ve experienced the joy of growing your own Swiss chard, we’re confident you’ll be hooked!
So, grab your seeds, potting mix, and grow lights, and get ready to embark on your indoor gardening adventure. And most importantly, don’t forget to share your experiences with us! We’d love to hear about your successes, challenges, and any variations you’ve tried. Share your photos and tips in the comments below – let’s build a community of indoor Swiss chard enthusiasts! Happy growing!
Frequently Asked Questions (FAQ)
What are the best varieties of Swiss chard to grow indoors?
While most Swiss chard varieties can be grown indoors, some tend to perform better than others. ‘Bright Lights’ is a popular choice due to its vibrant colors and relatively compact size. ‘Fordhook Giant’ is another excellent option, known for its large, tender leaves. ‘Lucullus’ is a classic variety with a slightly milder flavor. Consider the size of your growing space when selecting a variety, as some can grow quite large. Experimenting with different varieties is a great way to discover your personal favorite.
How much light does Swiss chard need when grown indoors?
Swiss chard requires a significant amount of light to thrive indoors. Ideally, aim for at least 6-8 hours of direct sunlight per day. If you don’t have access to sufficient natural light, you’ll need to supplement with grow lights. Fluorescent or LED grow lights are excellent choices, as they provide the necessary spectrum of light without generating excessive heat. Position the grow lights a few inches above the plants, adjusting the height as they grow. Insufficient light can lead to leggy growth and reduced yields.
What type of soil is best for growing Swiss chard indoors?
Swiss chard prefers well-draining soil that is rich in organic matter. A good potting mix for indoor growing should contain a blend of peat moss, perlite, and vermiculite. You can also amend the soil with compost or aged manure to provide additional nutrients. Avoid using garden soil, as it can be too heavy and may contain pests or diseases. Ensure that your containers have drainage holes to prevent waterlogging, which can lead to root rot.
How often should I water my indoor Swiss chard?
Water your Swiss chard regularly, keeping the soil consistently moist but not waterlogged. Check the soil moisture by inserting your finger about an inch deep. If the soil feels dry, it’s time to water. Water deeply, allowing the excess water to drain out of the drainage holes. Avoid overhead watering, as this can promote fungal diseases. During warmer months, you may need to water more frequently.
How do I fertilize my indoor Swiss chard?
Swiss chard is a heavy feeder and benefits from regular fertilization. Start fertilizing about two weeks after transplanting the seedlings. Use a balanced liquid fertilizer, diluted to half strength, every two to three weeks. Alternatively, you can use a slow-release fertilizer at the time of planting. Avoid over-fertilizing, as this can lead to excessive leaf growth and reduced flavor.
What are some common pests and diseases that affect indoor Swiss chard?
While indoor growing environments are generally less prone to pests and diseases than outdoor gardens, Swiss chard can still be susceptible to certain problems. Aphids, spider mites, and whiteflies are common pests that can infest indoor plants. Regularly inspect your plants for signs of infestation and treat them promptly with insecticidal soap or neem oil. Fungal diseases, such as powdery mildew, can also occur in humid environments. Ensure good air circulation and avoid overhead watering to prevent fungal problems.
When and how should I harvest my indoor Swiss chard?
You can begin harvesting Swiss chard leaves when they are about 6-8 inches long. Harvest the outer leaves first, leaving the inner leaves to continue growing. Use a sharp knife or scissors to cut the leaves near the base of the plant. Regular harvesting encourages continued production. You can harvest Swiss chard throughout the growing season, as long as the plants are healthy and well-maintained.
Can I grow Swiss chard from seed indoors?
Yes, growing Swiss chard from seed indoors is a great way to start your indoor garden. Sow the seeds about half an inch deep in seed-starting trays or small pots filled with seed-starting mix. Keep the soil moist and warm, and the seeds should germinate within a week or two. Once the seedlings have developed a few sets of true leaves, you can transplant them into larger containers.
How long does it take to grow Swiss chard indoors?
From seed to harvest, it typically takes about 50-60 days to grow Swiss chard indoors. However, the exact time can vary depending on the variety, growing conditions, and your personal preferences. You can start harvesting leaves as soon as they are large enough to use, even if the plants haven’t reached their full maturity.
Is growing Swiss chard indoors worth the effort?
Absolutely! Growing Swiss chard indoors offers numerous benefits, including a constant supply of fresh, healthy greens, control over the growing environment, and a rewarding gardening experience. While it requires some initial investment and ongoing care, the satisfaction of harvesting your own homegrown Swiss chard is well worth the effort. Plus, it’s a sustainable and eco-friendly way to enjoy fresh produce year-round.

Leave a Comment