
Grow Epazote Indoors? Absolutely! Have you ever dreamt of having fresh, aromatic herbs right at your fingertips, no matter the season? Imagine adding a unique, slightly citrusy, and pungent flavor to your favorite Mexican dishes, all thanks to a plant you nurtured yourself, right in your home. This isn’t just a dream; it’s a delicious reality you can achieve with a little know-how.
Epazote, also known as wormseed, has a rich history, deeply rooted in Mesoamerican cultures. For centuries, it’s been used not only as a culinary herb but also for its medicinal properties. Traditionally, it’s believed to aid digestion, particularly when paired with beans. Think of it as nature’s secret ingredient for a happy tummy!
But why should you bother learning how to grow epazote indoors? Well, for starters, access to fresh, organic herbs is a game-changer in the kitchen. Store-bought herbs often lack the vibrancy and flavor of homegrown ones. Plus, growing your own epazote allows you to control the growing conditions, ensuring it’s free from harmful pesticides and chemicals. More importantly, for those of us living in colder climates or with limited outdoor space, bringing this vibrant herb indoors opens up a world of culinary possibilities year-round. I’m excited to share some simple, effective DIY tricks and hacks that will have you harvesting your own epazote in no time!
Growing Epazote Indoors: A Complete DIY Guide
Hey there, fellow plant enthusiasts! Ever wanted to have fresh, flavorful epazote right at your fingertips? Well, you’re in the right place! I’m going to walk you through everything you need to know to successfully grow epazote indoors. It’s easier than you might think, and the reward of having this unique herb readily available for your culinary adventures is totally worth it.
What is Epazote?
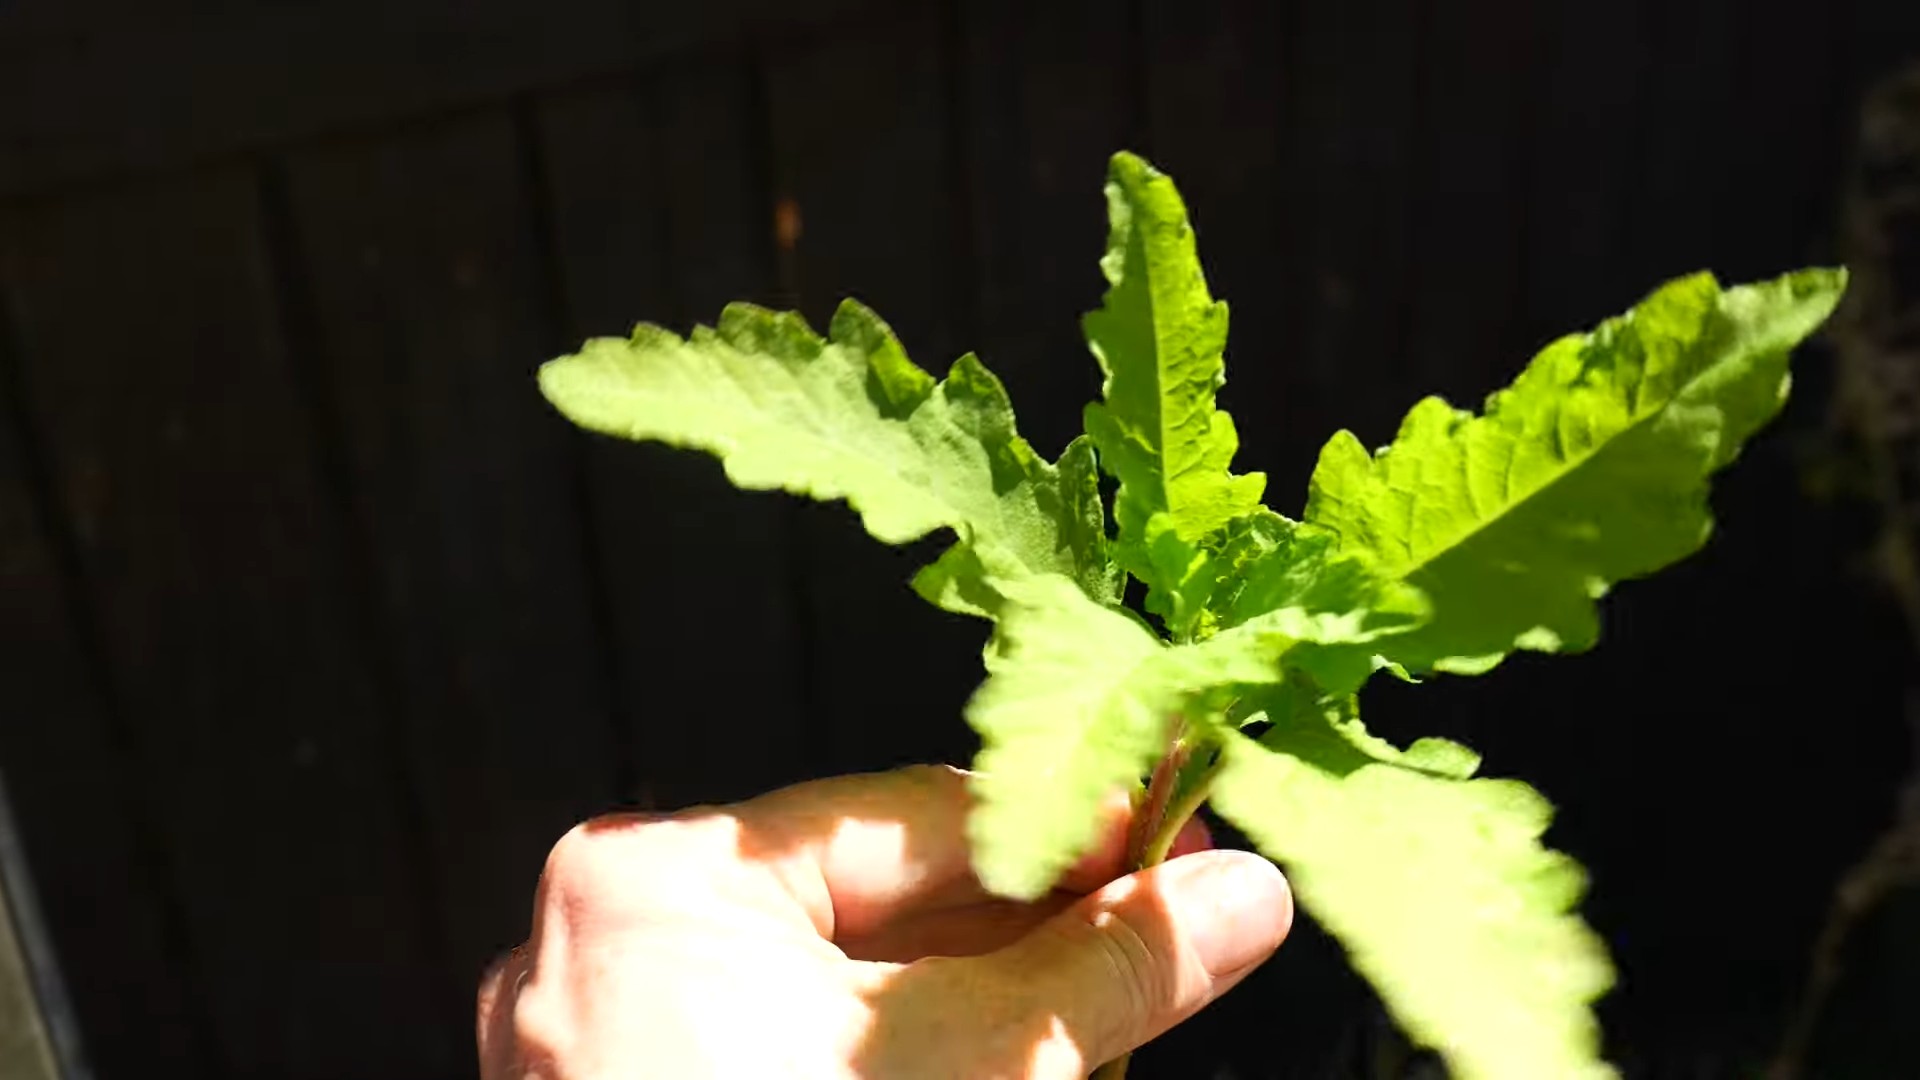
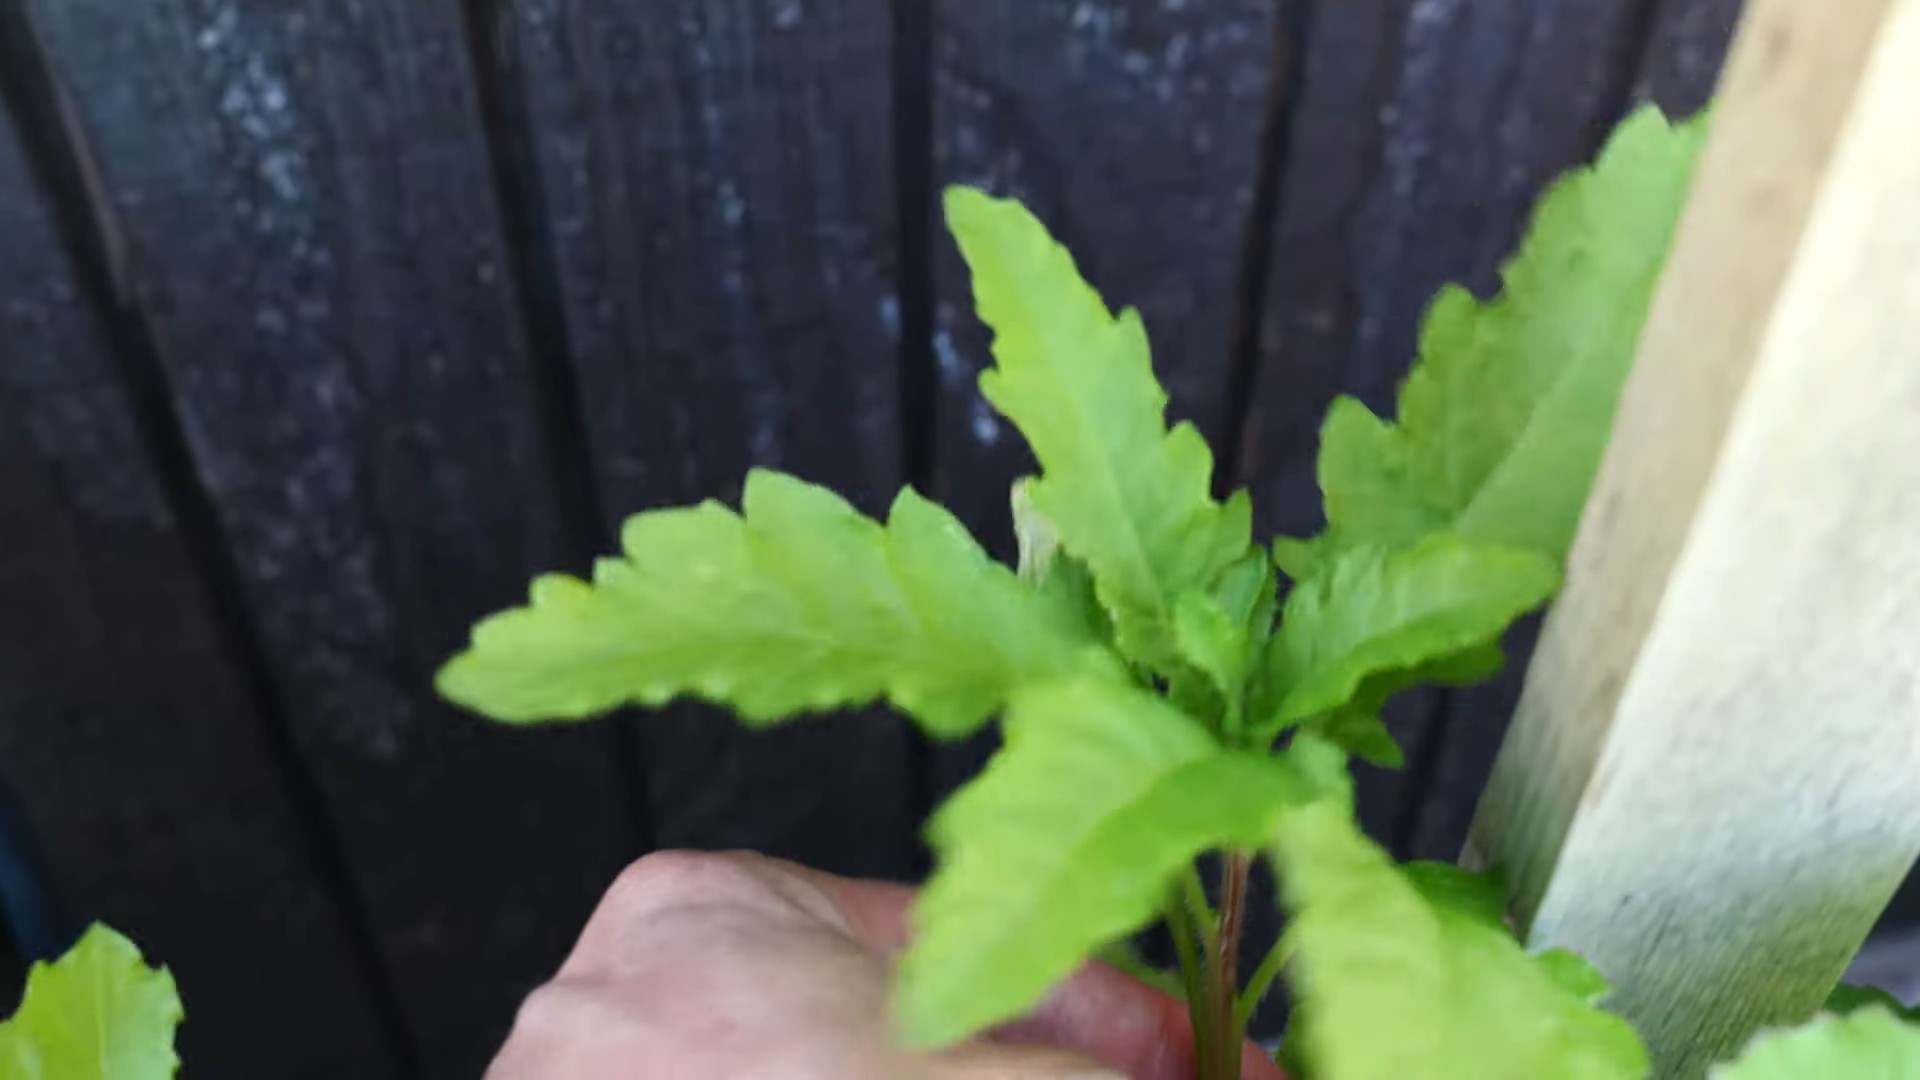
Before we dive in, let’s quickly cover what epazote actually is. Epazote (Dysphania ambrosioides) is a pungent herb native to Central and South America. It’s a staple in Mexican cuisine, often used in dishes like black beans, quesadillas, and soups. Beyond its culinary uses, epazote is also known for its medicinal properties, traditionally used to aid digestion. Its flavor is quite distinctive – some describe it as a mix of citrus, anise, and mint, with a slightly resinous undertone.
Why Grow Epazote Indoors?
Growing epazote indoors offers several advantages:
* Year-Round Availability: You can enjoy fresh epazote regardless of the season.
* Control Over Growing Conditions: You have complete control over the environment, ensuring optimal growth.
* Pest and Disease Management: Indoor growing minimizes the risk of pests and diseases.
* Convenience: Having fresh herbs readily available in your kitchen is incredibly convenient.
* Space Saving: If you have limited outdoor space, indoor gardening is a great alternative.
Materials You’ll Need
Okay, let’s gather our supplies. Here’s what you’ll need to get started:
* Epazote Seeds: You can find these online or at specialty nurseries. Make sure you’re getting seeds from a reputable source.
* Seed Starting Tray or Small Pots: These will be used to germinate the seeds.
* Potting Mix: Use a well-draining potting mix specifically formulated for seed starting.
* Larger Pot (at least 12 inches in diameter): This will be the final home for your epazote plant.
* Well-Draining Potting Soil: A good quality potting mix is essential for healthy growth.
* Grow Lights (optional but recommended): Especially if you don’t have a sunny windowsill.
* Watering Can or Spray Bottle: For gentle watering.
* Fertilizer (optional): A balanced liquid fertilizer can help boost growth.
* Small Shovel or Trowel: For transplanting.
Germinating Epazote Seeds
This is where the magic begins! Germinating the seeds is the first step towards your own indoor epazote garden.
1. Prepare the Seed Starting Tray: Fill your seed starting tray or small pots with the seed starting mix. Gently pat it down to create a level surface.
2. Sow the Seeds: Epazote seeds are tiny, so sprinkle them sparingly over the surface of the soil. You don’t want to overcrowd them.
3. Cover the Seeds Lightly: Cover the seeds with a very thin layer of soil. They need light to germinate, so don’t bury them too deep.
4. Water Gently: Use a spray bottle to mist the soil thoroughly. You want to keep the soil moist but not waterlogged.
5. Provide Warmth and Light: Place the seed starting tray in a warm location (around 70-75°F or 21-24°C) with plenty of light. A sunny windowsill or a grow light works well.
6. Maintain Moisture: Keep the soil consistently moist by misting it regularly.
7. Wait for Germination: Epazote seeds typically germinate within 7-14 days. Be patient!
Transplanting Your Epazote Seedlings
Once your seedlings have developed a few sets of true leaves (the leaves that look like miniature versions of the adult leaves), it’s time to transplant them into larger pots.
1. Prepare the Larger Pot: Fill your larger pot (at least 12 inches in diameter) with well-draining potting soil. Leave about an inch of space at the top of the pot.
2. Carefully Remove the Seedlings: Gently loosen the soil around the seedlings in the seed starting tray. Use a small trowel or your fingers to carefully lift each seedling, being careful not to damage the roots.
3. Plant the Seedlings: Make a small hole in the soil in the larger pot. Place the seedling in the hole and gently backfill with soil.
4. Water Thoroughly: Water the transplanted seedlings thoroughly to help them settle in.
5. Provide Support (Optional): If your seedlings are a bit leggy (tall and spindly), you can provide them with a small stake for support.
Caring for Your Indoor Epazote Plant
Now that your epazote plant is happily settled in its new home, it’s time to provide it with the care it needs to thrive.
1. Light: Epazote needs plenty of light to grow well. Aim for at least 6-8 hours of direct sunlight per day. If you don’t have a sunny windowsill, use a grow light. Place the grow light a few inches above the plant and keep it on for 12-14 hours per day.
2. Watering: Water your epazote plant when the top inch of soil feels dry to the touch. Avoid overwatering, as this can lead to root rot. Make sure the pot has drainage holes to allow excess water to escape.
3. Temperature: Epazote prefers temperatures between 60-80°F (15-27°C). Avoid exposing it to extreme temperatures or drafts.
4. Humidity: Epazote doesn’t require high humidity, but it appreciates a slightly humid environment. You can increase humidity by placing a tray of water near the plant or using a humidifier.
5. Fertilizing: Feed your epazote plant with a balanced liquid fertilizer every 2-4 weeks during the growing season (spring and summer). Follow the instructions on the fertilizer label.
6. Pruning: Prune your epazote plant regularly to encourage bushier growth. Pinch off the tips of the stems to promote branching. You can also remove any yellowing or dead leaves.
7. Pest Control: Keep an eye out for pests like aphids, spider mites, and whiteflies. If you notice any pests, treat them with insecticidal soap or neem oil.
8. Repotting: If your epazote plant becomes root-bound (the roots are circling the inside of the pot), you’ll need to repot it into a larger container. Choose a pot that is 1-2 inches larger in diameter than the current pot.
Harvesting Epazote
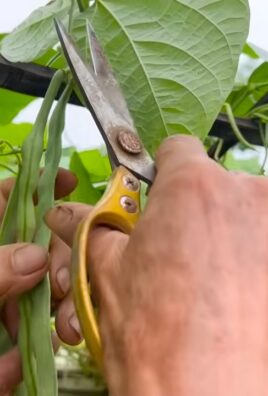
The best part! You can start harvesting epazote leaves once the plant is about 6-8 inches tall.
1. Harvesting Technique: Use scissors or your fingers to snip off the leaves. You can harvest individual leaves or entire stems.
2. Harvesting Frequency: Harvest epazote leaves as needed. Regular harvesting will encourage the plant to produce more leaves.
3. Best Time to Harvest: The best time to harvest epazote is in the morning, after the dew has dried.
4. Using Fresh Epazote: Fresh epazote is best used immediately. You can add it to your favorite dishes during the last few minutes of cooking to preserve its flavor.
5. Storing Epazote: If you have more epazote than you can use right away, you can store it in the refrigerator. Wrap the leaves in a damp paper towel and place them in a plastic bag. They should last for about a week. You can also dry epazote leaves for later use. Hang them upside down in a cool, dry place until they are completely dry. Store the dried leaves in an airtight container.
Troubleshooting
Even with the best care, you might encounter some challenges along the way. Here are some common problems and how to address them:
* Yellowing Leaves: This could be caused by overwatering, underwatering, nutrient deficiency, or pest infestation. Check the soil moisture, fertilize if necessary, and inspect the plant for pests.
* Leggy Growth: This is usually caused by insufficient light. Provide more light by moving the plant to a sunnier location or using a grow light.
* Slow Growth: This could be due to a variety of factors, including insufficient light, poor soil, or nutrient deficiency. Make sure the plant is getting enough light, use a good quality potting mix, and fertilize regularly.
* Pest Infestation: Treat pests with insecticidal soap or neem oil.
Enjoying Your Homegrown Epazote
Congratulations! You’ve successfully grown epazote indoors. Now it’s time to enjoy the fruits (or rather, the leaves) of your labor. Experiment with different recipes and discover the unique
Conclusion
So, there you have it! Growing epazote indoors is not only achievable but also incredibly rewarding. Imagine having a readily available supply of this unique herb, bursting with its distinctive flavor, right at your fingertips. No more last-minute dashes to specialty stores or settling for dried substitutes that simply don’t capture the essence of fresh epazote.
This DIY trick is a must-try for several compelling reasons. First and foremost, it grants you unparalleled control over the quality of your epazote. You know exactly what goes into nurturing your plant, ensuring it’s free from harmful pesticides and grown with the utmost care. Secondly, it’s a fantastic way to connect with nature, even within the confines of your home. Tending to your epazote plant can be a therapeutic and fulfilling experience, offering a welcome respite from the stresses of daily life. Finally, and perhaps most importantly, it empowers you to elevate your culinary creations with the authentic taste of fresh epazote.
But the possibilities don’t end there! Feel free to experiment with different varieties of epazote to discover your personal favorite. Some gardeners have had success with using self-watering planters to minimize the need for constant monitoring, while others have found that supplementing with a grow light during the darker winter months can significantly boost growth. You could even try propagating your epazote plant from cuttings to expand your indoor herb garden. Consider companion planting your epazote with other herbs like cilantro or oregano to create a thriving indoor ecosystem.
Don’t be intimidated by the prospect of growing epazote indoors. With a little patience and attention, you’ll be amazed at how easily you can cultivate this flavorful herb in your own home. We encourage you to give this DIY trick a try and discover the joy of harvesting your own fresh epazote.
We’re confident that you’ll find this experience both enjoyable and rewarding. And once you’ve successfully grown your own epazote, we’d love to hear about your experience! Share your tips, tricks, and culinary creations with us in the comments below. Let’s build a community of indoor epazote enthusiasts and inspire others to embark on this flavorful journey. Your insights could be invaluable to fellow gardeners and food lovers alike. So, go ahead, get your hands dirty, and start growing your own epazote indoors today! You won’t regret it.
Frequently Asked Questions (FAQ)
What exactly is epazote, and what does it taste like?
Epazote (Dysphania ambrosioides) is a leafy herb native to Central and South America, particularly Mexico. It’s a staple in traditional Mexican cuisine, often used in dishes like black beans, quesadillas, and soups. The flavor is quite unique and often described as a combination of anise, citrus, and mint, with a slightly pungent or medicinal undertone. Some people also detect hints of gasoline or petroleum, which might sound unappetizing, but it actually adds a distinctive depth to dishes. The flavor is most pronounced when the leaves are fresh.
Why should I bother growing epazote indoors when I can just buy it?
While you might be able to find dried epazote in some stores, the flavor is significantly diminished compared to fresh epazote. Fresh epazote is often difficult to find outside of areas with large Latin American populations. Growing it indoors ensures you have a readily available supply of fresh, flavorful epazote whenever you need it. Plus, you have complete control over the growing conditions, ensuring it’s free from pesticides and grown to your standards. It’s also a fun and rewarding gardening project!
What kind of pot and soil should I use for growing epazote indoors?
Choose a pot that’s at least 6 inches in diameter to give the roots enough room to grow. Make sure the pot has drainage holes to prevent waterlogging. As for soil, a well-draining potting mix is essential. You can use a standard potting mix amended with perlite or vermiculite to improve drainage. Avoid using garden soil, as it can be too heavy and compact for container gardening.
How much sunlight does epazote need when grown indoors?
Epazote thrives in bright, indirect sunlight. Aim for at least 6 hours of sunlight per day. If you don’t have a sunny windowsill, you can supplement with a grow light. Place the grow light a few inches above the plant and keep it on for 12-14 hours a day. Rotate the plant regularly to ensure all sides receive adequate light.
How often should I water my indoor epazote plant?
Water your epazote plant when the top inch of soil feels dry to the touch. Avoid overwatering, as this can lead to root rot. Water thoroughly until water drains out of the drainage holes. Reduce watering during the winter months when the plant’s growth slows down.
Does epazote need fertilizer?
Yes, epazote benefits from regular fertilization, especially when grown in a container. Use a balanced liquid fertilizer diluted to half strength every 2-3 weeks during the growing season (spring and summer). Avoid fertilizing during the winter months.
How do I harvest epazote leaves?
You can start harvesting epazote leaves once the plant is about 6 inches tall. Simply snip off the leaves as needed, being careful not to remove more than one-third of the plant at a time. Regular harvesting encourages the plant to produce more leaves. The leaves are most flavorful just before the plant flowers.
Is epazote safe to eat? Are there any precautions I should take?
Epazote is generally considered safe to eat in moderation. However, it contains a compound called ascaridole, which can be toxic in large quantities. Therefore, it’s important to use epazote sparingly in your cooking. Pregnant women and individuals with liver or kidney problems should avoid consuming epazote. Always wash the leaves thoroughly before using them.
My epazote plant is flowering. Should I do anything?
Flowering can make the leaves taste more bitter. Pinch off the flower buds to encourage the plant to produce more leaves and maintain a better flavor. You can also allow the plant to flower and collect the seeds for future planting.
Can I grow epazote from seed indoors?
Yes, you can easily grow epazote from seed indoors. Start the seeds in small pots or seed trays filled with well-draining potting mix. Keep the soil moist and warm (around 70-75°F). The seeds should germinate in about 1-2 weeks. Once the seedlings are large enough to handle, transplant them into larger pots.
Leave a Comment