
Grow Mint Indoors and unlock a world of fresh, fragrant possibilities right at your fingertips! Imagine stepping into your kitchen and snipping off a few vibrant mint leaves to brighten your morning tea, add a refreshing twist to your summer cocktails, or elevate your culinary creations. No more last-minute grocery store runs for that essential herb – with these simple DIY tricks, you can cultivate your own thriving mint garden inside your home, regardless of the season or your outdoor space.
Mint, with its invigorating aroma and versatile uses, has been cherished for centuries. From ancient Egyptians using it for medicinal purposes to Romans crowning themselves with mint wreaths, this herb boasts a rich history and cultural significance. But beyond its historical allure, growing mint indoors offers practical benefits for the modern home gardener.
Let’s face it, we all crave fresh, healthy ingredients, but not everyone has the space or time for a sprawling outdoor garden. That’s where the magic of indoor gardening comes in! This DIY guide will equip you with the knowledge and simple techniques to successfully grow mint indoors, even if you’re a complete beginner. Say goodbye to wilted, store-bought herbs and hello to a constant supply of fresh, flavorful mint, ready to enhance your life in countless ways. I’m excited to share these tips with you!
Growing Mint Indoors: A Beginner’s Guide to Fresh Flavor All Year Round
Hey there, fellow plant enthusiasts! Are you craving the refreshing taste of mint in your tea, cocktails, or culinary creations, but don’t have the outdoor space (or the patience for outdoor pests)? Well, you’re in luck! Growing mint indoors is surprisingly easy, and I’m here to guide you through every step of the process. Get ready to have a thriving mint plant right on your windowsill!
Choosing the Right Mint Variety
First things first, let’s talk about mint varieties. While all mints share that characteristic refreshing flavor, they each have their own unique nuances. Here are a few popular choices for indoor growing:
* Peppermint: This is your classic, strong mint flavor, perfect for teas and desserts.
* Spearmint: A milder, sweeter mint, ideal for mojitos and savory dishes.
* Chocolate Mint: Yes, you read that right! This variety has a subtle chocolatey aroma and flavor, making it a fun addition to your indoor garden.
* Apple Mint: A fruity and slightly fuzzy mint, great for adding a unique twist to your recipes.
I personally love growing spearmint indoors because it’s so versatile, but feel free to experiment and find your favorite!
Gathering Your Supplies
Before we dive into the planting process, let’s make sure you have everything you need. Here’s a checklist:
* Mint cuttings or a small starter plant: You can find these at your local nursery or even propagate your own from a friend’s plant (more on that later!).
* A pot with drainage holes: Choose a pot that’s at least 6 inches in diameter to give your mint room to grow. Terracotta pots are great because they allow the soil to breathe.
* Well-draining potting mix: Avoid using garden soil, as it can become compacted and doesn’t drain well in pots. A good quality potting mix specifically formulated for herbs is ideal.
* Watering can or spray bottle: For gentle watering.
* A sunny windowsill or grow light: Mint needs plenty of light to thrive.
* Optional: Liquid fertilizer: A balanced liquid fertilizer can help boost growth, but it’s not essential.
Planting Your Mint
Okay, let’s get our hands dirty! Here’s how to plant your mint:
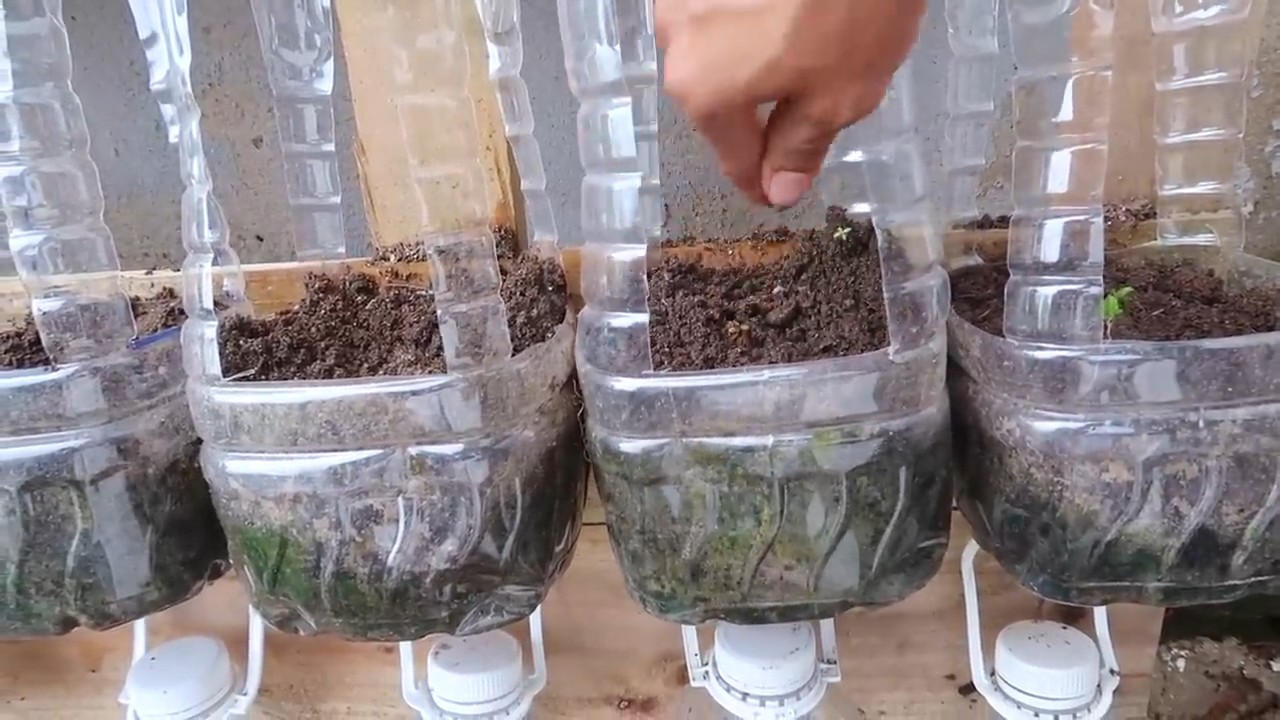
1. Prepare the pot: Fill your pot with potting mix, leaving about an inch of space at the top.
2. Plant the mint: If you’re using a starter plant, gently remove it from its container and loosen the roots a bit. If you’re using cuttings, make sure they have developed roots in water first (see propagation section below). Place the plant or cuttings in the center of the pot.
3. Fill in with soil: Add more potting mix around the plant, gently pressing down to secure it.
4. Water thoroughly: Water the soil until it’s evenly moist, but not soggy.
5. Place in a sunny location: Put your newly planted mint on a sunny windowsill that receives at least 6 hours of direct sunlight per day. If you don’t have a sunny windowsill, you can use a grow light.
Caring for Your Indoor Mint
Now that your mint is planted, it’s time to learn how to keep it happy and healthy.
1. Watering: Mint likes to be kept consistently moist, but not waterlogged. Water when the top inch of soil feels dry to the touch. Be careful not to overwater, as this can lead to root rot.
2. Light: As I mentioned earlier, mint needs plenty of light. If your plant isn’t getting enough sunlight, it will become leggy and pale. Supplement with a grow light if needed.
3. Fertilizing: If you want to give your mint a boost, you can fertilize it every 2-4 weeks with a balanced liquid fertilizer. Follow the instructions on the fertilizer label.
4. Pruning: Pruning is essential for keeping your mint plant bushy and productive. Regularly pinch off the top leaves to encourage branching. Don’t be afraid to harvest your mint frequently – the more you harvest, the more it will grow!
5. Pest control: Indoor mint plants are generally less susceptible to pests than outdoor plants, but they can still be affected by aphids, spider mites, or whiteflies. If you notice any pests, try spraying them off with a strong stream of water. You can also use insecticidal soap or neem oil if the infestation is severe.
6. Repotting: Mint is a fast-growing plant, so you may need to repot it into a larger container every year or two. When repotting, choose a pot that’s a few inches larger in diameter than the current pot.
Harvesting Your Mint
The best part about growing mint indoors is being able to harvest fresh leaves whenever you need them!
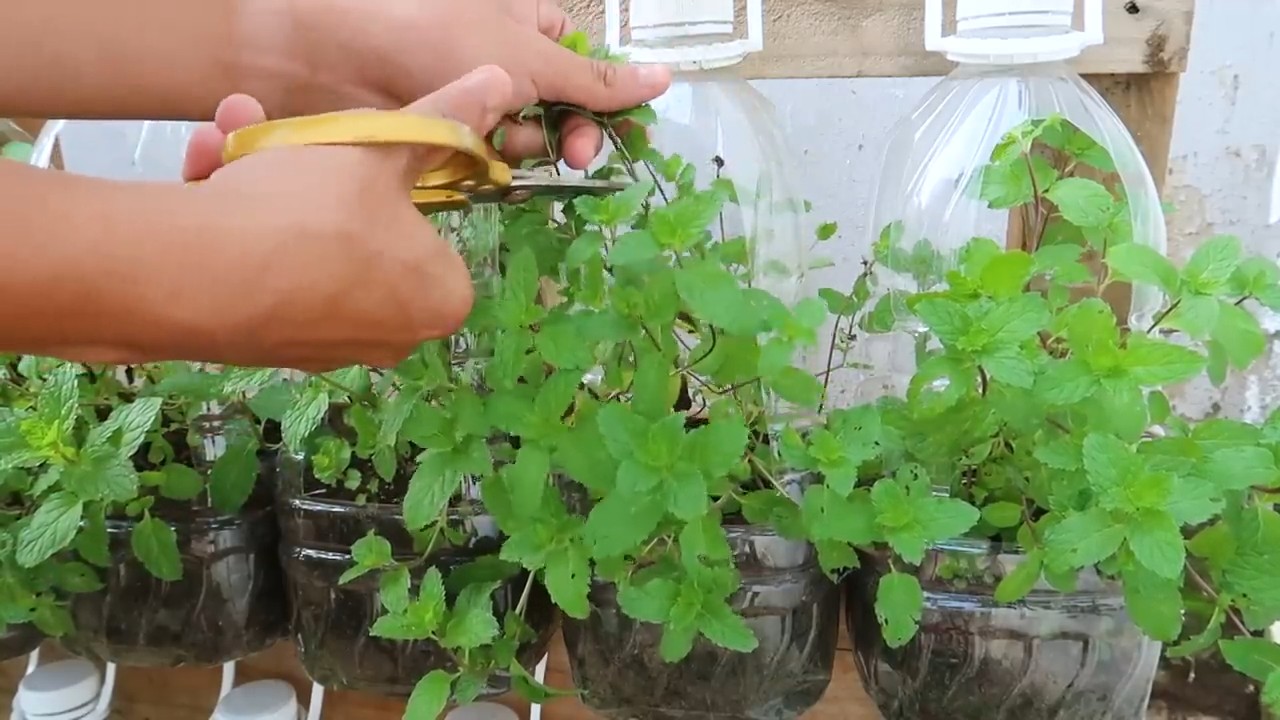
1. When to harvest: You can start harvesting mint leaves as soon as the plant is a few inches tall.
2. How to harvest: Use scissors or your fingers to pinch off the top leaves of the plant. Avoid cutting off more than one-third of the plant at a time.
3. Storing your harvest: Freshly harvested mint leaves can be stored in the refrigerator for up to a week. Wrap them in a damp paper towel and place them in a plastic bag. You can also dry mint leaves for longer storage. To dry mint, hang the stems upside down in a cool, dry place until the leaves are brittle.
Propagating Mint from Cuttings
Want to expand your mint collection without spending any money? Propagating mint from cuttings is a breeze!
1. Take a cutting: Choose a healthy stem that’s about 4-6 inches long. Cut the stem just below a leaf node (the point where a leaf grows out of the stem).
2. Remove the lower leaves: Remove the leaves from the bottom inch or two of the stem.
3. Place in water: Put the cutting in a glass of water, making sure that the lower nodes are submerged.
4. Wait for roots
Hey there, fellow plant enthusiasts! Are you craving the refreshing taste of mint in your tea, cocktails, or culinary creations, but don’t have the outdoor space (or the patience for outdoor pests)? Well, you’re in luck! Growing mint indoors is surprisingly easy, and I’m here to guide you through every step of the process. Get ready to have a thriving mint plant right on your windowsill!
Choosing the Right Mint Variety
First things first, let’s talk about mint varieties. While all mints share that characteristic refreshing flavor, they each have their own unique nuances. Here are a few popular choices for indoor growing:
* Peppermint: This is your classic, strong mint flavor, perfect for teas and desserts.
* Spearmint: A milder, sweeter mint, ideal for mojitos and savory dishes.
* Chocolate Mint: Yes, you read that right! This variety has a subtle chocolatey aroma and flavor, making it a fun addition to your indoor garden.
* Apple Mint: A fruity and slightly fuzzy mint, great for adding a unique twist to your recipes.
I personally love growing spearmint indoors because it’s so versatile, but feel free to experiment and find your favorite!
Gathering Your Supplies
Before we dive into the planting process, let’s make sure you have everything you need. Here’s a checklist:
* Mint cuttings or a small starter plant: You can find these at your local nursery or even propagate your own from a friend’s plant (more on that later!).
* A pot with drainage holes: Choose a pot that’s at least 6 inches in diameter to give your mint room to grow. Terracotta pots are great because they allow the soil to breathe.
* Well-draining potting mix: Avoid using garden soil, as it can become compacted and doesn’t drain well in pots. A good quality potting mix specifically formulated for herbs is ideal.
* Watering can or spray bottle: For gentle watering.
* A sunny windowsill or grow light: Mint needs plenty of light to thrive.
* Optional: Liquid fertilizer: A balanced liquid fertilizer can help boost growth, but it’s not essential.
Planting Your Mint
Okay, let’s get our hands dirty! Here’s how to plant your mint:
1. Prepare the pot: Fill your pot with potting mix, leaving about an inch of space at the top.
2. Plant the mint: If you’re using a starter plant, gently remove it from its container and loosen the roots a bit. If you’re using cuttings, make sure they have developed roots in water first (see propagation section below). Place the plant or cuttings in the center of the pot.
3. Fill in with soil: Add more potting mix around the plant, gently pressing down to secure it.
4. Water thoroughly: Water the soil until it’s evenly moist, but not soggy.
5. Place in a sunny location: Put your newly planted mint on a sunny windowsill that receives at least 6 hours of direct sunlight per day. If you don’t have a sunny windowsill, you can use a grow light.
Caring for Your Indoor Mint
Now that your mint is planted, it’s time to learn how to keep it happy and healthy.
1. Watering: Mint likes to be kept consistently moist, but not waterlogged. Water when the top inch of soil feels dry to the touch. Be careful not to overwater, as this can lead to root rot.
2. Light: As I mentioned earlier, mint needs plenty of light. If your plant isn’t getting enough sunlight, it will become leggy and pale. Supplement with a grow light if needed.
3. Fertilizing: If you want to give your mint a boost, you can fertilize it every 2-4 weeks with a balanced liquid fertilizer. Follow the instructions on the fertilizer label.
4. Pruning: Pruning is essential for keeping your mint plant bushy and productive. Regularly pinch off the top leaves to encourage branching. Don’t be afraid to harvest your mint frequently – the more you harvest, the more it will grow!
5. Pest control: Indoor mint plants are generally less susceptible to pests than outdoor plants, but they can still be affected by aphids, spider mites, or whiteflies. If you notice any pests, try spraying them off with a strong stream of water. You can also use insecticidal soap or neem oil if the infestation is severe.
6. Repotting: Mint is a fast-growing plant, so you may need to repot it into a larger container every year or two. When repotting, choose a pot that’s a few inches larger in diameter than the current pot.
Harvesting Your Mint
The best part about growing mint indoors is being able to harvest fresh leaves whenever you need them!
1. When to harvest: You can start harvesting mint leaves as soon as the plant is a few inches tall.
2. How to harvest: Use scissors or your fingers to pinch off the top leaves of the plant. Avoid cutting off more than one-third of the plant at a time.
3. Storing your harvest: Freshly harvested mint leaves can be stored in the refrigerator for up to a week. Wrap them in a damp paper towel and place them in a plastic bag. You can also dry mint leaves for longer storage. To dry mint, hang the stems upside down in a cool, dry place until the leaves are brittle.
Propagating Mint from Cuttings
Want to expand your mint collection without spending any money? Propagating mint from cuttings is a breeze!
1. Take a cutting: Choose a healthy stem that’s about 4-6 inches long. Cut the stem just below a leaf node (the point where a leaf grows out of the stem).
2. Remove the lower leaves: Remove the leaves from the bottom inch or two of the stem.
3. Place in water: Put the cutting in a glass of water, making sure that the lower nodes are submerged.
4. Wait for roots to develop: Place the glass in a bright, indirect light location. Change the water every few days. Within a week or two, you should see roots starting to grow.
5. Plant the cutting: Once the roots are about an inch long, you can plant the cutting in a pot filled with potting mix. Follow the planting instructions above.
Troubleshooting Common Mint Problems
Even with the best care, you might encounter a few problems with your indoor mint plant. Here are some common issues and how to fix them:
* Yellowing leaves: This could be a sign of overwatering, underwatering, or nutrient deficiency. Check the soil moisture and adjust your watering accordingly. If the soil is dry, water thoroughly. If the soil is soggy, let it dry out before watering again. You can also try fertilizing your plant with a balanced liquid fertilizer.
* Leggy growth: This is usually caused by insufficient light. Move your plant to a sunnier location or supplement with a grow light.
* Brown spots on leaves: This could be a sign of fungal disease. Remove any affected leaves and improve air circulation around the plant. Avoid getting water on the leaves when watering.
* Pests: As mentioned earlier, indoor mint plants can be affected by aphids, spider mites, or whiteflies. Spray them off with a strong stream of water or use insecticidal soap or neem oil.
Enjoying Your Homegrown Mint
Now that you’ve successfully grown your own mint indoors, it’s time to enjoy the fruits (or rather, leaves) of your labor! Here are just a few ways to use your fresh mint:
* Tea: Add a few fresh mint leaves to a cup of hot water for a refreshing and soothing tea.
* Cocktails: Mint is a key ingredient in many classic cocktails, such as mojitos, mint juleps, and Moscow mules.
* Salads: Add chopped mint to salads for a burst of fresh flavor.
* Desserts: Mint pairs well with chocolate, fruit, and other sweet treats.
* Savory dishes: Mint can also be used in savory dishes, such as lamb, chicken, and vegetables.
I hope this guide has inspired you to grow your own mint indoors. It’s a rewarding and delicious experience that anyone can enjoy! Happy gardening!
Conclusion
So, there you have it! Mastering the art of growing mint indoors is not only achievable, but it’s also incredibly rewarding. Imagine stepping into your kitchen and having fresh, vibrant mint leaves readily available to elevate your culinary creations, infuse your beverages with a refreshing zest, or simply add a touch of aromatic greenery to your living space. This isn’t just about saving money on store-bought herbs; it’s about cultivating a connection with nature, fostering a sense of self-sufficiency, and enjoying the unparalleled flavor of homegrown goodness.
This DIY trick is a must-try for several compelling reasons. First and foremost, it provides a constant supply of fresh mint, regardless of the season or your outdoor gardening space. No more wilted, overpriced bunches from the supermarket! Second, it’s a sustainable and eco-friendly alternative to constantly purchasing packaged herbs. You’re reducing waste and minimizing your environmental impact. Third, it’s a surprisingly simple and low-maintenance project, even for those with limited gardening experience. With just a few basic supplies and a little bit of attention, you can transform your windowsill into a thriving mint garden.
But the beauty of growing mint indoors lies not only in its practicality but also in its versatility. Feel free to experiment with different varieties of mint, such as peppermint, spearmint, chocolate mint, or even orange mint, to discover your favorite flavors and aromas. Consider using different types of containers, from charming terracotta pots to sleek, modern planters, to complement your home décor. You can even get creative with your growing medium, adding perlite or vermiculite to improve drainage and aeration.
Don’t be afraid to experiment with different lighting conditions to find the sweet spot for your mint plants. While mint thrives in bright, indirect light, it can also tolerate partial shade. Observe your plants closely and adjust their location accordingly. If you notice the leaves turning yellow or the stems becoming leggy, it’s a sign that they need more light.
Furthermore, think about incorporating your homegrown mint into a variety of recipes and beverages. Add it to your morning smoothies for a refreshing boost, use it to garnish your favorite cocktails, or steep it in hot water for a soothing herbal tea. The possibilities are endless!
We wholeheartedly encourage you to embark on this exciting journey of growing mint indoors. It’s a simple yet profound way to connect with nature, enhance your culinary experiences, and add a touch of freshness to your home. Once you’ve experienced the joy of harvesting your own homegrown mint, you’ll never want to go back to store-bought herbs again.
So, grab your supplies, follow our simple steps, and get ready to enjoy the bounty of your own indoor mint garden. And most importantly, we want to hear about your experiences! Share your tips, tricks, and photos with us in the comments below. Let’s create a community of indoor mint enthusiasts and inspire others to discover the joys of homegrown herbs. Happy growing!
Frequently Asked Questions (FAQ)
1. What is the best type of mint to grow indoors?
While all mint varieties can be grown indoors, some are better suited than others. Spearmint and peppermint are generally considered the easiest and most popular choices for indoor cultivation. They are relatively low-maintenance and produce abundant yields. Other varieties, such as chocolate mint and orange mint, can also be grown successfully indoors, but they may require a bit more attention. Ultimately, the best type of mint to grow indoors depends on your personal preferences and the flavors you enjoy most. Experiment with different varieties to discover your favorites!
2. What kind of soil should I use for growing mint indoors?
Mint prefers well-draining soil that is rich in organic matter. A good potting mix specifically formulated for herbs is an excellent choice. You can also create your own potting mix by combining equal parts of potting soil, perlite, and compost. Perlite helps to improve drainage and aeration, while compost provides essential nutrients for healthy growth. Avoid using garden soil, as it can be too heavy and may contain pests or diseases.
3. How much sunlight does indoor mint need?
Mint thrives in bright, indirect light. Ideally, it should receive at least 6 hours of sunlight per day. However, it can also tolerate partial shade. If you don’t have a sunny windowsill, you can supplement with artificial lighting, such as a grow light. Place the grow light about 6-12 inches above the plants and keep it on for 12-14 hours per day. Observe your plants closely and adjust their location or lighting as needed. If the leaves are turning yellow or the stems are becoming leggy, it’s a sign that they need more light.
4. How often should I water my indoor mint plant?
Water your mint plant regularly, keeping the soil consistently moist but not waterlogged. Allow the top inch of soil to dry out slightly between waterings. Overwatering can lead to root rot, so it’s important to ensure that the pot has good drainage. Check the soil moisture regularly by sticking your finger into the soil. If it feels dry to the touch, it’s time to water.
5. How do I prevent my indoor mint from becoming leggy?
Leggy growth is a common problem with indoor mint plants, especially when they don’t receive enough light. To prevent leggy growth, ensure that your mint plant is receiving adequate sunlight or artificial lighting. You can also pinch back the stems regularly to encourage bushier growth. Pinching back involves removing the tips of the stems, which stimulates the plant to produce more side shoots.
6. How do I harvest mint leaves from my indoor plant?
Harvest mint leaves by snipping them off with scissors or pinching them off with your fingers. You can harvest individual leaves or entire stems. It’s best to harvest mint in the morning, after the dew has dried, as this is when the leaves are most flavorful. Avoid harvesting more than one-third of the plant at a time, as this can stress the plant.
7. How do I propagate mint from cuttings?
Mint is very easy to propagate from cuttings. Simply take a 4-6 inch cutting from a healthy stem, remove the lower leaves, and place the cutting in a glass of water. Change the water every few days. Within a week or two, the cutting will develop roots. Once the roots are about an inch long, you can transplant the cutting into a pot filled with potting mix.
8. My indoor mint plant has pests. What should I do?
Indoor mint plants can be susceptible to pests such as aphids, spider mites, and whiteflies. If you notice any pests on your plant, try spraying it with a strong stream of water to dislodge them. You can also use insecticidal soap or neem oil to control pests. Be sure to follow the instructions on the product label carefully.
9. Can I grow mint indoors year-round?
Yes, you can grow mint indoors year-round. With proper care and attention, your indoor mint plant can thrive throughout the year, providing you with a constant supply of fresh herbs. Just be sure to provide adequate light, water, and nutrients.
10. How do I encourage my indoor mint plant to produce more leaves?
To encourage your indoor mint plant to produce more leaves, provide it with adequate light, water, and nutrients. You can also fertilize it regularly with a balanced liquid fertilizer. Pinching back the stems regularly will also encourage bushier growth and more leaf production. Finally, make sure to harvest your mint leaves regularly, as this will stimulate the plant to produce new growth.
Leave a Comment