
Grow Peanuts at Home
Have you ever dreamed of enjoying the sweet, nutty flavor of homegrown peanuts, freshly dug from your own backyard? Well, dream no more! This article is your complete guide to successfully growing peanuts at home, revealing simple yet effective DIY tricks and techniques that will transform your garden into a peanut paradise. I’ll walk you through everything from selecting the right peanut variety and preparing the soil to harvesting your bounty – all with a focus on making this rewarding experience accessible to everyone, regardless of gardening experience.
While peanuts might seem like a challenging crop, their cultivation actually boasts a rich history. Originally domesticated in South America thousands of years ago, peanuts have since become a global staple, deeply woven into the culinary traditions of countless cultures. From savory peanut sauces to sweet peanut butter, the versatility of this humble legume is undeniable. And now, you can experience the satisfaction of growing your own, ensuring the freshest and most flavorful peanuts imaginable.
Why Grow Your Own Peanuts?
Beyond the delicious reward, growing peanuts at home offers several compelling advantages. You’ll have complete control over the growing process, avoiding potentially harmful pesticides and ensuring the highest quality peanuts for your family. Plus, there’s an undeniable sense of accomplishment in nurturing a plant from seed to harvest, a connection to nature that’s increasingly rare in our modern world. This DIY approach allows you to enjoy the freshest, most flavorful peanuts possible, free from artificial additives and preservatives.
So, let’s get started on this exciting journey of growing peanuts at home! I’m confident that by following these simple steps and embracing the DIY spirit, you’ll be enjoying your own homegrown peanut harvest in no time.
Growing Peanuts at Home: A Complete Guide
Growing your own peanuts is a surprisingly rewarding experience! It’s easier than you might think, and the fresh taste of homegrown peanuts is unbeatable. Here’s how I did it, and how you can too.
Choosing Your Peanuts and Getting Started
- Select the right peanuts: Don’t use peanuts from the grocery store; they’re usually treated to prevent sprouting. You’ll need raw, untreated peanuts specifically for planting. Look for seed catalogs or online retailers specializing in heirloom or open-pollinated varieties. These are generally better for home growing than hybrid varieties.
- Prepare your peanuts: Before planting, soak your peanuts in water for 24 hours. This helps soften the shells and encourages faster germination. Make sure to use warm water, and change the water at least once during the soaking period.
- Choose your location: Peanuts need plenty of sunshine – at least six to eight hours a day. Select a sunny spot in your garden with well-drained soil. Peanuts don’t tolerate soggy conditions.
- Soil preparation: Peanuts prefer loose, sandy loam soil. Amend heavy clay soils with compost or other organic matter to improve drainage and aeration. Test your soil’s pH; peanuts thrive in slightly acidic to neutral soil (pH 6.0-7.0). Adjust the pH if necessary using lime or sulfur.
Planting Your Peanuts
- Prepare the planting area: Till the soil to a depth of about 6-8 inches. Remove any rocks or debris. This ensures good root penetration.
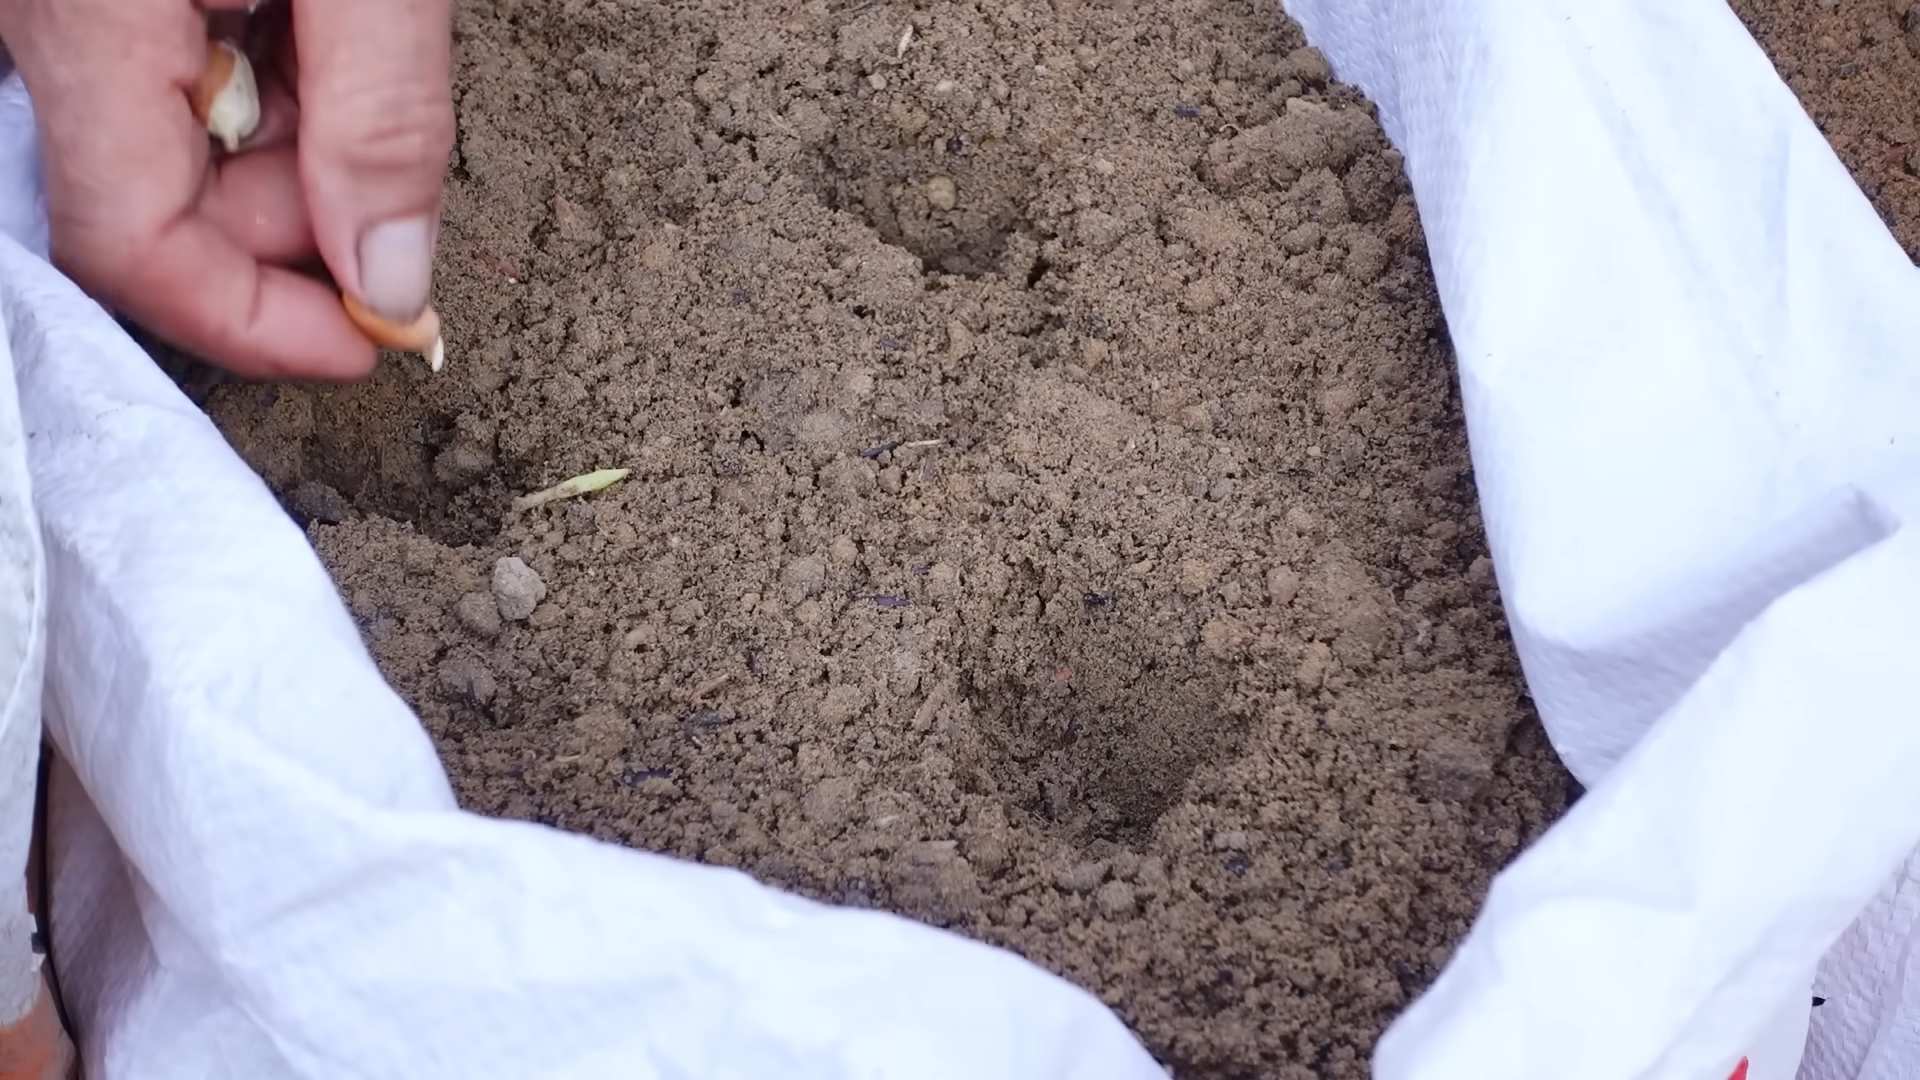
- Plant the peanuts: Plant your soaked peanuts about 2-3 inches deep and 6-8 inches apart in rows spaced 2-3 feet apart. Planting too deeply can hinder germination. Gently press the soil around each peanut.
- Water thoroughly: After planting, water the area deeply to settle the soil and provide moisture for germination. Avoid overwatering, which can lead to root rot.
- Mulch (optional): Applying a layer of mulch, such as straw or shredded leaves, can help retain moisture, suppress weeds, and regulate soil temperature.
Caring for Your Peanut Plants
- Watering: Keep the soil consistently moist, especially during dry spells. Water deeply and less frequently rather than shallowly and often. The goal is to keep the soil moist, not waterlogged.
- Weed control: Regularly remove weeds to prevent competition for nutrients and water. Mulching can significantly reduce weed growth.
- Pest and disease control: Monitor your plants for pests like aphids, leafhoppers, or nematodes. If you notice any infestations, consider using organic pest control methods, such as insecticidal soap or neem oil. Good air circulation can help prevent fungal diseases.
- Fertilizing: Peanuts are relatively low feeders. A balanced fertilizer applied at planting time is usually sufficient. Over-fertilizing can lead to excessive vegetative growth at the expense of peanut production. Follow the instructions on your chosen fertilizer carefully.
Harvesting Your Peanuts
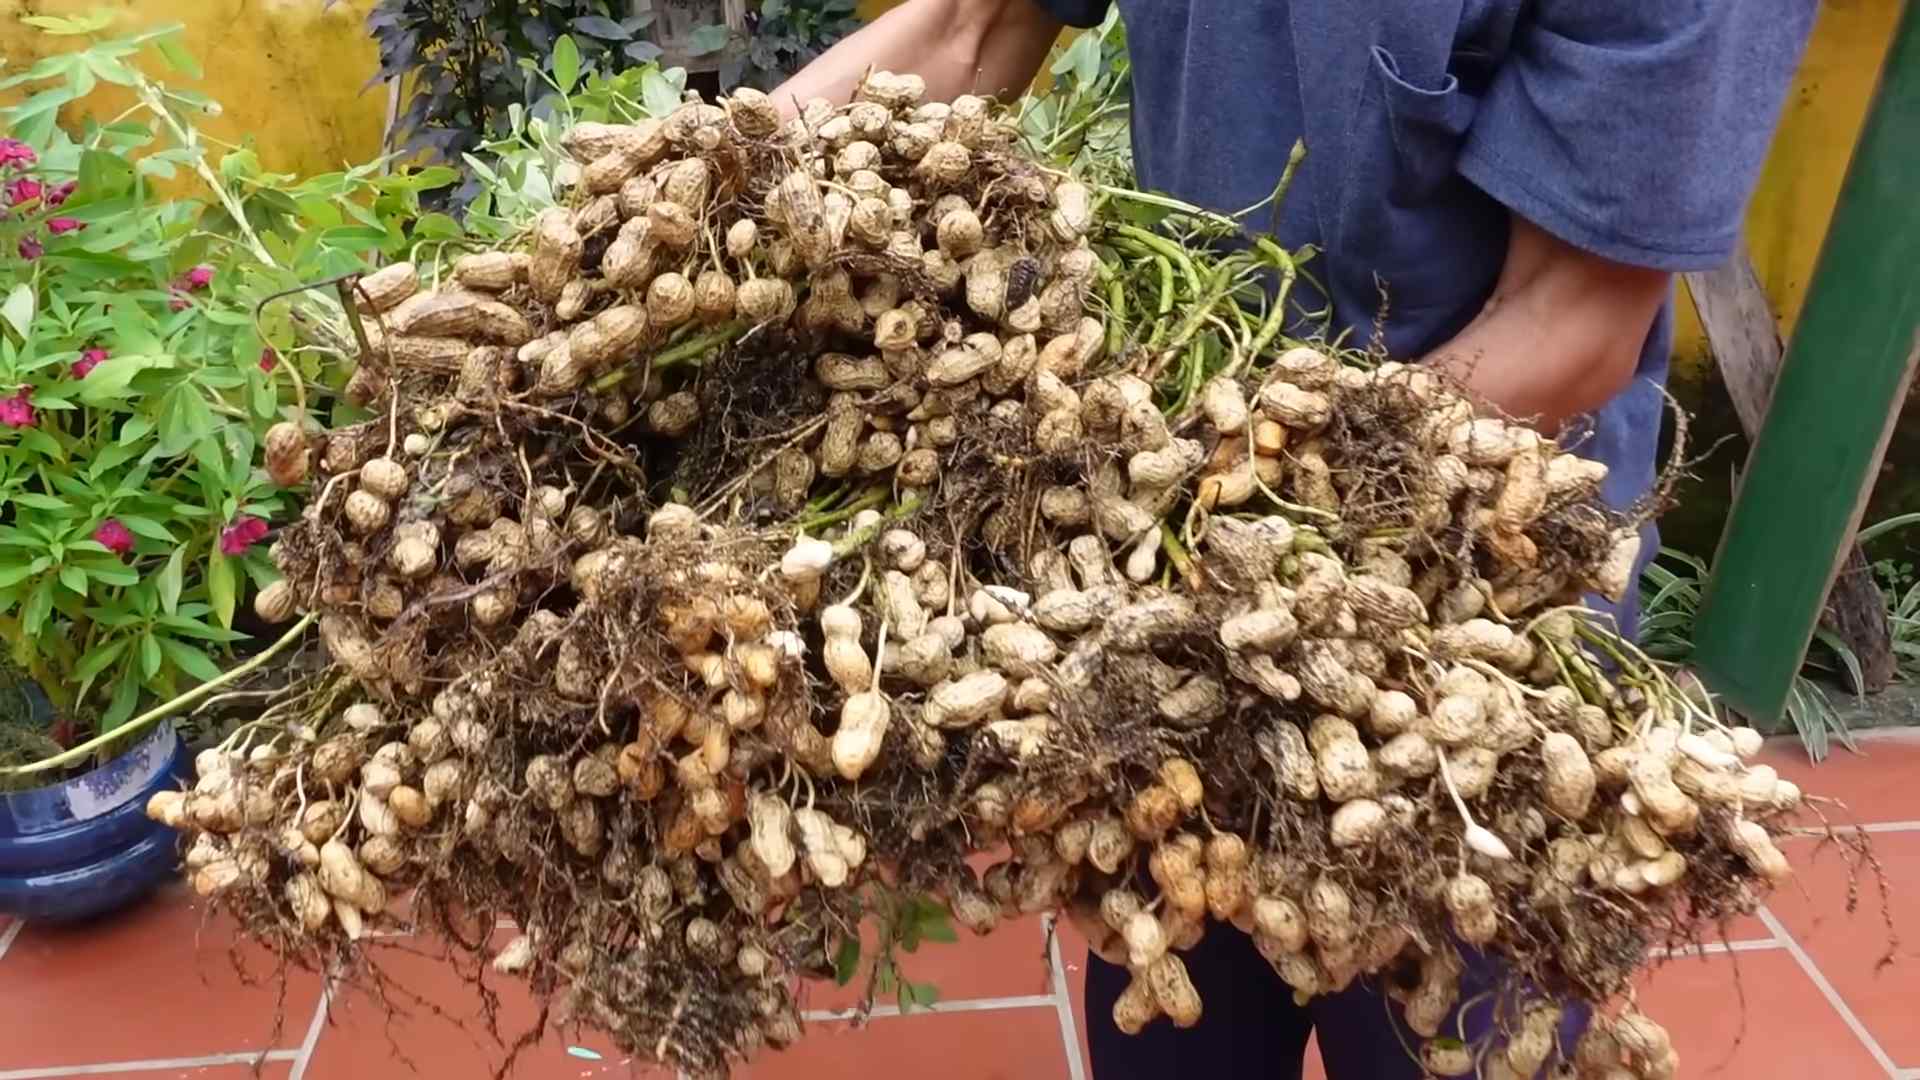
- Timing is key: Peanuts are typically ready for harvest 100-130 days after planting, depending on the variety and growing conditions. The leaves will turn yellow and brown as the plants mature. You can gently tug on a few plants to check if the pods are ready. If the plants easily pull up from the ground and the pods are dry and brown, they’re ready for harvest.
- Digging up the peanuts: Carefully dig up the peanut plants, being careful not to damage the pods. Use a garden fork or shovel to loosen the soil around the plants.
- Curing the peanuts: After digging, allow the plants to dry in a well-ventilated area for a few days. This allows the pods to dry further and the peanuts to cure. You can spread them out on a tarp or screen in a dry, shady location.
- Shelling the peanuts: Once the plants are completely dry, you can shell the peanuts by hand or using a peanut sheller. Remove any remaining soil or debris.
- Storing the peanuts: Store your harvested peanuts in a cool, dry, and airtight container. Proper storage will help maintain their freshness and prevent spoilage. They can be stored for several months under ideal conditions.
Troubleshooting Common Problems
Poor Germination:
If your peanuts aren’t germinating, it could be due to using treated peanuts, planting too deeply, or insufficient moisture. Ensure you’re using untreated peanuts, planting at the correct depth, and watering adequately.
Yellowing Leaves:
Yellowing leaves can indicate nutrient deficiencies, pest infestations, or diseases. Check for pests and diseases and consider soil testing to determine if nutrient levels are adequate.
Root Rot:
Root rot is often caused by overwatering or poorly drained soil. Improve drainage by amending the soil with organic matter and avoid overwatering.
Pest Infestations:
Monitor your plants regularly for pests. Use organic pest control methods as needed.
Remember to always research the specific needs of your chosen peanut variety for optimal results. Happy growing!
Conclusion
Growing your own peanuts at home might seem daunting, but this DIY trick proves it’s surprisingly achievable and incredibly rewarding. You’ll not only enjoy the satisfaction of nurturing a plant from seed to harvest, but you’ll also savor the unparalleled taste of fresh, homegrown peanuts. The unique flavor profile of peanuts grown in your own backyard simply can’t be matched by store-bought varieties. This method offers a fun, educational experience for the whole family, transforming a simple gardening project into a memorable adventure. The process is surprisingly straightforward, requiring minimal space and resources, making it perfect for beginners and seasoned gardeners alike. Beyond the delicious harvest, you’ll gain a deeper appreciation for the journey from seed to table, fostering a stronger connection to your food and the environment. This DIY peanut growing method is a must-try for anyone seeking a rewarding gardening project with a delicious payoff.
Beyond the basic method outlined, there are numerous ways to personalize your peanut growing experience. Experiment with different peanut varieties to discover your favorite flavor profiles. Consider companion planting, incorporating plants like marigolds or basil to deter pests and improve soil health. If space is limited, explore vertical gardening techniques to maximize your yield in a smaller area. For those with larger gardens, consider dedicating a larger plot to grow a more substantial peanut crop. You can also experiment with different soil types and amendments to optimize your peanut plants’ growth. The possibilities are endless, allowing you to tailor the process to your specific needs and preferences. Don’t be afraid to get creative and try different approaches – that’s part of the fun! Remember to document your progress, taking photos and notes along the way. This will not only help you refine your technique for future harvests but also provide a wonderful record of your gardening journey. Share your experiences, successes, and even your challenges with fellow gardening enthusiasts online. The community aspect of gardening can be incredibly supportive and enriching.
So, what are you waiting for? Grab some peanut seeds, prepare your soil, and embark on this exciting journey of growing your own peanuts. This DIY project is more than just a recipe; it’s an opportunity to connect with nature, learn new skills, and enjoy the fruits (or should we say, nuts?) of your labor. Share your homegrown peanut harvest with friends and family – it’s a truly unique and delicious gift. We encourage you to try this method and share your experience with us. Post your photos and stories on social media using #GrowPeanutsAtHome and tag us – we’d love to see your successful peanut plants and hear about your journey! Let’s create a thriving community of home peanut growers, sharing tips, tricks, and the joy of harvesting our own delicious peanuts. Remember, the most rewarding part of this process is the journey itself, so embrace the learning experience and enjoy the delicious results. Happy growing!
Frequently Asked Questions
What type of soil is best for growing peanuts?
Peanuts thrive in well-drained, sandy loam soil with a slightly acidic pH (around 6.0-6.8). Heavy clay soils can retain too much moisture, leading to root rot. Amend heavy clay soils with organic matter like compost to improve drainage. Sandy soils may require more frequent watering to maintain adequate moisture levels. Testing your soil’s pH and adjusting it accordingly is crucial for optimal peanut growth. You can purchase soil testing kits at most garden centers.
How much sunlight do peanut plants need?
Peanut plants require at least six to eight hours of direct sunlight per day. Choose a location in your garden that receives ample sunlight throughout the day. Insufficient sunlight can lead to poor growth and reduced yields. If your garden doesn’t receive enough direct sunlight, consider using grow lights to supplement natural sunlight, especially during the early stages of growth.
When is the best time to plant peanuts?
The best time to plant peanuts is after the last frost and when the soil temperature has warmed to at least 60-70°F (15-21°C). This typically falls between late spring and early summer, depending on your geographic location. Check your local frost dates to determine the optimal planting time for your area. Planting too early can expose seedlings to frost damage, while planting too late can shorten the growing season and reduce yields.
How long does it take for peanuts to mature?
The time it takes for peanuts to mature depends on the variety and growing conditions, but generally ranges from 120 to 150 days. Once the plants flower and the pods begin to develop underground, it’s crucial to monitor their progress closely. The plants will often show signs of maturity, such as yellowing leaves. Harvesting too early can result in immature peanuts, while harvesting too late can lead to spoilage. Careful observation and understanding of your specific peanut variety’s maturity timeline are key to a successful harvest.
What are some common pests and diseases that affect peanuts?
Peanuts can be susceptible to various pests and diseases, including aphids, leafhoppers, and fungal diseases like leaf spot and southern blight. Regularly inspect your plants for signs of infestation or disease. Implementing preventative measures, such as proper spacing between plants to improve air circulation, and using organic pest control methods can help minimize problems. If you notice significant pest or disease issues, consult with your local agricultural extension office for advice on appropriate treatment options. Early detection and prompt action are crucial for managing pest and disease problems effectively.
Can I grow peanuts in containers?
Yes, you can grow peanuts in containers, provided they are large enough to accommodate the plant’s root system. Choose containers at least 12-18 inches in diameter and depth to allow for adequate root growth. Ensure the containers have drainage holes to prevent waterlogging. Using a well-draining potting mix is essential for successful container growing. Remember that container-grown peanuts may require more frequent watering than those grown in the ground. Container gardening is a great option for those with limited space or those who want to control the growing environment more precisely.
Leave a Comment