
Grow Peas Indoors? Absolutely! Imagine harvesting fresh, sweet peas right from your windowsill, even in the dead of winter. Sounds like a dream, right? Well, it’s a dream that can easily become a reality with a few simple tricks and a little DIY magic. For centuries, humans have cultivated peas, tracing their origins back to the Near East. They were initially dried for storage, but over time, we discovered the joy of eating them fresh and green.
But why bother growing peas indoors? Well, for starters, it extends your growing season, allowing you to enjoy these delicious legumes long before (or after) the outdoor growing season. Plus, it’s a fantastic way to add a touch of green to your home and a rewarding activity for gardeners of all levels. I know I love having fresh ingredients readily available. This DIY guide will walk you through everything you need to know to successfully grow peas indoors, from choosing the right varieties to providing the perfect growing conditions. Say goodbye to bland, store-bought peas and hello to a vibrant, homegrown harvest!
Growing Peas Indoors: A Complete DIY Guide
Hey there, fellow gardening enthusiasts! Ever dreamt of fresh, sweet peas in the middle of winter? Well, dream no more! I’m going to walk you through the surprisingly simple process of growing peas indoors. It’s a rewarding experience, and nothing beats the taste of homegrown veggies, even when they’re grown inside. Let’s get started!
Choosing the Right Pea Variety
Not all pea varieties are created equal when it comes to indoor growing. You’ll want to pick bush varieties, also known as dwarf or compact peas, as they don’t require extensive trellising like their vining counterparts. Here are a few of my favorites:
* ‘Little Marvel’: A classic choice, known for its sweet flavor and compact size.
* ‘Tom Thumb’: Super compact, perfect for small spaces.
* ‘Sugar Ann’: An early-maturing snap pea that’s delicious and easy to grow.
* ‘Snowbird’: A snow pea variety that produces abundant, flat pods.
Gathering Your Supplies
Before we dive into planting, let’s make sure you have everything you need. This will make the whole process smoother and more enjoyable.
* Pea Seeds: Choose your desired variety from the list above. Make sure they are fresh seeds for the best germination rate.
* Containers: You’ll need containers that are at least 6 inches deep and wide. I prefer using plastic pots with drainage holes, but you can also use repurposed containers like yogurt tubs or milk cartons (just make sure to add drainage holes!).
* Potting Mix: Use a high-quality, well-draining potting mix. Avoid using garden soil, as it can compact and hinder drainage.
* Grow Lights (Optional but Recommended): While peas can grow indoors with natural light, grow lights will significantly improve their growth and yield, especially during the darker months.
* Small Trellis or Support (Optional): Even bush varieties can benefit from a little support, especially as they start producing pods. You can use small bamboo stakes, twigs, or even chopsticks.
* Watering Can or Spray Bottle: For gentle watering.
* Seed Starting Tray (Optional): If you prefer to start your seeds indoors before transplanting.
Planting Your Pea Seeds
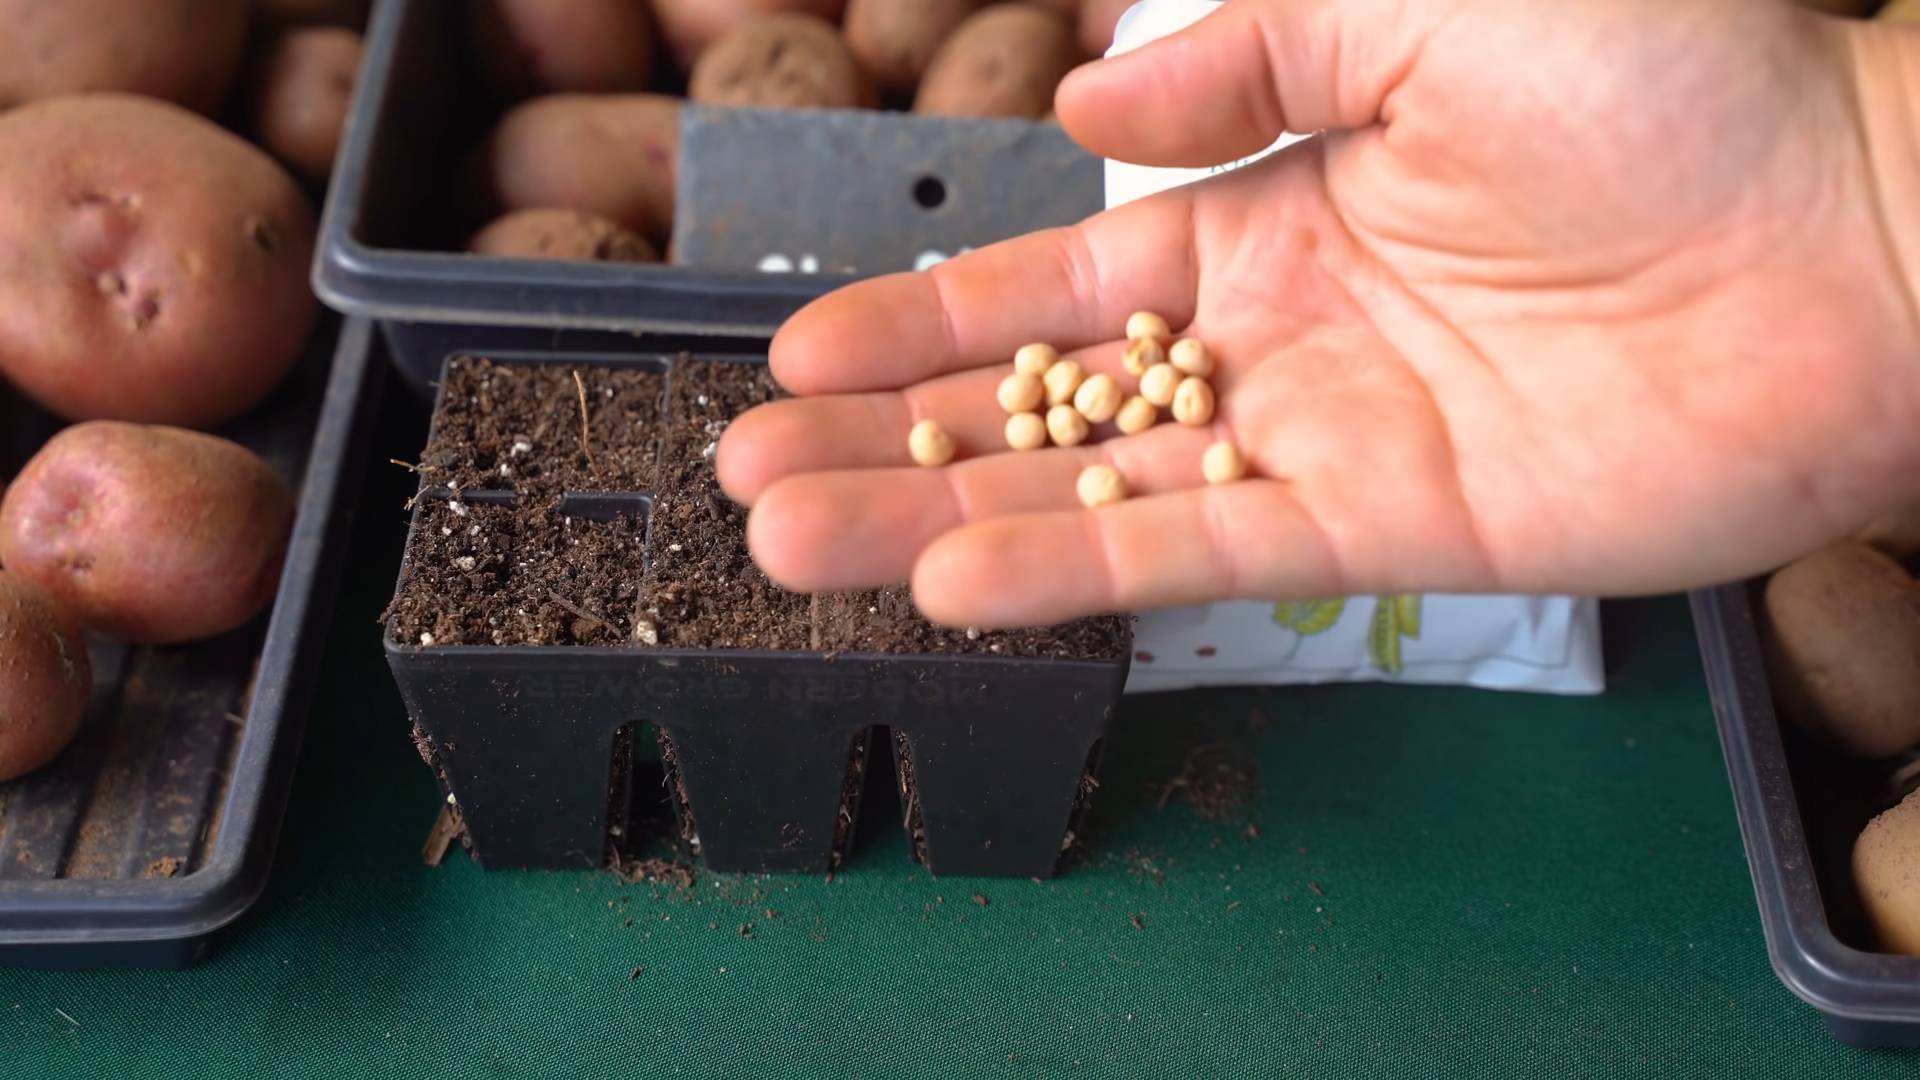
Now for the fun part! Planting your pea seeds is a straightforward process. I usually soak my pea seeds in water for 24 hours before planting to help speed up germination, but this step is optional.
1. Prepare Your Containers: Fill your containers with potting mix, leaving about an inch of space at the top. Gently pat down the soil.
2. Sow the Seeds: Sow the pea seeds about 1 inch deep and 1-2 inches apart. I usually plant 3-4 seeds per container to ensure good germination.
3. Cover the Seeds: Cover the seeds with a thin layer of potting mix.
4. Water Gently: Water the soil gently until it’s evenly moist but not soggy.
5. Provide Light: Place the containers in a location that receives at least 6 hours of direct sunlight per day. If you’re using grow lights, position them a few inches above the soil surface and keep them on for 12-16 hours per day.
6. Maintain Moisture: Keep the soil consistently moist but not waterlogged. Check the soil moisture daily and water when the top inch feels dry.
Caring for Your Indoor Pea Plants
Once your pea seeds have germinated (usually within 7-14 days), it’s time to focus on providing them with the care they need to thrive.
1. Thin Seedlings (If Necessary): If multiple seeds germinate in the same spot, thin them out by snipping off the weakest seedlings at the soil line. This will give the remaining seedlings more room to grow.
2. Provide Support (If Needed): As your pea plants grow, they may start to lean or flop over. Provide them with support by inserting small bamboo stakes or twigs into the soil and gently tying the stems to the supports with twine.
3. Fertilize Regularly: Peas are heavy feeders, so it’s important to fertilize them regularly with a balanced liquid fertilizer. I usually fertilize my pea plants every 2-3 weeks, following the instructions on the fertilizer label.
4. Monitor for Pests and Diseases: Keep an eye out for common pests like aphids and spider mites. If you spot any pests, you can try spraying them with insecticidal soap or neem oil. Also, watch out for fungal diseases like powdery mildew, which can be prevented by ensuring good air circulation and avoiding overwatering.
5. Rotate Your Plants: If you’re growing your peas near a window, rotate the containers regularly to ensure that all sides of the plants receive equal amounts of light. This will help prevent them from leaning towards the light source.
Pollinating Your Pea Plants
Peas are self-pollinating, meaning they don’t require insects or wind to transfer pollen from the male to the female parts of the flower. However, you can still help them along by gently shaking the plants or using a small paintbrush to transfer pollen from one flower to another. This is especially helpful if you’re growing your peas indoors, where there’s less air movement.
Harvesting Your Peas
The moment you’ve been waiting for! Harvesting your peas is the most rewarding part of the process. The timing of the harvest will depend on the variety of peas you’re growing.
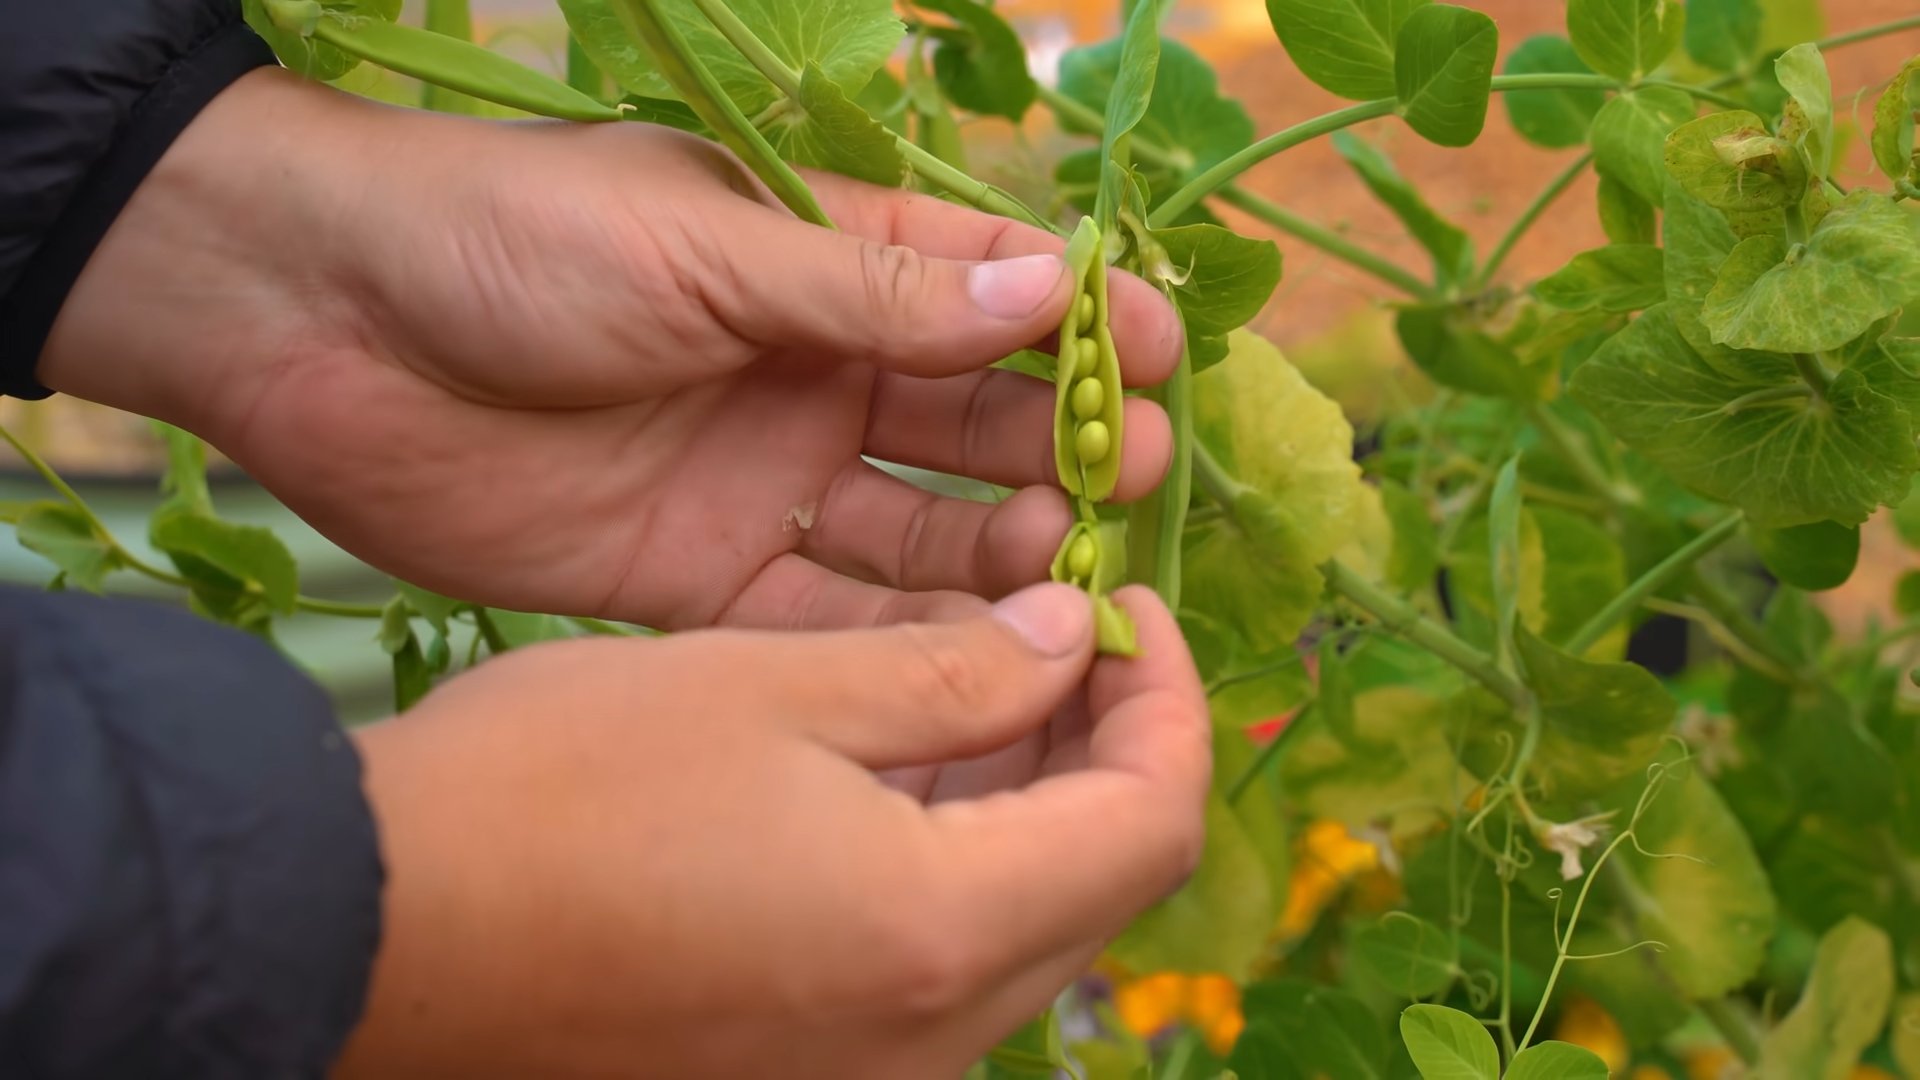
* Shelling Peas: Harvest when the pods are plump and filled with peas. The pods should be firm but not hard.
* Snap Peas: Harvest when the pods are plump and the peas inside are just starting to develop. The pods should be crisp and tender.
* Snow Peas: Harvest when the pods are flat and the peas inside are barely visible. The pods should be tender and translucent.
To harvest your peas, simply snip the pods off the plant with scissors or gently twist them off with your fingers. Harvest regularly to encourage the plant to produce more pods.
Troubleshooting Common Problems
Even with the best care, you may encounter some problems when growing peas indoors. Here are a few common issues and how to address them:
* Poor Germination: If your pea seeds aren’t germinating, make sure they’re fresh and that the soil is consistently moist. You can also try scarifying the seeds by gently nicking the outer coating with a knife or sandpaper before planting.
* Yellowing Leaves: Yellowing leaves can be a sign of overwatering, underwatering, or nutrient deficiency. Check the soil moisture and adjust your watering accordingly. If the soil is consistently moist, you may need to improve drainage. If the leaves are yellowing all over, it could be a sign of nutrient deficiency, in which case you should fertilize your plants.
* Leggy Growth: Leggy growth (tall, spindly plants with few leaves) is usually caused by insufficient light. If your plants are growing leggy, move them to a brighter location or supplement with grow lights.
* Lack of Pod Production: If your pea plants are growing well but not producing pods, it could be due to a lack of pollination or insufficient nutrients. Try gently shaking the plants to encourage pollination and fertilize them with a balanced fertilizer.
Extending Your Harvest
To extend your pea harvest, you can try succession planting. This involves planting new seeds every 2-3 weeks to ensure a continuous supply of peas. You can also try growing different varieties of peas that mature at different times.
Enjoying Your Homegrown Peas
Congratulations! You’ve successfully grown peas indoors. Now it’s time to enjoy the fruits (or rather, vegetables) of your labor. Freshly harvested peas are delicious eaten raw, steamed, stir-fried, or added to salads and soups. You can also freeze or can your peas to enjoy them later.
Growing peas indoors is a fun and rewarding experience that can provide you with fresh, delicious vegetables year-round. With a little bit of care and attention, you can enjoy a bountiful harvest of homegrown peas, even in the middle of winter. Happy gardening!
Conclusion
So, there you have it! Growing peas indoors is not only achievable but also incredibly rewarding. Forget relying solely on seasonal availability or expensive grocery store options. With a little effort and this simple DIY trick, you can enjoy fresh, crisp, and delicious peas right from your own home, all year round.
Why is this a must-try? Because it puts you in control. You control the growing environment, ensuring optimal conditions for your peas to thrive. You control the quality, knowing exactly what goes into nurturing your plants, free from harmful pesticides and chemicals. And you control the harvest, picking your peas at their peak ripeness for the most intense flavor.
Beyond the basic method outlined, there’s plenty of room for experimentation. Try different varieties of peas, from classic shelling peas to sweet snow peas or snap peas. Each offers a unique texture and flavor profile that will add variety to your meals. Consider using different types of containers, from traditional pots to vertical planters, to maximize space and add a touch of greenery to your indoor environment. You can even experiment with different growing mediums, such as coco coir or a soilless mix, to see what works best for your peas.
Don’t be afraid to get creative! Add companion plants like basil or mint to your pea containers to deter pests and enhance the flavor of your harvest. Use a trellis or netting to provide support for your growing vines, creating a beautiful and productive indoor garden. The possibilities are endless!
Ultimately, this DIY trick for growing peas indoors is about more than just having access to fresh produce. It’s about connecting with nature, learning new skills, and experiencing the satisfaction of nurturing something from seed to harvest. It’s about adding a touch of green to your home and a burst of flavor to your meals.
We wholeheartedly encourage you to give this a try. It’s easier than you think, and the rewards are well worth the effort. Once you’ve experienced the joy of harvesting your own homegrown peas, you’ll never look at store-bought peas the same way again.
So, grab your seeds, gather your supplies, and get ready to embark on your indoor pea-growing adventure. And most importantly, don’t forget to share your experiences with us! We’d love to hear about your successes, your challenges, and any tips or tricks you discover along the way. Share your photos, your stories, and your questions in the comments below. Let’s build a community of indoor pea growers and inspire others to discover the joys of homegrown goodness. Happy growing!
Frequently Asked Questions (FAQ)
What are the best pea varieties to grow indoors?
While many pea varieties can be grown indoors, some tend to perform better than others. Bush varieties, also known as dwarf or compact varieties, are generally recommended because they require less space and support than vining varieties. Some popular choices for indoor growing include:
* Little Marvel: A classic bush pea known for its sweet flavor and early maturity.
* Sugar Ann Snap Pea: A compact snap pea that produces crisp, edible pods.
* Tom Thumb: An ultra-dwarf variety that’s perfect for small spaces and containers.
* Oregon Sugar Pod II: A productive snow pea with tender, flat pods.
* Snowbird: Another excellent snow pea variety that is well-suited for container gardening.
When selecting your pea variety, consider your available space, your desired flavor profile, and the maturity time.
How much light do indoor peas need?
Peas require a significant amount of light to thrive indoors. Aim for at least 6-8 hours of direct sunlight per day. A south-facing window is ideal, but if you don’t have access to one, you can supplement with artificial grow lights. Fluorescent or LED grow lights are excellent options. Position the lights a few inches above the plants and keep them on for 12-16 hours per day. Insufficient light can lead to leggy growth, reduced yields, and a higher susceptibility to pests and diseases.
What type of soil is best for growing peas indoors?
Peas prefer well-draining soil that is rich in organic matter. A good potting mix specifically formulated for vegetables is a great choice. You can also create your own mix by combining equal parts of compost, peat moss (or coco coir), and perlite or vermiculite. Avoid using garden soil, as it can be too heavy and may contain pests or diseases. Ensure that your containers have drainage holes to prevent waterlogging, which can lead to root rot.
How often should I water my indoor pea plants?
Water your pea plants regularly, keeping the soil consistently moist but not soggy. Check the soil moisture by sticking your finger about an inch deep. If it feels dry, it’s time to water. Water deeply, allowing the excess water to drain out of the bottom of the container. Avoid overhead watering, as this can promote fungal diseases. During warmer months or when the plants are actively growing, you may need to water more frequently.
Do I need to fertilize my indoor pea plants?
Peas are relatively light feeders, but they will benefit from occasional fertilization. Use a balanced liquid fertilizer diluted to half strength every 2-3 weeks. Alternatively, you can amend the soil with compost or worm castings at planting time. Avoid over-fertilizing, as this can lead to excessive foliage growth at the expense of pod production.
How do I support my indoor pea plants?
Vining pea varieties require support to climb. You can use a trellis, netting, or even bamboo stakes to provide support. Install the support system at planting time to avoid disturbing the roots later on. As the plants grow, gently guide the vines onto the support. Bush varieties typically don’t require support, but they may benefit from staking if they become top-heavy.
How long does it take for peas to mature indoors?
The time it takes for peas to mature indoors depends on the variety and growing conditions. Generally, you can expect to harvest your first peas within 60-70 days of planting. Check the seed packet for specific maturity times.
How do I know when my peas are ready to harvest?
The best time to harvest peas is when the pods are plump and filled with peas, but before they become tough or starchy. For shelling peas, the pods should be firm and round. For snap peas, the pods should be crisp and tender. For snow peas, the pods should be flat and thin. Harvest regularly to encourage continued production.
What are some common pests and diseases that affect indoor pea plants?
Common pests that can affect indoor pea plants include aphids, spider mites, and whiteflies. Regularly inspect your plants for signs of infestation and take action promptly. You can try spraying the plants with insecticidal soap or neem oil. Common diseases include powdery mildew and root rot. Ensure good air circulation and avoid overwatering to prevent these diseases.
Can I save seeds from my indoor pea plants?
Yes, you can save seeds from your indoor pea plants, but it’s important to choose open-pollinated varieties rather than hybrid varieties. Allow the pods to dry completely on the plant before harvesting the seeds. Store the seeds in a cool, dry place until you’re ready to plant them. Keep in mind that saved seeds may not always produce plants that are identical to the parent plant.
Leave a Comment