
Grow Pineapple at Home – imagine plucking a juicy, sun-ripened pineapple straight from your own backyard! Sounds like a tropical dream, right? Well, it’s more achievable than you might think, and this DIY guide is your passport to pineapple paradise. Forget those expensive grocery store pineapples; we’re about to unlock the secrets to cultivating your own sweet treat, right in the comfort of your home.
The pineapple, a symbol of hospitality and welcome, has a rich history. Originating in South America, it was prized by indigenous cultures long before European explorers discovered its deliciousness. Pineapples were so rare and coveted in Europe that they became status symbols, often rented out for display at lavish parties! Now, you can bring that touch of luxury and exotic flair to your own life.
Why should you learn to grow pineapple at home? Because it’s incredibly rewarding, surprisingly easy, and a fantastic way to reduce your carbon footprint by cutting down on transportation. Plus, store-bought pineapples often lack the intense flavor of a homegrown one. This DIY trick is perfect for anyone who wants to add a touch of the tropics to their garden, learn a new skill, and enjoy the unparalleled taste of a freshly harvested pineapple. Let’s get started!
Growing Your Own Pineapple: A Tropical Treat at Home!
Hey there, fellow plant enthusiasts! Ever dreamt of sipping a piña colada made with a pineapple you grew yourself? Well, dream no more! Growing a pineapple at home is surprisingly achievable, even if you don’t live in a tropical paradise. It takes patience, but the reward of harvesting your own sweet, juicy pineapple is totally worth it. I’m going to walk you through the whole process, step-by-step, so you can enjoy this tropical delight right from your own home.
What You’ll Need:
Before we dive in, let’s gather our supplies. Here’s what you’ll need to get started:
* A fresh pineapple (look for one with healthy, green leaves)
* A sharp knife
* A well-draining potting mix (cactus mix works great!)
* A pot (at least 6 inches in diameter)
* A glass or jar
* Water
* Rooting hormone (optional, but recommended)
* Patience! (This is the most important ingredient!)
Preparing the Pineapple Top: The Foundation of Your Future Fruit
This is where the magic begins! We’re going to carefully separate the leafy top of the pineapple from the fruit.
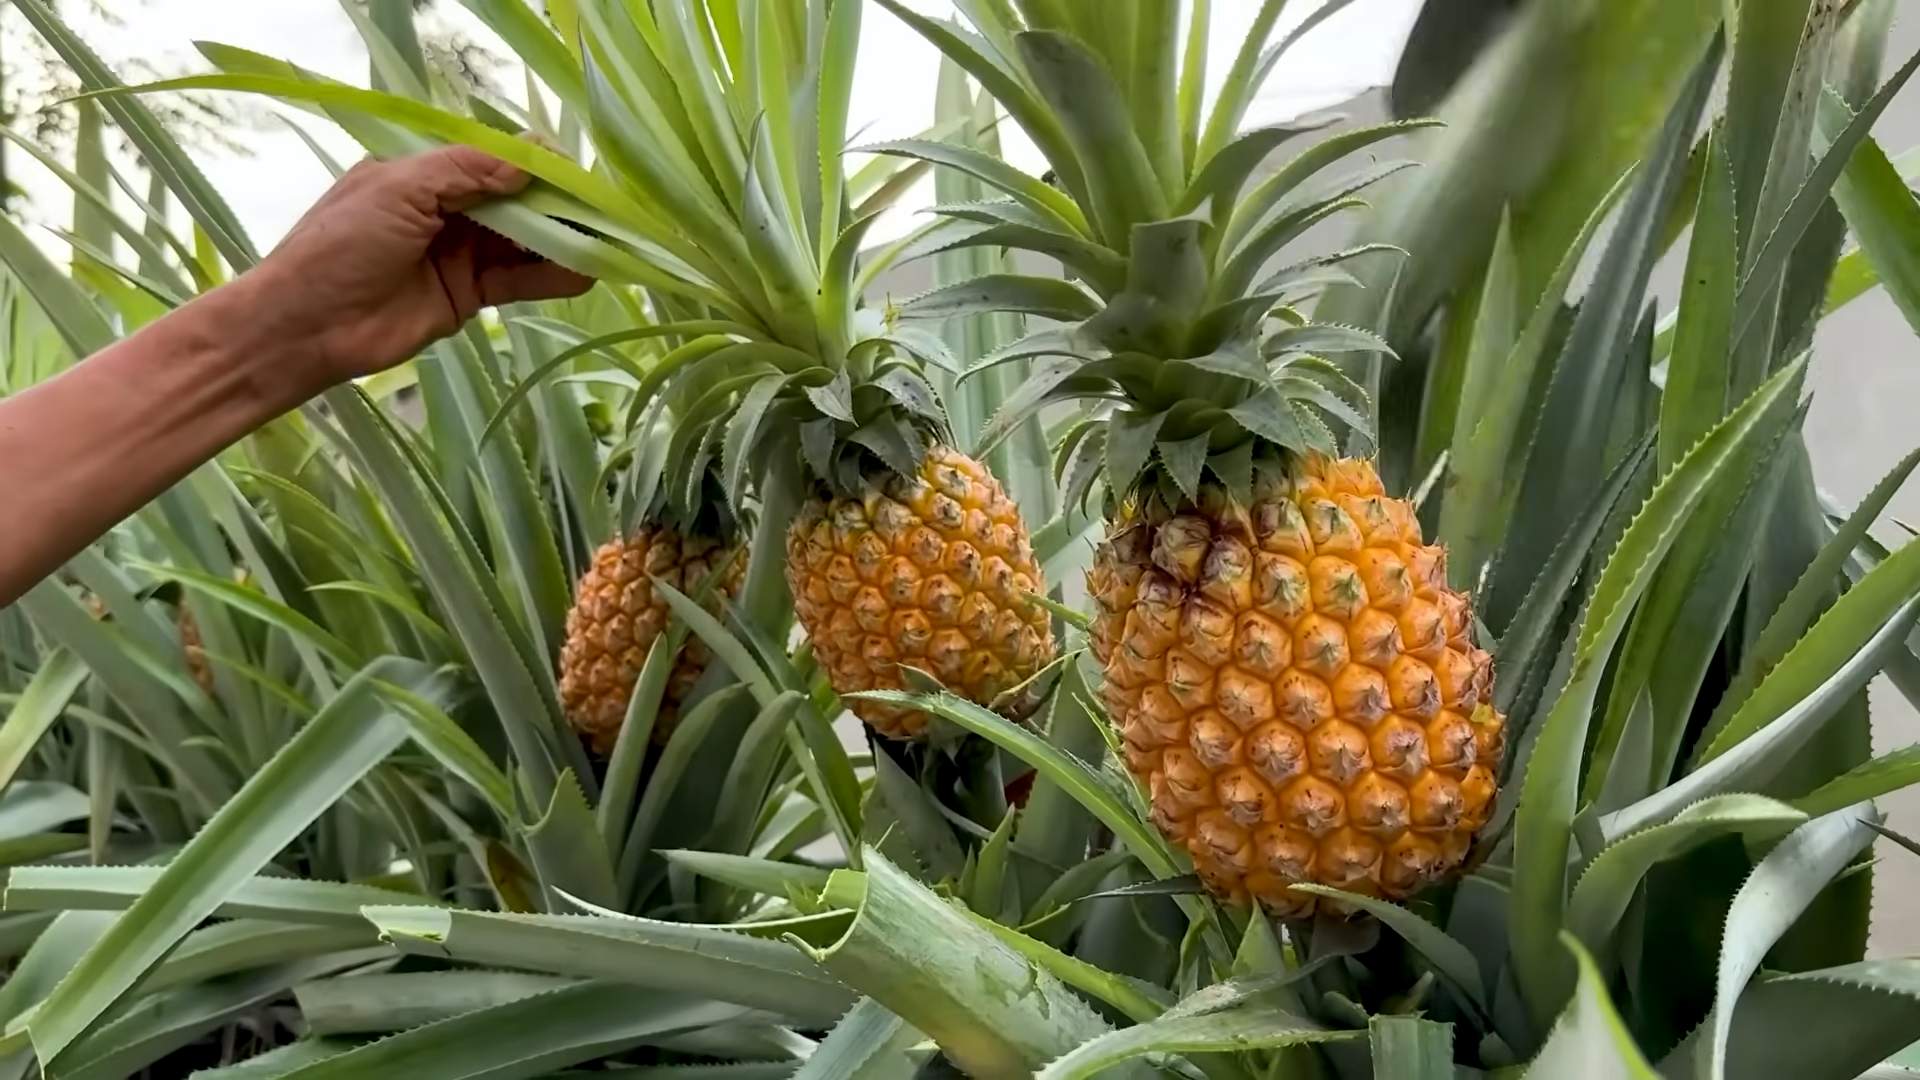
1. Choose Your Pineapple Wisely: Head to your local grocery store and pick out a ripe pineapple. Look for one with vibrant green leaves that aren’t brown or damaged. The fruit itself should be fragrant and slightly soft to the touch. This indicates ripeness and a healthy top.
2. Twist and Shout (Gently!): The easiest method is to firmly grasp the leaves near the base and twist the top off the pineapple. Apply steady pressure and twist until the top separates from the fruit. If twisting doesn’t work, don’t force it!
3. The Knife Method (If Twisting Fails): If the top refuses to twist off, use your sharp knife to carefully cut the top off, about an inch or two below the leaves. Make sure your cut is clean and straight.
4. Remove the Fruit Flesh: This is crucial! Carefully remove all the remaining fruit flesh from the base of the pineapple top. Any leftover fruit will rot and could prevent rooting. You can use your knife to gently scrape away the flesh. Be careful not to damage the base where the roots will emerge.
5. Peel Back the Lower Leaves: Gently peel off the bottom few layers of leaves from the base of the pineapple top. This will expose the stem, where the roots will grow. You should see small brown bumps or root primordia – these are where the roots will sprout!
6. Let it Dry: Allow the pineapple top to dry out for a few days (2-3 days is ideal). This helps to prevent rot. Place it in a cool, dry place, away from direct sunlight. You’ll notice the cut end will callous over – that’s exactly what we want!
Rooting Your Pineapple Top: From Top to Roots
Now that we’ve prepped our pineapple top, it’s time to encourage those roots to grow!
1. Water Propagation (My Preferred Method): Fill your glass or jar with water. Make sure the water is clean and fresh.
2. Submerge the Base: Place the pineapple top in the glass of water, ensuring that only the base (where you peeled off the leaves) is submerged. The leaves should be above the water line.
3. Find a Sunny Spot: Place the glass with the pineapple top in a bright, sunny location. A windowsill is perfect!
4. Change the Water Regularly: Change the water every few days (every 2-3 days is ideal) to keep it fresh and prevent algae growth.
5. Be Patient: Rooting can take several weeks, so don’t get discouraged if you don’t see roots right away. It usually takes around 4-8 weeks for roots to develop. You’ll know it’s working when you see small, white roots emerging from the base.
6. Rooting Hormone (Optional Boost): If you want to give your pineapple top an extra boost, you can dip the base in rooting hormone powder before placing it in water. This can help to speed up the rooting process.
Planting Your Rooted Pineapple: From Water to Soil
Once your pineapple top has developed a good set of roots (at least an inch or two long), it’s time to plant it in soil!
1. Choose the Right Pot: Select a pot that is at least 6 inches in diameter. Make sure the pot has drainage holes to prevent waterlogging.
2. Use Well-Draining Soil: Pineapples need well-draining soil to thrive. A cactus or succulent mix is ideal. You can also create your own mix by combining potting soil, perlite, and sand.
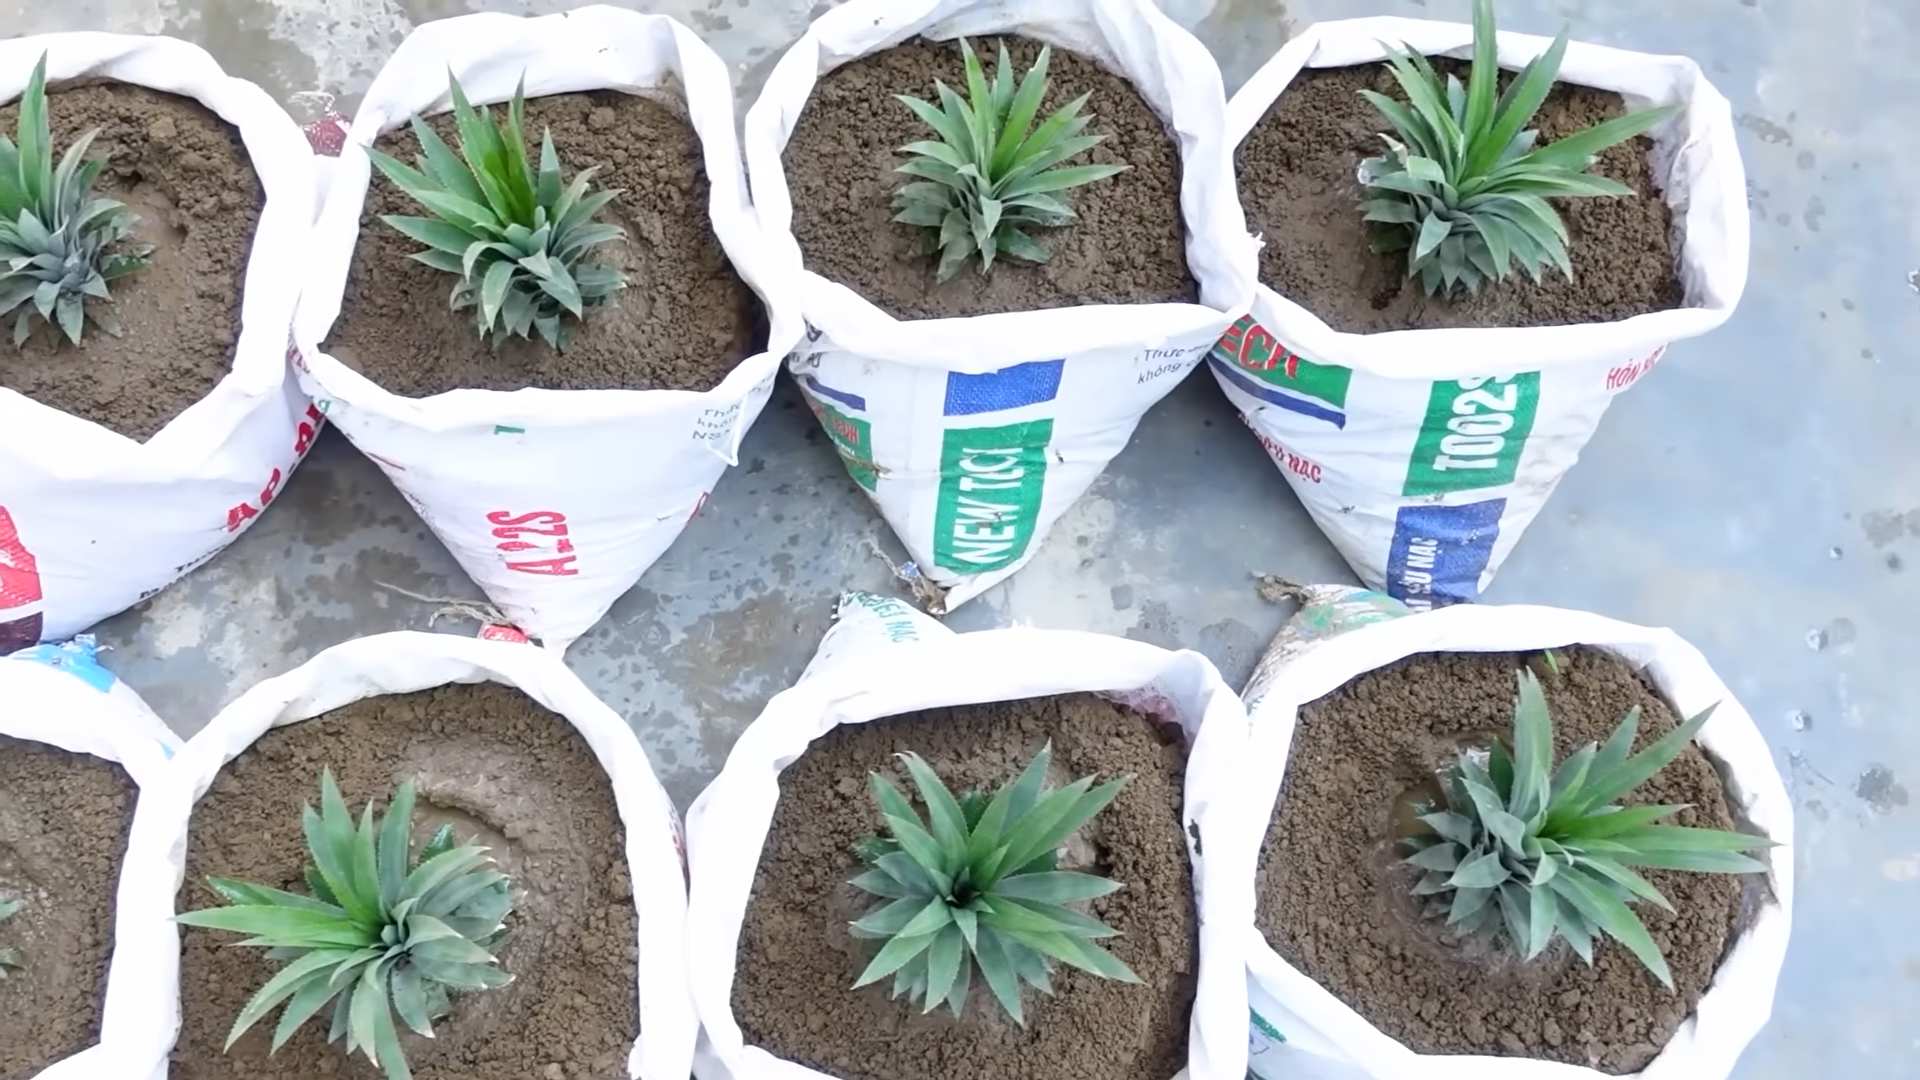
3. Planting Time: Fill the pot with your chosen soil mix. Make a hole in the center of the soil, large enough to accommodate the roots of your pineapple top.
4. Gently Place the Pineapple Top: Carefully remove the pineapple top from the water and gently place it in the hole. Make sure the roots are spread out and not crammed together.
5. Backfill with Soil: Fill the hole with soil, gently packing it around the base of the pineapple top. Make sure the base is firmly planted in the soil.
6. Water Thoroughly: Water the newly planted pineapple top thoroughly, until water drains out of the drainage holes.
Caring for Your Pineapple Plant: Nurturing Your Tropical Treasure
Now that your pineapple is planted, it’s time to provide it with the care it needs to grow and eventually produce fruit!
1. Sunlight is Key: Pineapples love sunlight! Place your potted pineapple plant in a location that receives at least 6 hours of direct sunlight per day. A south-facing window is ideal. If you don’t have enough natural sunlight, you can supplement with a grow light.
2. Watering Wisely: Water your pineapple plant when the top inch of soil feels dry to the touch. Avoid overwatering, as this can lead to root rot. During the growing season (spring and summer), you may need to water more frequently than during the dormant season (fall and winter).
3. Fertilizing for Growth: Feed your pineapple plant with a balanced liquid fertilizer every 2-3 weeks during the growing season. Follow the instructions on the fertilizer label.
4. Temperature Matters: Pineapples thrive in warm temperatures, ideally between 65°F and 85°F (18°C and 29°C). Protect your plant from frost and cold drafts.
5. Humidity is Helpful: Pineapples appreciate humidity. If you live in a dry climate, you can increase the humidity around your plant by misting it regularly with water or placing it on a pebble tray filled with water.
6. Repotting (Eventually): As your pineapple plant grows, it may eventually need to be repotted into a larger container. Repot it when the roots start to outgrow the pot.
Encouraging Fruiting: The Patience Game
This is where the real test of patience comes in! It can take several years (2-3 years is typical) for a pineapple plant grown from a top to produce fruit. But don’t give up! Here are a few tips to encourage fruiting:
1. Ethylene Gas Trick: Once your plant is mature (around 2-3 years old), you can try to induce fruiting by exposing it to ethylene gas. Place a ripe apple or banana near the plant and cover it with a plastic bag for a few days. Ripe fruits release ethylene gas, which can trigger flowering.
2. Magnesium Sulfate (Epsom Salts): Some gardeners recommend applying magnesium sulfate (Epsom salts) to the soil to encourage flowering. Dissolve 1 tablespoon of Epsom salts in 1 gallon of water and water your plant with the solution.
3. Patience, Patience, Patience: The most important thing is to be patient! Keep providing your pineapple plant with the care it needs, and eventually, it will reward you with a delicious, homegrown pineapple.
Harvesting Your Pineapple: The Sweet Reward
After months (or even years!) of waiting, the moment you’ve been dreaming of has finally arrived – it’s time to harvest your pineapple!
1. Signs of Ripeness: A ripe pineapple will have a fragrant aroma and a slightly soft feel. The color of the fruit will also change from green to yellow or golden.
2. The Harvest: Use a sharp knife to carefully cut the pineapple from the plant. Leave a few inches of stem attached to the fruit.
3. Enjoy Your Homegrown Pineapple: Now it’s time to savor the fruits (literally!) of your labor. Cut up your homegrown pineapple and enjoy it fresh, in smoothies, or in your favorite tropical recipes.
Growing a pineapple at home is a rewarding experience that requires patience and dedication. But with a little effort
Conclusion
So, there you have it! Growing your own pineapple at home isn’t just a fun project; it’s a rewarding experience that brings a touch of the tropics right to your windowsill or garden. Forget those expensive, sometimes bland, store-bought pineapples. Imagine the satisfaction of slicing into a juicy, sweet pineapple that you nurtured from start to finish. The flavor difference alone is a compelling reason to embark on this adventure.
This DIY trick is a must-try for several reasons. First, it’s incredibly cost-effective. You’re essentially turning the top of a pineapple, which would normally be discarded, into a brand new plant. Second, it’s a fantastic way to reduce food waste and embrace a more sustainable lifestyle. Third, it’s a fascinating learning experience for both adults and children, teaching valuable lessons about plant propagation and the wonders of nature. Finally, and perhaps most importantly, the taste of a homegrown pineapple is simply unparalleled. It’s sweeter, more flavorful, and bursting with sunshine in every bite.
But the fun doesn’t stop there! Once you’ve mastered the basic technique, you can experiment with different varieties of pineapple. Try growing a ‘Sugarloaf’ for its exceptionally sweet flavor, or a ‘Red Spanish’ for its vibrant color and slightly tart taste. You can also experiment with different growing mediums, such as coco coir or perlite, to see which works best for your climate and growing conditions. Consider using a terracotta pot, which helps with drainage and aeration, or even a self-watering pot for added convenience.
For those living in colder climates, consider keeping your pineapple plant indoors year-round. Provide it with plenty of sunlight, either through a south-facing window or with the help of a grow light. You can even move it outdoors during the warmer months to give it an extra boost of sunshine. Remember to protect it from frost and freezing temperatures.
Don’t be discouraged if your pineapple plant doesn’t produce fruit right away. It can take anywhere from one to three years for a pineapple plant to mature and bear fruit. Patience is key! But trust us, the wait is well worth it. The moment you harvest your first homegrown pineapple will be a moment of pure joy and accomplishment.
We wholeheartedly encourage you to give this DIY trick a try. It’s a simple, fun, and rewarding project that will bring a touch of the tropics to your home. And once you’ve successfully grown your own pineapple, we’d love to hear about your experience! Share your photos, tips, and stories with us in the comments below. Let’s create a community of pineapple enthusiasts and inspire others to embark on this exciting journey. Let’s all learn how to grow pineapple at home together!
Frequently Asked Questions (FAQ)
How long does it take to grow a pineapple from a top?
The time it takes to grow a pineapple from a top can vary depending on several factors, including climate, growing conditions, and the specific variety of pineapple. Generally, it takes anywhere from one to three years for a pineapple plant to mature and produce fruit. Be patient and provide your plant with the proper care, and you’ll eventually be rewarded with a delicious homegrown pineapple.
What kind of soil is best for growing pineapples?
Pineapples thrive in well-draining, slightly acidic soil. A mixture of potting soil, perlite, and peat moss is a good option. The perlite helps with drainage, while the peat moss provides acidity. You can also use a commercial potting mix specifically formulated for bromeliads, as pineapples are members of the bromeliad family. Avoid heavy clay soils, as they can retain too much moisture and lead to root rot.
How much sunlight does a pineapple plant need?
Pineapple plants need plenty of sunlight to thrive. Aim for at least six hours of direct sunlight per day. If you’re growing your pineapple indoors, place it near a south-facing window where it will receive the most sunlight. If you don’t have enough natural light, you can supplement with a grow light.
How often should I water my pineapple plant?
Water your pineapple plant regularly, but avoid overwatering. Allow the soil to dry out slightly between waterings. During the warmer months, you may need to water more frequently than during the cooler months. A good rule of thumb is to water when the top inch of soil feels dry to the touch. Also, pineapples can absorb water through their leaves, so occasionally misting the foliage can be beneficial.
How do I know when my pineapple is ripe?
There are several signs that indicate a pineapple is ripe. The color of the skin will change from green to yellow or golden. The pineapple will also emit a sweet, fragrant aroma. You can also gently tug on one of the leaves; if it comes out easily, the pineapple is likely ripe. Finally, the pineapple should feel slightly soft to the touch, but not mushy.
Can I grow a pineapple indoors?
Yes, you can absolutely grow a pineapple indoors, especially if you live in a climate with cold winters. Provide your pineapple plant with plenty of sunlight, well-draining soil, and regular watering. You may also need to supplement with a grow light if you don’t have enough natural light.
What are some common problems when growing pineapples?
Some common problems when growing pineapples include root rot, mealybugs, and scale. Root rot is caused by overwatering and poor drainage. Mealybugs and scale are pests that can suck the sap from the plant. To prevent root rot, ensure your pineapple plant is planted in well-draining soil and avoid overwatering. To control mealybugs and scale, you can use insecticidal soap or neem oil.
Do I need to fertilize my pineapple plant?
Yes, fertilizing your pineapple plant can help it grow and produce fruit. Use a balanced fertilizer, such as a 10-10-10, diluted to half strength. Fertilize your pineapple plant every two to three months during the growing season (spring and summer). Avoid fertilizing during the dormant season (fall and winter).
How do I encourage my pineapple plant to fruit?
One trick to encourage your pineapple plant to fruit is to expose it to ethylene gas. You can do this by placing a ripe apple or banana near the plant, or by covering the plant with a plastic bag along with a ripe apple or banana for a few days. The ethylene gas released by the fruit will stimulate the pineapple plant to flower and eventually produce fruit.
What if my pineapple top rots before it roots?
Rotting is a common issue when starting a pineapple from the top. To minimize this risk, ensure you’ve removed enough of the fruit flesh from the base of the top. Let the cut end dry out for several days to form a callus before planting. Use well-draining soil and avoid overwatering. If you notice signs of rot, remove the affected areas and allow the top to dry out again before replanting in fresh soil. Sometimes, despite your best efforts, the top may still rot. Don’t be discouraged! Try again with another pineapple top.


Leave a Comment