
Grow Purple Corn Rooftop gardens are becoming increasingly popular, and for good reason! Imagine stepping onto your roof and harvesting vibrant, antioxidant-rich purple corn – a truly unique and rewarding experience. But let’s be honest, rooftop gardening can seem daunting, especially when you’re aiming for something as special as purple corn. That’s where this DIY guide comes in!
Purple corn, with its deep, almost mystical hue, isn’t just a pretty face. Its history stretches back centuries to the Andean regions of South America, where it was revered for its nutritional and medicinal properties. Cultures like the Incas used it for everything from food and beverages to dyes and traditional remedies. Now, you can bring a piece of that rich heritage to your own home.
Why should you bother with this particular DIY project? Well, beyond the sheer novelty of growing your own purple corn, it’s about taking control of your food source, embracing sustainable practices, and adding a splash of color and health to your diet. Plus, rooftop gardening maximizes space, especially for those of us living in urban environments. This guide will break down the process into manageable steps, offering tips and tricks to ensure your grow purple corn rooftop garden thrives, even if you’re a beginner. I’m excited to share my knowledge and help you cultivate your own little piece of Andean magic right on your roof!
Purple Splendor on the Roof: Grow Your Own Purple Corn!
Hey everyone! Fancy an extraordinary garden project? I’ll show you how to grow beautiful, purple corn on your roof (or balcony!). Yes, you read that right, purple corn! It’s not only a real eye-catcher but also super delicious and rich in antioxidants. Don’t worry, it’s easier than you think. Let’s get started!
What you need: The Shopping List
Before we start, we naturally need the right equipment. Here is a list of everything you’ll need:
- Purple Corn Seeds: You can get these online, in well-stocked garden centers, or even at special seed markets. Look for a variety that is suitable for your climate zone.
- Large Planters: Corn needs space! Choose containers with at least a 40-liter (about 10-gallon) capacity per plant. The bigger, the better!
- High-Quality Potting Soil: A good mix of garden soil, compost, and sand is ideal.
- Drainage Material: Expanded clay, gravel, or broken pottery shards for the bottom of the containers. This prevents waterlogging.
- Organic Fertilizer: Corn is a heavy feeder. An organic fertilizer provides the necessary nutrient supply. Horn shavings, compost, or a special corn fertilizer are great.
- Watering Can or Garden Hose: For regular watering.
- Trowel: For repotting and planting.
- Support Stakes (optional): In strong winds, support stakes can help stabilize the plants.
- Patience and Love: The most important thing of all!
The Preparation: The Foundation for a Bountiful Harvest
Before we start planting, we need to make a few preparations. This is important so that the corn feels comfortable and thrives magnificently.
- Prepare the Containers: First, we place a layer of drainage material at the bottom of the planters. This prevents waterlogging, which corn really dislikes. On top of that comes the potting soil. Don’t fill the containers completely, leave a few centimeters of space to the rim.
- Prepare the Seeds (optional): To speed up germination, you can pre-soak the seeds. Place them in lukewarm water for 12-24 hours. This isn’t a must, but it helps a little.
- Choose the Location: Corn loves the sun! Find a sunny spot on your roof or balcony that gets at least 6-8 hours of sun per day. Also, make sure the location is sheltered from the wind, as tall corn plants can easily snap in strong winds.
The Sowing: The Start of the Corn Adventure
Now comes the exciting part: Sowing!
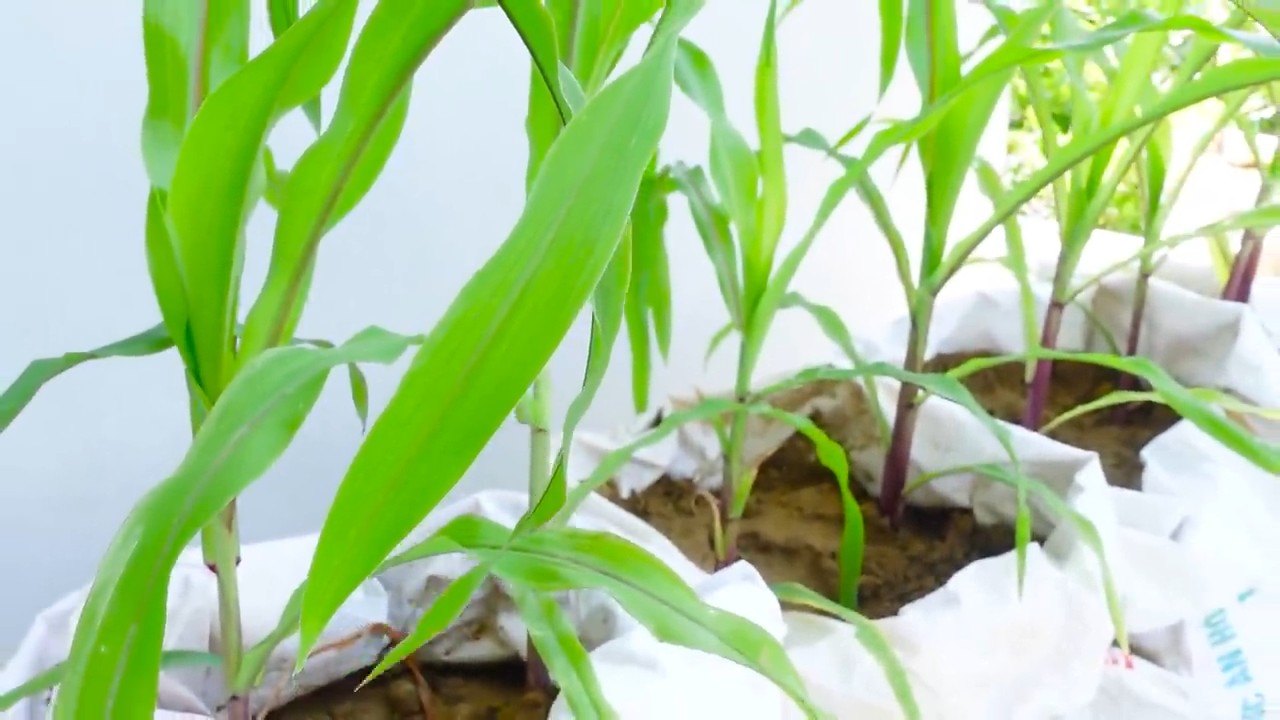
- Plant the Seeds: Make small holes in the soil with your finger or a small stick, about 2-3 cm (about 1 inch) deep. Place 2-3 seeds in each hole. This increases the chance that at least one seed will germinate.
- Close the Holes: Cover the seeds with soil and press down lightly.
- Watering: Water the soil gently so that it is well moistened. But be careful, not too much, or the seeds will float away!
The Care: So the Corn Thrives Magnificently
After sowing, it’s important to take good care of the corn so that it thrives.
- Water Regularly: Corn needs a lot of water, especially during the growth phase and when the cobs are forming. Water regularly, but avoid waterlogging. It’s best to water in the morning or evening when the sun isn’t so strong.
- Fertilize: Corn is a heavy feeder and needs a lot of nutrients. Fertilize regularly with an organic fertilizer. Start about 4-6 weeks after sowing and repeat the fertilization every 2-3 weeks.
- Remove Weeds: Keep the soil around the corn plants free of weeds. Weeds compete with the corn for nutrients and water.
- Support (optional): If your corn plants get very tall or the wind is strong, you can stabilize them with support stakes. Tie the plants loosely to the stakes so they don’t snap.
- Watch for Pests: Regularly check your corn plants for pests like aphids or corn borers. If infested, you can use natural pesticides.
The Pollination: The Key to Cob Formation
Corn is monoecious, which means it has both male and female flowers on the same plant. The male flowers are at the top of the plant (the tassel), and the female flowers (the ears) are on the sides. The wind is responsible for pollination.
- Help with Pollination (optional): If you want to make sure that pollination works well, you can help a little. Gently shake the corn plants when the tassel is blooming. This helps distribute the pollen better. You can also use a brush to transfer pollen from the tassel to the silks of the ears.
- The Silks: The silky threads that protrude from the ears are the stigmas of the female flowers. Each silk must be pollinated for a kernel to form. When the silks turn brown, pollination is complete.
The Harvest: The Reward for Your Efforts
After about 80-120 days, depending on the variety and weather conditions, the time has finally come: The harvest!
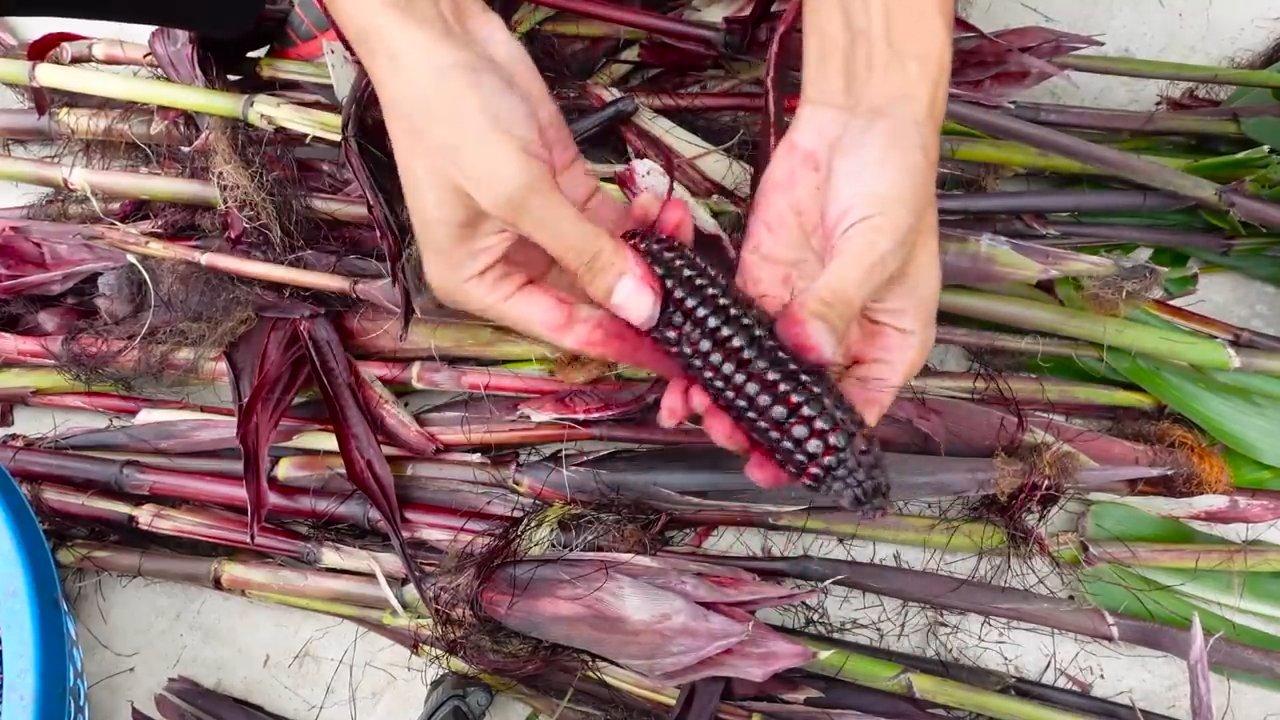
- Recognizing Ripeness: The cobs are ripe when the silks are brown and dry and the cobs feel firm. The leaves that envelop the cobs may also turn brown.
- The Harvest: Carefully break the cobs off the plants. Twist them slightly to make them easier to detach.
- Processing: You can eat the purple corn fresh, grill it, cook it, or process it into flour. It’s also a great ingredient for tortillas, polenta, or cornbread. And of course, you can save the seeds for the next season!
Extra Tips for Growing Purple Corn on the Roof
- Consider the Weight: Make sure your roof can support the weight of the planters. If necessary, consult a structural engineer.
- Optimize Watering: It can get very hot on the roof. Consider installing an irrigation system to provide the plants with an optimal water supply.
- Wind Protection: Build a windbreak to protect the plants from strong winds. This can be a simple tarp or a fence.
- Inform Your Neighbors: Talk to your neighbors about your project. Maybe they’ll be excited too and want to join in!
I hope this guide helps you grow your own purple corn on the roof. It’s a great project that is not only fun but also brings a bountiful harvest. Good luck and enjoy your meal! And don’t forget to tell me about your experiences! I’m excited to hear your purple corn stories!
Conclusion
So, there you have it! Growing purple corn on your rooftop isn’t just a quirky gardening experiment; it’s a rewarding journey that connects you to the rich history of this vibrant grain while providing you with a unique and nutritious food source. We’ve walked through the steps, from selecting the right seeds and preparing your containers to nurturing your plants and harvesting your beautiful, deep purple ears.
Why is this DIY trick a must-try? Because it’s more than just growing corn. It’s about reclaiming a piece of our agricultural heritage, adding a splash of color and intrigue to your urban landscape, and enjoying the unparalleled flavor of freshly grown, heirloom corn. Imagine the satisfaction of grinding your own purple cornmeal for tortillas, polenta, or cornbread, knowing that you nurtured it from seed to table, all on your own rooftop!
But the possibilities don’t stop there. Feel free to experiment with different varieties of purple corn. Some are better suited for specific climates or purposes. You could also try companion planting, adding herbs like basil or rosemary to deter pests and enhance the flavor of your corn. Consider adding a trellis or support system if your rooftop is particularly windy, ensuring your stalks remain upright and healthy.
Don’t be afraid to get creative with your harvest, either. Beyond the traditional uses of purple cornmeal, explore recipes for purple corn beverages like “chicha morada,” a popular Peruvian drink. You can even use the dried husks for crafting or decorative purposes. The vibrant color of purple corn makes it a stunning addition to any dish or project.
We understand that rooftop gardening can seem daunting at first, but with a little planning and dedication, you can successfully cultivate your own patch of purple corn. The rewards – both tangible and intangible – are well worth the effort. From the vibrant hues of the stalks and ears to the unique flavor of the kernels, growing purple corn on your rooftop is an experience that will delight your senses and nourish your soul.
We wholeheartedly encourage you to give this DIY project a try. Embrace the challenge, learn from your experiences, and most importantly, have fun! And once you’ve harvested your first crop of beautiful purple corn, we’d love to hear about it. Share your photos, tips, and recipes with us in the comments below. Let’s build a community of rooftop purple corn growers and inspire others to connect with nature in unexpected ways. Your success story could be the inspiration someone else needs to embark on their own purple corn adventure! Let’s see those purple corn rooftop gardens flourish!
Frequently Asked Questions (FAQ)
What are the best varieties of purple corn to grow on a rooftop?
The best varieties for rooftop growing are those that are relatively compact and adaptable to container gardening. Consider varieties like ‘Hopi Purple’, ‘Blue Clarage’, or ‘Oaxacan Purple’. These varieties tend to be shorter and more manageable in pots. Research the specific needs of each variety in relation to your local climate and growing conditions. Some varieties are more drought-tolerant, while others may be better suited for cooler temperatures. Local nurseries or seed suppliers can provide valuable insights into which varieties thrive in your region.
How much sunlight does purple corn need when grown on a rooftop?
Purple corn, like all corn varieties, requires a significant amount of sunlight to thrive. Aim for at least 6-8 hours of direct sunlight per day. A south-facing rooftop is often ideal, but east- or west-facing locations can also work if they receive sufficient sunlight. If your rooftop is partially shaded, consider using reflective materials to bounce sunlight onto your plants. You can also supplement with grow lights if necessary, especially during periods of cloudy weather. Monitor your plants closely for signs of insufficient sunlight, such as leggy growth or pale leaves.
What size containers are needed for growing purple corn on a rooftop?
Purple corn plants can grow relatively large, so you’ll need to provide them with ample space for their roots to develop. A minimum container size of 10-15 gallons per plant is recommended. Larger containers are even better, as they provide more room for root growth and help retain moisture. Choose containers that are sturdy and well-draining. Terra cotta pots are a good option, but they can dry out quickly in hot weather. Plastic containers are more moisture-retentive but may not be as aesthetically pleasing. Consider using fabric pots, which allow for good drainage and aeration.
How often should I water my purple corn plants on the rooftop?
Watering frequency will depend on several factors, including the size of your containers, the weather conditions, and the type of soil you’re using. In general, you should water your purple corn plants deeply whenever the top inch of soil feels dry to the touch. Avoid overwatering, as this can lead to root rot. During hot, dry weather, you may need to water daily. In cooler, wetter weather, you may only need to water every few days. Check the soil moisture regularly and adjust your watering schedule accordingly. Consider using a moisture meter to get a more accurate reading of soil moisture levels.
What kind of fertilizer should I use for purple corn grown in containers?
Purple corn is a heavy feeder, so it’s important to provide it with adequate nutrients. Use a balanced fertilizer with an NPK ratio of around 10-10-10 or 14-14-14. You can use either a slow-release granular fertilizer or a liquid fertilizer. If using a granular fertilizer, apply it according to the package directions, typically every few weeks. If using a liquid fertilizer, dilute it according to the package directions and apply it with each watering. Supplement with compost tea or other organic fertilizers to provide micronutrients and beneficial microbes. Avoid over-fertilizing, as this can burn the roots of your plants.
How do I pollinate my purple corn plants on a rooftop?
Corn is wind-pollinated, so you’ll need to ensure that pollen from the tassels (male flowers) reaches the silks (female flowers) on the ears. On a rooftop, where there may be less wind, you may need to hand-pollinate your plants. To do this, gently shake the tassels over the silks, or use a small brush to collect pollen from the tassels and apply it to the silks. Repeat this process every day for several days to ensure that all of the silks are pollinated. You’ll know that pollination has been successful when the silks turn brown and dry.
How do I protect my purple corn plants from pests and diseases on a rooftop?
Rooftop gardens can be susceptible to various pests and diseases. Monitor your plants regularly for signs of infestation or disease. Common pests of corn include aphids, corn earworms, and spider mites. You can control these pests with insecticidal soap, neem oil, or by hand-picking them off the plants. Common diseases of corn include rust and leaf blight. You can prevent these diseases by providing good air circulation, avoiding overhead watering, and using disease-resistant varieties. Consider using organic pest control methods whenever possible to protect beneficial insects and pollinators.
When is the right time to harvest my purple corn?
The time to harvest purple corn depends on the variety and your intended use. For fresh corn, harvest when the silks have turned brown and dry, and the kernels are plump and milky. You can test for ripeness by piercing a kernel with your fingernail. If the liquid that comes out is milky, the corn is ready to harvest. For cornmeal or other dried products, allow the ears to dry on the stalk until the husks are completely brown and dry. The kernels should be hard and dry to the touch. Harvest on a dry day to prevent mold growth.
Can I save seeds from my purple corn to plant next year?
Yes, you can save seeds from your purple corn, but keep in mind that corn is an open-pollinated crop, so the seeds may not come true to type if they were cross-pollinated with other varieties of corn. To save seeds, select healthy, well-formed ears from your best plants. Allow the ears to dry completely on the stalk. Once the husks are dry, remove the kernels from the cob and store them in an airtight container in a cool, dry place. Label the container with the variety and date. Before planting, test the germination rate of your seeds by planting a few in a pot of soil.
What are some creative ways to use my harvested purple corn?
Beyond the traditional uses of purple cornmeal, there are many creative ways to use your harvest. You can make purple corn tortillas, polenta, cornbread, or muffins. You can also use purple corn to make beverages like “chicha morada,” a popular Peruvian drink. The dried husks can be used for crafting or decorative purposes. The vibrant color of purple corn makes it a stunning addition to any dish or project. Experiment with different recipes and techniques to discover your favorite ways to use this unique and nutritious grain.


Leave a Comment