
Grow Snake Gourd at Home and unlock a world of culinary possibilities right in your backyard! Have you ever dreamed of harvesting your own exotic vegetables, impressing your friends with unique dishes, and knowing exactly where your food comes from? Well, dream no more! This DIY guide will take you step-by-step through the process of cultivating these fascinating gourds, even if you’re a complete beginner.
Snake gourds, also known as Chichinda in some regions, have a rich history, particularly in Asian cuisines. For centuries, they’ve been a staple ingredient, adding a subtle, slightly sweet flavor to curries, stir-fries, and soups. Beyond their culinary appeal, they’re also packed with nutrients, making them a healthy addition to your diet.
But why should you bother to grow snake gourd at home? In today’s world, where we’re increasingly conscious of food miles and the impact of our choices on the environment, growing your own produce is a powerful way to take control. Plus, let’s be honest, there’s nothing quite like the satisfaction of nurturing a plant from seed to harvest. This guide will provide you with practical tips and tricks to ensure a bountiful harvest, regardless of your gardening experience. Get ready to embark on a rewarding journey and enjoy the delicious fruits (or rather, vegetables!) of your labor!
Growing Snake Gourd at Home: Your DIY Guide
Hello garden friends! Have you ever heard of the snake gourd? This fascinating, long, and winding cucumber is not only an eye-catcher in any garden but also incredibly delicious and versatile in the kitchen. I’ll show you how you can easily grow this exotic beauty yourself. Don’t worry, it’s easier than you think!
What you need for growing snake gourds
Before we get started, here is a list of things you will need for the successful cultivation of your own snake gourds:
- Snake gourd seeds: You can get these from specialty stores or online. Look for good quality.
- Seed pots or trays: For starting the seeds indoors.
- Seed starting mix: Special soil for starting seeds that is low in nutrients and loose.
- Garden soil: For the bed or container where the gourds will later grow.
- Compost or organic fertilizer: To enrich the soil.
- Planter (optional): If you want to grow the gourds in a container. A large container with at least a 40-liter (about 10-gallon) capacity is ideal.
- Trellis/Support: Snake gourds are climbing plants and absolutely need a support structure. This can be a trellis, a fence, or a self-built frame.
- Watering can or garden hose: For regular watering.
- Pruning shears: For pruning and harvesting.
- Patience and love: The most important thing of all!
The Preparation: Sowing Seeds and Raising Seedlings
Starting seeds indoors is the key to success, especially in cooler regions. I usually start this in April so the young plants can go outdoors after the last frost.
- Prepare the seeds: To speed up germination, you can soak the seeds in lukewarm water for 24 hours before sowing. This softens the seed coat.
- Sowing: Fill the seed pots with seed starting mix. Place one to two seeds about 1-2 cm (0.4-0.8 inches) deep in the soil per pot. Lightly cover the seeds with soil and water them gently.
- Location: Place the seed pots in a warm and bright place. A temperature of 20-25°C (68-77°F) is ideal for germination. A mini-greenhouse or a clear plastic cover over the pots helps to keep the humidity high.
- Moisture: Keep the soil evenly moist, but not wet. Avoid waterlogging, as this can lead to rot.
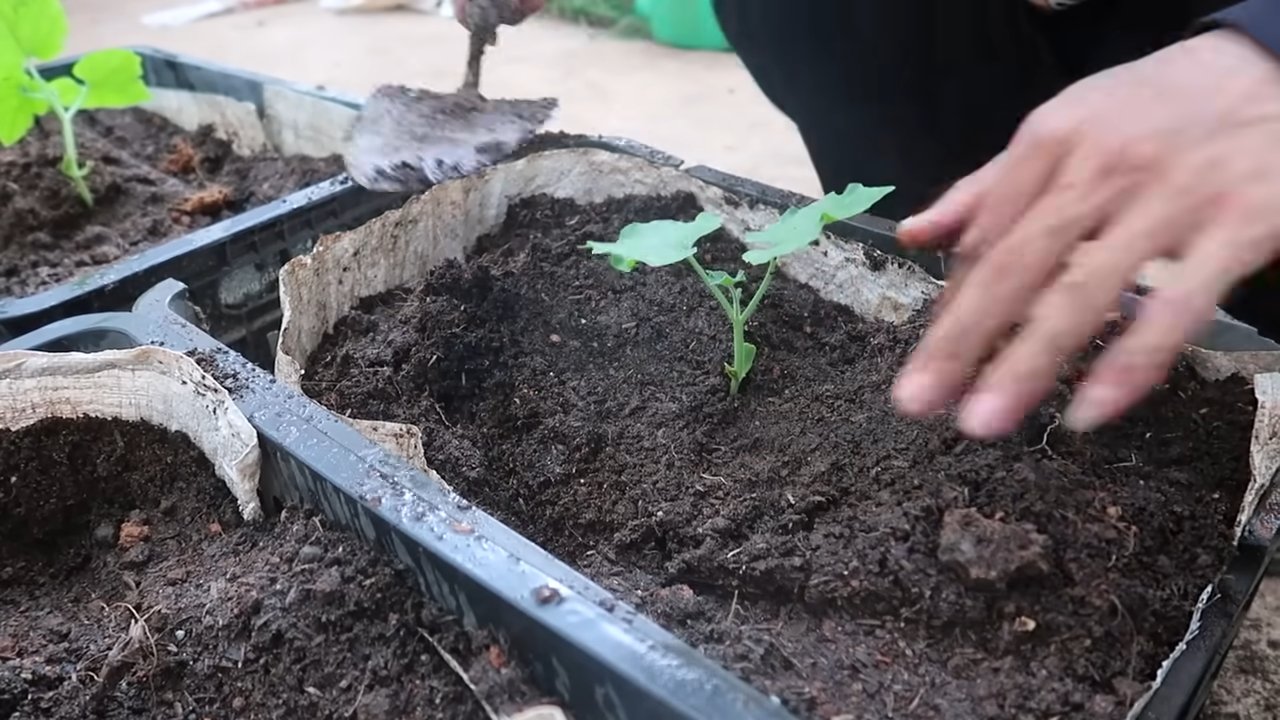
- Germination: After about 1-2 weeks, the first seedlings should appear. Once the plants have two to three true leaves, you can prick them out if you sowed multiple seeds per pot. This means you transplant the strongest plant into a larger pot.
Planting Out: Into the Bed or Container
After the last frost (mid-May), it’s time to move the young plants outdoors.
- Choosing a location: Snake gourds love the sun! Choose a sunny and wind-protected location for your plants. The soil should be loose, rich in humus, and full of nutrients.
- Soil preparation: Loosen the soil thoroughly and mix in compost or organic fertilizer. This ensures a good supply of nutrients.
- Planting distance: Plant the seedlings about 50-60 cm (20-24 inches) apart from each other. If you are growing them in a container, make sure the container is large enough (at least 40-liter capacity).
- Planting: Dig a hole that is slightly larger than the root ball of the seedling. Carefully place the plant in and fill the hole with soil. Press the soil down lightly and water the plant thoroughly.
- Attach the trellis: You should install the support structure immediately after planting. The snake gourds need something to hold onto and climb.
The Care: Watering, Fertilizing, and Pruning
Proper care is crucial for a bountiful harvest.
- Watering: Snake gourds have a high water requirement, especially during flowering and fruit formation. Water regularly and thoroughly, preferably in the morning or evening. Avoid wetting the leaves to prevent fungal diseases.
- Fertilizing: Fertilize the plants regularly with an organic fertilizer or compost. Start about two weeks after planting out and repeat the fertilization every two to three weeks.
- Pruning: Pruning is important to encourage fruit formation. Regularly remove the side shoots that grow from the leaf axils. Leave only the main shoot and a few side shoots. This ensures that the plant puts its energy into fruit production.
- Protection from pests and diseases: Regularly check the plants for pests such as aphids or spider mites. If necessary, you can use organic pesticides. Also, watch for signs of fungal diseases like mildew. Good ventilation and avoiding waterlogging help prevent diseases.
The Harvest: Finally, Snake Gourds!
The harvest season usually begins in the summer, about 2-3 months after planting out.
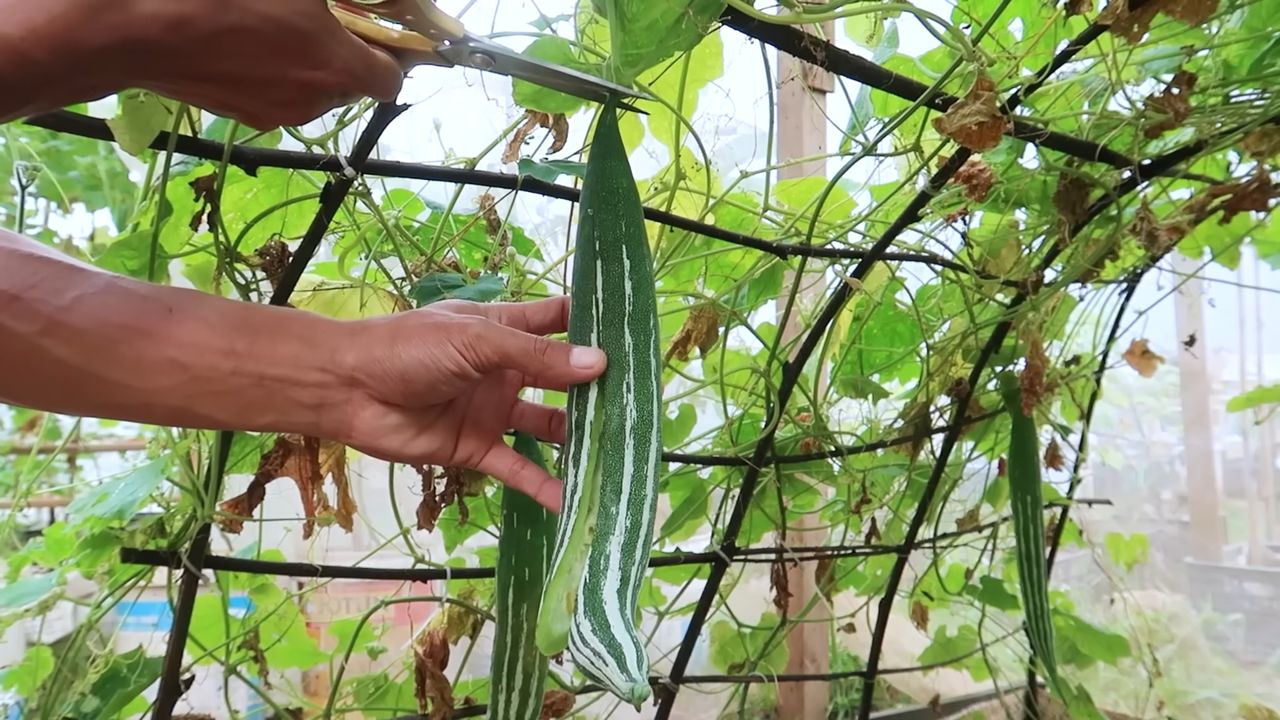
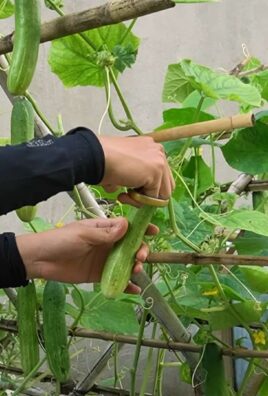
- Harvest time: The snake gourds are ready to harvest when they have reached a length of about 30-50 cm (12-20 inches). They should still be young and tender before they become too thick and bitter.
- Harvesting technique: Cut the gourds with pruning shears or a sharp knife. Be careful not to damage the plant.
- Regular harvesting: Harvest the gourds regularly to encourage the formation of new fruits. The more often you harvest, the more gourds will grow back.
Additional Tips for Successful Cultivation
- Mulching: A layer of mulch made of straw or grass clippings helps to retain moisture in the soil and suppress weeds.
- Pollination: Snake gourds are cross-pollinators. This means they need insects or the wind to be pollinated. If you are growing in a greenhouse, you may need to hand-pollinate the flowers.
- Variety selection: There are different varieties of snake gourds. Before buying, learn about the characteristics of the individual varieties and choose the one that best suits your needs and climate.
- Creative trellises: Let your creativity run wild when designing the support structure. You can use an old bicycle wheel, a ladder, or a self-built frame, for example.
What to do when things don’t work out?
Sometimes things don’t go as planned. Here are a few common problems and their solutions:
- No germination: The seeds may have been too old or the temperature was too low. Try again with fresh seeds and ensure a warm environment.
- Yellow leaves: This can be a sign of a nutrient deficiency. Fertilize the plants with a suitable fertilizer.
- Pests: Combat pests with organic methods or home remedies like nettle tea.
- Fungal diseases: Ensure good ventilation and avoid waterlogging. If necessary, you can use a fungicide.
I hope this guide helps you to grow your own snake gourds.
Conclusion
So, there you have it! Growing snake gourd at home is not only achievable but also incredibly rewarding. Forget relying solely on grocery stores or farmers’ markets; with a little patience, the right techniques, and our simple DIY trick, you can cultivate your own supply of this unique and nutritious vegetable.
Why is this DIY method a must-try? Because it empowers you to take control of your food source. You know exactly what goes into growing your snake gourd – no harmful pesticides, no questionable fertilizers, just pure, homegrown goodness. Plus, it’s a fantastic way to connect with nature and learn about the fascinating life cycle of plants. The satisfaction of harvesting your first snake gourd, knowing you nurtured it from seed to fruit, is truly unparalleled.
But the benefits don’t stop there. Growing your own snake gourd allows you to experiment with different varieties. While the standard long, green snake gourd is widely available, you might want to try cultivating shorter, thicker varieties or even those with a slightly different flavor profile. Consider exploring heirloom seeds for a truly unique culinary experience.
Furthermore, you can tailor your growing methods to suit your specific needs and preferences. Want to grow organically? Absolutely! Prefer to use a specific type of soil amendment? Go for it! The beauty of DIY is the freedom to customize the process to your liking.
Don’t be afraid to experiment with variations on our suggested method. For instance, if you live in a particularly hot climate, you might want to provide extra shade for your snake gourd plants during the hottest part of the day. If you’re short on space, consider growing your snake gourd vertically on a trellis or fence. This not only saves space but also improves air circulation and reduces the risk of fungal diseases.
And speaking of disease, remember that prevention is always better than cure. Regularly inspect your plants for any signs of pests or diseases, and take action promptly if you spot any problems. Organic pest control methods, such as neem oil or insecticidal soap, are often effective in controlling common garden pests.
Ultimately, the success of your snake gourd growing endeavor depends on your dedication and willingness to learn. Don’t be discouraged if you encounter challenges along the way. Gardening is a journey, and every mistake is an opportunity to learn and improve.
We are confident that with our DIY trick, you’ll be well on your way to harvesting a bountiful crop of snake gourds. So, what are you waiting for? Get your hands dirty, plant those seeds, and watch your snake gourd plants thrive!
We’d love to hear about your experiences! Share your photos, tips, and challenges in the comments section below. Let’s create a community of snake gourd enthusiasts and learn from each other. Happy gardening! Remember, mastering the art of how to grow snake gourd at home is a journey, and we’re here to support you every step of the way.
Frequently Asked Questions (FAQ)
What is the best time to plant snake gourd seeds?
The ideal time to plant snake gourd seeds is during the late spring or early summer, after the last frost has passed. Snake gourds thrive in warm weather, so ensure the soil temperature is consistently above 65°F (18°C) for optimal germination. If you live in a region with a shorter growing season, you can start the seeds indoors 4-6 weeks before the last expected frost and then transplant them outdoors once the weather warms up. Starting indoors gives the seedlings a head start and increases your chances of a successful harvest.
How much sunlight does snake gourd need?
Snake gourds require at least 6-8 hours of direct sunlight per day to thrive. Choose a planting location that receives ample sunlight throughout the day. Insufficient sunlight can lead to stunted growth, reduced flowering, and smaller fruit. If you’re growing snake gourd indoors, supplement with grow lights to ensure they receive adequate light.
What type of soil is best for growing snake gourd?
Snake gourds prefer well-drained, fertile soil that is rich in organic matter. Amend your soil with compost, aged manure, or other organic materials before planting to improve its fertility and drainage. A slightly acidic to neutral soil pH (6.0-7.0) is ideal. Avoid heavy clay soils, as they can retain too much moisture and lead to root rot. If you have clay soil, consider growing your snake gourd in raised beds or containers with a well-draining potting mix.
How often should I water snake gourd plants?
Water snake gourd plants regularly, especially during hot, dry weather. Keep the soil consistently moist but not waterlogged. Water deeply at the base of the plant, avoiding wetting the foliage, which can increase the risk of fungal diseases. Mulching around the plants can help retain moisture in the soil and suppress weed growth. Check the soil moisture regularly by sticking your finger about an inch deep into the soil. If it feels dry, it’s time to water.
What kind of support system does snake gourd need?
Snake gourds are climbing vines and require a strong support system, such as a trellis, fence, or arbor. The support should be at least 6-8 feet tall to accommodate the growing vines. Train the vines to climb the support system as they grow. This will not only save space but also improve air circulation and reduce the risk of fungal diseases. Make sure the support is sturdy enough to handle the weight of the mature vines and fruits.
How do I pollinate snake gourd flowers?
Snake gourds have separate male and female flowers. Pollination is essential for fruit development. While bees and other insects can pollinate the flowers, hand-pollination may be necessary, especially if you’re growing snake gourd indoors or in an area with limited pollinator activity. To hand-pollinate, use a small paintbrush to transfer pollen from the male flower to the female flower. The female flower has a small, immature fruit behind it, while the male flower does not. Pollinate in the morning when the flowers are open.
How long does it take for snake gourd to mature?
Snake gourd typically takes about 2-3 months from planting to harvest. The exact time will depend on the variety, growing conditions, and climate. The fruits are ready to harvest when they are about 1-2 feet long and still tender. Overripe snake gourds can become tough and bitter. Check the fruits regularly and harvest them when they reach the desired size and maturity.
What are some common pests and diseases that affect snake gourd?
Common pests that affect snake gourd include aphids, spider mites, and squash bugs. These pests can be controlled with organic pest control methods, such as neem oil or insecticidal soap. Common diseases include powdery mildew and fungal leaf spots. Prevent these diseases by providing good air circulation, avoiding wetting the foliage when watering, and applying a fungicide if necessary. Regularly inspect your plants for any signs of pests or diseases and take action promptly.
Can I grow snake gourd in containers?
Yes, you can grow snake gourd in containers, but you’ll need a large container (at least 20 gallons) with good drainage. Use a well-draining potting mix and provide a strong support system for the vines to climb. Container-grown snake gourds may require more frequent watering and fertilization than those grown in the ground. Choose a sunny location for your container-grown snake gourd.
How do I store snake gourd after harvesting?
Store snake gourd in the refrigerator for up to a week. Wrap the gourds in plastic wrap or place them in a plastic bag to prevent them from drying out. Snake gourd can also be frozen for longer storage. Blanch the gourds in boiling water for a few minutes before freezing to preserve their quality.
Leave a Comment