
Grow Sweet Potatoes at Home – imagine harvesting a bounty of these vibrant, nutrient-packed tubers right from your own backyard! For centuries, sweet potatoes have been a staple in diets around the world, from their origins in Central and South America to becoming a beloved ingredient in Thanksgiving feasts. But did you know that you don’t need acres of farmland to enjoy the sweet, earthy flavor of freshly grown sweet potatoes?
I’m here to tell you that with a few simple tricks and a little DIY spirit, you can cultivate your own sweet potato patch, even if you only have a small garden or a sunny balcony. Forget those bland, store-bought sweet potatoes – nothing beats the taste of homegrown goodness!
Many people shy away from growing their own sweet potatoes, thinking it’s too complicated or requires too much space. But I’m about to debunk those myths! This guide is packed with easy-to-follow DIY hacks and tips that will empower you to grow sweet potatoes at home successfully, regardless of your gardening experience. Not only will you enjoy delicious, healthy food, but you’ll also experience the satisfaction of nurturing your own little slice of nature. Let’s get digging!
Grow Your Own Sweet Potatoes: A Beginner’s Guide
Okay, so you want to grow sweet potatoes at home? Awesome! It’s a surprisingly rewarding experience, and nothing beats the taste of homegrown sweet potatoes. Don’t be intimidated; it’s easier than you might think. I’m going to walk you through the whole process, from sprouting slips to harvesting your delicious bounty.
What You’ll Need
Before we dive in, let’s gather our supplies. This will make the whole process smoother.
* Sweet Potatoes: Choose organic sweet potatoes if possible. You’ll need at least one, but I recommend starting with a few to increase your chances of success.
* Water: Tap water is fine.
* Containers: Jars, glasses, or plastic containers to suspend the sweet potatoes in water.
* Toothpicks: To suspend the sweet potatoes.
* Potting Soil: A well-draining potting mix is essential.
* Garden Bed or Large Containers: For planting the slips. Make sure they have good drainage.
* Fertilizer (Optional): A balanced fertilizer can help boost growth.
* Gardening Gloves: To keep your hands clean.
* Trowel or Shovel: For planting.
* Watering Can or Hose: For watering your plants.
* Mulch (Optional): To help retain moisture and suppress weeds.
Sprouting Sweet Potato Slips
This is the first, and arguably most crucial, step. Sweet potato “slips” are the sprouts that grow from the sweet potato itself, and these are what you’ll actually plant in the ground.
1. Prepare the Sweet Potatoes: Wash your sweet potatoes thoroughly to remove any dirt.
2. Insert Toothpicks: Insert toothpicks around the middle of each sweet potato. Space them evenly, about an inch apart. These toothpicks will act as supports to suspend the sweet potato in water.
3. Suspend in Water: Fill your jars or containers with water. The water level should be high enough to submerge the bottom half of the sweet potato.
4. Place in a Warm, Sunny Location: Place the jars in a warm spot that receives plenty of sunlight. A windowsill is ideal.
5. Change the Water Regularly: Change the water every few days to prevent mold and bacteria growth. This is important for healthy slip development.
6. Wait for Sprouts: Be patient! It can take several weeks for sprouts to appear. You’ll start to see small roots growing from the bottom and green shoots (slips) emerging from the top.
7. Encourage Slip Growth: As the slips grow, continue to change the water regularly. You can also gently mist the slips with water to keep them hydrated.
Separating and Rooting the Slips
Once the slips are about 6-8 inches long, it’s time to separate them from the sweet potato and encourage them to develop their own root systems.
1. Gently Twist Off the Slips: Carefully twist or gently pull the slips off the sweet potato. Try to get as much of the base of the slip as possible.
2. Root the Slips in Water: Place the slips in a jar or glass of water, ensuring that the bottom inch or two of the stem is submerged.
3. Place in a Sunny Location: Again, place the jar in a warm, sunny location.
4. Wait for Roots to Develop: In a few days to a week, you should see roots starting to grow from the stems.
5. Change the Water Regularly: Continue to change the water every few days to keep it fresh.
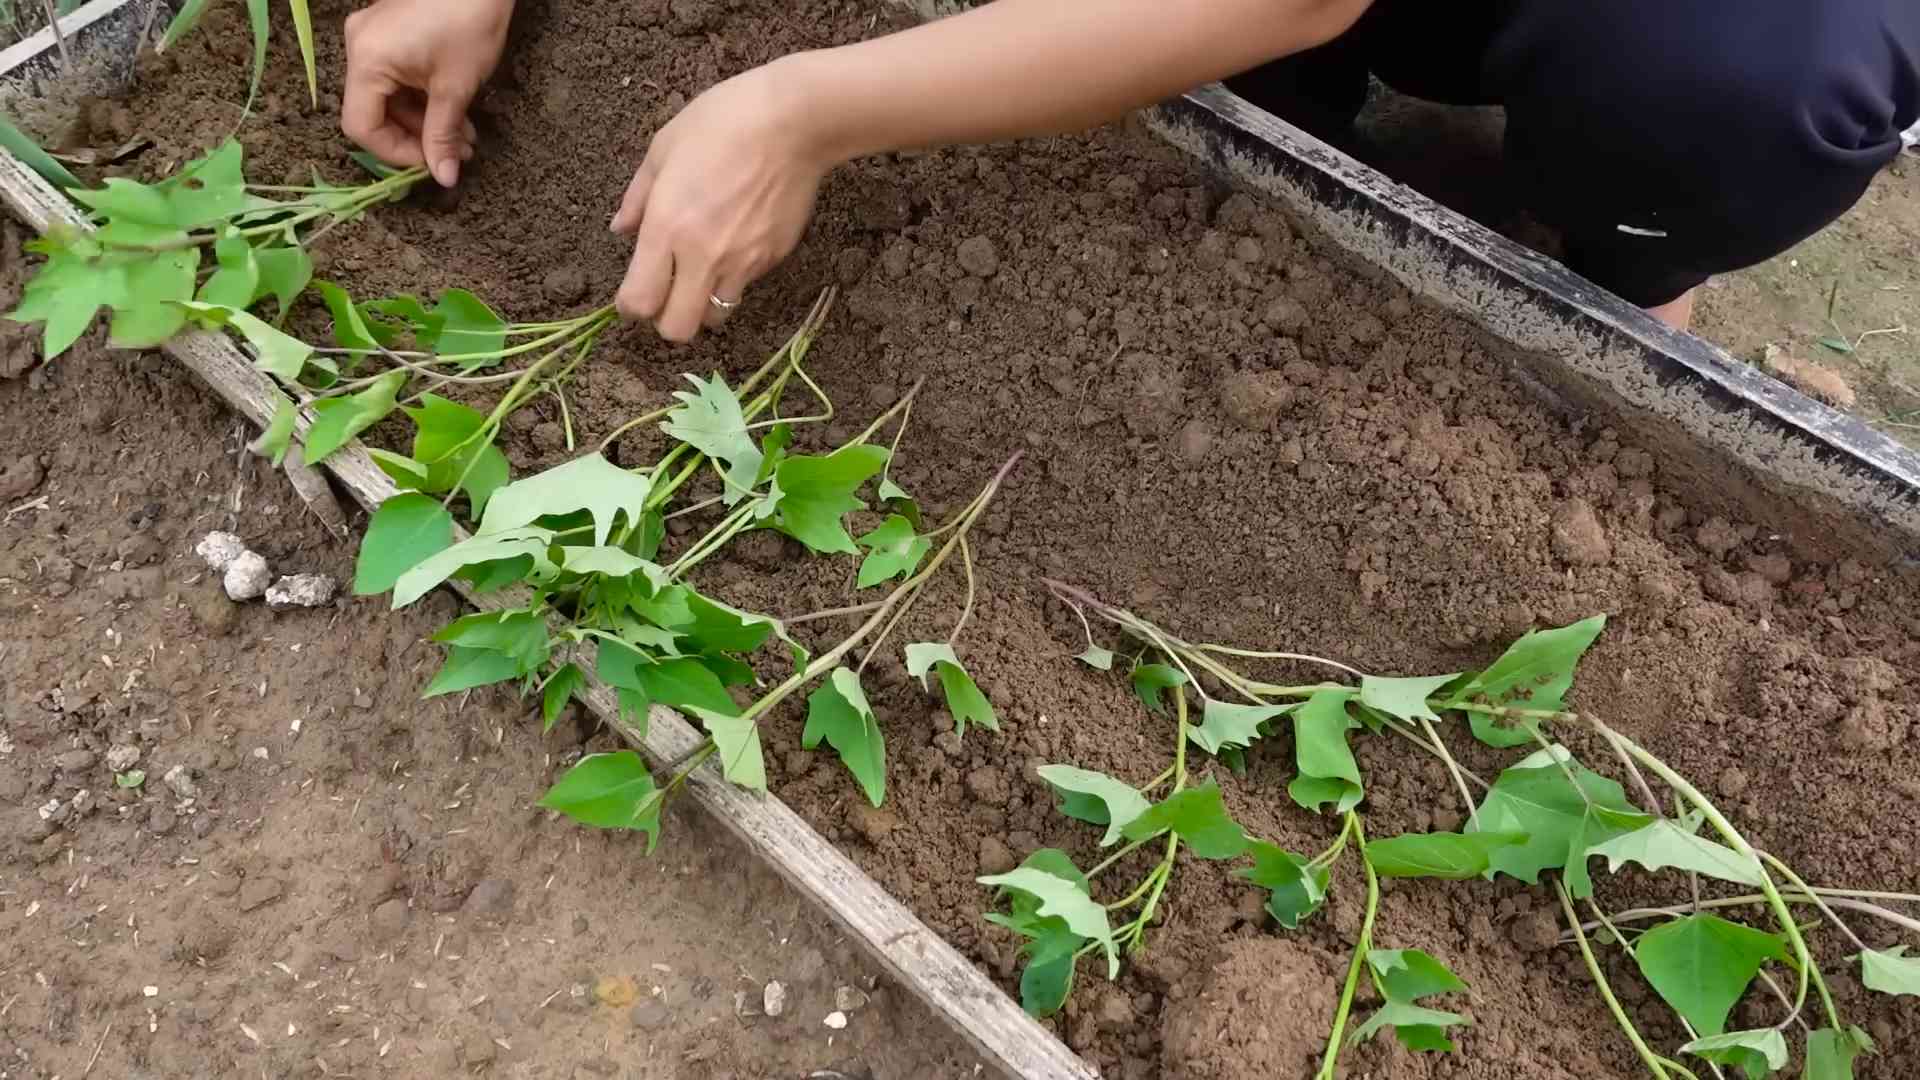
Planting Your Sweet Potato Slips
Now for the exciting part – planting your rooted slips!
1. Prepare the Soil: Sweet potatoes prefer well-drained, sandy loam soil. Amend your soil with compost or other organic matter to improve drainage and fertility. If you’re using containers, fill them with a high-quality potting mix.
2. Create Mounds or Ridges: Sweet potatoes grow best in mounds or ridges. This helps with drainage and allows the tubers to develop more easily. Create mounds that are about 8-12 inches high and 12-18 inches wide.
3. Plant the Slips: Dig a small hole in the top of each mound or ridge. Plant the slips about 4-6 inches deep, spacing them about 12 inches apart. Make sure to bury the roots and the bottom portion of the stem.
4. Water Thoroughly: Water the newly planted slips thoroughly. This will help them settle in and establish their roots.
5. Mulch (Optional): Apply a layer of mulch around the plants to help retain moisture, suppress weeds, and regulate soil temperature.
Caring for Your Sweet Potato Plants
Consistent care is key to a successful sweet potato harvest.
1. Water Regularly: Water your sweet potato plants regularly, especially during dry periods. Aim to keep the soil consistently moist, but not waterlogged.
2. Fertilize (Optional): If you choose to fertilize, use a balanced fertilizer according to the package directions. Avoid over-fertilizing, as this can lead to excessive vine growth at the expense of tuber development.
3. Weed Regularly: Keep the area around your sweet potato plants free of weeds. Weeds can compete with the plants for nutrients and water.
4. Control Pests and Diseases: Sweet potatoes are generally resistant to pests and diseases, but it’s still important to monitor your plants regularly. If you notice any problems, take action promptly to prevent them from spreading. Common pests include aphids and flea beetles. Common diseases include fungal infections.
5. Vine Management: Sweet potato vines can grow quite long and sprawling. You can prune them back if they become too unruly, but be careful not to remove too much foliage, as this can reduce your yield. You can also train the vines to grow in a specific direction.
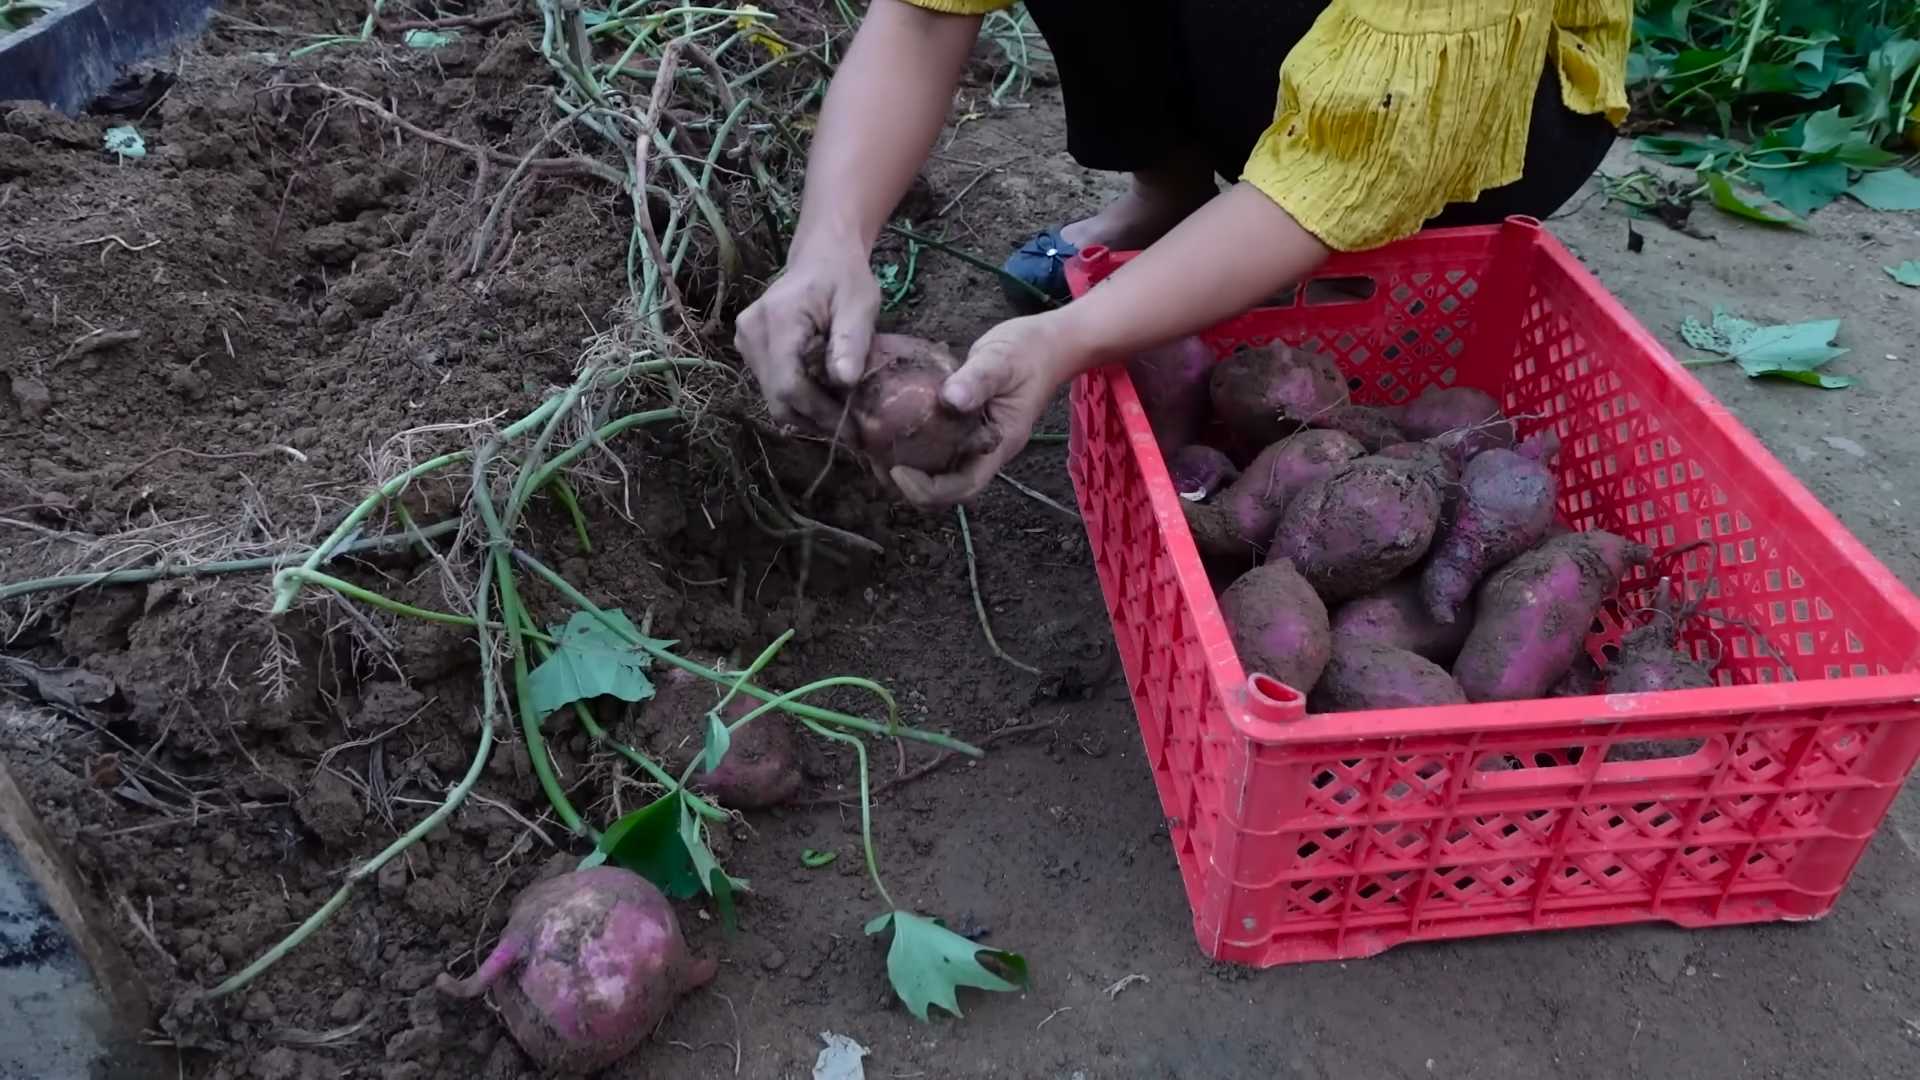
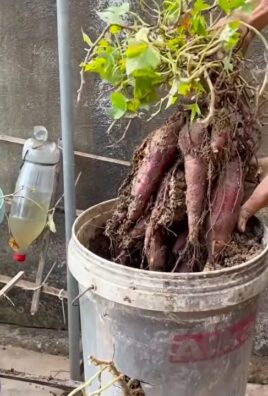
Harvesting Your Sweet Potatoes
The moment you’ve been waiting for! Harvesting sweet potatoes is a rewarding experience.
1. Timing is Key: Sweet potatoes are typically ready to harvest about 90-120 days after planting. The exact timing will depend on the variety and your local climate. A good indicator is when the vines start to turn yellow and die back.
2. Choose a Dry Day: Harvest your sweet potatoes on a dry day to prevent them from rotting.
3. Dig Carefully: Use a garden fork or shovel to carefully dig around the plants, being careful not to damage the tubers. Start digging a foot or so away from the base of the plant.
4. Lift the Plants: Gently lift the plants from the ground, being careful not to pull on the vines, as this can break the tubers.
5. Brush Off the Soil: Brush off any excess soil from the sweet potatoes.
6. Curing Your Sweet Potatoes: This is a crucial step for improving the flavor and storage life of your sweet potatoes. Cure them in a warm, humid place (80-85°F and 85-90% humidity) for about a week. A greenhouse or a warm, sunny room with a humidifier works well.
7. Store Properly: After curing, store your sweet potatoes in a cool, dry, and dark place (55-60°F). They should keep for several months.
Troubleshooting
Even with the best planning, things can sometimes go wrong. Here are a few common problems and how to address them:
* Slips Not Sprouting: Make sure the sweet potatoes are in a warm, sunny location and that you’re changing the water regularly. Sometimes, it just takes time. Try a different sweet potato if one doesn’t sprout.
* Yellowing Leaves: This could be a sign of overwatering, underwatering, or nutrient deficiency. Adjust your watering schedule and consider fertilizing.
* Pests: Inspect your plants regularly for pests and take action promptly if you find any. Insecticidal soap or neem oil can be effective for controlling many common pests.
* Rotting Sweet Potatoes: This is usually caused by overwatering or poor drainage. Make sure your soil is well-draining and avoid overwatering.
Growing sweet potatoes at home is a fun and rewarding project. With a little patience and care, you can enjoy a delicious harvest of homegrown sweet potatoes. Happy gardening!
Conclusion
So, there you have it! Growing sweet potatoes at home is not only achievable but also incredibly rewarding. From the initial sprouting to the final harvest, each step offers a unique connection to the food you consume. This DIY trick transforms the humble sweet potato into a source of fresh, vibrant slips, ready to populate your garden and provide you with a bounty of delicious, nutritious tubers.
Why is this a must-try? Because it empowers you to take control of your food source, reduce your reliance on store-bought produce, and experience the sheer joy of nurturing life from a simple root vegetable. Imagine the satisfaction of serving a meal featuring sweet potatoes you personally cultivated – the flavor is simply unmatched! Plus, it’s a fantastic way to engage children in the gardening process, teaching them about where their food comes from and fostering a love for nature.
Beyond the basic method, there’s plenty of room for experimentation. Try using different varieties of sweet potatoes to discover your favorite flavor profile. Explore different growing mediums for your slips, such as vermiculite or coco coir, to see which yields the best results. Consider using the sweet potato leaves in salads or stir-fries – they are edible and packed with nutrients! You can also adjust the size of the container you use for sprouting, depending on the number of slips you want to produce. For a decorative touch, try using a clear glass jar to watch the roots develop – it’s a fascinating process to observe.
Don’t be intimidated by the prospect of growing sweet potatoes at home. This DIY trick is surprisingly simple and requires minimal effort. With a little patience and attention, you’ll be well on your way to harvesting your own homegrown sweet potato crop. The taste of freshly harvested, homegrown sweet potatoes is far superior to anything you can buy in a store.
We wholeheartedly encourage you to give this DIY trick a try. It’s an investment in your health, your garden, and your connection to the natural world. Once you’ve experienced the satisfaction of growing your own sweet potatoes, you’ll never look at them the same way again.
And most importantly, we want to hear about your experience! Share your photos, tips, and stories with us in the comments below. Let’s create a community of home gardeners who are passionate about growing their own food and sharing their knowledge with others. What challenges did you face? What successes did you celebrate? Your insights can help others embark on their own sweet potato growing journey. Let’s cultivate a thriving community of home gardeners, one sweet potato at a time! This method is a great way to ensure you have a steady supply of sweet potato slips, ready to plant whenever you are.
Frequently Asked Questions (FAQ)
Q: What kind of sweet potato should I use for sprouting?
A: You can use any variety of sweet potato you find at the grocery store or farmers market. However, organic sweet potatoes are generally recommended, as they are less likely to have been treated with sprout inhibitors. Look for firm, unblemished sweet potatoes for the best results. Beauregard, Jewel, and Garnet varieties are popular choices for home gardeners. Experiment with different varieties to see which ones thrive best in your local climate and soil conditions.
Q: How long does it take for sweet potato slips to grow?
A: The time it takes for slips to grow can vary depending on factors such as temperature, humidity, and the variety of sweet potato. Generally, you can expect to see slips emerging within 2-4 weeks. Keep the sweet potato in a warm, well-lit location to encourage faster growth. Once the slips are 4-6 inches long, they are ready to be removed and planted.
Q: How do I remove the slips from the sweet potato?
A: Gently twist or cut the slips off the sweet potato, being careful not to damage the root system. You can also root the slips in water before planting them in soil. Simply place the slips in a glass of water, ensuring that the bottom portion of the stem is submerged. Roots should develop within a few days. Once the roots are about an inch long, the slips are ready to be transplanted into your garden.
Q: What kind of soil is best for growing sweet potatoes?
A: Sweet potatoes prefer well-drained, sandy loam soil. Avoid heavy clay soils, as they can become waterlogged and hinder tuber development. Amend your soil with compost or other organic matter to improve drainage and fertility. Sweet potatoes thrive in slightly acidic soil with a pH between 5.5 and 6.5.
Q: How much sunlight do sweet potatoes need?
A: Sweet potatoes require at least 6-8 hours of direct sunlight per day. Choose a sunny location in your garden for planting. If you live in a region with hot summers, provide some afternoon shade to prevent the leaves from scorching.
Q: How often should I water sweet potatoes?
A: Water sweet potatoes regularly, especially during dry periods. Keep the soil consistently moist, but avoid overwatering, which can lead to root rot. Water deeply once or twice a week, depending on the weather conditions. Mulching around the plants can help retain moisture in the soil.
Q: When is the best time to harvest sweet potatoes?
A: Sweet potatoes are typically harvested in the fall, before the first frost. The leaves will begin to turn yellow and die back, indicating that the tubers are mature. Gently dig around the plants to avoid damaging the sweet potatoes. Cure the harvested sweet potatoes in a warm, humid place for 1-2 weeks to improve their flavor and storage life.
Q: Can I grow sweet potatoes in containers?
A: Yes, you can grow sweet potatoes in containers, but you’ll need a large container with good drainage. Choose a container that is at least 12 inches deep and 18 inches wide. Fill the container with well-draining potting mix and plant the slips as you would in the garden. Container-grown sweet potatoes may not produce as many tubers as those grown in the ground, but they can still provide a decent harvest.
Q: Are sweet potato leaves edible?
A: Yes, sweet potato leaves are edible and nutritious. They can be used in salads, stir-fries, and other dishes. Choose young, tender leaves for the best flavor. Avoid eating leaves that have been treated with pesticides or herbicides.
Q: How do I store sweet potatoes?
A: Store cured sweet potatoes in a cool, dry, and dark place. Ideal storage temperatures are between 55 and 60 degrees Fahrenheit. Avoid storing sweet potatoes in the refrigerator, as this can cause them to develop a hard core. Properly stored sweet potatoes can last for several months.

Leave a Comment