
Grow Sweet Potatoes in Bags: Unlock the secrets to a bountiful harvest, even without a sprawling garden! Have you ever dreamed of harvesting your own sweet potatoes, but thought you didn’t have the space? I’m here to tell you that dream can absolutely become a reality, and it’s easier than you think! This DIY guide will walk you through a simple, space-saving method that will have you enjoying homegrown sweet potatoes in no time.
Sweet potatoes, a staple in many cultures for centuries, hold a rich history. Originating in Central and South America, they’ve been cultivated for over 5,000 years and have become a beloved ingredient in cuisines worldwide. From Thanksgiving casseroles to savory stews, their versatility is unmatched. But beyond their delicious flavor, growing your own sweet potatoes connects you to this long and fascinating agricultural heritage.
In today’s world, where access to fresh, healthy produce can be a challenge, learning to grow sweet potatoes in bags offers a fantastic solution. It’s perfect for apartment dwellers, balcony gardeners, or anyone with limited yard space. Plus, it’s a budget-friendly way to enjoy organic, homegrown goodness. Imagine the satisfaction of digging into a bag and unearthing your own sweet potato treasure! This DIY trick not only saves you money but also reduces your carbon footprint by minimizing transportation and packaging. Let’s get started and transform your small space into a sweet potato paradise!
Growing Sweet Potatoes in Bags: A Simple DIY Guide
I love sweet potatoes! They are not only incredibly delicious but also packed with nutrients. And the best part? You can easily grow them at home, even if you don’t have a large garden. In this article, I’ll show you how to grow sweet potatoes in bags – a space-saving and super effective method.
Why grow sweet potatoes in bags?
- Space-saving: Ideal for balconies, patios, or small gardens.
- Easy handling: The bags are easy to move and care for.
- Good drainage: Prevents waterlogging, which sweet potatoes dislike.
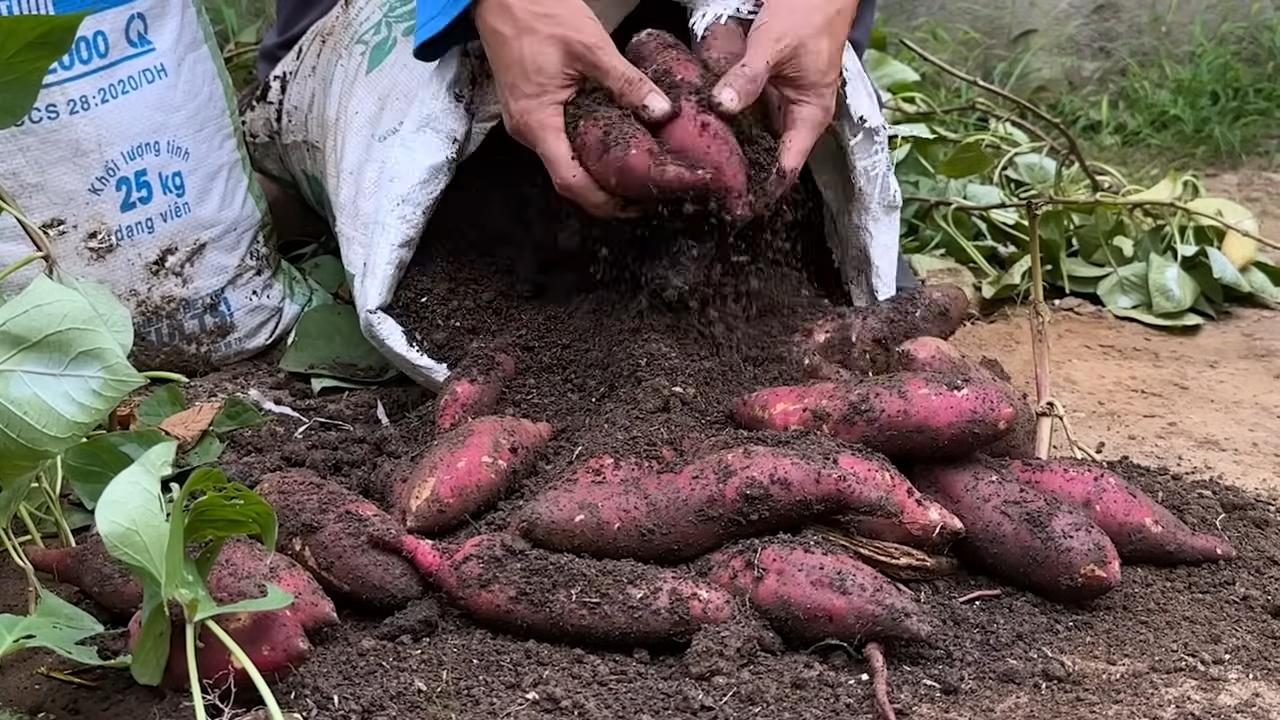
- Harvest-friendly: Harvesting is much easier than in a garden bed, as you can simply tip the bag over.
- Fewer weeds: The bags reduce weed growth.
What you need:
- Sweet potato slips: You can order these online, buy them at a garden center, or grow them yourself (more on that later).
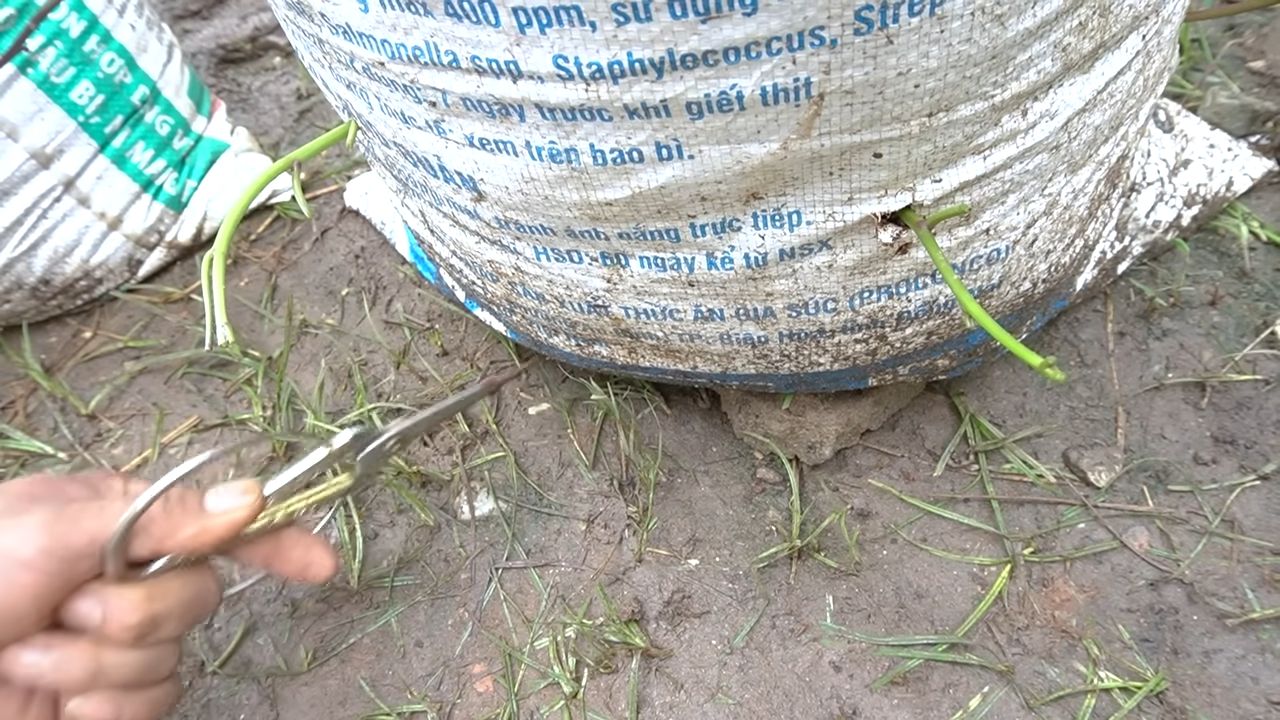
- Large, sturdy bags: Jute sacks, potato sacks, or special grow bags are best. They should have a capacity of at least 40-50 liters (10-13 gallons).
- High-quality potting soil: A mixture of garden soil, compost, and sand is ideal.
- Compost or organic fertilizer: For a good supply of nutrients.
- Watering can or hose: For watering.
- Optional: Mulch (straw, wood chips) to retain moisture.
Growing your own sweet potato slips:
If you want to grow your own sweet potato slips, you’ll need some lead time (about 6-8 weeks before the last frost). Here’s how:
- Prepare the sweet potato: Choose a healthy, undamaged sweet potato.
- Halve (optional): You can cut the sweet potato in half to get more slips.
- Place in water: Stick toothpicks into the sweet potato so that it hangs about halfway in water. Place it in a warm, bright spot.
- Roots and shoots: After a few weeks, roots and shoots (slips) will form.
- Separate the slips: When the shoots are about 15-20 cm (6-8 inches) long, you can gently twist or cut them off.
- Root them: Place the slips in a glass of water until they form their own roots (about 1 week).
- Planting: Once the slips have roots, you can plant them in small pots with soil and continue to grow them until they are large enough for the bags.
Step-by-Step Guide: Planting Sweet Potatoes in Bags
- Prepare the bag: Roll down the top edge of the bag a few times to stabilize it and make filling easier.
- Fill with soil: Fill the bag about 2/3 full with potting soil. Mix in compost or organic fertilizer with the soil.
- Prepare planting holes: Dig small holes in the soil, about 20-30 cm (8-12 inches) apart. The number of holes depends on the size of the bag. I recommend planting no more than 3-4 slips per bag so they have enough space to grow.
- Insert slips: Carefully place the sweet potato slips in the holes. Make sure the roots are well covered.
- Water in: Water the slips thoroughly. The soil should be well moistened.
- Mulch (optional): Spread a layer of mulch (straw, wood chips) around the plants to retain moisture in the soil and reduce weed growth.
- Choose a location: Place the bag in a sunny spot. Sweet potatoes need at least 6-8 hours of sun per day.
- Water regularly: Water the sweet potatoes regularly, especially during dry periods. The soil should always be slightly moist, but not wet.
- Fertilize: Feed the plants every few weeks with an organic fertilizer or compost tea.
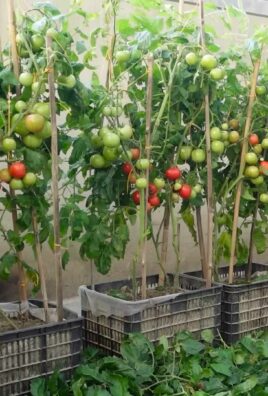
- Guide the vines (optional): Sweet potatoes form long vines. you can either let them lie on the ground or guide them up a trellis or fence. Training them upwards saves space and provides better air circulation.
Caring for your sweet potatoes in bags
- Watering: As mentioned, regular watering is important. Make sure the soil doesn’t dry out.
- Fertilizing: Sweet potatoes are heavy feeders. Fertilize them regularly to ensure a good harvest.
- Weeding: Regularly remove weeds that grow in the bag.
- Pests and diseases: Watch out for pests like aphids or potato beetles. If necessary, you can use organic pesticides. Sweet potatoes are relatively robust, but fungal diseases can occur with too much moisture. Ensure good air circulation and avoid waterlogging.
- Vine care: If you don’t train the vines upwards, make sure they are not too dense. You can thin them out a bit if needed to improve air circulation.
Harvest Time!
The harvest time for sweet potatoes is in the fall, just before the first frost. The leaves of the plants will then begin to turn yellow and die back.
- Prepare for harvest: Stop watering the plants a few days before the harvest.
- Tip the bag: Carefully tip the bag over and search for the sweet potatoes.
- Dig out the sweet potatoes: Carefully dig out the sweet potatoes. Be careful not to damage them.
- Curing: Let the sweet potatoes dry for a few days in a warm, dry place. This hardens the skin and makes them last longer.
- Store: Store the sweet potatoes in a cool, dark, and dry place. They can be stored for several months.
Additional Tips and Tricks
- Variety selection: There are many different varieties of sweet potatoes. Find out which varieties grow well in your region and which ones you like best.
- Soil improvement: If you don’t have high-quality potting soil, you can improve your garden soil with compost, sand, and some horn shavings.
- Warmth: Sweet potatoes love warmth. You can cover the bag with a dark tarp to further warm the soil.
- Pest protection: To protect the plants from pests, you can cover them with a net.
- Sustainability: Use recycled bags and organic fertilizer to make your sweet potato cultivation as sustainable as possible.
I hope this guide helps you to grow your own sweet potatoes in bags. It’s a really rewarding project, and there’s nothing better than enjoying fresh, homegrown sweet potatoes! Good luck and have fun gardening!
Conclusion
So, there you have it! Growing sweet potatoes in bags is not just a gardening trend; it’s a game-changer for anyone looking to maximize their harvest, regardless of space constraints. We’ve walked you through the simple yet effective steps, from selecting the right slip to nurturing your plants to a bountiful yield. The beauty of this method lies in its accessibility and adaptability. It’s perfect for apartment dwellers with balconies, suburban homeowners with limited garden space, or even seasoned gardeners looking to experiment with a new technique.
But why is this DIY trick a must-try? Firstly, it’s incredibly space-efficient. Forget sprawling garden beds; a few strategically placed bags can yield a surprisingly large harvest. Secondly, it offers superior control over the growing environment. You can easily move your bags to chase the sun, protect them from unexpected frosts, or amend the soil as needed. Thirdly, and perhaps most importantly, harvesting is a breeze. No more digging and hoping to unearth hidden treasures; simply tip the bag and collect your sweet potato bounty!
This method is a must-try for anyone who loves fresh, homegrown produce but is limited by space or traditional gardening constraints.
Now, let’s talk variations. Feel free to experiment with different bag sizes and materials. While burlap sacks offer a rustic charm and excellent drainage, heavy-duty plastic bags or even repurposed grow bags work just as well. Consider adding companion plants like marigolds or basil to deter pests and attract beneficial insects. You can also tailor the soil mix to your specific climate and sweet potato variety. For example, if you live in a particularly dry area, adding more moisture-retentive materials like peat moss or coconut coir can be beneficial.
Don’t be afraid to get creative with your setup. Stack your bags for a vertical garden effect, or arrange them in a sunny corner of your patio. The possibilities are endless!
We’re confident that you’ll find growing sweet potatoes in bags to be a rewarding and enjoyable experience. It’s a fantastic way to connect with nature, learn about the growing process, and enjoy the delicious fruits (or rather, roots!) of your labor.
So, what are you waiting for? Gather your supplies, follow our guide, and get ready to harvest your own homegrown sweet potatoes. We’re eager to hear about your experiences! Share your photos, tips, and triumphs in the comments below. Let’s build a community of bag-grown sweet potato enthusiasts! Happy gardening!
Frequently Asked Questions (FAQ)
What kind of soil should I use for growing sweet potatoes in bags?
The ideal soil for growing sweet potatoes in bags is a well-draining, loamy mix that is rich in organic matter. A good starting point is a blend of equal parts garden soil, compost, and peat moss or coconut coir. Sweet potatoes prefer slightly acidic soil with a pH between 5.5 and 6.5. Avoid heavy clay soils, as they can become waterlogged and hinder root development. You can amend your soil with sand or perlite to improve drainage if needed. Adding a slow-release fertilizer formulated for root vegetables can also provide essential nutrients throughout the growing season. Remember to test your soil pH before planting and adjust accordingly with lime (to raise pH) or sulfur (to lower pH).
How often should I water my sweet potato plants in bags?
Watering frequency depends on several factors, including the weather, the size of the bag, and the type of soil you’re using. Generally, you should aim to keep the soil consistently moist but not waterlogged. Check the soil moisture level regularly by sticking your finger about an inch into the soil. If it feels dry, it’s time to water. During hot, dry periods, you may need to water daily, while during cooler, wetter periods, you can reduce the frequency. Ensure that the bags have adequate drainage to prevent root rot. Water deeply each time, allowing the water to drain out of the bottom of the bag. Avoid overhead watering, as this can promote fungal diseases.
How much sunlight do sweet potatoes need when grown in bags?
Sweet potatoes are sun-loving plants and require at least 6-8 hours of direct sunlight per day to thrive. Choose a location for your bags that receives ample sunlight throughout the day. If you live in a particularly hot climate, providing some afternoon shade can help prevent the plants from overheating. If you’re growing sweet potatoes indoors or in a partially shaded area, you may need to supplement with artificial lighting, such as grow lights. Rotate the bags regularly to ensure that all sides of the plants receive adequate sunlight. Insufficient sunlight can result in leggy growth, reduced yields, and smaller sweet potatoes.
When is the best time to harvest sweet potatoes grown in bags?
Sweet potatoes are typically ready to harvest about 90-120 days after planting the slips. The exact timing will depend on the variety of sweet potato and your local climate. A good indicator that your sweet potatoes are ready to harvest is when the foliage starts to turn yellow and die back. You can also gently dig around the base of the plant to check the size of the sweet potatoes. Harvest before the first frost, as frost can damage the roots. To harvest, simply tip the bag over and carefully remove the sweet potatoes from the soil. Handle them gently to avoid bruising.
Can I reuse the soil from my sweet potato bags for other plants?
Yes, you can reuse the soil from your sweet potato bags, but it’s important to amend it before planting other crops. Sweet potatoes are heavy feeders, so the soil may be depleted of nutrients after a growing season. Add compost, aged manure, or other organic matter to replenish the nutrients. You may also want to test the soil pH and adjust it as needed for the specific plants you plan to grow. Consider rotating crops to prevent the buildup of soilborne diseases. Avoid planting other root vegetables in the same soil immediately after harvesting sweet potatoes.
What are some common pests and diseases that affect sweet potatoes grown in bags, and how can I prevent them?
Common pests that can affect sweet potatoes include sweet potato weevils, flea beetles, and aphids. Diseases include fungal diseases like stem rot and black rot. To prevent pests and diseases, start with healthy, disease-free slips. Practice good sanitation by removing any dead or decaying plant material from around the bags. Use organic pest control methods, such as insecticidal soap or neem oil, to control pests. Ensure that the bags have good drainage to prevent fungal diseases. Rotate crops to prevent the buildup of soilborne pathogens. Consider using companion plants, such as marigolds, to deter pests. Regularly inspect your plants for signs of pests or diseases and take action promptly.
Can I grow different varieties of sweet potatoes in bags?
Absolutely! Growing different varieties of sweet potatoes in bags is a great way to experiment and find your favorites. Just be sure to label each bag clearly so you know which variety you’re growing. Consider the growth habits of each variety when choosing your bags. Some varieties may be more compact and suitable for smaller bags, while others may require larger bags to accommodate their larger root systems. Keep in mind that different varieties may have different maturity dates, so you may need to harvest them at different times.
How do I cure sweet potatoes after harvesting them from bags?
Curing sweet potatoes is essential for improving their flavor and storage life. After harvesting, gently brush off any excess soil but do not wash them. Place the sweet potatoes in a warm, humid location (80-85°F and 85-90% humidity) for 7-10 days. A greenhouse, sunroom, or even a warm, humid room in your house can work. After curing, store the sweet potatoes in a cool, dry, and well-ventilated location (55-60°F). Avoid storing them in the refrigerator, as this can cause them to develop a hard core. Properly cured and stored sweet potatoes can last for several months.
Leave a Comment