
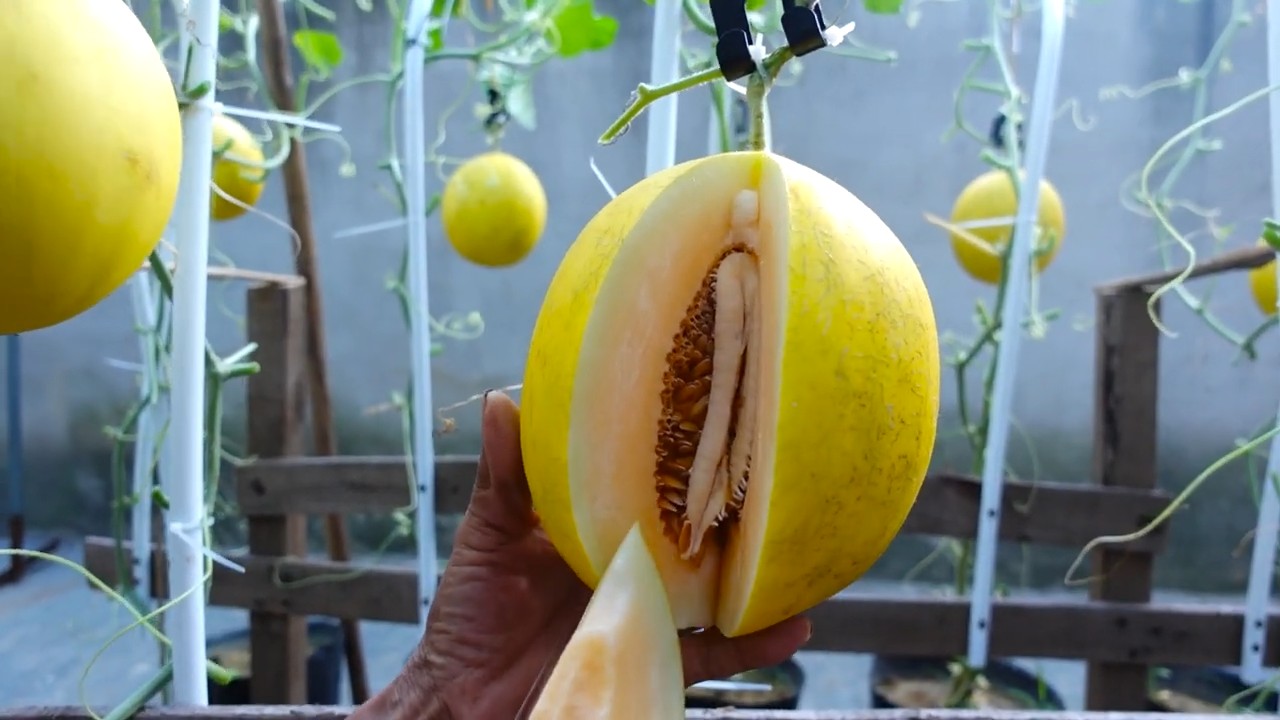
Grow sweeter cantaloupes at home? Absolutely! Imagine biting into a juicy, intensely sweet cantaloupe that you nurtured from seed to fruit, right in your own backyard. Forget those bland, store-bought melons – we’re talking about cantaloupes bursting with flavor, the kind that makes your taste buds sing! For centuries, cultivating melons has been a cherished tradition, from ancient Egyptian royalty enjoying them in their gardens to modern-day gardeners seeking the simple pleasure of homegrown goodness.
But let’s be honest, sometimes growing cantaloupes can be a bit tricky. You might end up with melons that are pale, watery, or just plain disappointing. That’s where these DIY tricks and hacks come in! I’m going to share some simple, yet effective techniques that will help you grow sweeter cantaloupes at home, even if you’re a beginner gardener. These aren’t complicated methods requiring fancy equipment; they’re practical tips that anyone can implement to significantly improve the sweetness and overall quality of their cantaloupe harvest. So, ditch the disappointment and get ready to enjoy the most delicious cantaloupes you’ve ever tasted!
Growing Sweeter Cantaloupe Melons Yourself: A DIY Guide for the Perfect Taste
Hello dear garden friends! I love cantaloupe melons, but often the ones from the store just aren’t sweet enough. That’s why I started looking for ways to grow cantaloupe melons at home that are truly sweet and aromatic. And I’ve found some tricks that I’d love to share with you! This guide will show you how to grow your own super-sweet cantaloupe melons. Let’s get started!
The Basics: What Cantaloupe Melons Need to Grow
Before we begin, it’s important to understand what cantaloupe melons really need to thrive and develop that incredible sweetness. Here are the key points:
- Sun, Sun, Sun: Cantaloupe melons love the sun! They need at least 6-8 hours of direct sunlight per day. The more sun, the sweeter the melon.
- Warm Temperatures: These melons are heat-lovers. The soil temperature should ideally be between 21°C and 32°C (70°F and 90°F). Frost is their greatest enemy.
- Well-Draining Soil: Cantaloupe melons don’t like “wet feet.” The soil must be well-draining so that water can run off. Waterlogging leads to root rot and less sweet fruit.
- Rich Soil: They are heavy feeders and need nutrient-rich soil. Compost, well-rotted manure, or organic fertilizers are worth their weight in gold here.
- Sufficient Water: During the growing phase and especially during fruit development, cantaloupe melons need enough water. But be careful: don’t overdo it!
- Good Ventilation: Good air circulation helps to prevent fungal diseases. Don’t plant the melons too close to each other.
Step-by-Step Guide: From Sowing to Harvest
Now that we know the basics, we can get to the actual work. Here is a detailed guide on how you can grow your own cantaloupe melons:
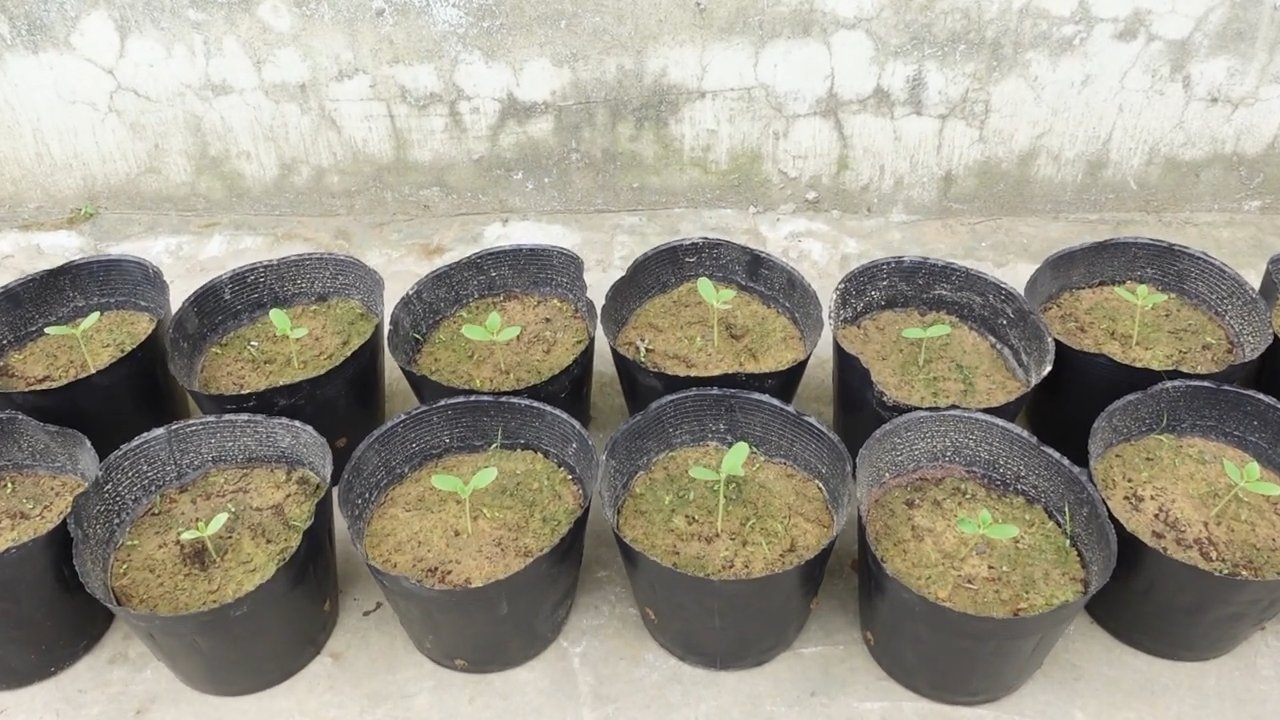
1. Sowing: The Start of the Cantaloupe Season
I usually start by sowing seeds indoors, about 4-6 weeks before the last expected frost. This gives the plants a head start.
- Prepare the seeds: I like to soak the cantaloupe seeds in lukewarm water for 24 hours. This helps to speed up germination.
- Prepare sowing containers: I use small seed pots or peat pellets. Fill them with seed-starting mix.
- Sow the seeds: Place 2-3 seeds per pot about 1-2 cm (0.4-0.8 inches) deep into the soil.
- Water: Gently water the soil so that it is moist, but not wet.
- Keep them warm: Place the pots in a warm place (ideally 21-27°C / 70-80°F). A heating mat can be very helpful here.
- Keep moist: Keep the soil moist, but avoid waterlogging.
- Wait for germination: Germination usually takes 7-14 days.
- Thin out: Once the seedlings have a few leaves, remove the weakest seedling from each pot, leaving only the strongest one.
2. Preparing the Bed: A Home for Your Melons
While the seedlings are growing indoors, we prepare the garden bed.
- Choose a location: Select a sunny spot with at least 6-8 hours of direct sunlight per day.
- Prepare the soil: Loosen the soil thoroughly and remove stones and weeds.
- Improve the soil: Mix in plenty of compost, well-rotted manure, or other organic materials. Cantaloupe melons love nutrient-rich soil.
- Test the soil: A soil test can help determine the pH level and nutrient content of the soil. Cantaloupe melons prefer a slightly acidic to neutral pH (6.0-7.0).
- Mulch: A layer of mulch made of straw or black plastic sheeting helps to increase soil temperature, retain moisture, and suppress weeds. Black plastic is particularly good for warming the soil quickly.
3. Planting Out: Out into Freedom!
Once the danger of frost has passed and the soil temperature is at least 18°C (65°F), the seedlings can be planted outdoors.
- Harden off: Before you plant the seedlings out, you need to harden them off. To do this, place them outside for a few hours a day, starting with one hour and increasing the time each day.
- Dig planting holes: Dig planting holes that are slightly larger than the seed pots.
- Plant the seedlings: Carefully remove the seedlings from the pots and place them in the planting holes. Be careful not to damage the roots.
- Water: Water the plants thoroughly.
- Keep your distance: Plant the melon plants about 90-120 cm (3-4 feet) apart.
- Protect from pests: Young plants are susceptible to slugs and other pests. Protect them with slug bait or other appropriate measures.
4. Care: Watering, Fertilizing, and More
After planting, proper care is crucial for a bountiful harvest of sweet cantaloupe melons.
- Watering: Water the plants regularly, especially during dry periods. Avoid wetting the leaves to prevent fungal diseases. It’s best to water directly at the roots.
- Fertilizing: Fertilize the plants every 2-3 weeks with a balanced fertilizer or an organic fertilizer like compost tea. Be careful not to use too much nitrogen, as this can lead to lush leaf growth but fewer fruits.
- Remove weeds: Keep the bed free of weeds to minimize competition for nutrients and water.
- Trellising: Cantaloupe melons can spread out. If you have limited space, you can train them up a trellis. However, make sure the fruits have adequate support as they get larger.
- Pollination: Cantaloupe melons rely on pollination by bees and other insects. If you have few insects in your garden, you can also hand-pollinate the flowers.
- Pruning: Pruning the side shoots can help to concentrate the plant’s energy on fruit production. Also, remove any yellow or diseased leaves.
5. The Trick for Sweeter Melons: Reduce Watering
Here comes the trick that makes all the difference! About 1-2 weeks before the expected harvest, significantly reduce the amount of water you give them. This forces the plant to concentrate the sugars in the fruits, resulting in a more intense flavor. But be careful: the plants must not dry out completely!
6. The Harvest: The Reward for Your Efforts
Harvest time is the most exciting part! But how do you know when a cantaloupe melon is ripe?
Stem end: The stem should detach easily from the fruit. If you gently
Scent: A ripe cantaloupe melon will emit a sweet, aromatic fragrance.
Color: The rind of the melon should change from green to a beige or yellowish color.
Conclusion
So, there you have it! Unlocking the secret to intensely sweet cantaloupes right in your own backyard is more achievable than you might think. This simple, yet effective DIY trick – manipulating the watering schedule as the cantaloupes ripen – is a game-changer for home gardeners seeking that burst of sugary goodness with every bite. We’ve explored the science behind it, the practical steps to implement it, and even addressed potential challenges along the way.
Why is this a must-try? Because store-bought cantaloupes often fall short of the flavor expectations we have. They’re frequently harvested before peak ripeness to withstand transportation and storage, sacrificing sweetness in the process. By taking control of the ripening process yourself, you can ensure that your cantaloupes reach their full potential, delivering an unparalleled taste experience. Imagine the satisfaction of biting into a cantaloupe grown with your own hands, bursting with natural sweetness and flavor – a far cry from the bland, watery melons you might find at the grocery store.
But the beauty of this DIY trick lies not only in its effectiveness but also in its adaptability. Feel free to experiment with variations to suit your specific growing conditions and preferences. For instance, if you live in a particularly humid climate, you might want to consider providing additional ventilation around your cantaloupes during the reduced watering period to prevent fungal diseases. You could also try different mulching materials to see which one best retains moisture in your soil. Some gardeners even swear by adding a small amount of Epsom salts to the soil a few weeks before harvest to boost sweetness, although scientific evidence for this is limited.
Another variation to consider is the timing of the watering reduction. While we’ve suggested starting a week or two before the expected harvest date, you can adjust this based on your observations of the cantaloupes’ development. Look for signs of ripening, such as a change in color, a softening of the rind, and a fragrant aroma. Once you notice these indicators, it’s time to start reducing the water supply.
Ultimately, the key to success with this DIY trick is observation and experimentation. Pay close attention to your cantaloupes, monitor the weather conditions, and adjust your watering schedule accordingly. Don’t be afraid to try different approaches and see what works best for you.
We are confident that this method will significantly improve the sweetness of your homegrown cantaloupes. It’s a simple, cost-effective, and rewarding way to elevate your gardening game and enjoy the fruits (or rather, melons) of your labor.
So, what are you waiting for? Give this DIY trick a try and experience the joy of growing incredibly sweet cantaloupes at home. We’re eager to hear about your results! Share your experiences, tips, and photos with us in the comments section below. Let’s build a community of cantaloupe enthusiasts and help each other grow the sweetest melons possible! Happy gardening!
Frequently Asked Questions (FAQ)
Q: Why does reducing water make cantaloupes sweeter?
A: Reducing water stress in the final stages of ripening concentrates the sugars within the cantaloupe. When the plant receives less water, it focuses its energy on ripening the existing fruit rather than producing new growth. This leads to a higher sugar concentration and a more intense flavor. Think of it like making a reduction sauce – by simmering away the excess liquid, you intensify the flavors. The same principle applies to cantaloupes.
Q: How do I know when my cantaloupe is ready to have its water reduced?
A: Several visual and olfactory cues indicate that your cantaloupe is approaching ripeness. Look for these signs:
* **Color Change:** The rind of the cantaloupe will typically change from green to a tan or yellowish hue. The netting on the surface will also become more prominent and defined.
* **Aroma:** A ripe cantaloupe will emit a sweet, musky aroma, especially near the stem end.
* **Stem Slip:** The stem should begin to separate easily from the vine. This is known as “slipping.” If you have to tug hard to remove the cantaloupe, it’s not quite ripe yet.
* **Softening:** The blossom end (opposite the stem) will soften slightly when gently pressed.
Start reducing water when you observe a combination of these signs, typically about a week or two before the expected harvest date.
Q: What happens if I reduce water too early?
A: Reducing water too early can stunt the growth of the cantaloupe and prevent it from reaching its full size and sweetness potential. It’s crucial to wait until the fruit is nearly fully grown and showing signs of ripening before implementing the water reduction strategy. Premature water reduction can also lead to a tough, dry texture.
Q: What happens if I don’t reduce water at all?
A: If you continue to water your cantaloupes regularly until harvest, they may still be sweet, but they likely won’t reach their maximum sweetness potential. The excess water can dilute the sugars and result in a less flavorful fruit. You might also experience splitting or cracking of the rind due to the increased water pressure.
Q: How much should I reduce the water? Should I stop watering completely?
A: The goal is to reduce the water supply significantly, but not to eliminate it entirely. Completely stopping watering can stress the plant too much and lead to problems. Aim to reduce the watering frequency by about 50-75%. For example, if you’re currently watering every other day, switch to watering every 3-4 days. The exact amount will depend on your soil type, climate, and the overall health of the plant. Observe the plant closely for signs of stress, such as wilting leaves, and adjust the watering accordingly.
Q: Will this trick work for other types of melons, like honeydew or watermelon?
A: While the principle of concentrating sugars by reducing water can apply to other melons, the specific timing and degree of water reduction may need to be adjusted. Honeydew melons, for example, tend to be more sensitive to water stress than cantaloupes. Watermelons, on the other hand, generally require consistent watering throughout their growth cycle to develop their size and sweetness. Research the specific needs of each type of melon before attempting this trick.
Q: My cantaloupes are cracking. Is this related to watering?
A: Yes, cracking in cantaloupes is often related to inconsistent watering. If the plant experiences periods of drought followed by heavy watering, the sudden influx of water can cause the rind to expand too quickly, leading to cracks. Maintaining consistent soil moisture throughout the growing season is crucial to prevent cracking. However, as you approach harvest, the controlled reduction of water, as described in this article, is different and intended to increase sweetness, not cause cracking.
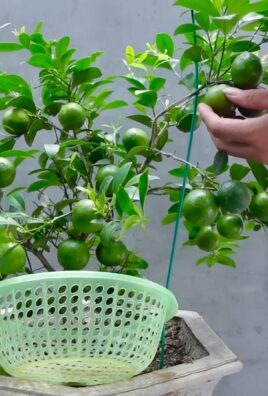
Q: Can I use this trick if I’m growing cantaloupes in containers?
A: Yes, this trick can be used for container-grown cantaloupes. In fact, it may be even easier to control the watering in containers than in the ground. Just be sure to monitor the soil moisture levels closely and adjust the watering accordingly. Container-grown plants tend to dry out more quickly than those in the ground, so you may need to water them more frequently, even during the reduced watering period.
Q: I tried this trick, but my cantaloupes still weren’t very sweet. What could have gone wrong?
A: Several factors can affect the sweetness of cantaloupes, even if you reduce the water properly. These include:
* **Variety:** Some cantaloupe varieties are naturally sweeter than others. Choose a variety known for its sweetness.
* **Sunlight:** Cantaloupes need plenty of sunlight to produce sugars. Make sure your plants are getting at least 6-8 hours of direct sunlight per day.
* **Soil Fertility:** The soil should be rich in nutrients, especially potassium, which is essential for sugar production. Amend the soil with compost or a balanced fertilizer before planting.
* **Pest and Disease Control:** Pests and diseases can weaken the plant and reduce its ability to produce sweet fruit. Monitor your plants regularly and take appropriate measures to control any problems.
* **Weather Conditions:** Unfavorable weather conditions, such as prolonged periods of cloudiness or cool temperatures, can also affect sweetness.
Consider these factors and make adjustments to your growing practices as needed.
Q: Is there anything else I can do to improve the sweetness of my cantaloupes?
A: Yes, in addition to reducing water, you can try these tips:
* **Pollination:** Ensure proper pollination by attracting bees and other pollinators to your garden.
* **Pruning:** Prune the vines to encourage the plant to focus its energy on ripening the existing fruit.
* **Epsom Salts:** Some gardeners recommend adding a small amount of Epsom salts to the soil a few weeks before harvest to boost sweetness. However, scientific evidence for this is limited.
* **Harvest at the Right Time:** Harvest the cantaloupes when they are fully ripe, as indicated by the signs mentioned earlier.
By combining these techniques with the water reduction strategy, you can maximize the sweetness of your homegrown cantaloupes.

Leave a Comment