
Grow Watermelon Cheaply? Absolutely! Imagine sinking your teeth into a juicy, homegrown watermelon on a hot summer day, knowing you didn’t break the bank to make it happen. For centuries, watermelons have been a symbol of summer abundance and a refreshing treat enjoyed across cultures. From ancient Egypt, where they were buried with pharaohs, to modern-day picnics, watermelons hold a special place in our hearts (and stomachs!).
But let’s be honest, buying watermelons from the store can get expensive, and sometimes the taste just isn’t quite right. That’s where this DIY guide comes in! I’m going to share some simple, effective, and budget-friendly tricks to help you grow watermelon cheaply right in your own backyard (or even in containers!).
This isn’t just about saving money; it’s about experiencing the joy of nurturing a plant from seed to fruit, knowing exactly what went into it. Plus, homegrown watermelons often taste so much better than store-bought ones! So, if you’re ready to ditch the expensive grocery store watermelons and embark on a rewarding gardening adventure, keep reading! I’m excited to show you how easy and affordable it can be to enjoy the sweet taste of summer, grown by your own hands.
Grow Watermelons Inexpensively Yourself: Your DIY Guide for a Bountiful Harvest
Hey gardening friends! Who doesn’t love biting into a juicy, sweet watermelon on a hot summer day? But watermelons from the supermarket can be quite expensive. That’s why today I’m going to show you how you can grow watermelons inexpensively and successfully in your own garden. Don’t worry, it’s easier than you think!
The Preparation: The Key to Success
Before we get started, good preparation is the be-all and end-all. Watermelons are little divas when it comes to their needs, but with a little love and attention, they will thrive magnificently.
- The right location: Watermelons love the sun! Choose a sunny spot in your garden that gets at least 6-8 hours of direct sunlight per day.
- The soil: The soil should be loose, well-draining, and rich in nutrients. Watermelons like slightly acidic soil with a pH between 6.0 and 6.8.
- Variety selection: There are countless watermelon varieties. For beginners, I recommend varieties like ‘Sugar Baby’ (small, early-ripening) or ‘Crimson Sweet’ (classic, sweet). Find out which varieties grow well in your region.
- Starting seeds indoors (optional, but recommended): To give the watermelons a head start, you can start them indoors from April.
Step-by-Step Guide: From Sowing to Planting
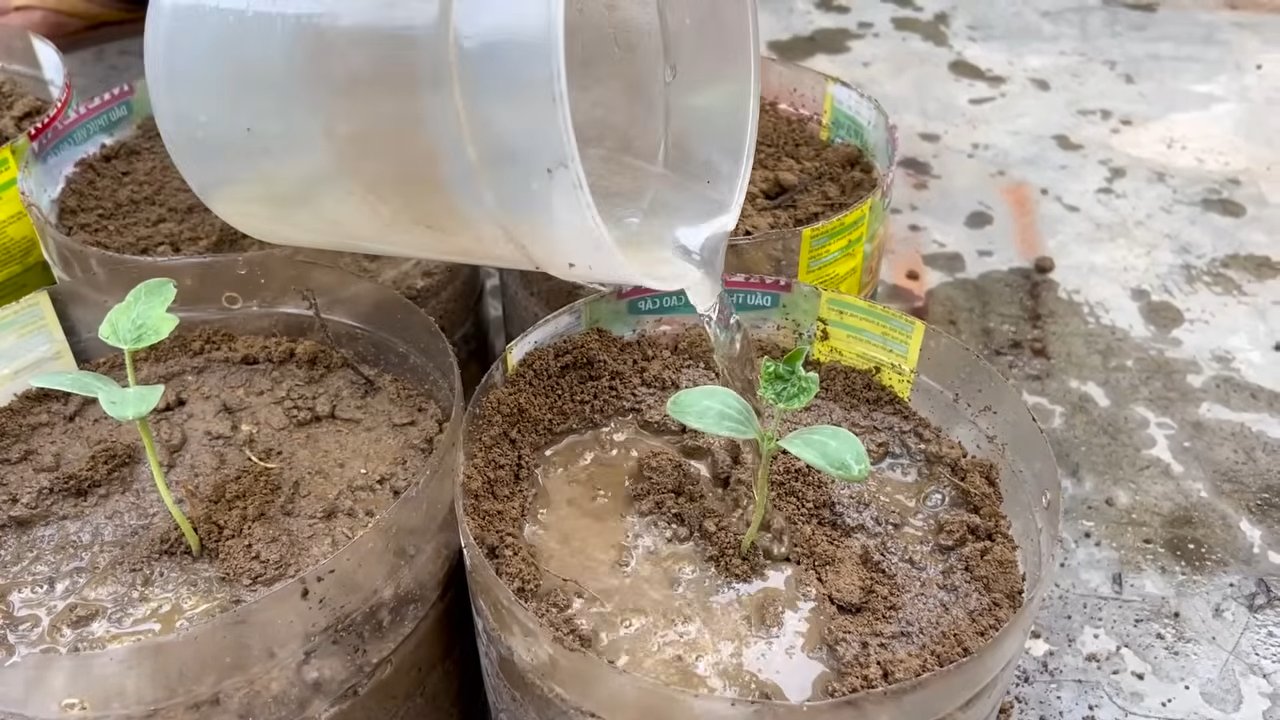
1. Sowing Indoors (Starting Seeds):
- Fill small starter pots (approx. 8-10 cm / 3-4 inches in diameter) with seed-starting mix.
- Place 2-3 seeds per pot about 2 cm (0.8 inches) deep into the soil.
- Water the soil gently so it is moist but not wet.
- Place the pots in a warm, bright place (e.g., on a windowsill or in a greenhouse). The ideal germination temperature is 25-30°C (77-86°F).
- Keep the soil moist, but avoid waterlogging.
- The seeds should germinate after about 1-2 weeks.
- Once the seedlings have 2-3 leaves, you can remove the weakest seedling from each pot.
2. Soil Preparation in the Garden:
- Remove weeds and stones from the area where you want to plant the watermelons.
- Loosen the soil thoroughly.
- Improve the soil with compost or well-rotted manure. This ensures a good supply of nutrients. I always add a decent layer of compost; my melons love it!
- You can also work in some horn shavings or organic fertilizer.
3. Planting in the Garden:
- Wait until there is no more danger of frost (usually mid-May). Watermelons are very sensitive to frost!
- Dig planting holes that are slightly larger than the starter pots.
- Carefully place the young plants into the holes. Be careful not to damage the roots.
- Fill the holes with soil and press down lightly.
- Water the plants thoroughly.
- Maintain a distance of at least 80-100 cm (31-39 inches) between the plants. Watermelons need space to grow!
The Care: Watering, Fertilizing, Mulching
After planting, the real work begins. But don’t worry, with a few simple tricks, you can ensure your watermelons thrive.
- Watering: Watermelons need a lot of water, especially during fruit development. Water regularly and thoroughly, preferably in the morning. Avoid wetting the leaves to prevent fungal diseases.
- Fertilizing: Fertilize the watermelons regularly with an organic fertilizer or a special melon fertilizer. I like to use nettle tea; it’s free and super effective! Start fertilizing about 2-3 weeks after planting and repeat every 2-3 weeks.
- Mulching: A layer of mulch made of straw or grass clippings helps to retain moisture in the soil, suppress weeds, and keep the soil warm. Watermelons love this!
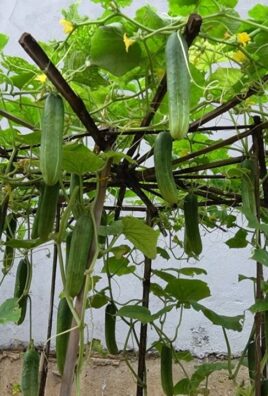
- Trellis (optional): If you have limited space, you can train the watermelons up a trellis. This saves space and provides better air circulation. But be sure to support the fruits as they get heavy.
- Protection from pests and diseases: Regularly check the plants for pests and diseases. If necessary, you can use organic pesticides. Snails are often a problem; slug pellets or snail fences can help here.
The Harvest: The Reward for Your Efforts
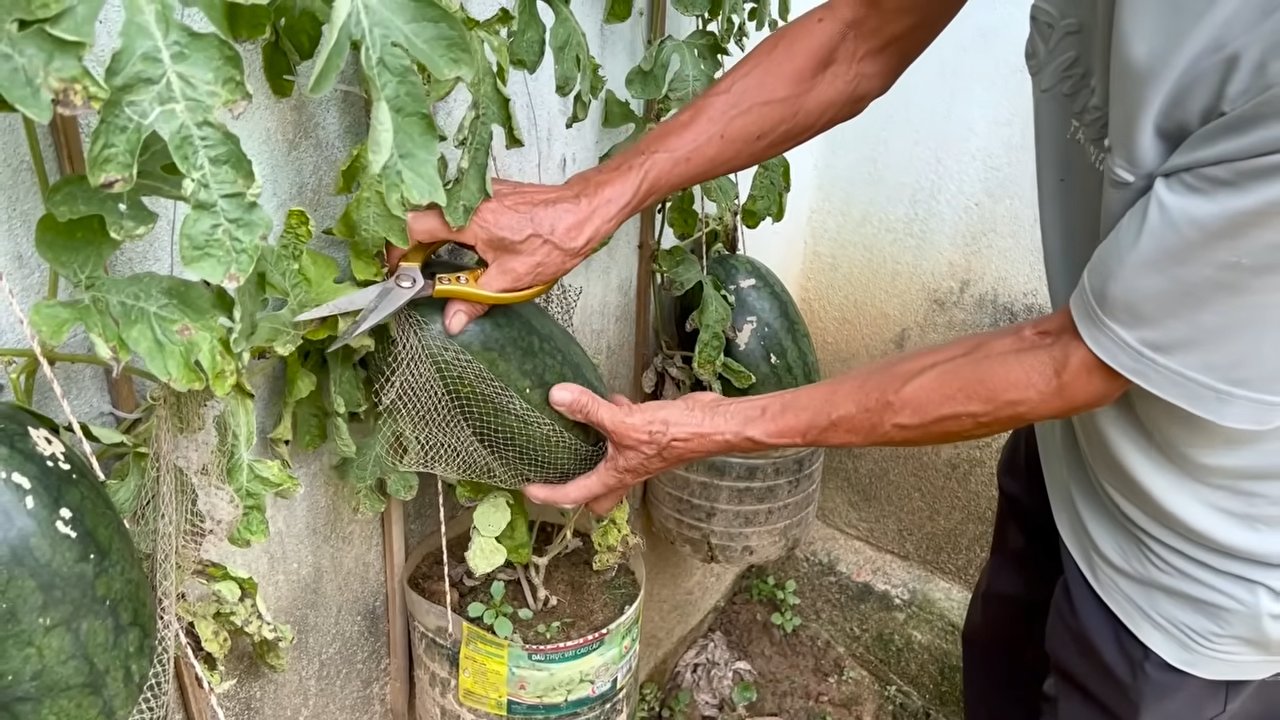
After about 80-100 days (depending on the variety), the watermelons are ripe. But how do you know if they are truly ready?
- The thump test: Gently tap the melon. If it sounds hollow, it’s ripe.
- The stem: The stem connecting the melon to the plant should be dry and brown.
- The ground spot: The spot where the melon rests on the ground should be yellowish or cream-colored.
- The scent: Ripe watermelons often have a slightly sweet smell.
Carefully cut the melon from the stem and enjoy your homegrown watermelon!
Additional Tips for a Bountiful Harvest
- Pollination: Watermelons rely on pollination by bees and other insects. Ensure you have a bee-friendly garden by planting flowering plants near the watermelons.
- Pruning: Regularly remove side shoots to concentrate the plant’s energy on fruit production.
- Encouraging fruit set: In cooler regions, it can be helpful to hand-pollinate the first flowers.
- Protection from birds: Birds love watermelons! Protect the fruits with nets or scarecrows.
- Variety: Try out different watermelon varieties to find out which ones you like best and which grow best in your garden.
Saving Costs: Inexpensive Alternatives
- Save your own seeds: If you had a particularly delicious watermelon last year, you can save the seeds for the next season.
- Make your own compost: Compost is an excellent fertilizer and costs nothing if you make it yourself.
- Nettle tea: Nettle tea is a free and effective fertilizer.
- Used starter pots: Use used starter pots or yogurt cups for starting seeds.
- Mulch material from the garden: Use grass clippings, straw, or leaves as mulch material.
With these tips and tricks, you can grow watermelons inexpensively and successfully in your own garden. It’s a great feeling to harvest the fruits of your labor and enjoy a juicy, homegrown watermelon. Happy gardening!
Conclusion
So, there you have it! Growing watermelons doesn’t have to break the bank. This DIY method for cultivating these juicy summer treats is not only budget-friendly but also incredibly rewarding. Imagine sinking your teeth into a perfectly ripe, homegrown watermelon, knowing you nurtured it from seed to fruit without emptying your wallet. This isn’t just about saving money; it’s about connecting with nature, learning new skills, and enjoying the unparalleled satisfaction of harvesting your own food.
This method is a must-try for several reasons. First, it democratizes watermelon cultivation. No longer is growing these large fruits limited to those with extensive gardens or expensive equipment. This approach makes it accessible to anyone with a small space, a sunny spot, and a desire to learn. Second, it promotes sustainability. By utilizing readily available materials and minimizing waste, you’re contributing to a more eco-conscious lifestyle. Third, it fosters creativity and experimentation. You’re not just following a recipe; you’re embarking on a journey of discovery, adapting the techniques to your specific environment and preferences.
Don’t be afraid to experiment with variations! Try different types of containers, such as repurposed tires or woven baskets. Explore companion planting to deter pests and attract beneficial insects. Consider using different types of mulch to conserve moisture and suppress weeds. You can even experiment with grafting your watermelon plants onto more vigorous rootstocks for increased disease resistance and yield. The possibilities are endless!
Growing watermelons cheaply is not just a possibility; it’s a reality waiting to be embraced. We encourage you to take the plunge, get your hands dirty, and experience the joy of growing your own watermelons. The sweet, refreshing taste of success is well worth the effort.
We are confident that this DIY trick will transform your approach to gardening and provide you with a bountiful harvest of delicious watermelons. Remember to document your journey, share your successes (and failures!), and inspire others to embrace the joys of homegrown produce.
Now, go forth and grow! We can’t wait to hear about your watermelon adventures. Share your photos, tips, and experiences in the comments below. Let’s build a community of passionate, budget-conscious watermelon growers!
Frequently Asked Questions (FAQ)
What kind of soil is best for growing watermelons?
Watermelons thrive in well-drained, sandy loam soil that is rich in organic matter. The ideal pH range is between 6.0 and 6.8. If your soil is heavy clay, amend it with compost, peat moss, or other organic materials to improve drainage and aeration. You can also perform a soil test to determine its pH and nutrient levels and amend accordingly. Adding aged manure or compost before planting can significantly boost your watermelon’s growth.
How much sunlight do watermelons need?
Watermelons are sun-loving plants and require at least 6-8 hours of direct sunlight per day to produce a good harvest. Choose a location in your garden that receives full sun throughout the day. If you live in a particularly hot climate, some afternoon shade may be beneficial to prevent the fruits from scorching. Insufficient sunlight can lead to smaller fruits and reduced sweetness.
How often should I water my watermelon plants?
Watermelons need consistent moisture, especially during fruit development. Water deeply and regularly, aiming for about 1-2 inches of water per week. Avoid overhead watering, as this can promote fungal diseases. Instead, water at the base of the plants, using a soaker hose or drip irrigation system. Reduce watering as the fruits ripen to concentrate their sugars and enhance their sweetness. Monitor the soil moisture regularly and adjust your watering schedule accordingly, depending on weather conditions.
What are some common pests and diseases that affect watermelons, and how can I prevent them?
Common pests include aphids, squash bugs, vine borers, and cucumber beetles. Diseases include powdery mildew, fusarium wilt, and anthracnose. To prevent these problems, practice good garden hygiene, such as removing plant debris and weeds. Use row covers to protect young plants from pests. Encourage beneficial insects, such as ladybugs and lacewings, to control aphids. Choose disease-resistant varieties whenever possible. Rotate your crops each year to prevent soilborne diseases from building up. If necessary, use organic pesticides or fungicides as a last resort, following the instructions carefully.
How do I know when my watermelon is ripe?
Determining when a watermelon is ripe can be tricky, but here are a few indicators:
* **The tendril closest to the fruit turns brown and dries out.** This is a reliable sign that the watermelon is nearing maturity.
* **The underside of the watermelon (where it rests on the ground) turns from white to a creamy yellow.** This is often referred to as the “ground spot.”
* **The watermelon sounds dull and hollow when thumped.** A ripe watermelon will have a deeper, more resonant sound than an unripe one.
* **The skin becomes dull and less shiny.**
* **The watermelon feels heavy for its size.**
It may take some practice to master the art of watermelon ripeness detection, but with experience, you’ll be able to consistently pick the perfect fruit.
Can I grow watermelons in containers?
Yes, you can grow watermelons in containers, but you’ll need a large container (at least 20 gallons) with good drainage. Choose a bush or dwarf variety of watermelon, as they are better suited for container growing. Use a high-quality potting mix and provide regular watering and fertilization. You may also need to provide support for the vines as they grow. Container-grown watermelons may not be as large as those grown in the ground, but they can still produce a delicious harvest.
What kind of fertilizer should I use for watermelons?
Watermelons benefit from regular fertilization, especially during the early stages of growth and fruit development. Use a balanced fertilizer (e.g., 10-10-10) at planting time, and then switch to a fertilizer higher in phosphorus and potassium (e.g., 5-10-10) as the fruits begin to form. You can also supplement with compost tea or other organic fertilizers. Avoid over-fertilizing, as this can lead to excessive vine growth and reduced fruit production. Follow the instructions on the fertilizer label carefully.
How can I save seeds from my watermelons for next year?
Saving seeds from your watermelons is a great way to perpetuate your favorite varieties. Choose a fully ripe watermelon and scoop out the seeds. Rinse the seeds thoroughly to remove any pulp. Spread the seeds out on a paper towel to dry completely. Once dry, store the seeds in an airtight container in a cool, dark, and dry place. Properly stored watermelon seeds can remain viable for several years. Keep in mind that hybrid watermelons may not produce true-to-type offspring, so you may want to save seeds from open-pollinated or heirloom varieties.
How do I deal with blossom end rot on my watermelons?
Blossom end rot is a common problem that affects watermelons and other fruits. It is caused by a calcium deficiency, which can be exacerbated by inconsistent watering. To prevent blossom end rot, ensure that your watermelon plants receive consistent moisture and that the soil is well-drained. You can also add calcium to the soil by incorporating bone meal or crushed eggshells. If you notice blossom end rot developing, remove the affected fruits to encourage the plant to produce healthy ones.
Is it really possible to grow watermelons cheaply?
Absolutely! By utilizing readily available materials, such as repurposed containers, homemade compost, and saved seeds, you can significantly reduce the cost of growing watermelons. This guide focuses on providing cost-effective solutions for every stage of the growing process, from seed starting to harvesting. With a little ingenuity and effort, you can enjoy a bountiful harvest of delicious watermelons without breaking the bank. Growing watermelons cheaply is not just a catchy phrase; it’s a practical and achievable goal.
Leave a Comment