
Growing Big Melons at Home might seem like a challenge reserved for seasoned farmers, but I’m here to tell you it’s totally achievable, even in your own backyard! Forget those tiny, lackluster melons you find at the grocery store. Imagine sinking your teeth into a juicy, homegrown watermelon, cantaloupe, or honeydew – bursting with flavor and sweetness. Sounds amazing, right?
Melons have a rich history, dating back to ancient Egypt and beyond, where they were prized for their refreshing qualities and nutritional value. Cultivating them has been a tradition passed down through generations. But let’s be honest, not everyone has the space or resources for a sprawling melon patch. That’s where these DIY tricks and hacks come in!
In this article, I’m going to share some simple, yet effective techniques to help you maximize your melon yield, regardless of your garden size. We’ll cover everything from soil preparation and pollination tips to clever trellising methods and pest control strategies. Why do you need these tricks? Because growing big melons at home means enjoying fresher, healthier, and tastier fruit, all while saving money and connecting with nature. Plus, there’s nothing quite like the satisfaction of harvesting something you’ve nurtured from seed to deliciousness. So, let’s get started and unlock the secrets to melon-growing success!
Growing Giant Melons: My Foolproof DIY Guide
Hey there, fellow gardening enthusiasts! I’m so excited to share my secrets for growing ridiculously large melons right in your own backyard. Forget those tiny supermarket melons – we’re talking prize-winning, jaw-dropping giants! It takes a little effort and some specific techniques, but trust me, the bragging rights (and delicious melon) are totally worth it.
Choosing the Right Variety
First things first, you can’t expect a tiny melon variety to suddenly balloon into a behemoth. You need to start with the right genetics. Here are a few of my favorite giant melon varieties:
* Carolina Cross: This is the classic giant watermelon variety. It’s known for producing melons that can easily exceed 100 pounds!
* Moon and Stars: Not only does this watermelon get huge, but it’s also incredibly beautiful with its dark green skin and yellow “moon” and “star” markings.
* Big Max Pumpkin: Yes, pumpkins can get HUGE too! Big Max is a popular choice for giant pumpkin competitions.
* Atlantic Giant Pumpkin: This is the king of giant pumpkins. With the right care, you can grow one that weighs hundreds of pounds!
Preparing the Soil: The Foundation for Success
Melons are heavy feeders, meaning they need a lot of nutrients to grow big and strong. Proper soil preparation is absolutely crucial.
* Sunlight: Melons need at least 6-8 hours of direct sunlight per day. Choose a location in your yard that gets plenty of sun.
* Soil Type: Melons prefer well-drained, sandy loam soil. If your soil is heavy clay, you’ll need to amend it.
* Soil Testing: Before you do anything, get your soil tested! This will tell you the pH level and nutrient content of your soil. You can usually get your soil tested at your local agricultural extension office.
* Amending the Soil: Based on your soil test results, you’ll need to amend your soil. Here’s what I recommend:
* Compost: Add plenty of compost to your soil. Compost is a great source of nutrients and it also helps to improve drainage. I usually add at least 4-6 inches of compost to my melon patch.
* Aged Manure: Aged manure is another excellent soil amendment. It’s rich in nutrients and helps to improve soil structure. Be sure to use aged manure, as fresh manure can burn your plants.
* Fertilizer: Use a balanced fertilizer with a ratio of 10-10-10 or something similar. Follow the instructions on the fertilizer package. I also like to add some bone meal to the soil, as it’s a good source of phosphorus, which is important for root development.
* Creating Mounds: I like to plant my melons on mounds. This helps to improve drainage and warms the soil up faster in the spring. To create a mound, simply pile up the amended soil into a mound that’s about 12 inches high and 3 feet wide.
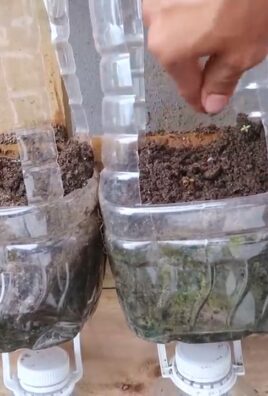
Starting Your Seeds: Getting a Head Start
You can direct sow melon seeds in the garden, but I prefer to start them indoors to get a head start on the growing season.
* When to Start: Start your seeds about 4-6 weeks before the last expected frost in your area.
* Seed Starting Mix: Use a good quality seed starting mix.
* Containers: I like to use peat pots or biodegradable pots, as they can be planted directly into the ground without disturbing the roots.
* Planting the Seeds: Plant the seeds about 1 inch deep.
* Watering: Keep the soil moist but not soggy.
* Warmth: Melons need warmth to germinate. Use a heat mat to keep the soil temperature around 80-85 degrees Fahrenheit.
* Light: Once the seeds have germinated, provide them with plenty of light. Use grow lights or place them in a sunny window.
* Hardening Off: Before you transplant your seedlings into the garden, you’ll need to harden them off. This means gradually exposing them to outdoor conditions. Start by placing them outside for a few hours each day, gradually increasing the amount of time they spend outdoors.
Transplanting and Initial Care
Once the danger of frost has passed and your seedlings have been hardened off, it’s time to transplant them into the garden.
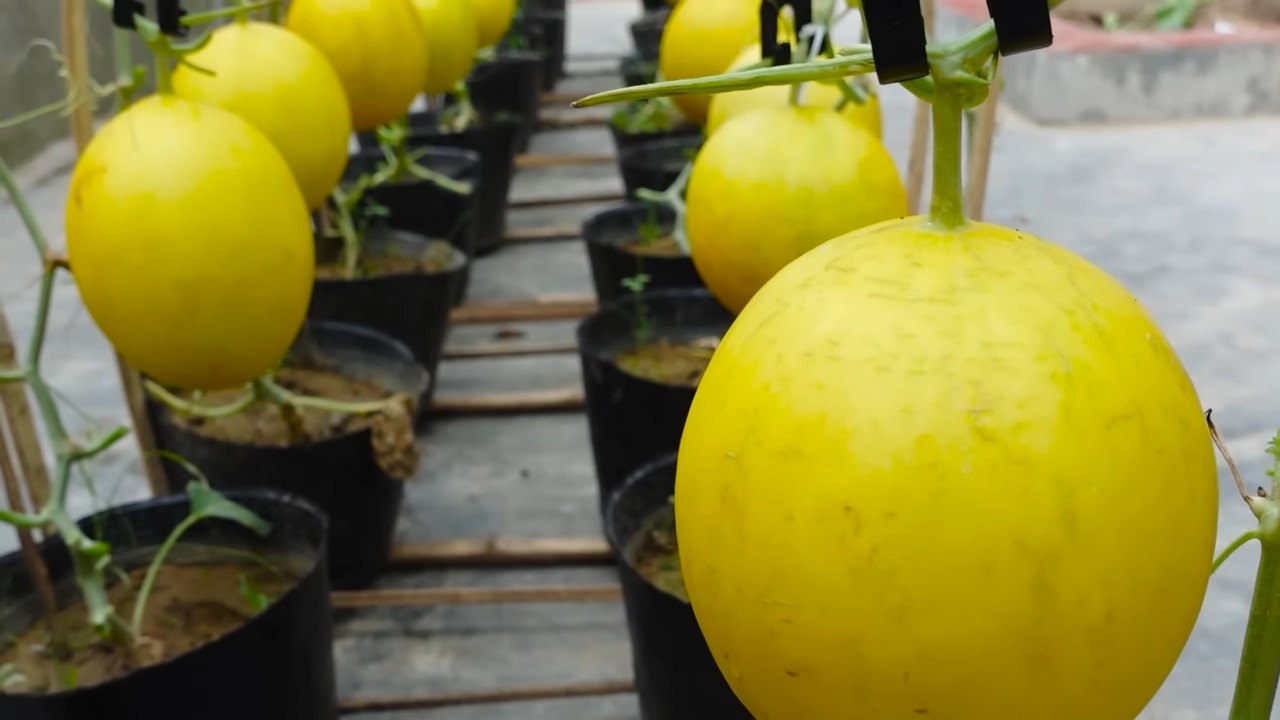
* Spacing: Give your melon plants plenty of space. For giant watermelons, I recommend spacing them at least 6-8 feet apart. For giant pumpkins, you’ll need even more space – at least 10-12 feet apart.
* Planting: Dig a hole that’s slightly larger than the root ball of your seedling. Gently remove the seedling from its container and place it in the hole. Backfill with soil and water thoroughly.
* Watering: Water your melon plants regularly, especially during hot, dry weather. Melons need a lot of water to grow big and juicy.
* Fertilizing: Fertilize your melon plants every 2-3 weeks with a balanced fertilizer.
* Weeding: Keep your melon patch free of weeds. Weeds compete with your melon plants for nutrients and water.
* Pest Control: Keep an eye out for pests such as squash bugs, cucumber beetles, and aphids. Treat them promptly with an appropriate insecticide or organic pest control method.
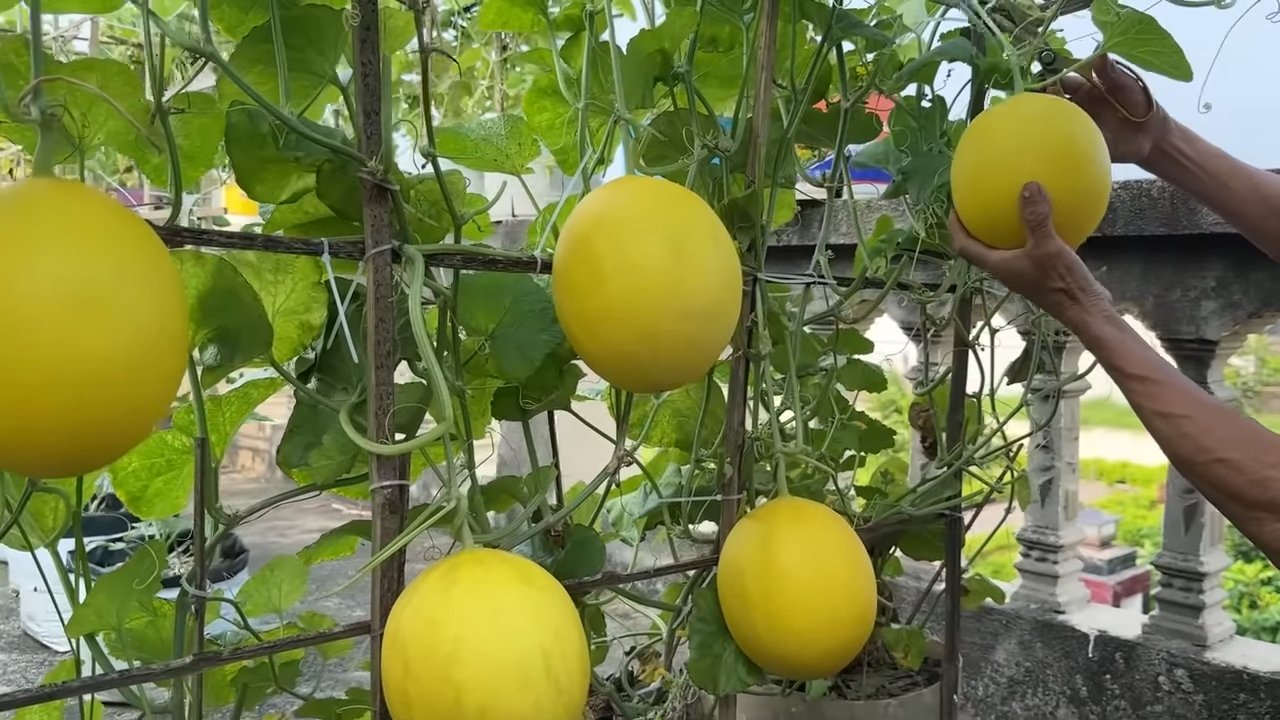
Training and Pruning: Directing the Energy
This is where the magic happens! Training and pruning your melon plants is essential for growing giant melons. The goal is to direct all of the plant’s energy into producing just one or two melons.
* Choosing the Fruit: Once your melon plants start producing fruit, you’ll need to choose which ones you want to focus on. Select the most promising fruit – the ones that are the most symmetrical and have the fewest blemishes.
* Removing Other Fruit: Once you’ve chosen your fruit, remove all of the other fruit from the plant. This will allow the plant to focus all of its energy on growing the chosen fruit.
* Pruning Vines: Prune the vines that are growing away from the chosen fruit. This will also help to direct the plant’s energy into the fruit. I usually prune the vines back to about 6-8 feet from the fruit.
* Burying Vines: Burying sections of the vine can encourage additional root growth, providing the plant with more access to nutrients and water. Choose sections of the vine that are close to the main plant and bury them a few inches deep in the soil.
Protecting Your Melon: Shielding Your Investment
As your melon grows, it will become increasingly vulnerable to pests, diseases, and sun damage. Here’s how to protect your investment:
* Sun Protection: As the melon gets bigger, it can be susceptible to sunburn. Protect it by shading it with a piece of cloth or cardboard.
* Pest Control: Continue to monitor your melon for pests and treat them promptly.
* Disease Control: Melons can be susceptible to diseases such as powdery mildew and blossom end rot. Prevent these diseases by providing good air circulation and watering properly.
* Supporting the Melon: As your melon gets bigger, it may need some support. Place a piece of plywood or a pallet under the melon to prevent it from rotting. You can also use slings or hammocks to support the melon.
Watering and Feeding: Fueling the Growth
Consistent watering and feeding are crucial for growing giant melons.
* Watering: Water your melon plants deeply and regularly, especially during hot, dry weather. Aim for at least 1-2 inches of water per week.
* Fertilizing: Continue to fertilize your melon plants every 2-3 weeks with a balanced fertilizer. You can also supplement with liquid seaweed or fish emulsion.
* Calcium: Calcium is essential for preventing blossom end rot. Add calcium to the soil by mixing in some lime or gypsum. You can also spray the leaves with a calcium solution.
Harvesting: The Grand Finale
Knowing when to harvest your giant melon can be tricky. Here are a few things to look for:
* The Tendril: The tendril closest to the melon should be brown and dry.
* The Ground Spot: The spot where the melon rests on the ground should be yellow or orange.
* The Sound: When you thump the melon, it should sound hollow.
* The Weight: This is the most obvious sign! Your melon should be incredibly heavy.
Once you’ve determined that your melon is ripe, carefully cut it from the vine with a sharp knife. Be sure to leave a few inches of stem attached.
Post-Harvest Care
Even after harvesting, your giant melon needs some care.
* Handle with Care: Giant melons are heavy and fragile. Handle them with care to avoid bruising or damaging them.
* Storage
Conclusion
So, there you have it! Growing big melons at home isn’t just a pipe dream; it’s an achievable reality with a little know-how and dedication. We’ve explored the key elements, from selecting the right variety and preparing the soil to mastering the art of pollination and providing essential support. But the real magic lies in the DIY trick we’ve unveiled: the strategic use of reflective mulch and targeted feeding.
Why is this DIY trick a must-try? Because it’s a game-changer. Reflective mulch amplifies sunlight exposure, ensuring every precious inch of your melon receives the energy it needs to develop its full potential. This increased sunlight translates directly into faster growth, sweeter flavor, and, most importantly, significantly larger melons. Think of it as giving your melons a personal tanning bed, but instead of a tan, they get a growth spurt!
And the targeted feeding? It’s like providing your melon with a personalized vitamin boost. By delivering nutrients directly to the root zone, you bypass the competition from surrounding plants and ensure your melon receives the precise nourishment it craves. This focused approach maximizes nutrient uptake, leading to healthier, more robust growth and, ultimately, bigger, juicier melons.
But don’t stop there! Experiment with variations to tailor the technique to your specific environment and melon variety. For example, if you live in a particularly hot climate, consider using a shade cloth in conjunction with the reflective mulch to prevent sunburn. You could also try different types of organic fertilizers to find the perfect nutrient blend for your soil. Perhaps you’ll discover that adding a specific micronutrient, like boron, gives your melons an extra edge.
Consider these additional tips for even better results:
* Water deeply and consistently, especially during fruit development. Aim for deep watering sessions a few times a week rather than shallow, daily watering.
* Monitor your plants regularly for pests and diseases. Early detection is key to preventing major problems.
* Prune your melon vines to encourage fruit production. Removing excess foliage allows more sunlight to reach the developing melons.
* Rotate your crops each year to prevent soil depletion and disease buildup.
Growing big melons at home is a rewarding experience that connects you with nature and provides you with delicious, homegrown fruit. It’s a testament to the power of observation, experimentation, and a little bit of DIY ingenuity.
We’re confident that with this DIY trick and the knowledge you’ve gained, you’ll be well on your way to harvesting prize-winning melons. So, grab your seeds, prepare your soil, and get ready to witness the magic unfold.
We can’t wait to hear about your success! Share your experiences, photos, and tips in the comments below. Let’s build a community of melon-growing enthusiasts and learn from each other. Happy growing!
Frequently Asked Questions (FAQ)
What type of reflective mulch is best for growing big melons?
The most effective type of reflective mulch is silver or aluminum-colored plastic mulch. These materials reflect a high percentage of sunlight back onto the plant, maximizing light exposure. You can find reflective mulch at most garden centers or online retailers. While you can use aluminum foil in a pinch, plastic mulch is more durable and weather-resistant. Make sure to secure the mulch properly to prevent it from blowing away in windy conditions.
How often should I apply the targeted feeding solution?
The frequency of targeted feeding depends on the type of fertilizer you’re using and the specific needs of your melon plants. As a general guideline, apply the feeding solution every 1-2 weeks during the active growing season, especially after the fruits have set. Always follow the instructions on the fertilizer packaging and adjust the frequency based on your observations of the plants’ growth and health. Over-fertilizing can be just as harmful as under-fertilizing, so err on the side of caution.
Can I use this DIY trick for other types of melons besides watermelon?
Yes, absolutely! This DIY trick can be adapted for growing other types of melons, such as cantaloupe, honeydew, and even smaller varieties like Galia melons. The principles of increased sunlight exposure and targeted feeding apply to all melons, although you may need to adjust the specific techniques based on the size and growth habits of the particular variety. For example, smaller melons may not require as much support as larger watermelons.
What if I don’t have access to reflective mulch? Are there any alternatives?
If you can’t find reflective mulch, you can try using other reflective materials, such as white plastic sheeting or even strategically placed mirrors. However, these alternatives may not be as effective as silver or aluminum mulch, as they may not reflect as much sunlight. Another option is to focus on maximizing sunlight exposure through other means, such as choosing a sunny location for your melon patch and pruning surrounding plants to reduce shading.
How do I know when my melon is ripe and ready to harvest?
Determining when a melon is ripe can be tricky, but there are several indicators to look for. For watermelons, check the underside of the melon where it rests on the ground. This spot should be a creamy yellow color. You can also thump the melon; a ripe watermelon will have a deep, hollow sound. For cantaloupes, look for a change in color from green to tan or yellow, and the stem should easily slip from the fruit with gentle pressure. Honeydew melons should have a slightly waxy feel and a sweet aroma.
What are some common pests and diseases that affect melon plants, and how can I prevent them?
Common pests that affect melon plants include aphids, squash bugs, and vine borers. Diseases include powdery mildew, fusarium wilt, and anthracnose. To prevent these problems, practice good garden hygiene, such as removing plant debris and weeds. Use insecticidal soap or neem oil to control pests, and choose disease-resistant varieties whenever possible. Ensure good air circulation around your plants to prevent fungal diseases. Crop rotation can also help prevent soilborne diseases.
Is it necessary to hand-pollinate my melon plants?
While not always necessary, hand-pollinating melon plants can significantly increase fruit set, especially if you live in an area with low pollinator activity. To hand-pollinate, use a small paintbrush to transfer pollen from the male flowers to the female flowers. Female flowers have a small, immature melon at the base, while male flowers do not. Hand-pollinate in the morning, when the pollen is most viable.
How much space do melon plants need to grow?
Melon plants require a significant amount of space to grow and thrive. Watermelons typically need 6-8 feet between plants, while cantaloupes and honeydew melons need 3-4 feet. If you’re growing melons in containers, choose large pots that are at least 24 inches in diameter. Ensure that the containers have good drainage to prevent root rot.
Can I grow melons in containers?
Yes, you can grow melons in containers, but it’s important to choose the right variety and provide adequate support. Smaller melon varieties, such as bush watermelons or personal-sized cantaloupes, are best suited for container gardening. Use a large container with good drainage and a high-quality potting mix. Provide a trellis or other support structure for the vines to climb. Water and fertilize regularly, as container-grown plants tend to dry out and deplete nutrients more quickly.
What type of soil is best for growing big melons?
Melons thrive in well-drained, fertile soil that is rich in organic matter. The ideal soil pH is between 6.0 and 6.8. Before planting, amend your soil with compost, aged manure, or other organic materials to improve drainage and fertility. You can also add a slow-release fertilizer to provide essential nutrients throughout the growing season. Avoid planting melons in heavy clay soil, as this can lead to root rot.


Leave a Comment