
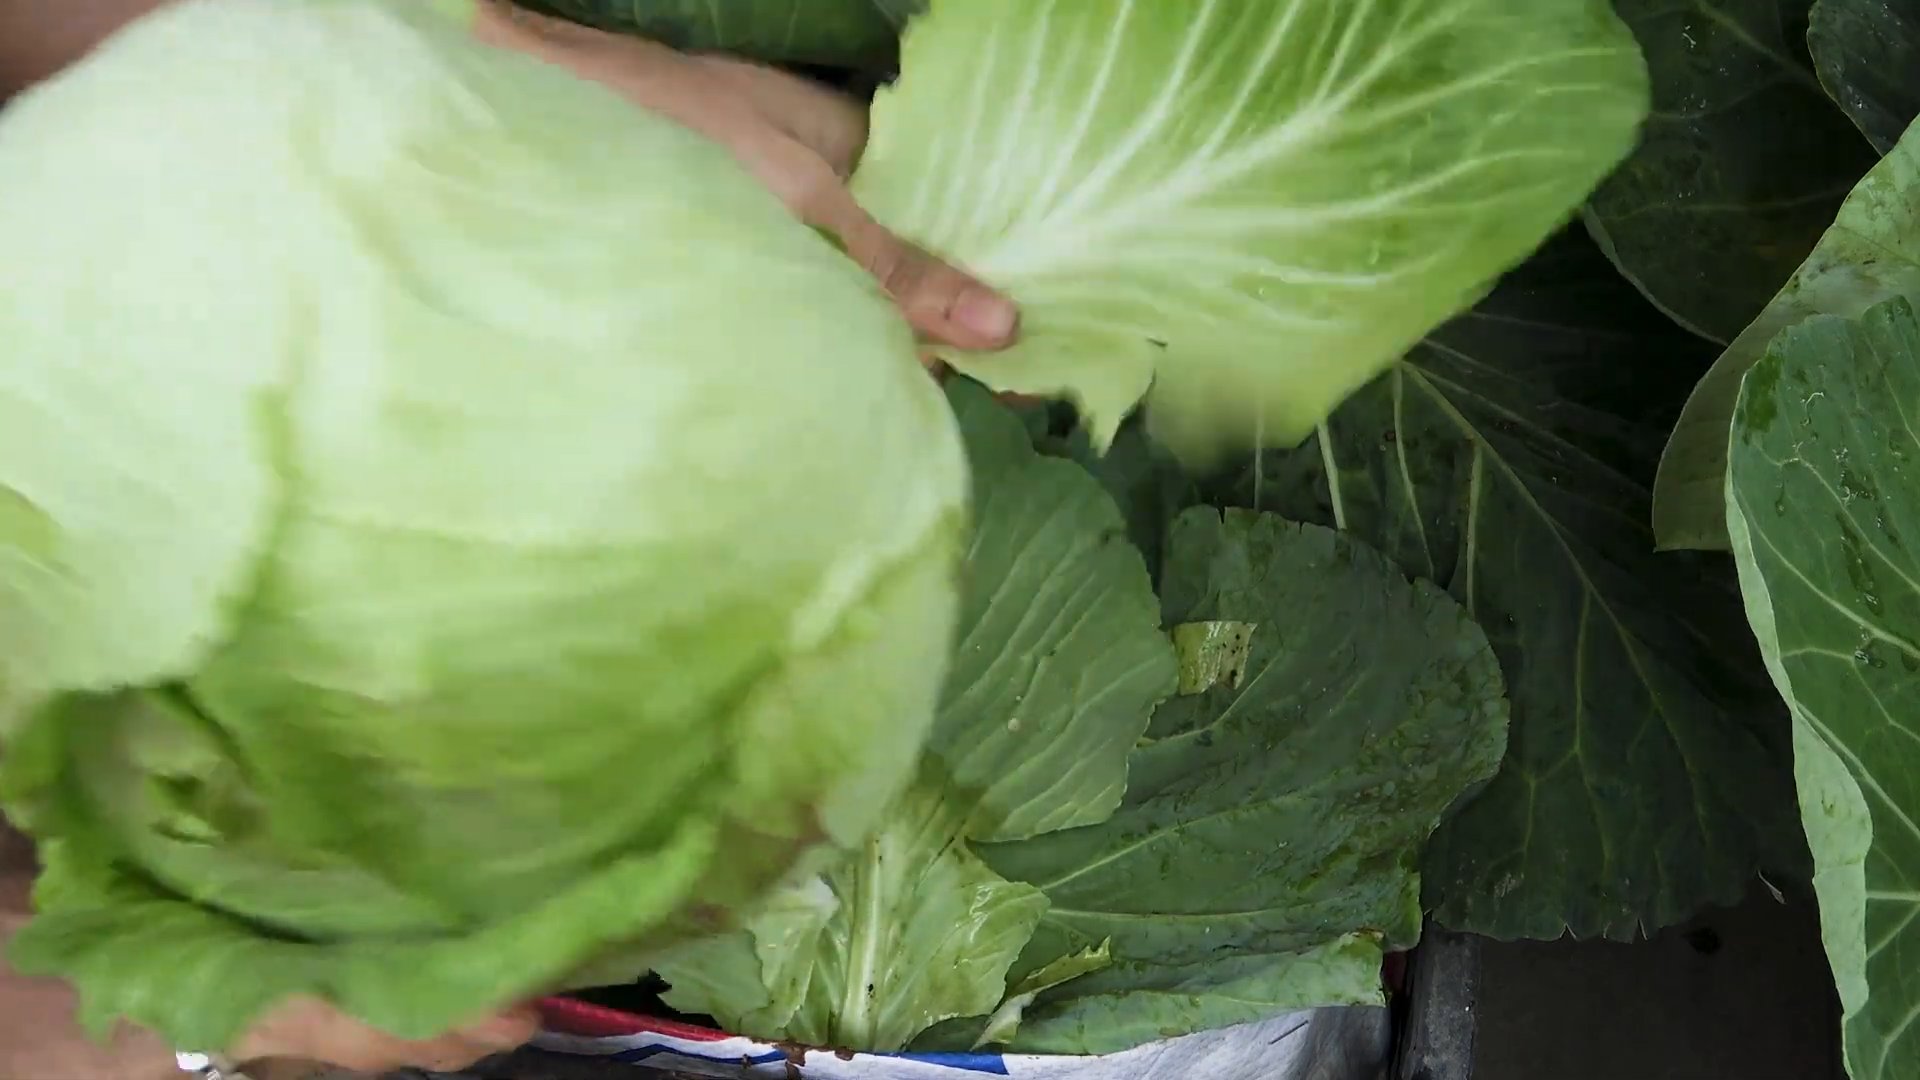
Growing Cabbage From Seeds might seem daunting, but trust me, it’s an incredibly rewarding experience! Imagine biting into a crisp, flavorful cabbage you nurtured from a tiny seed – the taste is simply unmatched. For centuries, cabbage has been a staple in diets worldwide, from the hearty stews of Eastern Europe to the vibrant slaws of Asia. Its cultivation dates back to ancient times, a testament to its resilience and nutritional value.
But why bother starting from seeds when you can just buy a head at the store? Well, for starters, you gain access to a wider variety of cabbage types, some of which you’ll never find commercially. Plus, you’ll save money in the long run, and there’s nothing quite like the satisfaction of watching your own little seedlings sprout and thrive. This DIY guide will walk you through every step, from choosing the right seeds to transplanting your seedlings, ensuring you have a bountiful harvest. I’m here to show you that growing cabbage from seeds is easier than you think, and with a few simple tricks, you’ll be enjoying homegrown cabbage in no time!
Growing Cabbage From Seeds: A Complete DIY Guide
Okay, cabbage lovers, let’s get our hands dirty! I’m going to walk you through everything you need to know to grow your own delicious, crunchy cabbage from seed. It might seem intimidating at first, but trust me, it’s totally doable, and the reward of harvesting your own homegrown cabbage is so worth it.
Choosing Your Cabbage Variety
Before we even think about planting, let’s talk cabbage types. There’s a whole world beyond the standard green cabbage you see in the grocery store! Consider these options:
* Green Cabbage: The classic, all-purpose cabbage. Great for coleslaw, soups, and roasting. Varieties like ‘Early Jersey Wakefield’ are good for early harvests.
* Red Cabbage: Adds a beautiful color to your dishes and has a slightly peppery flavor. ‘Red Acre’ is a popular choice.
* Savoy Cabbage: Known for its crinkled leaves and milder flavor. ‘Savoy Ace’ is a reliable variety.
* Napa Cabbage: Also known as Chinese cabbage, it has a more elongated shape and delicate flavor. Perfect for stir-fries and salads.
* Pointed Cabbage: These cabbages have a conical shape and a sweet flavor.
Think about what you want to use your cabbage for and choose a variety that suits your needs. Also, consider your climate and growing season. Some varieties are better suited for warmer or cooler climates.
When to Start Your Seeds
Timing is key when it comes to growing cabbage. You’ll want to start your seeds indoors about 4-6 weeks before the last expected frost in your area. Cabbage prefers cooler temperatures, so getting a head start indoors will give them a good boost.
* Check your local frost dates: This is crucial! Knowing when the last frost typically occurs will help you determine when to start your seeds.
* Consider your climate: If you live in a warmer climate, you might be able to direct sow your seeds later in the season.
* Succession planting: For a continuous harvest, consider planting seeds every few weeks. This way, you’ll have a steady supply of cabbage throughout the growing season.
Materials You’ll Need
Alright, let’s gather our supplies. Here’s what you’ll need to get started:
* Cabbage seeds: Choose your favorite variety!
* Seed starting trays or pots: I prefer using seed starting trays with individual cells.
* Seed starting mix: This is a light and airy soil mix specifically designed for starting seeds. Don’t use regular garden soil!
* Watering can or spray bottle: For gentle watering.
* Grow lights (optional but recommended): These will provide your seedlings with the light they need to thrive.
* Heat mat (optional): This can help speed up germination.
* Labels and a marker: To keep track of your varieties.
* Small trowel or spoon: For transplanting.
* Fertilizer: A balanced fertilizer for feeding your seedlings.
Starting Your Cabbage Seeds Indoors
Now for the fun part! Let’s get those seeds planted.
1. Prepare your seed starting trays: Fill each cell of your seed starting tray with seed starting mix. Gently press down on the soil to remove any air pockets.
2. Sow your seeds: Place 2-3 cabbage seeds in each cell, about ¼ inch deep.
3. Cover the seeds: Gently cover the seeds with more seed starting mix.
4. Water thoroughly: Use a watering can or spray bottle to gently water the soil until it’s evenly moist.
5. Provide warmth: Place your seed starting tray on a heat mat (if using) and cover it with a humidity dome or plastic wrap to create a warm and humid environment.
6. Provide light: Place your seed starting tray under grow lights or in a sunny window. If using grow lights, keep them about 2-3 inches above the seedlings.
7. Monitor moisture: Keep the soil consistently moist, but not soggy. Water when the top inch of soil feels dry to the touch.
8. Remove humidity dome: Once the seedlings emerge (usually within 5-10 days), remove the humidity dome or plastic wrap.
9. Thin seedlings: Once the seedlings have their first true leaves (the second set of leaves), thin them to one seedling per cell. Choose the strongest seedling and snip off the others at the soil line.
10. Fertilize: Start fertilizing your seedlings with a diluted balanced fertilizer (follow the instructions on the fertilizer package) about once a week.
Hardening Off Your Seedlings
Before you transplant your cabbage seedlings outdoors, you’ll need to “harden them off.” This process gradually acclimates them to the outdoor environment, making them less susceptible to shock.
1. Start 1-2 weeks before transplanting: Begin by placing your seedlings outdoors in a sheltered location for just a few hours each day.
2. Gradually increase exposure: Gradually increase the amount of time they spend outdoors each day, exposing them to more sunlight and wind.
3. Protect from extreme weather: Protect your seedlings from frost, strong winds, and heavy rain.
4. Monitor for stress: Watch for signs of stress, such as wilting or leaf burn. If you see any of these signs, bring your seedlings back indoors and gradually reintroduce them to the outdoors.
Preparing Your Garden Bed
While your seedlings are hardening off, it’s time to prepare your garden bed. Cabbage prefers well-drained soil that is rich in organic matter.
1. Choose a sunny location: Cabbage needs at least 6 hours of sunlight per day.
2. Amend the soil: Amend your soil with compost or other organic matter to improve drainage and fertility.
3. Check the soil pH: Cabbage prefers a soil pH of 6.0-7.0. You can test your soil pH with a soil testing kit.
4. Remove weeds: Remove any weeds from your garden bed.
5. Work the soil: Loosen the soil to a depth of at least 12 inches.
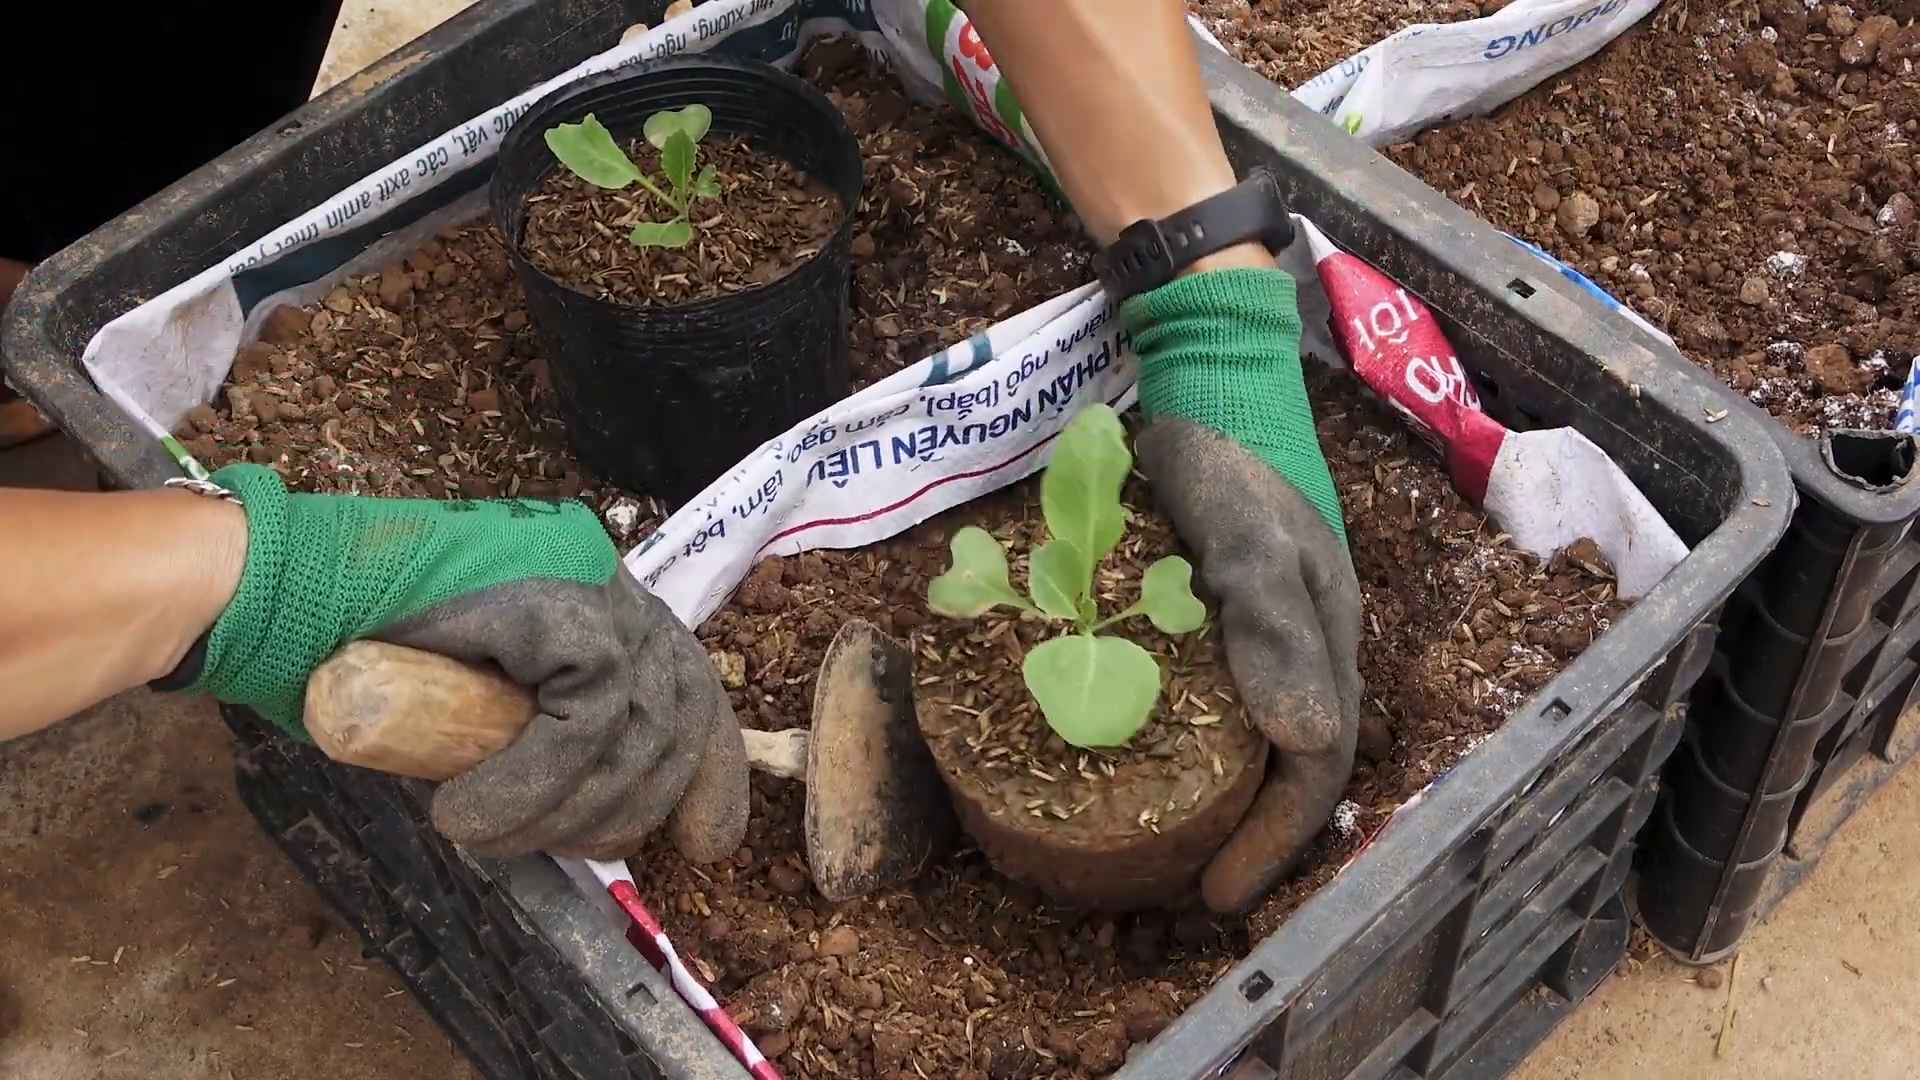
Transplanting Your Cabbage Seedlings
Now that your seedlings are hardened off and your garden bed is prepared, it’s time to transplant them outdoors.
1. Choose a cloudy day: Transplanting on a cloudy day will help reduce stress on your seedlings.
2. Dig holes: Dig holes that are slightly larger than the root balls of your seedlings. Space the holes about 12-24 inches apart, depending on the variety of cabbage you’re growing.
3. Gently remove seedlings: Gently remove the seedlings from their cells, being careful not to damage the roots.
4. Place seedlings in holes: Place the seedlings in the holes and backfill with soil.
5. Water thoroughly: Water the seedlings thoroughly after transplanting.
6. Mulch: Apply a layer of mulch around the seedlings to help retain moisture and suppress weeds.
Caring for Your Cabbage Plants
Once your cabbage plants are transplanted, it’s important to provide them with proper care to ensure a healthy and abundant harvest.
* Watering: Water your cabbage plants regularly, especially during dry periods. Aim for about 1 inch of water per week.
* Fertilizing: Fertilize your cabbage plants every 2-3 weeks with a balanced fertilizer.
* Weeding: Keep your garden bed free of weeds.
* Pest control: Monitor your cabbage plants for pests, such as cabbage worms, aphids, and flea beetles. Use organic pest control methods, such as handpicking, insecticidal soap, or Bacillus thuringiensis (Bt).
* Disease control: Monitor your cabbage plants for diseases, such as black rot and clubroot. Practice good sanitation and crop rotation to prevent diseases.
Harvesting Your Cabbage
The moment we’ve been waiting for! Harvesting your homegrown cabbage.
* Check for firmness: Your cabbage is ready to harvest when the head is firm and solid.
* Cut the head: Use a sharp knife to cut the head from the stem, leaving a few outer leaves attached.
* Store properly: Store your cabbage in the refrigerator for up to several weeks.
Troubleshooting Common Cabbage Problems
Even with the best care, you might encounter some problems while growing cabbage. Here are a few common issues and how to address them:
* Cabbage worms: These green caterpillars can devour your cabbage leaves. Handpick them off or use Bt.
* Aphids: These tiny insects can suck the sap from your cabbage plants. Spray them with insecticidal soap.
* Flea beetles: These small beetles can create small holes in your cabbage leaves. Cover
Conclusion
So, there you have it! Growing cabbage from seeds isn’t just a gardening project; it’s a deeply rewarding experience that connects you to the food you eat. From the initial thrill of watching those tiny seeds sprout to the satisfaction of harvesting your own crisp, flavorful heads, the entire process is a testament to the magic of nature and the power of a little patience.
Why is this DIY trick a must-try? Because it puts you in control. You get to choose the exact variety of cabbage you want, ensuring it perfectly suits your culinary preferences. You avoid the potential chemicals and pesticides often used in commercial farming. And, perhaps most importantly, you gain a profound appreciation for the journey of your food from seed to table. Imagine the pride you’ll feel serving a coleslaw made entirely from cabbage you nurtured yourself!
But the adventure doesn’t stop there. Feel free to experiment with different varieties of cabbage. Red cabbage adds a vibrant splash of color to salads and slaws, while savoy cabbage offers a more delicate flavor and texture. You can also try succession planting, sowing seeds every few weeks to ensure a continuous harvest throughout the growing season. Consider companion planting too! Marigolds can deter pests, while dill can attract beneficial insects that prey on cabbage worms.
Don’t be afraid to get your hands dirty and embrace the learning process. Gardening is all about experimentation, and even if you encounter a few challenges along the way, the rewards are well worth the effort. The taste of homegrown cabbage is simply unparalleled – fresher, sweeter, and more flavorful than anything you can buy in the store. Plus, you’ll be contributing to a more sustainable food system and reducing your carbon footprint.
We wholeheartedly encourage you to give this DIY trick a try. Start small, perhaps with just a few seeds, and see how it goes. Once you experience the joy of growing your own cabbage, you’ll be hooked! And we want to hear all about your experiences. Share your tips, tricks, and triumphs in the comments below. Let’s build a community of cabbage-growing enthusiasts and inspire others to embrace the joys of homegrown food. Remember, the journey of a thousand meals begins with a single seed. So, grab your seeds, get planting, and get ready to enjoy the delicious rewards of your labor. Growing your own **cabbage** is easier than you think, and the results are simply amazing!
Frequently Asked Questions (FAQ)
Q: What is the best time of year to start cabbage seeds?
A: The timing depends on your climate and the specific cabbage variety. Generally, for a spring harvest, start seeds indoors 6-8 weeks before the last expected frost. For a fall harvest, start seeds outdoors in mid-summer. Check your seed packet for specific recommendations based on your region and variety.
Q: What kind of soil is best for growing cabbage?
A: Cabbage thrives in well-drained, fertile soil that is rich in organic matter. A slightly acidic soil pH of 6.0 to 7.0 is ideal. Amend your soil with compost or well-rotted manure before planting to improve drainage and fertility.
Q: How often should I water my cabbage plants?
A: Cabbage needs consistent moisture, especially during head formation. Water deeply and regularly, aiming for about 1-1.5 inches of water per week. Avoid overhead watering, as this can promote fungal diseases. Mulching around the plants can help retain moisture and suppress weeds.
Q: What are some common pests and diseases that affect cabbage?
A: Common pests include cabbage worms, cabbage loopers, aphids, and flea beetles. Diseases include clubroot, black rot, and downy mildew. Regularly inspect your plants for signs of pests or diseases. Use organic pest control methods such as handpicking pests, using insecticidal soap, or applying Bacillus thuringiensis (Bt) for cabbage worms. Ensure good air circulation and avoid overhead watering to prevent fungal diseases. Crop rotation can also help prevent soilborne diseases.
Q: How do I know when my cabbage is ready to harvest?
A: Cabbage is ready to harvest when the head is firm and solid to the touch. The size of the head will vary depending on the variety. Check the seed packet for the expected head size and maturity date. Use a sharp knife to cut the head from the stem, leaving a few outer leaves attached.
Q: Can I grow cabbage in containers?
A: Yes, you can grow cabbage in containers, but you’ll need a large container (at least 12 inches in diameter) with good drainage. Choose a compact or dwarf variety of cabbage. Use a high-quality potting mix and fertilize regularly. Container-grown cabbage may require more frequent watering than cabbage grown in the ground.
Q: How do I store harvested cabbage?
A: To store cabbage, remove any loose outer leaves and wrap the head in plastic wrap. Store in the refrigerator crisper drawer for up to 2-3 weeks. You can also shred or chop cabbage and freeze it for later use. Blanching the cabbage before freezing will help preserve its color and texture.
Q: Can I save seeds from my cabbage plants?
A: Saving seeds from cabbage can be a bit challenging, as cabbage is a biennial plant, meaning it takes two years to produce seeds. You’ll need to overwinter the plants and allow them to flower and produce seeds in the second year. Also, cabbage is cross-pollinated, so if you’re growing multiple varieties, the seeds may not be true to type.
Q: What are some good companion plants for cabbage?
A: Good companion plants for cabbage include:
* Marigolds: Deter pests like nematodes and cabbage moths.
* Dill: Attracts beneficial insects that prey on cabbage worms.
* Rosemary: Deters cabbage moths.
* Thyme: Repels cabbage white butterflies.
* Onions and Garlic: Repel various pests.
* Nasturtiums: Act as a trap crop for aphids.
Q: My cabbage heads are splitting. What causes this, and how can I prevent it?
A: Cabbage heads split when they grow too quickly due to inconsistent watering or heavy rainfall after a dry period. To prevent splitting, water your cabbage plants consistently, especially during head formation. Mulching can help retain moisture and prevent fluctuations in soil moisture levels. If heavy rain is expected, you can try twisting the cabbage head slightly to break some of the roots and slow down growth.
Q: What kind of fertilizer should I use for cabbage?
A: Cabbage is a heavy feeder and benefits from regular fertilization. Use a balanced fertilizer with a higher nitrogen content, especially during the early stages of growth. You can also side-dress with compost or well-rotted manure. Avoid over-fertilizing, as this can lead to excessive leaf growth and delayed head formation.
Q: Is it possible to grow organic cabbage?
A: Absolutely! Growing organic cabbage is a great way to ensure you’re eating healthy, pesticide-free food. Use organic seeds, amend your soil with compost and organic fertilizers, and use organic pest control methods. With a little extra care and attention, you can easily grow delicious and nutritious organic cabbage in your own backyard.

Leave a Comment