
Growing corn on concrete might sound like an impossible feat, a horticultural oxymoron! But what if I told you that with a little ingenuity and some DIY magic, you could actually harvest sweet, juicy corn even without a traditional garden plot? Forget acres of farmland – we’re bringing the farm to you, right onto your patio or balcony!
For centuries, corn has been a staple crop, deeply woven into the cultures of the Americas. From ancient civilizations using it as a primary food source to modern-day barbecues, corn holds a special place in our hearts (and stomachs!). But access to land is becoming increasingly limited, especially in urban areas. That’s where this DIY trick comes in.
Imagine stepping outside your apartment and picking fresh corn for dinner. No more trips to the grocery store, no more questionable freshness. This article is your guide to unlocking the secrets of growing corn on concrete, providing you with a sustainable and rewarding gardening experience. We’ll explore container gardening techniques, soil selection, and even some clever hacks to maximize your yield. So, grab your gardening gloves, and let’s turn that concrete jungle into a cornucopia!
Growing Corn on Concrete: An Unusual DIY Project
Hey folks! Have you ever thought about growing corn on concrete? Sounds crazy, right? But with a little creativity and the right materials, it’s absolutely doable! I’ll show you how to create your own little corn garden on a terrace, a balcony, or even a garage roof. Let’s get started!
What you’ll need:
- Corn seeds: Choose a variety that is suitable for growing in containers. Dwarf corn varieties are ideal.
- Large containers: Think of large pots, tubs, or even repurposed trash cans (with holes for drainage!). The bigger, the better, as corn develops deep roots.
- High-quality potting soil: A mixture of garden soil, compost, and perlite ensures good drainage and nutrient supply.
- Drainage material: Gravel, expanded clay, or clay shards for the bottom of the containers.
- Fertilizer: A slow-release fertilizer or regular liquid feeding during the growing season.
- Water: Corn needs a lot of water, especially during the flowering period.
- Sunlight: Corn loves the sun! Choose a location with at least 6-8 hours of direct sunlight per day.
- Trowel or shovel
- Watering can or garden hose
- Possibly: A trellis or support (depending on the corn variety)
Step-by-Step Guide:
1. Prepare the containers:
- First, you need to prepare your containers. If you’re using recycled containers, clean them thoroughly with soap and water.
- Drill holes in the bottom of the containers to ensure good drainage. This is super important to prevent the roots from rotting.
- Fill the bottom of the containers with a layer of drainage material (gravel, expanded clay, or clay shards). This helps to prevent waterlogging. A layer of about 5-10 cm is ideal.
2. Fill the containers with soil:
- Mix your potting soil. I like to use a mixture of garden soil, compost, and perlite. The compost provides nutrients, and the perlite ensures good aeration.
- Fill the containers with the potting soil, but leave about 5-10 cm of space to the rim.
- Press the soil down lightly.
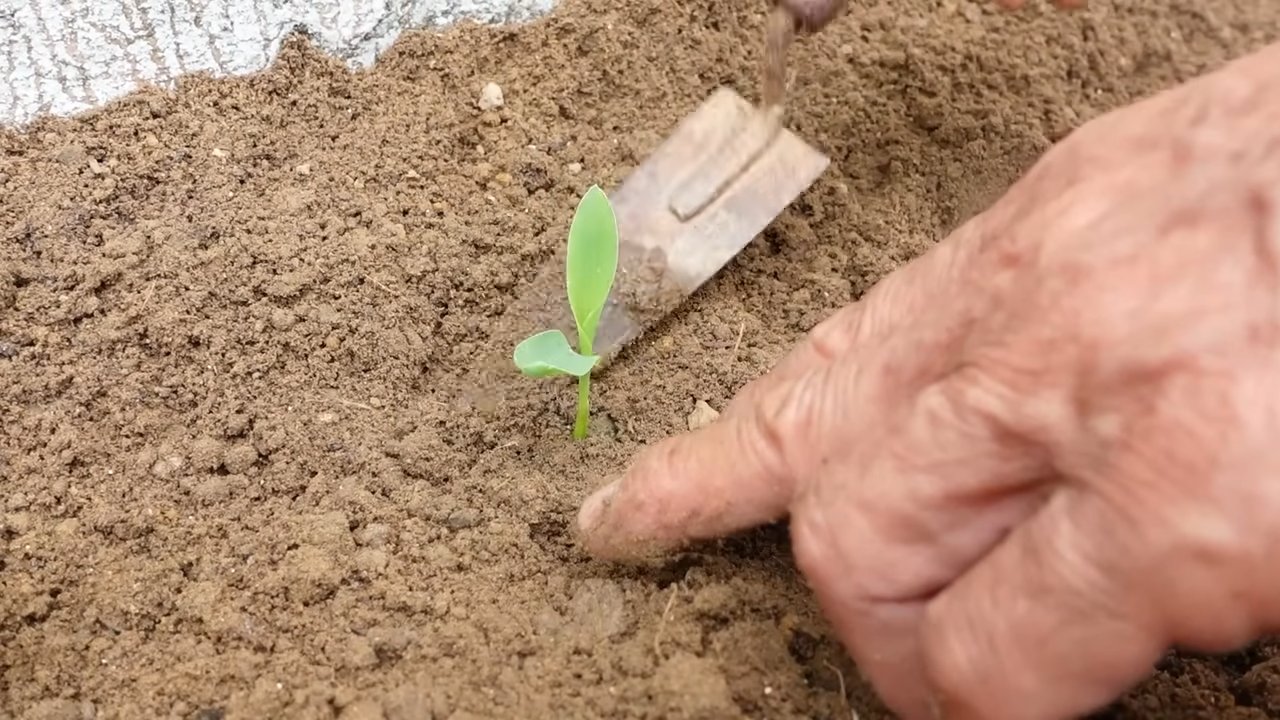
3. Sow the corn seeds:
- Make small holes in the soil, about 2-3 cm deep. The distance between the holes should be about 15-20 cm.
- Place 2-3 corn seeds in each hole. This increases the probability that at least one seed will germinate.
- Cover the seeds with soil and press down lightly.
- Water the soil gently so that it is moist but not soaked.
4. Choose a location:
- Place the containers in a sunny location. Corn needs at least 6-8 hours of direct sunlight per day to grow well.
- Make sure the location is sheltered from the wind, as tall corn plants can be knocked over by strong winds.
5. Watering:
- Water the soil regularly, especially during germination and the growing period. The soil should always be moist, but not soaked.
- On hot days, you may need to water daily.
- Avoid watering the leaves, as this can promote fungal diseases. Instead, water directly onto the soil.
6. Fertilizing:
- Fertilize the corn plants regularly to ensure they receive sufficient nutrients.
- Use a slow-release fertilizer when planting or fertilize regularly with a liquid fertilizer during the growing season.
- Be sure to follow the instructions on the fertilizer package.
7. Care:
- Remove weeds that grow in the containers.
- Check the plants regularly for pests and diseases.
- If you discover pests, combat them with a suitable insecticide or a natural method.
- If the corn plants grow very tall, it may be necessary to support them with a trellis.
Pollination of the Corn
Pollination is a crucial step for the corn harvest. Since we are growing corn in containers, we may need to help a little.
1. When to pollinate?
- Pollination occurs when the corn plants form male flowers (the “tassels”) at the top and female flowers (the “silk”) on the cobs.
- The silk should be fresh and sticky.
2. How to pollinate?
- Gently shake the male flowers to release the pollen.
- Collect the pollen in a clean container.
- Carefully distribute the pollen onto the silk of the female flowers. You can use a small brush for this.
- Repeat this process several times during the pollination period to ensure that all silk threads are pollinated.
3. Alternative method:
- You can also cut off the male flowers and shake them over the female flowers.
- Or you can place the male flowers in a container with water and shake them over the female flowers.
Harvest Time
Harvest time is the most exciting part!
1. When to harvest?
- The corn cobs are ripe when the silk is brown and dry.
- Press on the kernels. They should be plump and juicy.
- The harvest time depends on the corn variety and the weather conditions.
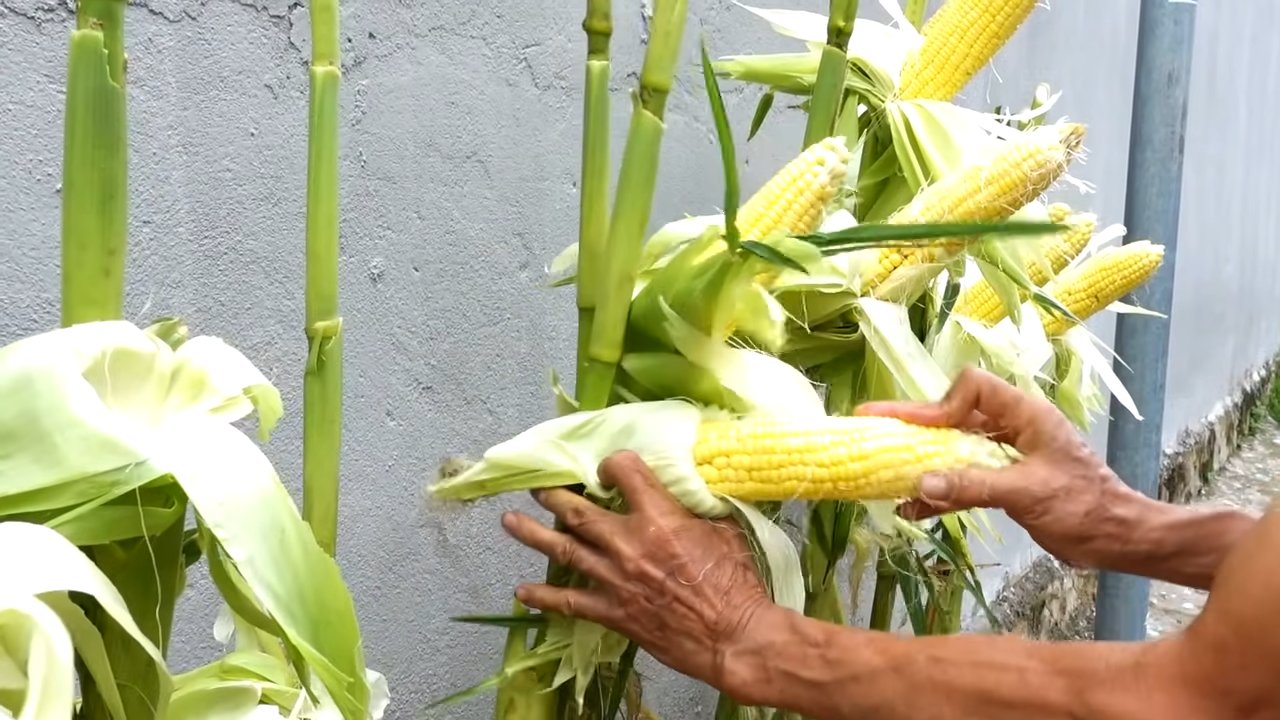
2. How to harvest?
- Carefully break the corn cobs off the plants.
- Remove the outer leaves (the “husks”).
- Enjoy your homegrown corn!
Tips and Tricks for Successful Corn Growing on Concrete
- Choose the right corn variety: Dwarf corn varieties are ideal for growing in containers as they don’t get as tall and require less space.
- Use large containers: Corn forms deep roots, so large containers are important for healthy growth.
- Ensure good drainage: Waterlogging can lead to root rot. Use drainage material and make sure the containers have holes in the bottom.
- Water regularly: Corn needs a lot of water, especially during the flowering period.
- Fertilize regularly: Corn is a heavy feeder and requires sufficient nutrients.
- Pollinate the flowers: Assist with pollination to achieve a good harvest.
- Protect the plants from pests: Check the plants regularly for pests and combat them if necessary.
- Be patient: Growing corn takes time and care. But the effort is worth it!
Conclusion
So, there you have it! Growing corn on concrete might sound like an impossible feat, a horticultural oxymoron, but with this simple DIY trick, you can indeed cultivate this summer staple even without a traditional garden. This method opens up a world of possibilities for urban dwellers, apartment residents with balconies, or anyone facing space constraints. It’s a testament to the power of resourcefulness and a reminder that gardening isn’t confined to sprawling fields.
Why is this DIY trick a must-try? Because it’s accessible, affordable, and surprisingly effective. It bypasses the need for extensive soil preparation, tilling, and weeding. It’s a fantastic way to recycle containers and repurpose materials, contributing to a more sustainable lifestyle. Plus, the sheer novelty of growing corn in an unexpected environment is a conversation starter and a source of immense satisfaction. Imagine the look on your friends’ faces when you tell them you’re harvesting fresh corn from your patio!
But don’t stop there! This method is ripe for experimentation. Try different varieties of corn to see which thrives best in your specific microclimate. Consider adding companion plants like beans or squash to your containers to create a miniature Three Sisters garden. Experiment with different fertilizer blends to optimize growth and yield. You could even explore vertical gardening techniques to maximize space and create a stunning visual display.
Remember, success with this DIY trick hinges on a few key factors: adequate sunlight, consistent watering, and proper fertilization. Monitor your plants closely, adjust your care routine as needed, and don’t be afraid to learn from your mistakes. Gardening is a journey, not a destination, and every setback is an opportunity to grow (pun intended!).
We wholeheartedly encourage you to give this DIY trick a try. It’s a rewarding experience that connects you with nature, provides fresh produce, and proves that anything is possible with a little ingenuity. And most importantly, we want to hear about your experiences! Share your photos, tips, and challenges in the comments below. Let’s build a community of concrete corn growers and inspire others to embrace the joy of urban gardening. Let us know what worked for you, what didn’t, and any creative adaptations you made along the way. Your insights could be invaluable to someone else embarking on this exciting adventure. So, grab your containers, gather your supplies, and get ready to experience the magic of growing corn on concrete!
Frequently Asked Questions (FAQ)
Can I really grow corn on concrete? It sounds too good to be true.
Yes, you absolutely can! While corn is traditionally grown in large fields, this DIY trick utilizes container gardening principles to create a suitable environment for corn to thrive even on concrete surfaces. The key is providing the right conditions: a large enough container, well-draining soil, ample sunlight, consistent watering, and appropriate fertilization. It might require a bit more attention than field-grown corn, but the results are definitely achievable.
What kind of containers should I use?
The size of the container is crucial. Corn plants have extensive root systems, so you’ll need a container that’s at least 12 inches in diameter and 12 inches deep per plant. Larger is always better! Consider using large plastic tubs, repurposed barrels, or even grow bags. Make sure the container has drainage holes to prevent waterlogging. Dark-colored containers can heat up quickly in direct sunlight, so consider using lighter colors or wrapping them in reflective material to keep the soil cool.
What type of soil is best for growing corn in containers?
A well-draining potting mix is essential. Avoid using garden soil, as it can become compacted in containers and hinder root growth. A good mix would include peat moss or coco coir for moisture retention, perlite or vermiculite for drainage, and compost for nutrients. You can also add slow-release fertilizer to the mix to provide a steady supply of nutrients throughout the growing season.
How much sunlight does corn need?
Corn requires at least 6-8 hours of direct sunlight per day to thrive. Choose a location that receives plenty of sunlight throughout the day. If you live in a particularly hot climate, you might need to provide some afternoon shade to prevent the plants from overheating.
How often should I water my corn plants?
Corn plants need consistent watering, especially during hot weather. Check the soil moisture regularly and water when the top inch feels dry to the touch. Avoid overwatering, as this can lead to root rot. A good rule of thumb is to water deeply and less frequently, rather than shallowly and more often.
What kind of fertilizer should I use?
Corn is a heavy feeder, so it needs regular fertilization. Use a balanced fertilizer with a higher nitrogen content, especially during the early stages of growth. You can also supplement with compost tea or other organic fertilizers. Follow the instructions on the fertilizer packaging carefully to avoid over-fertilizing, which can damage the plants.
How do I know when my corn is ready to harvest?
The silks on the corn ears will turn brown and dry. The ears should feel plump and full when squeezed gently. You can also peel back a small portion of the husk to check the kernels. They should be milky and release a white liquid when punctured.
Can I grow different varieties of corn using this method?
Yes, you can! Experiment with different varieties of corn to see which ones perform best in your specific climate and container size. Dwarf varieties are often a good choice for container gardening, as they tend to be smaller and more manageable.
What are some common problems I might encounter when growing corn on concrete?
Some common problems include pests, diseases, and nutrient deficiencies. Monitor your plants regularly for signs of trouble and take action promptly. Pests can be controlled with organic insecticides or by handpicking them off the plants. Diseases can be prevented by providing good air circulation and avoiding overwatering. Nutrient deficiencies can be addressed by fertilizing regularly with a balanced fertilizer.
Can I grow other plants alongside my corn in the same container?
Yes, you can! Companion planting can be beneficial for corn. Beans, for example, can fix nitrogen in the soil, which benefits the corn. Squash can provide ground cover, which helps to retain moisture and suppress weeds. This is known as the “Three Sisters” method, a traditional Native American planting technique. Just be sure to choose companion plants that have similar water and nutrient requirements.
What if I don’t have a sunny concrete area? Can I still use this method?
While concrete provides a stable and readily available surface, the key is sunlight. If you don’t have a sunny concrete area, you can still use this method on a sunny balcony, patio, or even indoors with supplemental grow lights. The important thing is to provide the corn plants with the sunlight they need to thrive.
Is growing corn on concrete really worth the effort?
Absolutely! While it might require a bit more attention than traditional gardening, the rewards are well worth the effort. You’ll have fresh, homegrown corn that tastes far superior to anything you can buy in the store. Plus, you’ll have the satisfaction of knowing that you grew it yourself, even in an unconventional environment. It’s a fun, educational, and rewarding experience that connects you with nature and provides a delicious harvest.
Leave a Comment