
Growing corn on concrete might sound like an impossible feat, a horticultural oxymoron! But what if I told you that with a little ingenuity and some DIY magic, you could actually harvest sweet, juicy corn even without a traditional garden plot? Forget acres of farmland; we’re bringing the farm to you, right on your patio or balcony!
For centuries, corn has been a staple crop, deeply woven into the fabric of countless cultures. From the ancient civilizations of Mesoamerica, where corn was revered as a sacred gift, to its modern-day prominence as a global food source, this versatile grain has nourished and sustained communities worldwide. But access to fresh, homegrown corn shouldn’t be limited to those with sprawling gardens. That’s where our innovative DIY approach comes in.
In today’s world, where space is often a premium and access to fresh produce can be challenging, the ability to growing corn on concrete opens up a world of possibilities. Imagine stepping outside your door to pluck a perfectly ripe ear of corn for dinner, knowing you nurtured it from seed to table. This DIY guide will empower you to overcome spatial limitations and enjoy the satisfaction of growing your own food, regardless of your living situation. We’ll explore simple, effective techniques that transform concrete jungles into miniature cornfields, proving that with a little creativity, anything is possible!
Growing Corn on Concrete: A DIY Project for the Urban Gardener
Hey folks! Do you also have a little concrete jungle outside your door and dream of fresh, homegrown corn? I’ll show you how to make the seemingly impossible possible and grow corn on concrete! It’s a bit of work, but the result is worth it – I promise!
What you need:
- Large planters: Large tubs or mortar tubs with a diameter and depth of at least 45 cm (18 inches) are best. Corn needs space for its roots!
- High-quality potting soil: Don’t skimp here! Good soil is the be-all and end-all for a bountiful harvest. I recommend a mixture of garden soil, compost, and coconut coir.
- Drainage material: Expanded clay, gravel, or clay shards ensure good water drainage and prevent waterlogging.
- Corn seed: Choose a variety that is suitable for growing in containers. There are special dwarf corn varieties that are particularly well-suited.
- Fertilizer: Corn is a heavy feeder and needs regular applications of fertilizer. I like to use organic fertilizer like horn shavings or compost tea.
- Watering can or garden hose: For regular watering.
- Trowel or spade: For filling the planters and planting the corn kernels.
- Support material (optional): For tall varieties, it can be useful to support the plants with stakes or bamboo canes.
- Patience and love: The most important things of all!
Preparation is Everything: Preparing the Planters
- Cleaning the planters: Before you start, you should clean the planters thoroughly. Remove old soil, dirt, and any algae. A brush and some water are usually sufficient.
- Creating drainage: Fill the bottom of the planters with a layer of drainage material. This prevents waterlogging, which is harmful to corn. A layer of about 5-10 cm (2-4 inches) is ideal.
- Filling with soil: Fill the planters with the prepared potting soil. Leave about 5-10 cm (2-4 inches) of space to the rim. The soil should be loose and airy.
Sowing: Getting the Corn Kernels into the Soil
- Sowing time: The best time to sow corn is when there is no more danger of frost. This is usually from mid-May onwards.
- Sowing depth: Make small holes in the soil with your finger or a small stick. The holes should be about 2-3 cm (1 inch) deep.
- Placing the corn kernels: Place 2-3 corn kernels in each hole. This increases the chance that at least one kernel will germinate.
- Closing the holes: Cover the corn kernels with soil and press down lightly.
- Watering in: Water the soil gently so that it is well moistened. Avoid washing out the kernels.
Care: How Your Corn Will Thrive
- Watering: Corn needs a lot of water, especially during the growth phase. Water regularly, but avoid waterlogging. The soil should always be slightly moist. On hot days, it may be necessary to water daily.
- Fertilizing: Fertilize the corn regularly to provide it with the necessary nutrients. Start fertilizing about 2-3 weeks after germination. I like to use organic fertilizer such as horn shavings or compost tea. Pay attention to the manufacturer’s dosage instructions.
- Removing weeds: Regularly remove weeds that grow in the planters. Weeds compete with the corn for nutrients and water.
- Supporting (optional): If your corn variety grows very tall, it can be useful to support the plants with stakes or bamboo canes. This prevents them from breaking in the wind.
- Assisting pollination: Corn is a wind-pollinated plant. However, in containers, it can be difficult to ensure adequate pollination. You can assist pollination by gently shaking the male flowers (located at the top of the plant) or by using a brush to transfer the pollen to the female flowers (the silks on the ears).
Protection from Pests and Diseases
- Slugs and snails: Slugs and snails can eat young corn plants. Protect your plants with slug pellets or snail fences.
- European corn borer: The European corn borer is a pest that bores into the corn cobs. You can combat the infestation with beneficial insects like parasitic wasps.
- Fungal diseases: In wet weather, fungal diseases can occur. Ensure good air circulation for the plants and remove affected leaves.
Harvest: Enjoying the Fruits of Your Labor
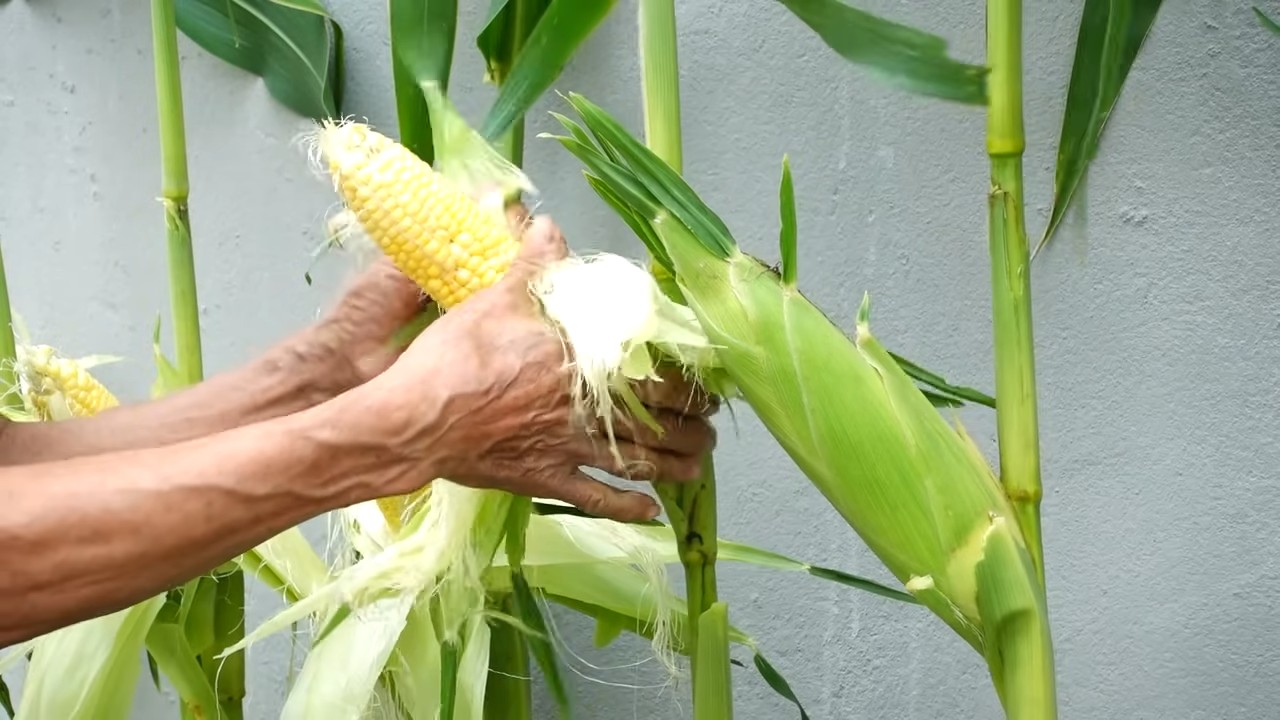
- Harvest time: The corn is ready to harvest when the husks of the cobs are brown and dry, and the kernels are plump and juicy.
- Harvesting: Carefully break the corn cobs off the plant.
- Processing: You can eat the corn fresh immediately or freeze or preserve it for later.
Additional Tips for Growing Corn on Concrete
- Location: Choose a sunny location for your planters. Corn needs at least 6 hours of sun per day.
- Wind protection: Protect the plants from strong wind, which can knock them over.
- Variety choice: Inform yourself about the different corn varieties and choose one that is suitable for growing in containers.
- Neighbors: Corn benefits from being near beans and squash. These plants can support each other (companion planting).
- Patience: Growing corn takes time and patience. Don’t be discouraged if it doesn’t work out the first time.
Common Mistakes and How to Avoid Them
- Planters are too small: Corn needs a lot of space for its roots. Use sufficiently large planters.
- Poor soil: Don’t skimp on the soil! Good soil is the be-all and end-all for a bountiful harvest.
- Waterlogging: Avoid waterlogging, which is harmful to corn. Ensure good drainage.
- Too little fertilizer: Corn is a heavy feeder and needs regular applications of fertilizer.
- Neglecting pollination: Assist with pollination to ensure a good harvest.
Conclusion
Growing corn on concrete is a challenge, but with the right preparation and care, it is quite possible. I hope this guide helps you to create your own little cornfield on your balcony or terrace. Good luck and have fun gardening! Enjoy your meal!

Conclusion
So, there you have it! Growing corn on concrete might sound like an impossible feat, but with this simple DIY trick, you can enjoy fresh, homegrown corn even without a traditional garden. This method is a game-changer for urban dwellers, apartment residents, or anyone with limited space. It’s not just about the convenience; it’s about reclaiming control over your food source, reducing your carbon footprint, and experiencing the unparalleled satisfaction of harvesting your own sweet corn.
This DIY approach to growing corn on concrete is more than just a gardening hack; it’s a testament to human ingenuity and our ability to adapt and thrive in any environment. The beauty of this method lies in its simplicity and adaptability. You can easily customize the size of your containers to fit your available space, and you can experiment with different corn varieties to find your favorites.
Consider adding companion plants like beans or squash to your containers to create a mini-ecosystem that benefits all the plants. Beans fix nitrogen in the soil, which helps the corn grow, and squash provides ground cover that suppresses weeds and retains moisture. You could also try using different types of soil mixes to see which one yields the best results. Some gardeners swear by a mix of compost, peat moss, and perlite, while others prefer a more organic approach with worm castings and aged manure.
Don’t be afraid to experiment with different watering schedules and fertilization techniques. Observe your plants closely and adjust your care routine accordingly. Remember, every environment is unique, and what works for one gardener might not work for another. The key is to be patient, observant, and willing to learn from your mistakes.
We’ve shown you how to make the impossible possible. Now it’s your turn to get your hands dirty and experience the joy of growing your own corn on concrete. Imagine the look on your friends’ faces when you tell them you grew your own corn on your balcony or patio! It’s a conversation starter, a source of pride, and a delicious way to enjoy the fruits (or rather, the vegetables) of your labor.
We are confident that this DIY trick will revolutionize your gardening experience. It’s a cost-effective, space-saving, and incredibly rewarding way to grow your own food. So, gather your supplies, follow our instructions, and get ready to harvest your own delicious corn.
We encourage you to try this DIY trick and share your experience with us. Post photos of your corn plants on social media using the hashtag #ConcreteCorn and let us know what you learned along the way. We can’t wait to see your success stories and learn from your experiences. Together, we can inspire others to embrace urban gardening and discover the joy of growing their own food, no matter where they live. Happy growing!
Frequently Asked Questions (FAQ)
What kind of corn is best for growing in containers on concrete?
The best types of corn for container gardening are dwarf or shorter varieties. These varieties are bred to be more compact and require less space than traditional field corn. Some excellent choices include:
* ‘On Deck’ Corn: A super sweet variety that matures quickly and produces multiple ears per stalk.
* ‘Golden Bantam’ Corn: An heirloom variety known for its sweet flavor and early maturity.
* ‘Trinity’ Corn: A hybrid variety that is disease-resistant and produces high yields.
* ‘Tom Thumb’ Corn: An ultra-dwarf variety that is perfect for small containers.
When selecting your corn variety, consider your local climate and growing season. Choose varieties that are well-suited to your region and that have a relatively short maturity time.
How much sunlight does corn need when grown on concrete?
Corn requires at least 6-8 hours of direct sunlight per day to thrive. When growing corn on concrete, it’s crucial to choose a location that receives ample sunlight. South-facing balconies or patios are ideal, as they typically receive the most sunlight throughout the day.
If you don’t have a location that receives full sun, you can supplement with grow lights. Position the grow lights close to the plants and ensure they provide a broad spectrum of light.
What size container is needed for growing corn on concrete?
The size of the container is crucial for successful corn cultivation. Corn plants have extensive root systems and require ample space to grow. A minimum of 10-15 gallons per plant is recommended. Larger containers are always better, as they provide more room for root growth and help retain moisture.
Consider using large plastic tubs, half whiskey barrels, or even repurposed trash cans as containers. Make sure the containers have drainage holes to prevent waterlogging.
What type of soil is best for growing corn on concrete?
Corn requires well-draining, nutrient-rich soil. A good potting mix for corn should contain a blend of:
* Compost: Provides essential nutrients and improves soil structure.
* Peat Moss or Coco Coir: Helps retain moisture and provides aeration.
* Perlite or Vermiculite: Improves drainage and prevents soil compaction.
* Slow-Release Fertilizer: Provides a steady supply of nutrients throughout the growing season.
Avoid using garden soil in containers, as it can become compacted and poorly drained.
How often should I water corn grown on concrete?
Corn plants require consistent moisture, especially during hot weather. Water your corn plants deeply whenever the top inch of soil feels dry to the touch. This may mean watering daily or even twice a day during the hottest periods.
Be sure to water at the base of the plants to avoid wetting the foliage, which can lead to fungal diseases. Consider using a soaker hose or drip irrigation system to provide a slow, steady supply of water.
How do I pollinate corn grown on concrete?
Corn is wind-pollinated, meaning that pollen from the tassels (male flowers) must be transferred to the silks (female flowers) by the wind. When growing corn in containers, you may need to hand-pollinate to ensure proper pollination.
To hand-pollinate, gently shake the tassels over the silks to release the pollen. You can also collect pollen from the tassels with a small brush and apply it directly to the silks. Repeat this process every day for several days to ensure that all the silks are pollinated.
How do I fertilize corn grown on concrete?
Corn is a heavy feeder and requires regular fertilization to produce a good harvest. Start with a slow-release fertilizer at planting time and then supplement with a liquid fertilizer every 2-3 weeks throughout the growing season.
Choose a fertilizer that is high in nitrogen, phosphorus, and potassium. You can also add compost tea or fish emulsion to provide additional nutrients.
What are some common pests and diseases that affect corn grown on concrete?
Some common pests that can affect corn include aphids, corn earworms, and spider mites. Diseases that can affect corn include rust, smut, and leaf blight.
To prevent pests and diseases, keep your plants healthy and well-watered. Inspect your plants regularly for signs of infestation or disease and take action promptly. You can use organic pesticides or fungicides to control pests and diseases.
How do I know when my corn is ready to harvest when grown on concrete?
Corn is typically ready to harvest about 20-25 days after the silks emerge. The silks will turn brown and dry, and the kernels will be plump and milky.
To test for ripeness, peel back a portion of the husk and puncture a kernel with your fingernail. If the liquid that comes out is milky, the corn is ready to harvest. If the liquid is clear, the corn needs more time to mature.
Can I grow other vegetables with corn in the same container on concrete?
Yes, you can practice companion planting with corn. Good companion plants for corn include beans, squash, and cucumbers. Beans fix nitrogen in the soil, which benefits the corn. Squash provides ground cover that suppresses weeds and retains moisture. Cucumbers can climb up the corn stalks, providing support and shade.
Avoid planting tomatoes or peppers near corn, as they can compete for nutrients and attract pests.
Leave a Comment