
Growing gourds indoors might sound like a whimsical dream, conjuring images of sprawling vines taking over your living room. But trust me, it’s more achievable (and less chaotic!) than you think. For centuries, gourds have held a special place in cultures around the world, used for everything from practical containers to beautiful works of art. Think of the intricate carvings of calabash gourds in Africa or the vibrant painted gourds of Latin America – these aren’t just plants; they’re living canvases!
Now, you might be wondering, “Why would I want to grow gourds indoors?” Well, maybe you live in an area with a short growing season, or perhaps you simply want to get a head start on your gourd crafts. Whatever your reason, I’m here to tell you that growing gourds indoors is a rewarding experience that brings a touch of nature and creativity into your home. This DIY guide will walk you through the entire process, from selecting the right varieties to providing the perfect growing conditions. Get ready to unleash your inner gardener and create some truly unique and beautiful gourds, all from the comfort of your own home!
Growing Gourds Indoors: A Comprehensive DIY Guide
Hey there, fellow gardening enthusiasts! Have you ever looked at those whimsical, oddly shaped gourds in the fall and thought, “I want to grow those!”? Well, guess what? You absolutely can, and you don’t even need a sprawling outdoor garden. I’m going to walk you through the process of growing gourds indoors, from seed to (hopefully!) spectacular harvest. It might seem daunting, but trust me, with a little patience and the right setup, you’ll be showing off your homegrown gourds in no time.
Understanding the Challenge: Why Indoors?
Growing gourds indoors presents a unique set of challenges compared to growing them outdoors. Gourds are naturally sprawling vines that love sunshine and plenty of space. Indoors, we need to mimic these conditions as closely as possible. This means:
* Light: Gourds need a LOT of light, much more than your average houseplant.
* Space: Even though we’re growing them indoors, they still need room to vine.
* Pollination: Gourds are not self-pollinating, so we’ll need to play bee!
* Support: Those gourds get heavy, so we need a strong support system.
Don’t let this scare you! We’ll tackle each of these challenges step-by-step.
Materials You’ll Need
Before we dive in, let’s gather our supplies. Here’s what you’ll need to successfully grow gourds indoors:
* Gourd Seeds: Choose a variety that’s suitable for smaller spaces. Smaller ornamental gourds are a great choice for beginners. Birdhouse gourds can also be grown indoors, but require more space.
* Seed Starting Tray and Dome: For germinating your seeds.
* Seed Starting Mix: A light, well-draining mix is essential.
* Larger Pots (5-10 gallon): One for each gourd plant.
* Potting Soil: A good quality potting mix amended with compost.
* Grow Lights: Full-spectrum LED grow lights are ideal.
* Timer: To automate your grow lights.
* Trellis or Support System: A sturdy trellis, tomato cage, or even a DIY support structure.
* Small Paintbrush or Cotton Swab: For hand-pollinating.
* Liquid Fertilizer: A balanced fertilizer for the vegetative stage and a bloom-boosting fertilizer for flowering.
* Spray Bottle: For misting seedlings and controlling humidity.
* Pruning Shears: For trimming and shaping the vines.
* Gloves: To protect your hands.
Step-by-Step Instructions: From Seed to Sprout
Okay, let’s get our hands dirty!
1. Soaking the Seeds: Gourd seeds have a tough outer shell. To improve germination, soak them in warm water for 24-48 hours before planting. This softens the shell and helps the seedlings emerge more easily. I usually put them in a small bowl and cover them with water.
2. Planting the Seeds: Fill your seed starting tray with seed starting mix. Make a small indentation (about 1/2 inch deep) in each cell and place one seed in each indentation. Cover the seeds lightly with the mix and gently water the tray.
3. Creating a Humid Environment: Place the dome on the seed starting tray. This will create a humid environment that’s perfect for germination. Place the tray in a warm location (around 70-75°F).
4. Monitoring and Watering: Check the tray daily. Keep the seed starting mix moist, but not soggy. You can use a spray bottle to mist the soil. Once the seedlings emerge (usually within 7-14 days), remove the dome.
Transplanting and Setting Up Your Indoor Garden
Once your seedlings have developed a few sets of true leaves (the leaves that look like miniature versions of the adult leaves), it’s time to transplant them into larger pots.
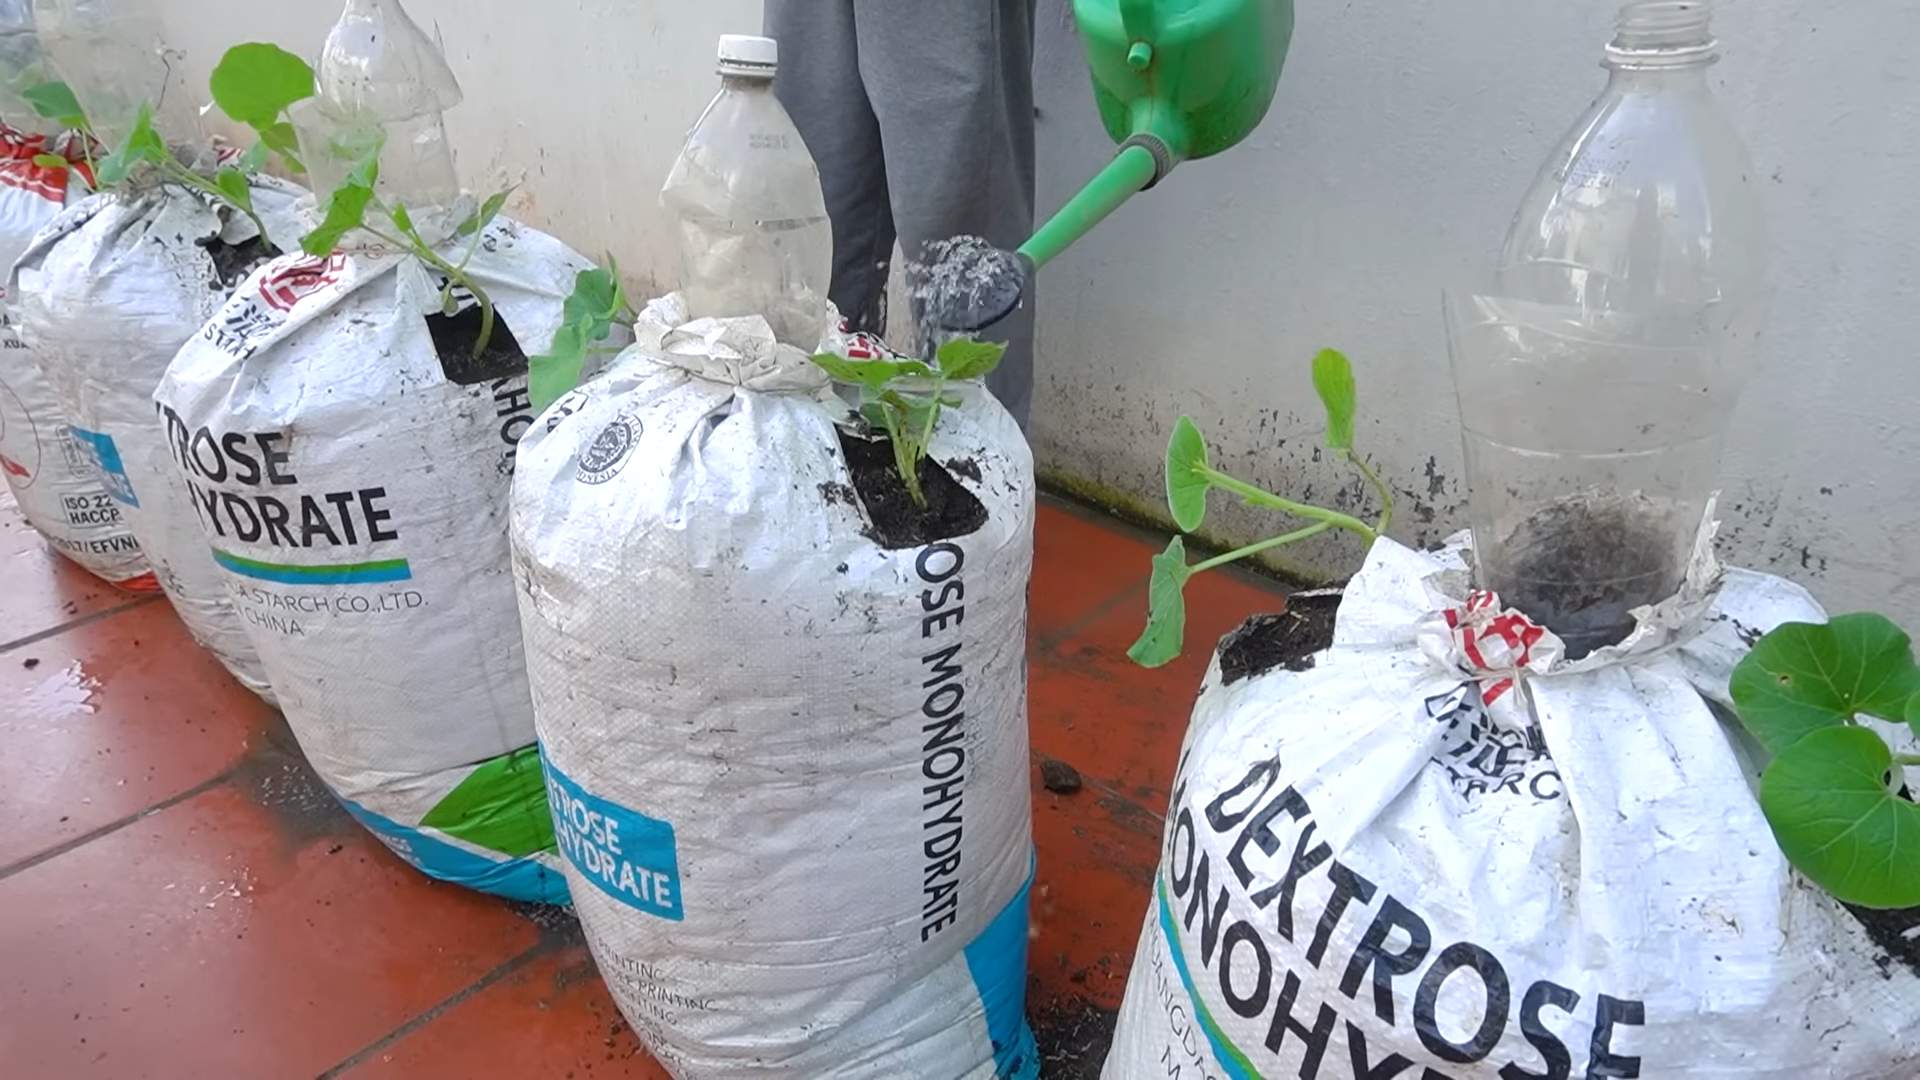
1. Preparing the Pots: Fill your 5-10 gallon pots with a mixture of potting soil and compost. Make sure the pots have drainage holes.
2. Transplanting the Seedlings: Gently remove the seedlings from the seed starting tray. Be careful not to damage the roots. Dig a hole in the center of each pot and place the seedling in the hole. Cover the roots with soil and gently pat down.
3. Setting Up the Grow Lights: Position your grow lights above the pots. The distance between the lights and the plants will depend on the type of lights you’re using. Follow the manufacturer’s instructions. I usually start with the lights about 6-12 inches above the seedlings and adjust as they grow.
4. Setting the Timer: Set your timer to provide your gourd plants with 14-16 hours of light per day. This will mimic the long days of summer and encourage healthy growth.
5. Watering and Fertilizing: Water your gourd plants regularly, keeping the soil moist but not waterlogged. Fertilize them every 2-3 weeks with a balanced liquid fertilizer.
Training and Supporting Your Vines
Gourd vines are vigorous growers and need a strong support system.
1. Installing the Trellis: Install your trellis or support system behind the pots. Make sure it’s sturdy enough to support the weight of the vines and the gourds.
2. Training the Vines: As the vines grow, gently train them to climb the trellis. You can use plant ties or clips to secure them.
3. Pruning the Vines: Pruning is essential for controlling the size of your gourd plants and encouraging fruit production. Remove any suckers (small shoots that grow from the base of the plant) and trim back the vines as needed. I usually prune the vines to keep them from getting too crowded.
Hand-Pollinating Your Gourds
Since we don’t have bees buzzing around indoors, we need to hand-pollinate our gourds.
1. Identifying Male and Female Flowers: Gourd plants produce both male and female flowers. Male flowers have a long, thin stem, while female flowers have a small, immature gourd at the base of the flower.
2. Pollinating the Flowers: In the morning, when the flowers are open, use a small paintbrush or cotton swab to collect pollen from the male flowers. Gently transfer the pollen to the stigma (the sticky part in the center) of the female flowers.
3. Marking Pollinated Flowers: Mark the pollinated flowers with a piece of ribbon or tape. This will help you keep track of which flowers have been pollinated.
4. Repeating the Process: Repeat the hand-pollination process every day until you see the gourds starting to develop.
Caring for Developing Gourds
Once the gourds start to develop, it’s important to provide them with the right care.
1. Supporting the Gourds: As the gourds grow larger, they may need additional support. You can use slings made from fabric or netting to support the gourds and prevent them from breaking off the vine.
2. Fertilizing for Fruit Production: Switch to a bloom-boosting fertilizer to encourage fruit production.
3. Monitoring for Pests and Diseases: Keep an eye out for pests and diseases. Common pests include aphids, spider mites, and squash bugs. Common diseases include powdery mildew and fungal infections. Treat any problems promptly with organic pest control methods or fungicides.
Harvesting and Curing Your Gourds
The final step is harvesting and curing your gourds.
1. Harvesting the Gourds: Harvest the gourds when the stems have dried and turned brown. Use pruning shears to cut the gourds from the vine, leaving a few inches of stem attached.
2. Cleaning the Gourds: Gently wash the gourds with soap and water to remove any dirt or debris.
3. Curing the Gourds: Place the gourds in a well-ventilated area to cure. This will help them dry out and prevent them from rotting. The curing process can take several weeks or even months. Turn the gourds regularly to ensure even drying.
4. Knowing When They’re Ready: The gourds are fully cured when they are hard and lightweight. You should be able to shake them and hear the seeds rattling inside.
Troubleshooting Common Problems
Even with the best care, you may encounter some problems along the way. Here are some common issues and how to address them:
* Poor Germination: Make sure your seeds are fresh and that you’re providing them with the right temperature and moisture.
* Leggy Seedlings: Leggy seedlings are a sign that they’re not getting enough light. Move your grow lights closer to the seedlings.
* Yellowing Leaves: Yellowing leaves can be caused by overwatering, underwatering, or nutrient deficiencies. Adjust your watering schedule and fertilize
Conclusion
So, there you have it! Growing gourds indoors might seem like a whimsical dream, but with a little planning and dedication, it’s entirely achievable. We’ve walked you through the essential steps, from selecting the right varieties and providing adequate light to ensuring proper pollination and managing those sprawling vines. But why should you even bother embarking on this gourd-growing adventure within the confines of your home?
The answer is simple: control and creativity. By growing gourds indoors, you gain complete control over their environment, shielding them from unpredictable weather, pests, and diseases that can plague outdoor gardens. This control translates to healthier, more vibrant gourds, ready to be transformed into stunning works of art or charming autumnal decorations.
Beyond the practical benefits, growing gourds indoors offers a unique creative outlet. Imagine the satisfaction of nurturing these fascinating plants from seed to harvest, then using your own homegrown gourds to craft personalized birdhouses, decorative bowls, or even musical instruments. The possibilities are truly endless!
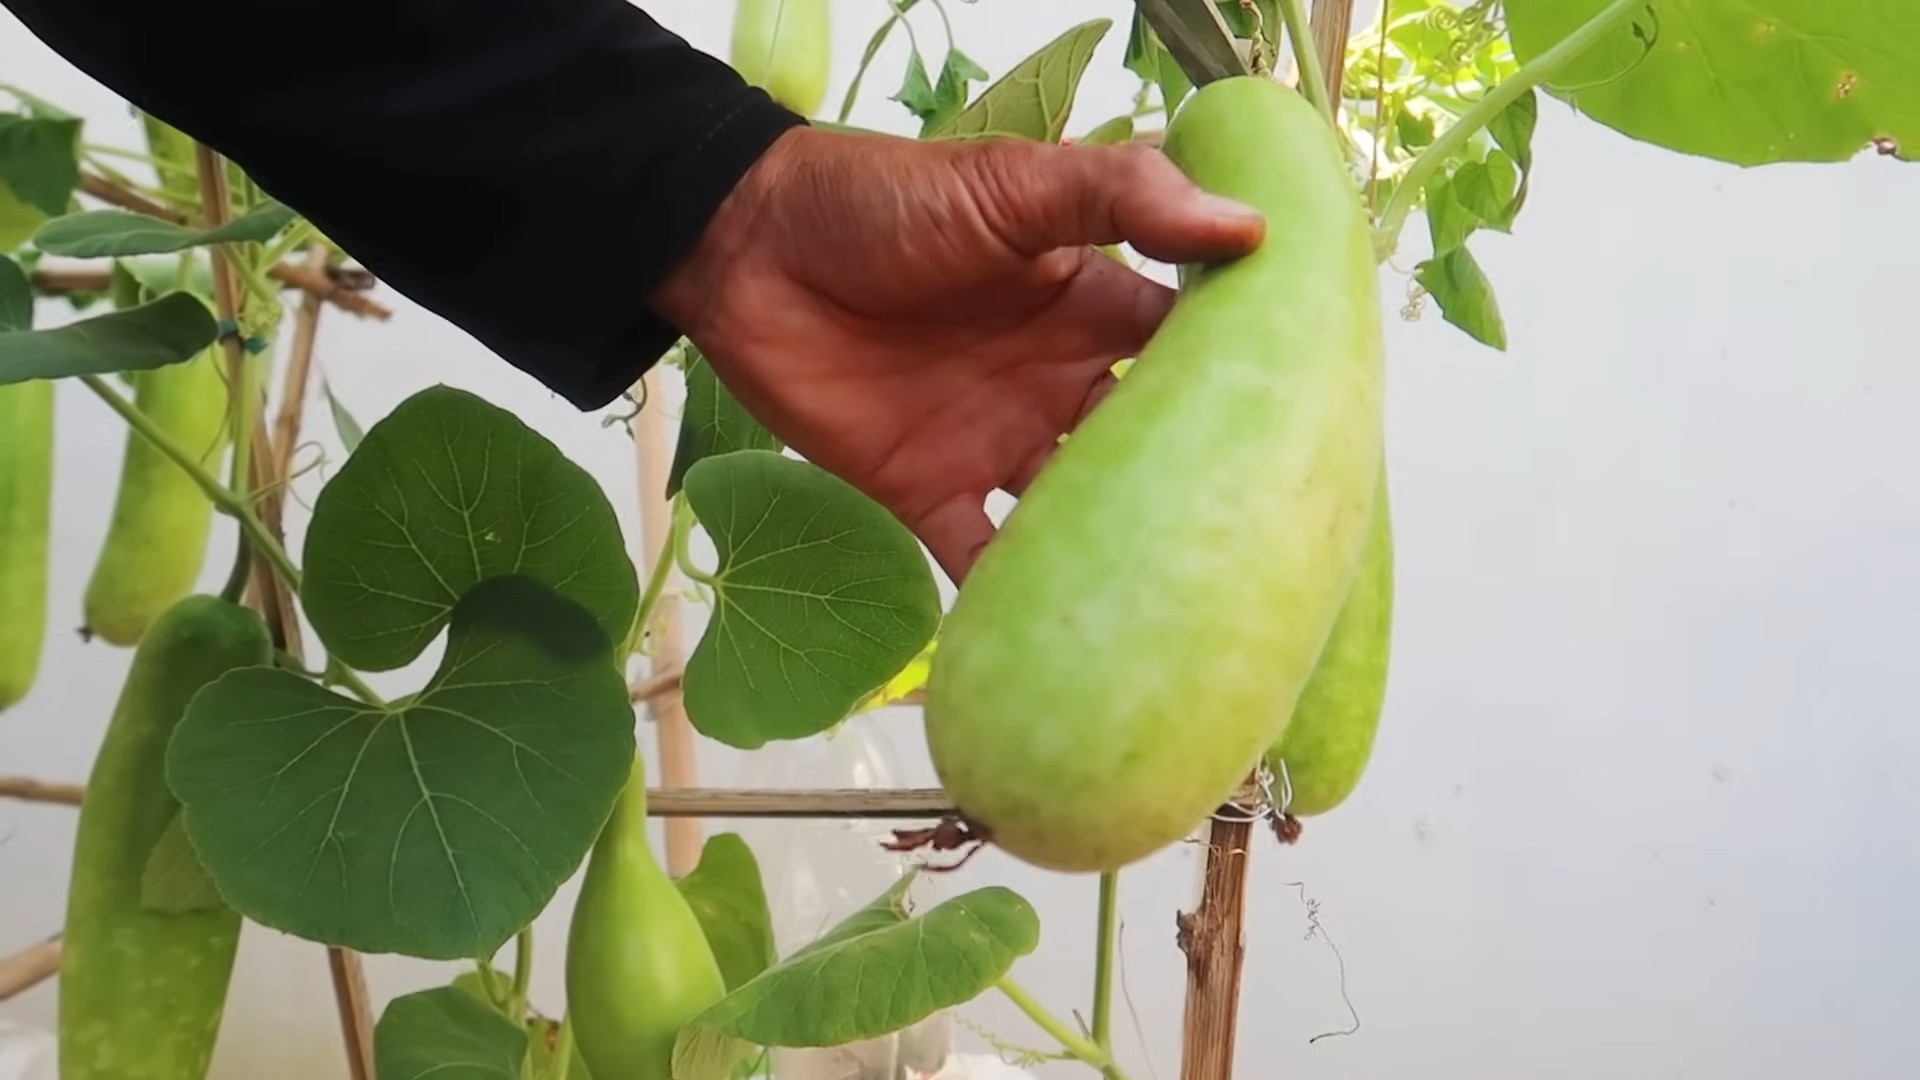
Don’t be afraid to experiment with different gourd varieties to find your favorites. Bottle gourds, with their smooth, elongated shapes, are perfect for crafting dippers and containers. Apple gourds, with their round, apple-like appearance, add a touch of whimsy to any display. And snake gourds, with their long, serpentine forms, are sure to spark conversation.
Consider variations in your growing setup as well. Try using different types of grow lights to see which ones produce the best results. Experiment with different potting mixes to find the perfect balance of drainage and moisture retention. And don’t hesitate to get creative with your trellising system, using repurposed materials or DIY designs to support your growing vines.
Growing gourds indoors is more than just a gardening project; it’s an opportunity to connect with nature, unleash your creativity, and add a touch of rustic charm to your home. It’s a rewarding experience that allows you to witness the magic of plant growth firsthand, all while enjoying the fruits (or rather, gourds) of your labor.
We encourage you to take the plunge and try growing gourds indoors. Start small, be patient, and don’t be afraid to learn from your mistakes. The journey is just as rewarding as the destination. And most importantly, share your experiences with us! We’d love to hear about your successes, your challenges, and the creative ways you’re using your homegrown gourds. Post pictures of your indoor gourd gardens, share your tips and tricks, and inspire others to embark on their own gourd-growing adventures. Let’s create a community of indoor gourd enthusiasts and celebrate the beauty and versatility of these amazing plants. So, grab some seeds, prepare your pots, and get ready to experience the joy of growing gourds indoors!
Frequently Asked Questions (FAQ)
What are the best gourd varieties to grow indoors?
Choosing the right gourd variety is crucial for indoor success. Smaller varieties like ornamental gourds (mini pumpkins, warty gourds) and bottle gourds tend to thrive better in limited spaces. Avoid extremely large varieties like giant pumpkins, as they require extensive space and resources. Consider bush varieties if space is a major constraint, although vining types are generally more productive. Look for varieties specifically labeled as “compact” or “bush” for the best results. Also, consider the purpose of your gourds. If you plan on crafting birdhouses, bottle gourds are ideal. For decorative purposes, a mix of ornamental gourds adds visual interest.
How much light do indoor gourds need?
Light is a critical factor for successful indoor gourd cultivation. Gourds are sun-loving plants and require at least 6-8 hours of direct sunlight per day. If you don’t have access to a sunny window, you’ll need to supplement with grow lights. Full-spectrum LED grow lights are an excellent choice, as they provide the necessary wavelengths for healthy plant growth. Position the lights close to the plants (around 6-12 inches) and adjust the height as the plants grow. Monitor your plants closely for signs of insufficient light, such as leggy growth or pale leaves. If you notice these symptoms, increase the intensity or duration of the light.
How do I pollinate gourds indoors?
Since you won’t have bees or other pollinators indoors, you’ll need to hand-pollinate your gourds. Gourds have separate male and female flowers. The male flowers typically appear first and have a long, slender stem. The female flowers have a small, immature gourd at the base. To hand-pollinate, use a small paintbrush or cotton swab to collect pollen from the male flower and transfer it to the stigma of the female flower. It’s best to do this in the morning, when the pollen is most viable. You can also gently remove a male flower and directly rub the pollen-covered stamen onto the female flower’s stigma. Repeat the process for all female flowers that are open. Successful pollination will result in the gourd starting to grow larger.
What kind of soil is best for growing gourds indoors?
Gourds need well-draining soil that is rich in organic matter. A good potting mix for gourds should consist of a combination of peat moss, perlite, and vermiculite. You can also add compost or aged manure to improve fertility and drainage. Avoid using garden soil, as it can be too heavy and may contain pests or diseases. Ensure your pots have drainage holes to prevent waterlogging, which can lead to root rot. A slightly acidic to neutral pH (around 6.0-7.0) is ideal for gourd growth.
How often should I water my indoor gourds?
Watering frequency depends on several factors, including the size of your pots, the type of soil, and the temperature and humidity of your environment. Generally, you should water your gourds when the top inch of soil feels dry to the touch. Water deeply, until water drains out of the drainage holes. Avoid overwatering, as this can lead to root rot. During hot, dry weather, you may need to water more frequently. During cooler, cloudy weather, you may need to water less frequently. Monitor your plants closely and adjust your watering schedule accordingly.
How do I fertilize my indoor gourds?
Gourds are heavy feeders and require regular fertilization to thrive. Start fertilizing your plants a few weeks after they emerge, using a balanced liquid fertilizer (e.g., 10-10-10) diluted to half strength. Once the plants start flowering, switch to a fertilizer that is higher in phosphorus and potassium (e.g., 5-10-10) to promote fruit development. Fertilize every 2-3 weeks, following the instructions on the fertilizer label. Avoid over-fertilizing, as this can burn the roots. You can also supplement with organic fertilizers, such as compost tea or fish emulsion.
How do I manage pests and diseases on indoor gourds?
While indoor gourds are less susceptible to pests and diseases than outdoor plants, they can still be affected. Common pests include aphids, spider mites, and whiteflies. To prevent infestations, inspect your plants regularly and remove any pests you find. You can also use insecticidal soap or neem oil to control pests. Common diseases include powdery mildew and fungal leaf spots. To prevent diseases, provide good air circulation, avoid overwatering, and remove any infected leaves. You can also use a fungicide to control diseases.
How do I train and support my indoor gourd vines?
Gourd vines can grow quite long and need to be trained and supported to prevent them from sprawling all over your house. Provide a sturdy trellis or other support structure for the vines to climb on. You can also use string or twine to tie the vines to the support. Prune the vines regularly to encourage branching and fruit production. Remove any dead or yellowing leaves. Pinch off the tips of the vines to control their growth.
When are my indoor gourds ready to harvest?
The time it takes for gourds to mature depends on the variety and growing conditions. Generally, gourds are ready to harvest when the stems start to dry out and turn brown. The skin of the gourd should be hard and resistant to scratching. Cut the gourds from the vine, leaving a few inches of stem attached. Cure the gourds in a warm, dry place for several weeks to allow them to harden and dry out completely. This will help prevent them from rotting.
Can I save seeds from my indoor gourds?
Yes, you can save seeds from your indoor gourds, but keep in mind that gourds are prone to cross-pollination, so the seeds may not produce plants that are true to type. To save seeds, allow the gourds to mature fully on the vine. Once the gourds are dry, cut them open and remove the seeds. Wash the seeds and dry them thoroughly. Store the seeds in an airtight container in a cool, dry place.


Leave a Comment