
Growing habanero peppers from seed can seem daunting, but trust me, it’s an incredibly rewarding experience! Imagine biting into a dish seasoned with peppers you nurtured from tiny seeds – the flavor is simply unmatched. For centuries, peppers, including the fiery habanero, have been cultivated and cherished across cultures, adding zest and vibrancy to cuisines worldwide. From their origins in South America to their global popularity today, peppers hold a special place in culinary history.
But why should you embark on this spicy adventure? Well, store-bought habaneros can be expensive and sometimes lack the intense flavor you crave. Plus, growing habanero peppers from seed allows you to control every aspect of their growth, ensuring you get the healthiest, most flavorful peppers possible. This DIY guide will walk you through each step, from selecting the right seeds to harvesting your bountiful crop. I’ll share my favorite tricks and hacks that I’ve learned over the years, making the process easier and more successful, even if you’re a complete beginner. Get ready to unleash your inner gardener and spice up your life!
Growing Habanero Peppers From Seed: A Fiery DIY Adventure!
Hey there, fellow chili enthusiasts! Ready to embark on a journey to cultivate your own supply of scorching habanero peppers? Growing these fiery fruits from seed can seem daunting, but trust me, with a little patience and the right guidance, you’ll be harvesting a bumper crop of heat in no time. I’ve been growing habaneros for years, and I’m excited to share my tried-and-true methods with you. Let’s get started!
What You’ll Need
Before we dive in, let’s gather our supplies. Here’s a checklist of everything you’ll need to successfully grow habaneros from seed:
* Habanero Pepper Seeds: Obviously! Choose a reputable seed supplier for the best germination rates. I personally prefer organic seeds whenever possible.
* Seed Starting Trays or Small Pots: These will be your seedlings’ first homes. Make sure they have drainage holes!
* Seed Starting Mix: This is a light, sterile soil mix specifically designed for seedlings. Don’t use garden soil – it’s too heavy and can harbor diseases.
* Spray Bottle: For gently watering your seedlings.
* Heat Mat (Optional but Recommended): Habaneros love warmth, and a heat mat will significantly improve germination rates.
* Grow Light (Optional but Recommended): If you don’t have a sunny windowsill, a grow light will provide the necessary light for healthy seedling development.
* Small Fan (Optional): Gentle air circulation helps prevent fungal diseases.
* Plant Labels and a Permanent Marker: To keep track of your different varieties (if you’re growing more than one).
* Small Pots (3-4 inch): For transplanting your seedlings once they’ve grown a bit.
* Potting Mix: A richer soil mix for transplanting into larger pots.
* Gardening Gloves: To keep your hands clean.
* Watering Can or Hose: For watering your plants once they’re outdoors.
* Fertilizer: A balanced fertilizer for feeding your plants. I prefer organic options like fish emulsion or seaweed extract.
Phase 1: Seed Starting (Indoor Germination)
Habaneros have a long growing season, so starting them indoors early is crucial, especially if you live in a cooler climate. I usually start my seeds about 8-10 weeks before the last expected frost.
1. Prepare Your Seed Starting Trays: Fill your seed starting trays or small pots with seed starting mix. Gently tap the trays to settle the soil.
2. Sow the Seeds: Make a small indentation (about 1/4 inch deep) in the soil of each cell or pot. Place one or two habanero seeds in each indentation. I usually plant two seeds per cell just in case one doesn’t germinate.
3. Cover the Seeds: Gently cover the seeds with a thin layer of seed starting mix.
4. Water Thoroughly: Use your spray bottle to thoroughly moisten the soil. Be careful not to overwater – you want the soil to be damp, not soggy.
5. Provide Warmth: Place your seed starting trays on a heat mat. Habaneros germinate best at temperatures between 80-90°F (27-32°C).
6. Maintain Moisture: Cover the seed starting trays with a humidity dome or plastic wrap to help retain moisture. Check the soil daily and mist with water as needed to keep it consistently damp.
7. Provide Light: If you’re using a grow light, position it a few inches above the seed starting trays. If you’re using a windowsill, choose a south-facing window that receives plenty of sunlight.
8. Be Patient: Habanero seeds can take anywhere from 7 to 21 days to germinate, so don’t get discouraged if you don’t see sprouts right away.
9. Remove Humidity Dome: Once the seedlings emerge, remove the humidity dome or plastic wrap to prevent fungal diseases.
10. Provide Air Circulation: If you’re using a grow light, place a small fan nearby to provide gentle air circulation. This will help prevent damping-off, a common fungal disease that can kill seedlings.
Phase 2: Seedling Care
Once your seedlings have emerged, it’s time to focus on providing them with the care they need to grow strong and healthy.
1. Watering: Water your seedlings regularly, but be careful not to overwater. Allow the top inch of soil to dry out between waterings.
2. Lighting: Continue to provide your seedlings with plenty of light. If you’re using a grow light, adjust the height as the seedlings grow to keep it a few inches above the foliage.
3. Fertilizing: Once your seedlings have developed their first set of true leaves (the leaves that look like miniature pepper leaves), start fertilizing them with a diluted solution of balanced fertilizer. I usually use a quarter-strength solution of fish emulsion or seaweed extract.
4. Thinning (If Necessary): If you planted two seeds per cell and both germinated, thin out the weaker seedling by snipping it off at the soil line with scissors. This will give the remaining seedling more room to grow.
5. Hardening Off: About a week or two before you plan to transplant your seedlings outdoors, you’ll need to “harden them off.” This process gradually acclimates the seedlings to outdoor conditions, preventing them from getting shocked when they’re transplanted. Start by placing your seedlings outdoors in a sheltered location for an hour or two each day, gradually increasing the amount of time they spend outdoors each day. Also, gradually expose them to more sunlight each day.
Phase 3: Transplanting and Outdoor Care
Now for the exciting part – moving your habanero plants to their permanent home!
1. Choose a Sunny Location: Habaneros need at least 6-8 hours of sunlight per day to thrive. Choose a location in your garden that receives plenty of sun.
2. Prepare the Soil: Habaneros prefer well-drained soil that is rich in organic matter. Amend your soil with compost or well-rotted manure before planting.
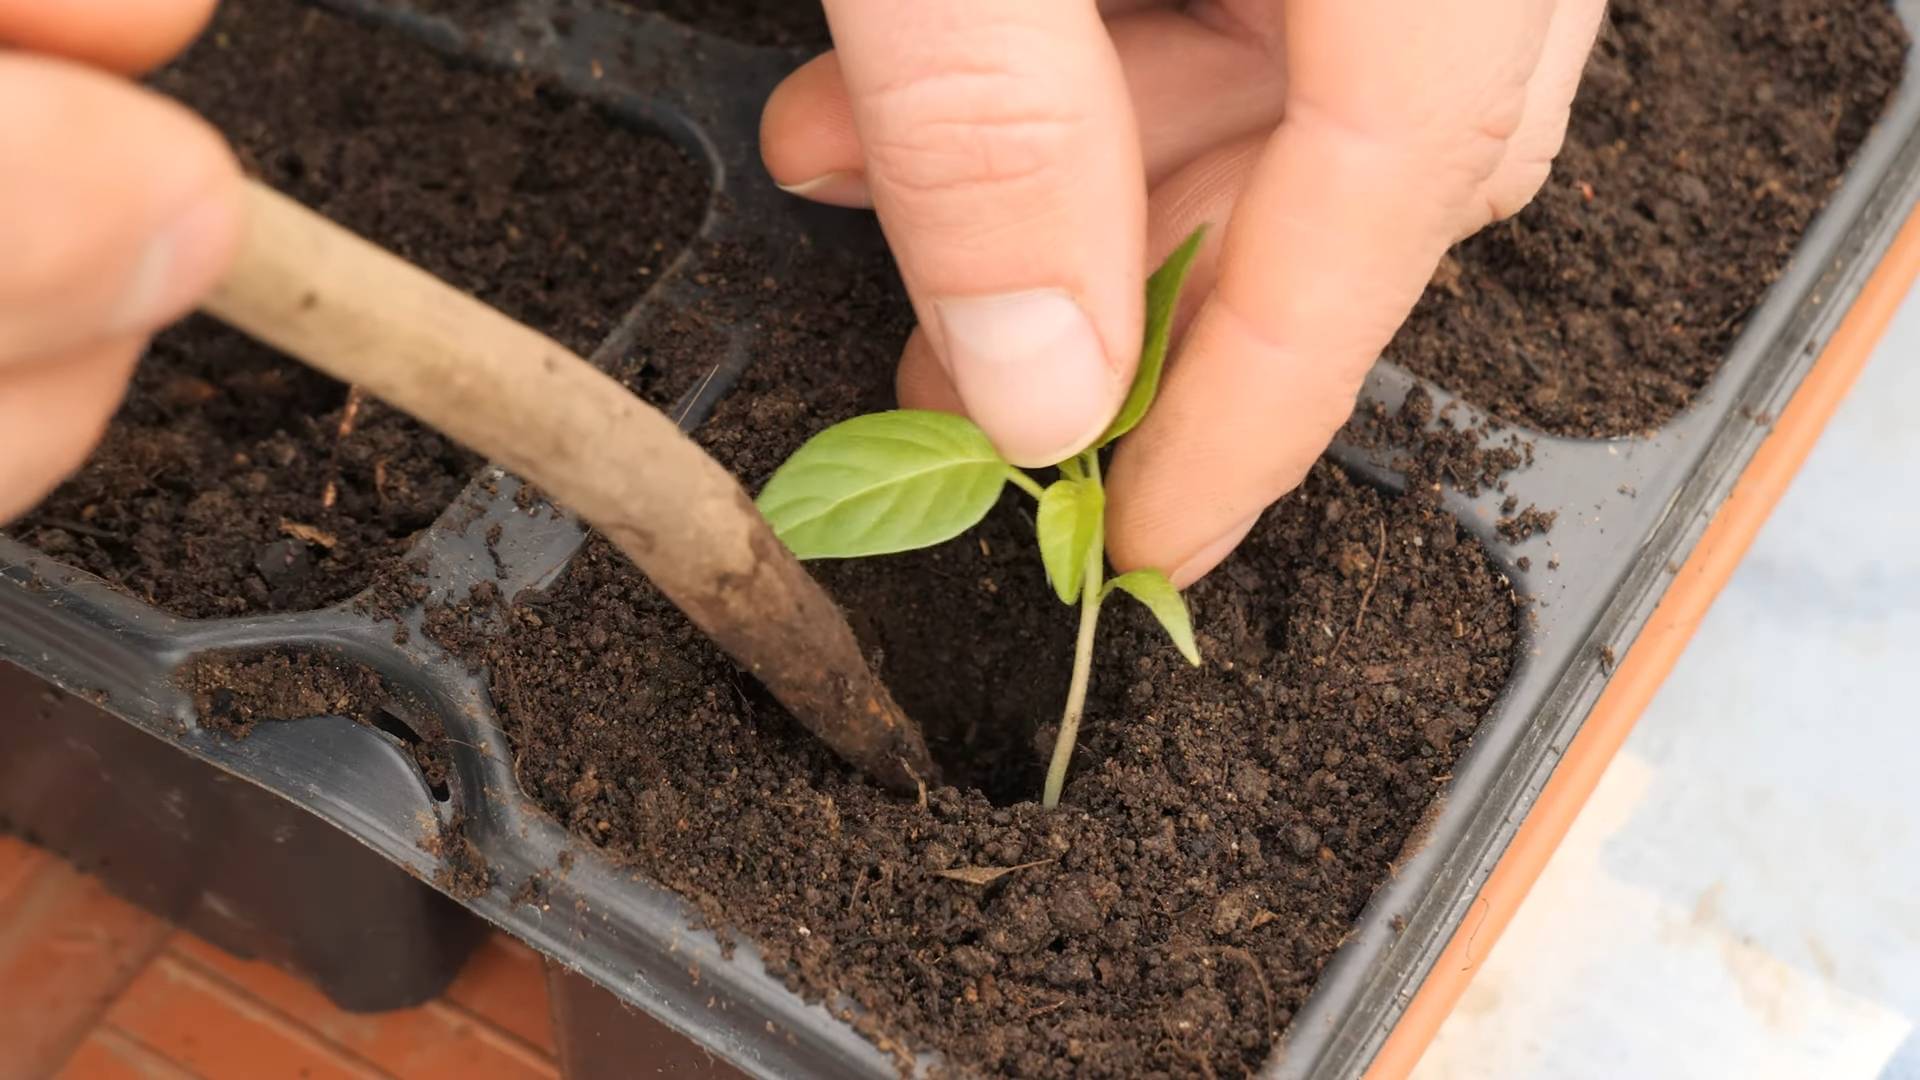
3. Transplant the Seedlings: Gently remove the seedlings from their pots or trays. Be careful not to damage the roots. Dig a hole in the soil that is slightly larger than the root ball. Place the seedling in the hole and backfill with soil. Water thoroughly.
4. Space the Plants: Space your habanero plants about 18-24 inches apart.
5. Watering: Water your plants regularly, especially during hot, dry weather. Allow the top inch of soil to dry out between waterings.
6. Fertilizing: Fertilize your plants every 2-3 weeks with a balanced fertilizer.
7. Support: As your habanero plants grow, they may need support to prevent them from falling over. You can use stakes or cages to support the plants.
8. Pest Control: Keep an eye out for pests such as aphids, spider mites, and whiteflies. Treat infestations promptly with insecticidal soap or neem oil.
9. Weed Control: Keep the area around your plants free of weeds. Weeds compete with your plants for nutrients and water.
Phase 4: Harvesting and Enjoying Your Fiery Bounty!
The moment you’ve been waiting for! Harvesting your own homegrown habaneros is incredibly rewarding.
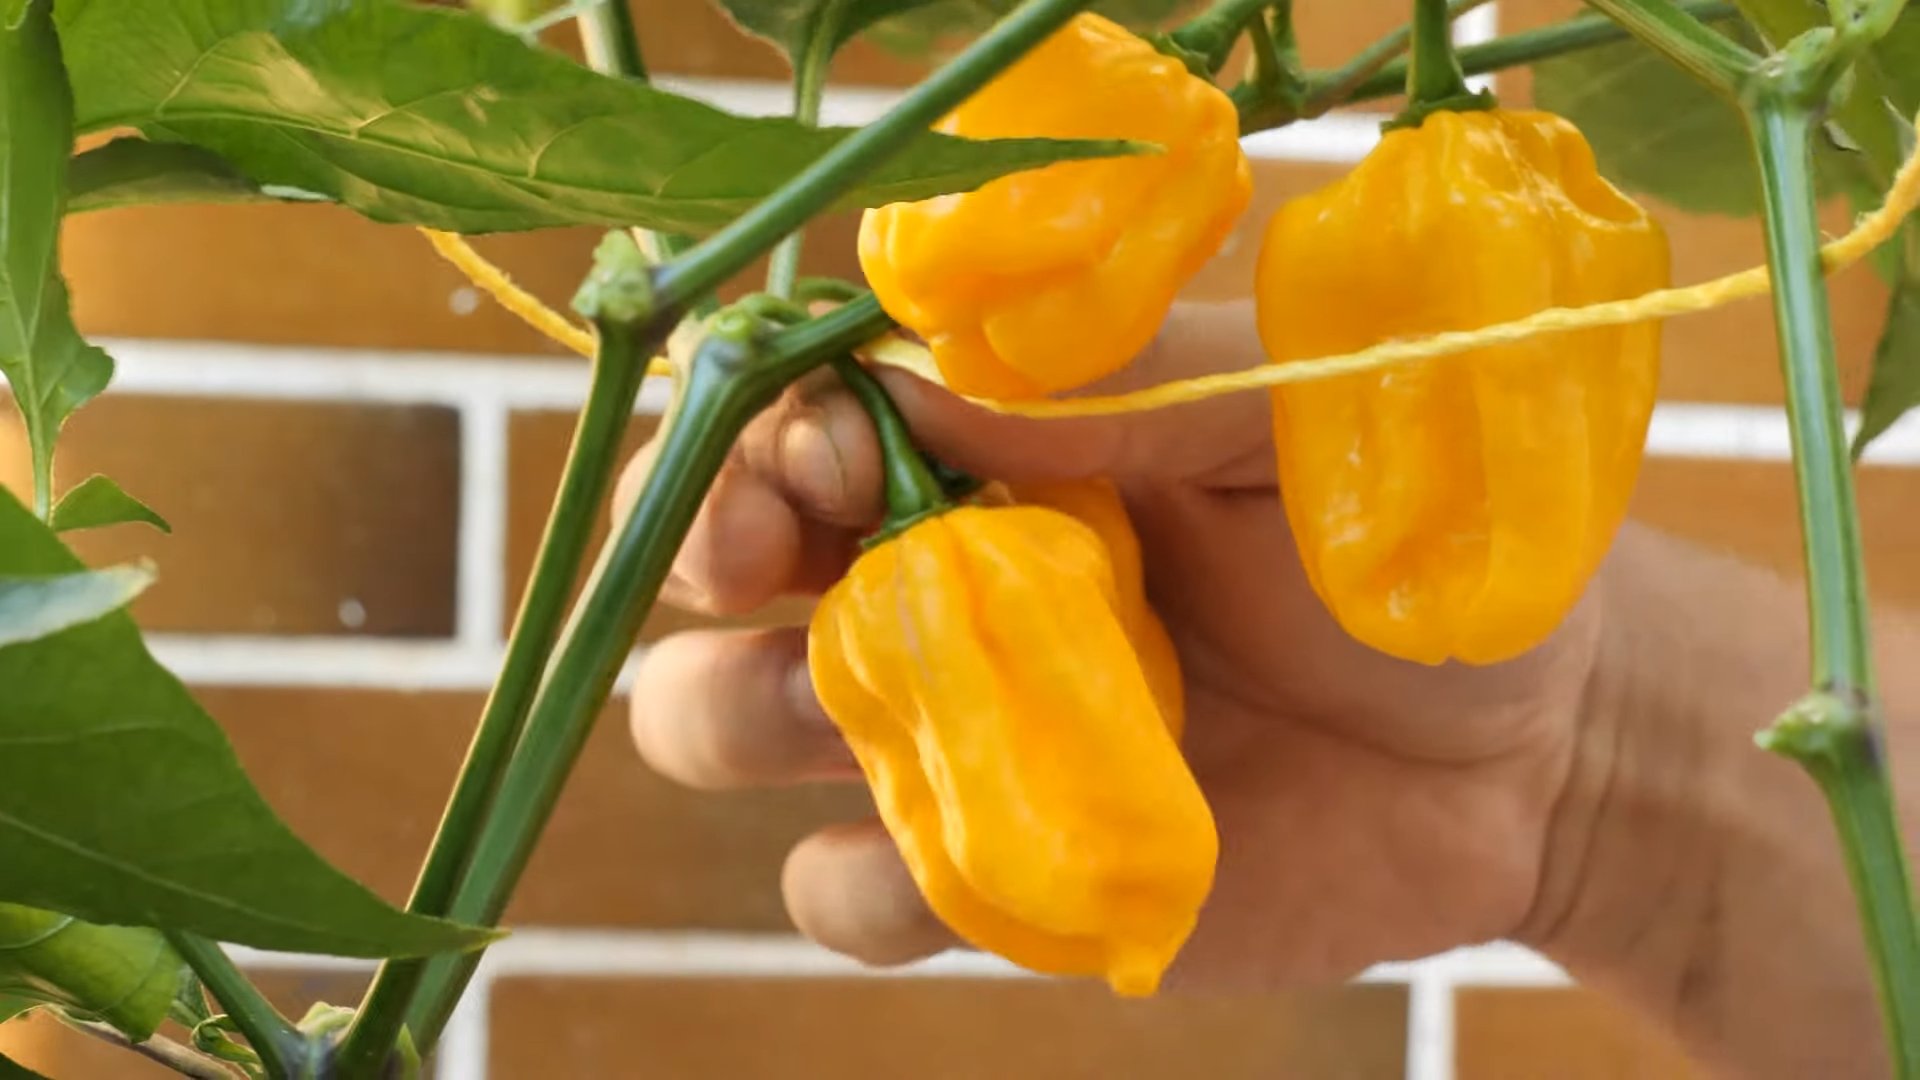
1. Harvesting: Habaneros are typically ready to harvest about 80-100 days after transplanting. The peppers will turn from green to orange or red when they are ripe. Use scissors or pruning shears to cut the peppers from the plant.
2. Handling with Care: Remember, habaneros are extremely hot! Wear gloves when handling them to avoid burning your skin. Avoid touching your eyes or face after handling habaneros.
3. Storage: You can store habaneros in the refrigerator for several weeks. You can also dry them, freeze them, or pickle them.
4. Enjoying Your Harvest: Now comes the fun part! Use your habaneros to add a fiery kick to your favorite dishes. Be careful not to overdo it – a little goes a long way! I love using them in salsas, hot sauces, and chili.
And there you have it! You’ve successfully grown habanero peppers from seed. With a little care and attention, you’ll be enjoying a bountiful harvest of these fiery fruits for months to come. Happy growing!
Conclusion
So, there you have it! Growing habanero peppers from seed might seem daunting at first, but with a little patience and the right approach, you can cultivate your own fiery harvest. This DIY trick, from seed selection to hardening off, is a must-try for any chili enthusiast looking to control the entire process and enjoy the unparalleled satisfaction of nurturing these potent peppers from the very beginning. Imagine the bragging rights when you tell your friends those scorching habaneros in your salsa were grown from seed, right in your own home!
But the journey doesn’t end with the basic method. Feel free to experiment! Try different seed starting mediums, like coco coir or rockwool, to see which yields the best results for you. Consider using a heat mat to accelerate germination, especially if you live in a cooler climate. Once your seedlings are established, you can even try different hydroponic systems for a unique growing experience.
For those seeking even more control, explore the world of grafting. Grafting a habanero scion onto a more disease-resistant rootstock can significantly improve your plant’s overall health and productivity. This is an advanced technique, but the rewards can be substantial.
Don’t be afraid to get creative with your habanero varieties, too. While the classic orange habanero is a staple, there are many other fascinating cultivars to explore, such as the chocolate habanero, the red savina, or even the scotch bonnet, which is closely related. Each variety offers a unique flavor profile and heat level, allowing you to tailor your pepper garden to your specific preferences.
The key to success with growing habanero peppers from seed is consistency and attention to detail. Monitor your seedlings regularly, provide them with adequate light and water, and be prepared to address any challenges that may arise. Remember, even experienced gardeners encounter setbacks from time to time. The important thing is to learn from your mistakes and keep experimenting.
We wholeheartedly encourage you to give this DIY trick a try. Not only will you save money compared to buying established plants, but you’ll also gain a deeper understanding of the pepper’s life cycle and develop a greater appreciation for the fruits (or rather, peppers!) of your labor.
Once you’ve embarked on your habanero-growing adventure, we’d love to hear about your experience! Share your tips, tricks, and triumphs in the comments below. Let’s build a community of passionate pepper growers and learn from each other. Your insights could be invaluable to someone just starting out. So, grab your seeds, get your hands dirty, and prepare to unleash the fiery potential of homegrown habaneros! Remember, the journey of a thousand Scoville units begins with a single seed. Happy growing!
Frequently Asked Questions (FAQ)
What is the best time to start habanero pepper seeds indoors?
The ideal time to start your habanero pepper seeds indoors is typically 8-10 weeks before the last expected frost in your area. This allows the seedlings ample time to develop a strong root system and establish themselves before being transplanted outdoors. Check your local weather forecasts and historical data to determine the average last frost date for your region. Starting too early can result in leggy, weak seedlings that struggle to thrive, while starting too late can shorten your growing season and reduce your overall yield.
What type of soil is best for starting habanero pepper seeds?
A light, well-draining seed starting mix is crucial for successful germination and seedling development. Avoid using garden soil, as it can be too heavy and may contain pathogens that can harm young plants. Look for a commercially available seed starting mix that is specifically formulated for seedlings. These mixes typically contain a blend of peat moss, vermiculite, and perlite, which provide excellent drainage and aeration. You can also make your own seed starting mix by combining equal parts peat moss, vermiculite, and perlite. Ensure the mix is moist but not soggy before sowing your seeds.
How deep should I plant habanero pepper seeds?
Habanero pepper seeds should be planted approximately 1/4 inch deep in the seed starting mix. Planting them too deep can prevent them from germinating, while planting them too shallow can cause them to dry out. Gently cover the seeds with the seed starting mix and lightly water the surface.
What is the ideal temperature for habanero pepper seed germination?
Habanero pepper seeds require warm temperatures to germinate successfully. The ideal temperature range is between 80-85°F (27-29°C). You can use a heat mat to maintain a consistent temperature and speed up the germination process. Once the seeds have germinated, you can lower the temperature slightly to around 70-75°F (21-24°C).
How much light do habanero pepper seedlings need?
Habanero pepper seedlings require plenty of light to grow strong and healthy. If you don’t have a sunny windowsill that receives at least 6-8 hours of direct sunlight per day, you’ll need to supplement with artificial lighting. Fluorescent grow lights or LED grow lights are excellent options. Position the lights a few inches above the seedlings and adjust the height as they grow. Provide the seedlings with 14-16 hours of light per day.
When should I transplant my habanero pepper seedlings outdoors?
Transplant your habanero pepper seedlings outdoors after the last expected frost and when the soil has warmed up to at least 60°F (15°C). Before transplanting, it’s essential to harden off the seedlings to acclimate them to outdoor conditions. This involves gradually exposing them to increasing amounts of sunlight and wind over a period of 7-10 days. Start by placing them in a sheltered location for a few hours each day and gradually increase the amount of time they spend outdoors.
What are some common problems when growing habanero peppers from seed?
Some common problems include damping off (a fungal disease that affects seedlings), leggy seedlings (caused by insufficient light), and pest infestations (such as aphids or spider mites). To prevent damping off, use a sterile seed starting mix and avoid overwatering. Provide adequate light to prevent leggy seedlings. Regularly inspect your plants for pests and take appropriate action if you find any.
Can I grow habanero peppers in containers?
Yes, habanero peppers can be successfully grown in containers. Choose a container that is at least 5 gallons in size and has good drainage. Use a high-quality potting mix and provide the plants with plenty of sunlight and water. Container-grown habanero peppers may require more frequent watering and fertilization than those grown in the ground.
How long does it take for habanero peppers to mature?
Habanero peppers typically take 90-100 days to mature from transplanting. The exact time will depend on the variety, growing conditions, and climate. The peppers are ready to harvest when they have reached their mature color (typically orange, red, or chocolate) and are firm to the touch.
What are some tips for increasing the heat of my habanero peppers?
Several factors can influence the heat level of habanero peppers, including genetics, growing conditions, and stress. To increase the heat, ensure your plants receive plenty of sunlight and water, but avoid overwatering. Some growers believe that withholding water slightly during the final weeks before harvest can also increase the heat. However, be careful not to stress the plants too much, as this can reduce their overall yield.

Leave a Comment