
Growing Kale in Soil Bags: Unlock the secrets to a thriving, space-saving garden! Have you ever dreamt of harvesting your own fresh, vibrant kale but thought you didn’t have the room? Or maybe you’re tired of battling weeds and poor soil conditions? Well, get ready to turn that dream into reality with this incredibly simple and rewarding DIY project.
For centuries, kale has been a nutritional powerhouse, gracing tables from ancient Rome to modern-day health food stores. Its resilience and adaptability have made it a staple crop across diverse cultures. But what if I told you that you could enjoy this leafy green goodness without the hassle of traditional gardening?
That’s where growing kale in soil bags comes in! This method is perfect for apartment dwellers, balcony gardeners, or anyone looking for a low-maintenance, high-yield solution. Imagine stepping outside your door and snipping fresh kale leaves for your morning smoothie or adding them to a delicious salad. No more trips to the grocery store for wilted greens! This DIY trick not only saves you money but also gives you the satisfaction of growing your own food. Plus, it’s a fantastic way to reduce your environmental footprint. Let’s dive in and discover how easy it is to cultivate your own kale bounty, one soil bag at a time!
Growing Cabbage in Grow Bags: A Simple DIY Guide
Hello dear garden friends! Do you fancy fresh, crisp cabbage straight from your own garden but have limited space? Then growing cabbage in grow bags is just the thing for you! I’ll show you how to achieve a bountiful cabbage harvest in no time with this simple DIY method. It’s easier than you think and a lot of fun!
What you need for growing cabbage in grow bags:
- Grow bags: Sturdy plastic or jute grow bags with a capacity of at least 40 liters are best. The bigger, the better, because cabbage needs space for its roots.
- High-quality potting soil: Look for a loose, nutrient-rich soil. You can also mix potting soil with compost to improve the nutrient supply.
- Cabbage plants: Choose your favorite type of cabbage! Kale, Lacinato kale, Brussels sprouts, or savoy cabbage – anything is possible. When buying, look for healthy, strong young plants.
- Fertilizer: An organic fertilizer, like horn shavings or compost, is ideal for cabbage plants.
- Watering can or garden hose: For regular watering.
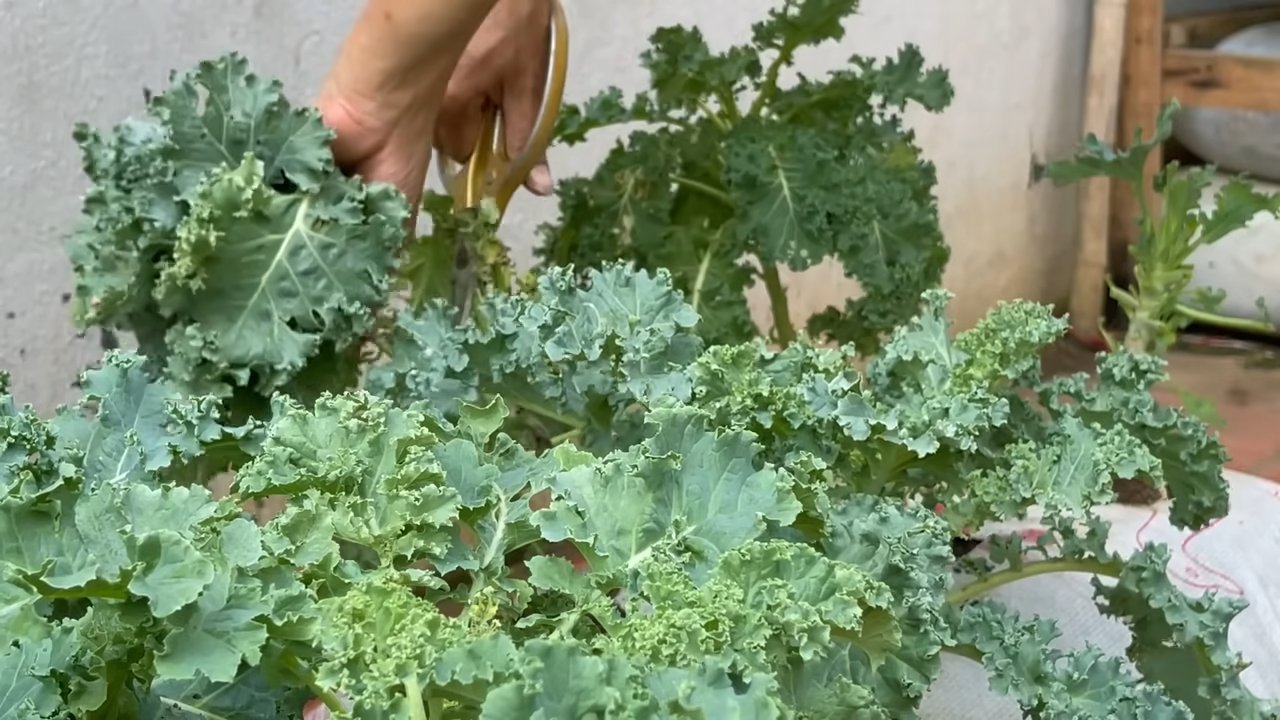
- Garden shears or knife: For harvesting the cabbage.
- Optional: Slug protection (e.g., slug pellets or a slug fence) to protect your cabbage plants from voracious slugs.
Step-by-Step Guide: Planting Cabbage in Grow Bags
1. Prepare the grow bags:
- First, you should place the grow bags where they will remain during the growing season. Once filled, they are difficult to move.
- Unroll the grow bags and place them in a sunny spot. Cabbage loves the sun! Make sure the location offers at least 6 hours of sunlight per day.
- If necessary, cut small holes in the bottom of the grow bags so that excess water can drain and waterlogging is avoided.
2. Fill with potting soil:
- Fill the grow bags with potting soil. Leave about 5-10 cm of space to the top edge.
- Loosen the soil a bit so that it is not too compact.
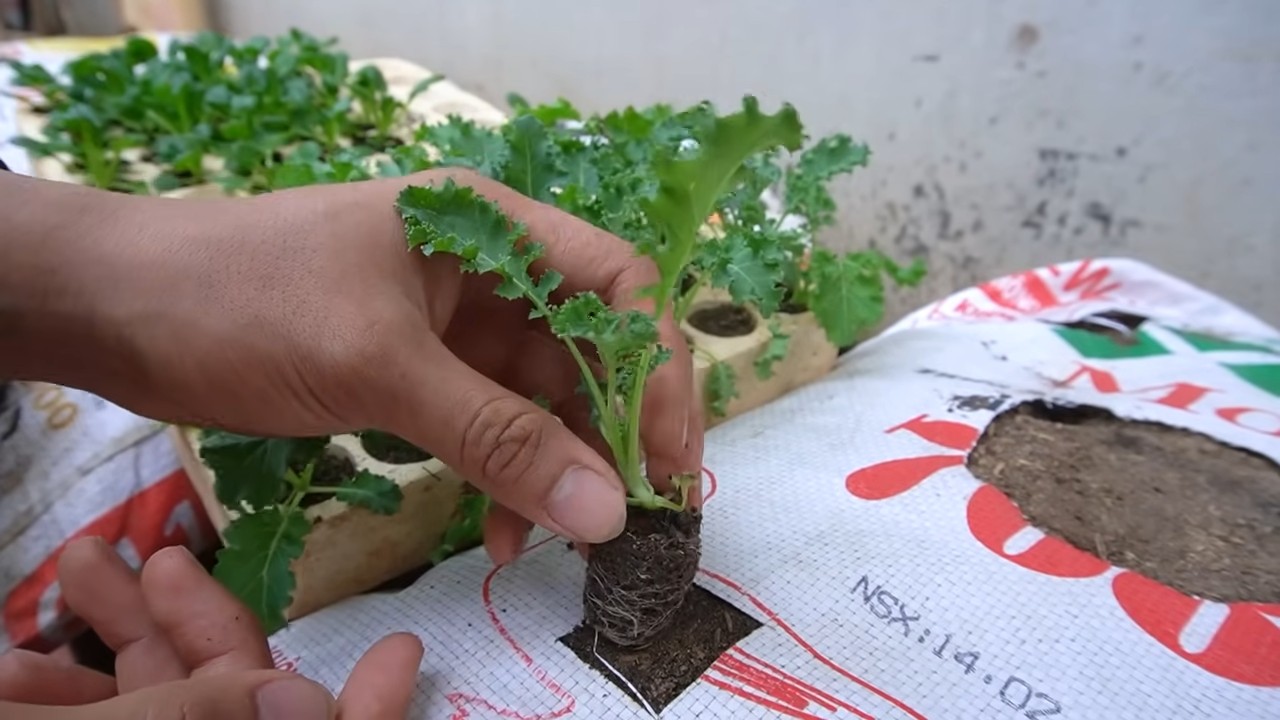
3. Plant the cabbage:
- With your hands, dig small holes in the soil large enough to accommodate the root balls of the cabbage plants.
- Carefully remove the cabbage plants from their pots and gently loosen the root balls.
- Place the cabbage plants in the holes and fill the holes with soil. Make sure the plants are not set too deep. The top of the root ball should be level with the soil surface.
- Lightly press the soil around the plants.
- Depending on the size of the grow bags, you can put several cabbage plants in one bag. However, make sure the plants have enough space to develop. A distance of 30-40 cm between the plants is ideal.
4. Water and fertilize:
- Water the cabbage plants thoroughly after planting.
- Fertilize the plants after about two weeks with an organic fertilizer. Follow the instructions on the packaging.
- Repeat the fertilization every 4-6 weeks to provide the plants with sufficient nutrients.
5. Care and protection:
- Water the cabbage plants regularly, especially on hot days. The soil should always be slightly moist, but not wet.
- Regularly remove weeds that grow in the grow bags.
- Check the plants regularly for pests, such as cabbage white butterflies or aphids. If necessary, you can use biological pesticides.
- Protect the plants from slugs by scattering slug pellets or setting up a slug fence.
- In strong winds, you can support the plants with stakes to prevent them from breaking.
The Right Watering: An Important Factor for Healthy Growth
Watering is a crucial factor for the success of your cabbage harvest. Cabbage plants need a lot of water, especially during the growth phase. Here are some tips for proper watering:
- Regularity: Water the plants regularly, preferably in the morning or evening. Avoid watering the leaves, as this can promote the development of fungal diseases.
- Soil moisture: Check the soil moisture regularly. The soil should always be slightly moist, but not wet. Stick your finger about 2-3 cm deep into the soil. If the soil feels dry, it’s time to water.
- Weather conditions: Adjust the watering to the weather conditions. On hot, dry days, you will need to water the plants more often than on cool, rainy days.
- Drainage: Make sure that the water can drain well. Waterlogging can lead to root rot. The holes in the bottom of the grow bags help to drain excess water.
- Watering method: Use a watering can or a garden hose with a spray nozzle to water the plants gently. Avoid watering the plants with a hard jet of water, as this can wash away the soil and damage the roots.
Fertilizing for a Bountiful Harvest: How to Optimally Supply Your Cabbage Plants
Cabbage plants are heavy feeders and require a lot of nutrients to grow healthily and produce a rich harvest. Here are some tips for proper fertilization:
- Organic fertilizers: Preferably use organic fertilizers, such as horn shavings, compost, or vegetable fertilizer. These fertilizers release nutrients slowly and are environmentally friendly.
- Fertilizing time: Fertilize the plants after planting and then every 4-6 weeks during the growing season.
- Amount of fertilizer: Follow the instructions on the fertilizer packaging. Over-fertilizing can be harmful to the plants.
- Soil analysis: If you are unsure which nutrients your plants need, you can have a soil analysis done. This analysis provides information about the nutrient content of the soil and helps you to adjust the fertilization optimally.
- Natural fertilizers: You can also use natural fertilizers, such as nettle tea or comfrey tea. These liquid manures are rich in nutrients and promote plant growth.
Protection from Pests and Diseases: How to Keep Your Cabbage Plants Healthy
Cabbage plants are susceptible to various pests and diseases. Here are some tips on how you can protect your plants:
Clubroot: Clubroot is a fungal disease that affects the roots of cabbage plants.
Cabbage white butterfly: The cabbage white butterfly is a common pest whose caterpillars eat the leaves of cabbage plants. You can pick off the caterpillars or use biological pesticides. A cabbage net can also help to keep the butterflies away.
Aphids: Aphids suck on the leaves of cabbage plants and weaken them. You can rinse off the aphids with a jet of water or use biological pesticides.
Flea beetles: Flea beetles eat small holes in the leaves of cabbage plants. You can cover the plants with a fleece or use biological pesticides.
Conclusion
So, there you have it! Growing kale in soil bags is not just a gardening trend; it’s a game-changer for anyone looking to enjoy fresh, nutritious greens with minimal effort and maximum yield. We’ve walked through the simple steps, highlighted the benefits, and addressed potential challenges. Now, it’s time to put your green thumb to the test and experience the joy of harvesting your own vibrant kale, right from your backyard, balcony, or even a sunny patio.
Why is this DIY trick a must-try? Because it democratizes gardening. It removes the barriers of large plots of land, expensive equipment, and extensive gardening knowledge. It’s an accessible, affordable, and incredibly rewarding way to connect with your food and nourish your body. Imagine stepping outside and snipping off a handful of fresh kale leaves for your morning smoothie, a lunchtime salad, or a hearty dinner stir-fry. The taste is unparalleled – fresher, crisper, and bursting with flavor compared to store-bought varieties. Plus, you have complete control over the growing process, ensuring your kale is free from harmful pesticides and chemicals.
But the benefits extend beyond just taste and convenience. Growing kale in soil bags is also an environmentally friendly choice. It reduces your carbon footprint by minimizing transportation needs and packaging waste. It also promotes soil health by preventing erosion and improving drainage. And let’s not forget the therapeutic benefits of gardening itself – the stress relief, the connection with nature, and the sense of accomplishment that comes from nurturing a plant from seed to harvest.
Looking for variations to spice things up? Consider companion planting! Interplanting your kale with herbs like rosemary, thyme, or sage can help deter pests and enhance the flavor of your greens. You can also experiment with different varieties of kale, from the classic curly kale to the more tender and mild Lacinato (dinosaur) kale. For a pop of color, try growing Red Russian kale, which boasts beautiful purple-tinged leaves.
Another variation is to explore different types of soil bags. While standard potting mix works well, you can also use raised garden beds made from recycled materials or even repurposed burlap sacks for a more rustic and eco-friendly look. Just be sure to choose a material that allows for proper drainage and aeration.
Don’t be afraid to get creative and personalize your kale-growing experience. Add a trellis for support if you’re growing taller varieties, or decorate your soil bags with paint or stencils to add a touch of personality to your garden. The possibilities are endless!
Ultimately, the success of your kale-growing endeavor hinges on your willingness to experiment, learn, and adapt. Don’t be discouraged if you encounter challenges along the way. Every gardener faces setbacks, but the key is to learn from your mistakes and keep trying.
So, what are you waiting for? Grab a soil bag, some kale seeds or seedlings, and get ready to embark on a rewarding gardening adventure. We’re confident that you’ll be amazed by the results. And once you’ve harvested your first batch of homegrown kale, we encourage you to share your experience with us and the wider gardening community. Post photos of your thriving kale plants, share your favorite recipes, and offer tips and advice to fellow gardeners. Let’s inspire each other to grow more of our own food and create a more sustainable and delicious world, one soil bag of kale at a time. Remember, mastering the art of **growing kale in soil bags** is easier than you think, and the rewards are immeasurable. Happy gardening!
Frequently Asked Questions (FAQ)
What type of soil bag is best for growing kale?
The best type of soil bag for growing kale is one that provides good drainage and aeration. A standard potting mix specifically designed for vegetables is a great option. Look for a mix that contains ingredients like peat moss, perlite, and vermiculite, which help to retain moisture while preventing the soil from becoming waterlogged. You can also use a raised garden bed mix, which is typically a bit heavier and provides more nutrients. Avoid using garden soil directly in soil bags, as it can become compacted and inhibit root growth. The size of the bag depends on how many plants you want to grow. A 10-20 gallon bag is generally sufficient for 2-3 kale plants.
How often should I water my kale plants in soil bags?
Watering frequency depends on several factors, including the weather, the size of the soil bag, and the type of soil you’re using. As a general rule, water your kale plants when the top inch of soil feels dry to the touch. During hot, dry weather, you may need to water daily, while during cooler, wetter weather, you may only need to water every few days. When watering, be sure to soak the soil thoroughly until water drains out of the bottom of the bag. Avoid overwatering, as this can lead to root rot. A good way to check if your plants need water is to lift the soil bag. If it feels light, it’s time to water.
What kind of fertilizer should I use for kale grown in soil bags?
Kale is a heavy feeder, meaning it requires a good amount of nutrients to thrive. To ensure your kale plants get the nutrients they need, fertilize them regularly with a balanced fertilizer. You can use either a granular fertilizer or a liquid fertilizer. If using a granular fertilizer, apply it according to the package directions, typically every 4-6 weeks. If using a liquid fertilizer, dilute it according to the package directions and apply it every 2-3 weeks. Look for a fertilizer that is specifically formulated for vegetables and contains essential nutrients like nitrogen, phosphorus, and potassium. Organic fertilizers, such as compost tea or fish emulsion, are also excellent choices.
How do I protect my kale plants from pests and diseases?
Kale is susceptible to a variety of pests and diseases, but there are several things you can do to protect your plants. Regularly inspect your plants for signs of pests, such as aphids, cabbage worms, and flea beetles. If you find any pests, remove them by hand or spray your plants with an insecticidal soap or neem oil. To prevent diseases, ensure your plants have good air circulation and avoid overwatering. You can also apply a fungicide to protect your plants from fungal diseases. Companion planting with herbs like rosemary, thyme, and sage can also help deter pests. Covering your kale plants with row covers can also protect them from pests and harsh weather conditions.
When is the best time to harvest kale grown in soil bags?
You can start harvesting kale leaves as soon as they are large enough to eat, typically when they are about 4-6 inches long. Harvest the outer leaves first, leaving the inner leaves to continue growing. To harvest, simply snip off the leaves with a pair of scissors or garden shears. Avoid harvesting more than one-third of the plant at a time, as this can stress the plant and reduce its yield. Kale is most flavorful when harvested in cool weather, so try to harvest it in the morning or evening. After harvesting, wash the leaves thoroughly and store them in the refrigerator for up to a week.
Can I grow kale in soil bags during the winter?
Yes, you can grow kale in soil bags during the winter, especially in regions with mild winters. Kale is a cold-hardy vegetable that can tolerate temperatures as low as 20°F (-6°C). To protect your kale plants from frost and freezing temperatures, you can cover them with a frost blanket or move them to a sheltered location, such as a greenhouse or garage. You can also mulch around the base of the plants to help insulate the soil and protect the roots. Even in colder climates, you can extend the growing season by using cold frames or hoop houses. Remember to water your kale plants less frequently during the winter, as they will not need as much moisture.
What are some common problems when growing kale in soil bags and how can I fix them?
Some common problems include yellowing leaves (often due to nutrient deficiency, address with fertilizer), stunted growth (could be poor soil quality or lack of sunlight, amend soil and ensure adequate sunlight), pest infestations (use insecticidal soap or neem oil), and diseases like powdery mildew (improve air circulation and use a fungicide if necessary). Overwatering can also lead to root rot, so ensure proper drainage. Regularly inspect your plants and address any problems promptly to prevent them from escalating.

Leave a Comment