
Growing mushrooms kitchen counter – sounds like something out of a fantasy novel, right? Well, it’s not only possible, but it’s also surprisingly easy and incredibly rewarding! Forget those expensive grocery store trips for exotic fungi; imagine harvesting fresh, flavorful mushrooms right from your own kitchen. I’m here to tell you, it’s easier than you think!
For centuries, mushrooms have held a special place in various cultures, from ancient medicinal practices in the East to culinary delicacies in Europe. They’re not just food; they’re symbols of health, longevity, and even magic. Now, you can tap into that rich history and bring a touch of that magic into your home.
In today’s world, where we’re all looking for ways to be more sustainable, save money, and connect with nature, growing mushrooms kitchen counter offers the perfect solution. Think about it: reducing your carbon footprint by avoiding packaged produce, enjoying organic, pesticide-free food, and having a fascinating conversation starter all in one go. Plus, who wouldn’t want to impress their friends and family with their newfound mushroom-growing skills? This DIY guide will provide you with simple, step-by-step instructions and helpful tips to get you started on your mushroom-growing adventure. Let’s get our hands dirty (metaphorically, of course!) and cultivate some deliciousness!
Grow Your Own Gourmet Mushrooms on Your Kitchen Counter!
Hey there, fellow foodies and DIY enthusiasts! Ever dreamt of harvesting your own delicious, fresh mushrooms right in your kitchen? Well, dream no more! I’m going to walk you through a super rewarding project: growing mushrooms on your kitchen counter. It’s easier than you think, and the taste of homegrown mushrooms is simply unbeatable. Get ready to impress your friends and family with your newfound mycological skills!
What You’ll Need: The Mushroom Growing Starter Pack
Before we dive in, let’s gather our supplies. Don’t worry, you won’t need a fancy lab or anything. Most of these items are readily available online or at your local garden supply store.
* Mushroom Grow Kit: This is the heart of our operation. You can buy pre-inoculated grow kits online. Oyster mushrooms are a great choice for beginners because they’re relatively easy to grow and produce abundant yields. Look for kits that come with a substrate bag already colonized with mycelium (the mushroom’s root system).
* Spray Bottle: A simple spray bottle filled with clean, filtered water is essential for maintaining humidity.
* Clear Plastic Bag or Humidity Tent: This will help create a humid microclimate around your mushrooms, which is crucial for their growth. A large ziplock bag, a clear plastic storage container, or even a repurposed produce bag will work.
* Sharp Knife or Scissors: For making slits in the grow bag.
* Rubbing Alcohol: For sterilizing your knife or scissors.
* Clean Workspace: A clean kitchen counter or table is ideal.
* Patience: Mushroom growing requires a little patience, but the results are well worth the wait!
Getting Started: Preparing Your Grow Kit
Okay, let’s get this mushroom party started! The first step is to prepare your grow kit.
1. Sanitize Everything: Before you even touch the grow kit, wash your hands thoroughly with soap and water. Then, wipe down your workspace with a disinfectant cleaner. This helps prevent contamination, which can hinder mushroom growth.
2. Open the Grow Kit: Carefully open the grow kit packaging. You should see a bag filled with a substrate (usually straw, sawdust, or coffee grounds) that’s covered in a white, fluffy substance – that’s the mycelium!
3. Choose Your Fruiting Site: Decide where you want your mushrooms to grow from. Oyster mushrooms typically fruit from the sides of the bag.
4. Make the Incisions: Using a sterilized knife or scissors (wipe them down with rubbing alcohol), carefully make a few small slits (about 1-2 inches long) in the plastic bag where you want the mushrooms to emerge. I usually make 2-3 slits on each side of the bag. Be careful not to cut too deep and damage the substrate.
5. Position the Kit: Place the grow kit in a location that receives indirect sunlight. Direct sunlight can dry out the substrate and inhibit mushroom growth. A kitchen counter away from a window or a shelf in a well-lit room is perfect.
Creating the Perfect Environment: Humidity is Key
Mushrooms thrive in humid environments. Maintaining the right humidity level is crucial for successful mushroom cultivation.
1. The Humidity Tent: Place the grow kit inside your clear plastic bag or container. This will act as a humidity tent, trapping moisture around the mushrooms.
2. Spritz, Spritz, Spritz: Using your spray bottle, mist the inside of the humidity tent and the exposed substrate around the slits with water. You want to keep the area moist but not soaking wet.
3. Ventilation is Important: While humidity is essential, you also need to provide some ventilation to prevent mold growth. Open the humidity tent for a few minutes each day to allow fresh air to circulate.
4. Monitor the Humidity: Keep an eye on the humidity levels inside the tent. If you notice the substrate drying out, mist it more frequently. I usually mist my mushrooms 2-3 times a day, depending on the ambient humidity.
Watching Them Grow: From Pins to Harvest
This is the exciting part! Now, we just need to be patient and watch our mushrooms grow.
1. Pinning: After a few days to a week, you should start to see tiny mushroom “pins” forming around the slits you made in the bag. These pins are the baby mushrooms, and they’ll grow rapidly.
2. Growth Spurt: Once the pins appear, the mushrooms will grow quickly, often doubling in size each day. Continue to mist them regularly to maintain humidity.
3. Harvest Time: Your mushrooms are ready to harvest when the caps are fully formed and the edges start to curl upwards. Don’t wait too long, or they’ll start to dry out and release spores.
4. Harvesting: To harvest your mushrooms, gently twist and pull them from the substrate. You can also use a sharp knife to cut them off at the base.
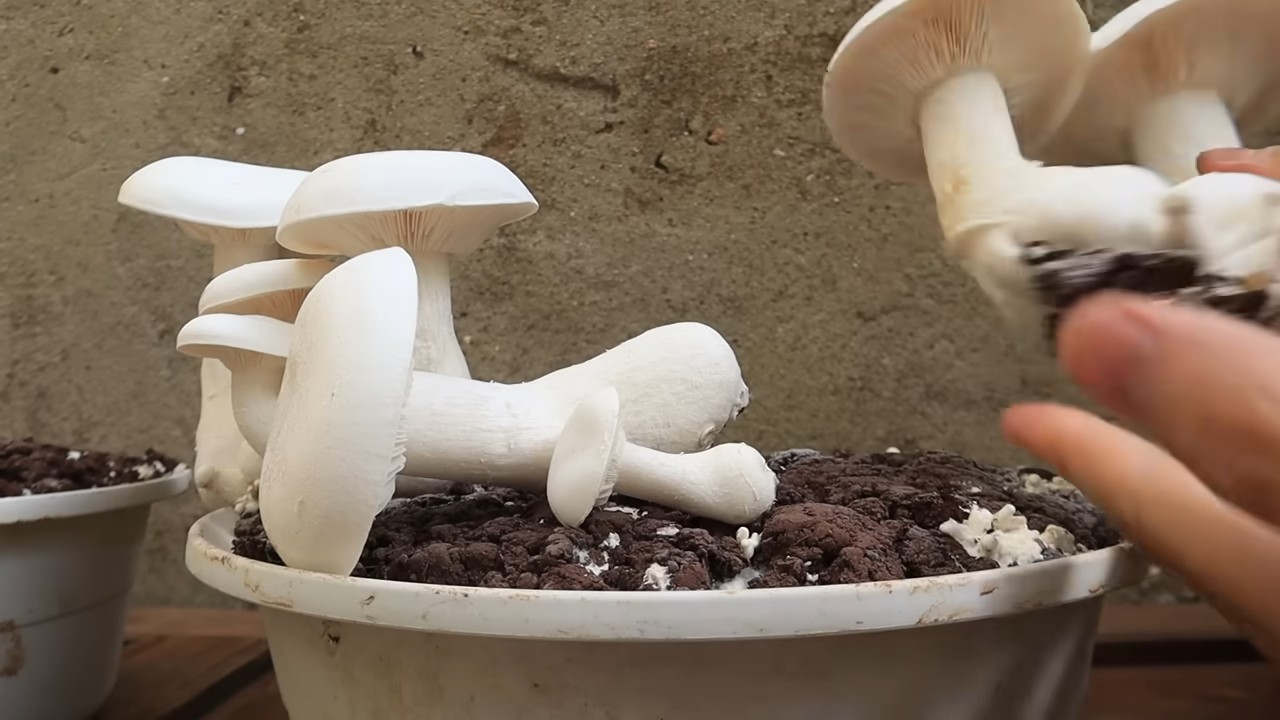
5. Enjoy Your Harvest: Congratulations! You’ve successfully grown your own mushrooms. Now, it’s time to enjoy the fruits (or fungi) of your labor. Sauté them with garlic and butter, add them to pasta dishes, or use them as a topping for pizza. The possibilities are endless!
Second Flush and Beyond: Keeping the Fun Going
The good news is that you can usually get multiple “flushes” of mushrooms from a single grow kit.
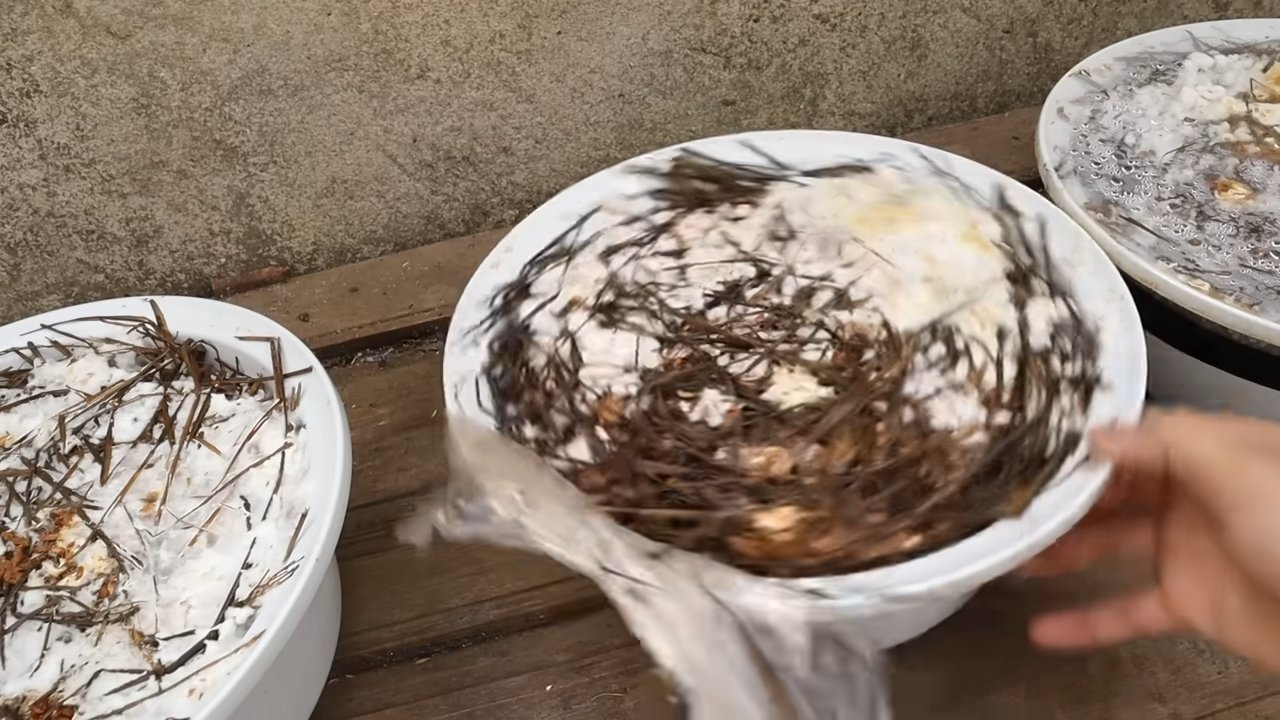
1. Soaking the Substrate: After harvesting your first flush, soak the substrate in cold water for 12-24 hours. This rehydrates the substrate and encourages new mushroom growth.
2. Draining and Repeating: Drain the excess water and place the grow kit back in the humidity tent. Continue to mist it regularly, and you should see another flush of mushrooms within a few weeks.
3. Subsequent Flushes: You can usually get 2-3 flushes of mushrooms from a single grow kit. The subsequent flushes may be smaller than the first, but they’re still a delicious bonus.
4. Composting: Once the grow kit stops producing mushrooms, you can compost the spent substrate. It makes a great addition to your garden soil.
Troubleshooting: Common Issues and Solutions
Even with the best intentions, things can sometimes go wrong. Here are a few common issues you might encounter and how to fix them.
* Mushrooms are Drying Out: If your mushrooms are drying out, it means the humidity is too low. Mist them more frequently and make sure your humidity tent is properly sealed.
* Mold Growth: If you see mold growing on the substrate, it means there’s not enough ventilation. Open the humidity tent more frequently to allow fresh air to circulate. You can also try spraying the affected area with a diluted hydrogen peroxide solution.
* No Mushroom Growth: If you’re not seeing any mushroom growth, it could be due to a number of factors, such as low humidity, poor ventilation, or contamination. Make sure you’re following the instructions carefully and providing the right environment for your mushrooms to thrive. Sometimes, the kit itself might be a dud, though this is rare.
* Small Mushrooms: If your mushrooms are growing but staying small, it could be due to insufficient nutrients in the substrate. While you can’t really fix this mid-grow, it’s something to consider for future grows if you decide to make your own substrate.
Tips and Tricks for Mushroom Growing Success
Here are a few extra tips and tricks to help you become a mushroom-growing pro:
* Choose the Right Location: Place your grow kit in a location that’s away from direct sunlight and drafts. A stable temperature is also important.
* Use Filtered Water: Tap water can contain chlorine and other chemicals that can inhibit mushroom growth. Use filtered water for misting.
* Be Patient: Mushroom growing takes time. Don’t get discouraged if you don’t see results immediately. Just keep following the instructions and be patient.
* Experiment: Once you’ve mastered the basics, try experimenting with different types of mushrooms and growing techniques. There’s a whole world of fungal possibilities out there!
* Keep a Journal: Track your progress, noting things like temperature, humidity, and watering frequency. This will help you identify what works best for your growing environment.
* Research: The internet is your friend! There are tons of resources available online about mushroom growing. Don’t be afraid to do some research and learn more about the process.
Growing mushrooms at home is a fun, rewarding, and delicious experience. With a little patience and attention, you can enjoy a steady supply of fresh, homegrown mushrooms right from your kitchen counter. So, what are you waiting for? Get your grow kit today and start your mushroom-growing adventure! Happy growing!
Conclusion
So, there you have it! Transforming your kitchen counter into a miniature mushroom farm is not only surprisingly simple, but also incredibly rewarding. Forget those expensive, pre-packaged mushrooms from the grocery store. With a little patience and our easy-to-follow guide, you can cultivate a continuous supply of fresh, flavorful fungi right in your own home.
Why is this DIY trick a must-try? Because it offers a unique blend of sustainability, cost-effectiveness, and culinary delight. Imagine the satisfaction of harvesting your own oyster mushrooms for a creamy pasta sauce, or adding homegrown shiitakes to a savory stir-fry. The possibilities are endless! Plus, you’re reducing your carbon footprint by eliminating the need for transportation and packaging associated with store-bought mushrooms.
But the benefits don’t stop there. Growing your own mushrooms is also a fascinating educational experience. You’ll gain a deeper understanding of the fungal kingdom and the intricate processes involved in mushroom cultivation. It’s a fantastic project for families, classrooms, or anyone with a curious mind.
Looking for variations? Absolutely! While we’ve focused on oyster mushrooms as a beginner-friendly option, you can experiment with other varieties like shiitake, lion’s mane, or even wine cap mushrooms, depending on your climate and available resources. Consider using different substrates, such as coffee grounds, straw, or hardwood sawdust, to tailor the growing environment to your chosen mushroom species. You can also explore different fruiting chambers, from simple plastic tubs to more elaborate setups with humidity control.
Don’t be afraid to get creative and personalize your mushroom growing experience. The key is to start small, experiment, and learn from your successes and failures. Remember to maintain proper hygiene and sanitation to prevent contamination and ensure a healthy harvest.
We are confident that you will find the process of growing mushrooms on your kitchen counter to be both enjoyable and fulfilling. It’s a fantastic way to connect with nature, enhance your culinary skills, and reduce your reliance on commercially produced food.
So, what are you waiting for? Gather your supplies, follow our instructions, and embark on your mushroom growing adventure today! We’re eager to hear about your experiences. Share your photos, tips, and questions in the comments below. Let’s build a community of home mushroom growers and inspire others to embrace the magic of fungi! We can’t wait to see what you create. Happy growing!
Frequently Asked Questions (FAQ)
What kind of mushrooms are easiest to grow at home?
Oyster mushrooms are generally considered the easiest type of mushroom to grow at home, especially for beginners. They are fast-growing, relatively tolerant of environmental fluctuations, and can thrive on a variety of substrates, including straw, coffee grounds, and even cardboard. Shiitake mushrooms are another popular option, but they require a bit more patience and attention to detail. Other varieties like lion’s mane and wine cap mushrooms can also be grown at home, but they may require more specialized techniques and equipment.
What is the best substrate for growing mushrooms?
The best substrate for growing mushrooms depends on the specific species you’re cultivating. Oyster mushrooms, as mentioned earlier, are quite versatile and can grow on a wide range of materials. Straw is a common and readily available option, as are coffee grounds (make sure they are pasteurized first). Hardwood sawdust is ideal for shiitake mushrooms, while wine cap mushrooms thrive on wood chips and straw. Research the specific requirements of your chosen mushroom species to determine the most suitable substrate. Remember to properly pasteurize or sterilize your substrate to eliminate competing microorganisms and ensure a successful grow.
How long does it take to grow mushrooms?
The time it takes to grow mushrooms varies depending on the species, substrate, and environmental conditions. Oyster mushrooms are known for their rapid growth, often fruiting within a few weeks of inoculation. Shiitake mushrooms, on the other hand, can take several months to fruit. Factors like temperature, humidity, and light exposure can also influence the growth rate. Be patient and monitor your mushrooms closely, adjusting the growing environment as needed to optimize their development.
What are the ideal temperature and humidity for growing mushrooms?
The ideal temperature and humidity for growing mushrooms also depend on the species. Oyster mushrooms generally prefer temperatures between 60-75°F (15-24°C) and high humidity levels (80-90%). Shiitake mushrooms thrive in cooler temperatures, around 50-65°F (10-18°C), and also require high humidity. Maintaining proper humidity is crucial for mushroom development, as it prevents the substrate from drying out and allows the mushrooms to form properly. You can use a humidifier, spray bottle, or humidity tent to maintain the desired humidity levels.
How do I prevent contamination when growing mushrooms?
Preventing contamination is essential for successful mushroom cultivation. Contamination can occur from bacteria, mold, or other fungi that compete with your desired mushroom species. To minimize the risk of contamination, follow these tips:
* **Sterilize or pasteurize your substrate:** This eliminates competing microorganisms and creates a clean environment for your mushrooms to grow.
* **Use sterile equipment:** Clean all your tools and containers with alcohol or bleach solution before use.
* **Work in a clean environment:** Minimize air currents and dust particles in your workspace.
* **Maintain proper hygiene:** Wash your hands thoroughly before handling your mushrooms or substrate.
* **Monitor your grow closely:** Look for signs of contamination, such as unusual colors or odors, and take action immediately if you detect any problems.
How do I know when my mushrooms are ready to harvest?
Knowing when to harvest your mushrooms is crucial for optimal flavor and texture. Oyster mushrooms are typically ready to harvest when the caps are fully formed and the edges are still slightly curled downwards. Shiitake mushrooms are ready when the caps have flattened out and the gills are visible. Harvest your mushrooms by gently twisting or cutting them off at the base of the stem. Avoid pulling them out, as this can damage the substrate and prevent future flushes.
Can I grow mushrooms from store-bought mushrooms?
While it’s technically possible to grow mushrooms from store-bought mushrooms, it’s not recommended for beginners. Store-bought mushrooms are often treated with chemicals to prevent them from spoiling, which can inhibit their ability to grow. Additionally, they may be contaminated with other microorganisms. It’s best to start with a reputable mushroom spawn or culture to ensure a successful grow.
What do I do after harvesting my mushrooms?
After harvesting your mushrooms, store them in the refrigerator in a paper bag or container lined with paper towels. This will help to absorb excess moisture and prevent them from becoming slimy. Freshly harvested mushrooms can typically be stored for up to a week. You can also dry or freeze your mushrooms for longer-term storage. To dry mushrooms, slice them thinly and place them in a dehydrator or oven at a low temperature. To freeze mushrooms, blanch them briefly in boiling water and then transfer them to an ice bath. Once cooled, drain them thoroughly and store them in freezer bags.
Is growing mushrooms on my kitchen counter safe?
Yes, growing edible mushrooms on your kitchen counter is generally safe, as long as you follow proper hygiene and sanitation practices. However, it’s important to only grow edible mushroom species and to avoid consuming any mushrooms that you are unsure about. If you have any allergies or sensitivities to fungi, consult with a doctor before growing or consuming mushrooms. Also, keep your mushroom growing area clean and free of pests to prevent any potential health hazards.
Leave a Comment