
Growing peppers in bottles might sound a little unconventional, but trust me, it’s a game-changer for home gardeners, especially those with limited space or challenging climates! For centuries, humans have been finding creative ways to cultivate food, from the hanging gardens of Babylon to ingenious terrace farming techniques. Now, we’re bringing that innovative spirit into the 21st century with a simple yet effective DIY trick.
Have you ever dreamed of harvesting a vibrant bounty of peppers right from your balcony or windowsill? Maybe you’ve struggled with pests, poor soil, or unpredictable weather that always seems to thwart your pepper-growing ambitions. Well, fear not! This DIY guide will show you how to repurpose plastic bottles into mini-greenhouses, creating the perfect environment for your pepper plants to thrive.
I’m so excited to share this method with you because it’s not only budget-friendly and eco-conscious, but it also offers incredible control over the growing conditions. Plus, growing peppers in bottles is a fantastic way to introduce kids to the joys of gardening and teach them about sustainability. Let’s dive in and unlock the secrets to a pepper-packed harvest, one bottle at a time!
DIY Bottle Pepper Garden: From Seed to Salsa on Your Windowsill
Hey there, fellow gardening enthusiasts! Ever dreamed of having fresh, spicy peppers right at your fingertips, even if you don’t have a sprawling backyard? Well, I’m here to tell you it’s totally possible! We’re going to create a miniature pepper paradise using recycled plastic bottles. It’s a fun, eco-friendly, and surprisingly productive way to grow your own peppers. Let’s dive in!
What You’ll Need: The Pepper Powerhouse Toolkit
Before we get our hands dirty, let’s gather our supplies. This is a pretty low-cost project, which is always a win in my book!
* Plastic Bottles: The stars of our show! I recommend using 2-liter soda bottles or larger water bottles. The bigger, the better, as it gives your pepper plants more room to grow. You’ll need at least one bottle per plant, but I usually prepare a few extra just in case.
* Pepper Seeds: Choose your pepper variety! From mild bell peppers to fiery habaneros, the choice is yours. I personally love growing jalapeños and cayenne peppers – they’re so versatile in the kitchen. Make sure you get good quality seeds from a reputable source.
* Potting Mix: This is crucial! Don’t skimp on the potting mix. You need a well-draining mix specifically formulated for container gardening. Regular garden soil is often too heavy and can compact, suffocating the roots.
* Scissors or Utility Knife: For cutting the bottles. Be careful!
* Drill or Awl: To create drainage holes.
* Watering Can or Spray Bottle: For watering your plants.
* Optional:
* Plant Labels: To keep track of your pepper varieties.
* Gloves: To protect your hands.
* Small Stones or Gravel: For drainage at the bottom of the bottle.
* Liquid Fertilizer: To give your plants a boost.
Preparing the Bottles: Giving Your Peppers a Home
Okay, let’s get those bottles ready for their new inhabitants! This is where the magic begins.
1. Clean the Bottles: Wash the bottles thoroughly with soap and water to remove any residue. Rinse them well and let them dry completely. This helps prevent any unwanted mold or bacteria from affecting your plants.
2. Cut the Bottles: This is where the scissors or utility knife comes in. You have a couple of options here:
* Option 1: Single Container: Cut the bottle in half horizontally. You’ll use the bottom half as the container for your pepper plant. The top half can be discarded or used for another project.
* Option 2: Self-Watering Container: This is my preferred method! Cut the bottle about two-thirds of the way up. Invert the top portion of the bottle and nest it inside the bottom portion. This creates a self-watering system where the roots can draw water from the bottom reservoir.
3. Create Drainage Holes: This is super important! Pepper plants don’t like sitting in soggy soil. Use a drill or awl to create several drainage holes in the bottom of the bottle (or the bottom of the bottom half if you’re using the self-watering method). I usually make about 5-6 holes.
4. Optional: Add Drainage Layer: If you’re using the single container method, you can add a layer of small stones or gravel to the bottom of the bottle before adding the potting mix. This helps improve drainage and prevents the soil from clogging the drainage holes.
Sowing the Seeds: Planting the Future Peppers
Now for the exciting part – planting the seeds! I usually start my pepper seeds indoors about 6-8 weeks before the last expected frost. This gives them a head start and ensures a longer growing season.
1. Fill the Bottles with Potting Mix: Fill the prepared bottles with potting mix, leaving about an inch of space at the top. If you’re using the self-watering method, fill the bottom portion with water after adding the potting mix to the top portion.
2. Sow the Seeds: Make a small indentation in the potting mix, about ¼ inch deep. Place 2-3 pepper seeds in each indentation. Cover the seeds lightly with potting mix.
3. Water Gently: Water the potting mix gently with a watering can or spray bottle. You want to moisten the soil without disturbing the seeds.
4. Provide Warmth and Light: Pepper seeds need warmth and light to germinate. Place the bottles in a warm location, such as a sunny windowsill or under grow lights. The ideal temperature for germination is around 70-80°F (21-27°C).
5. Keep the Soil Moist: Keep the potting mix consistently moist, but not soggy. Check the moisture level daily and water as needed.
6. Wait Patiently: Germination can take anywhere from 7-21 days, depending on the pepper variety and the growing conditions. Be patient!
Transplanting Seedlings: Giving Them Room to Grow
Once your seedlings have developed a few sets of true leaves (the leaves that look like miniature pepper leaves), it’s time to thin them out and transplant them into individual bottles.
1. Thin the Seedlings: If you planted multiple seeds in each bottle, thin them out by snipping off the weaker seedlings at the soil level. Leave only the strongest seedling in each bottle.
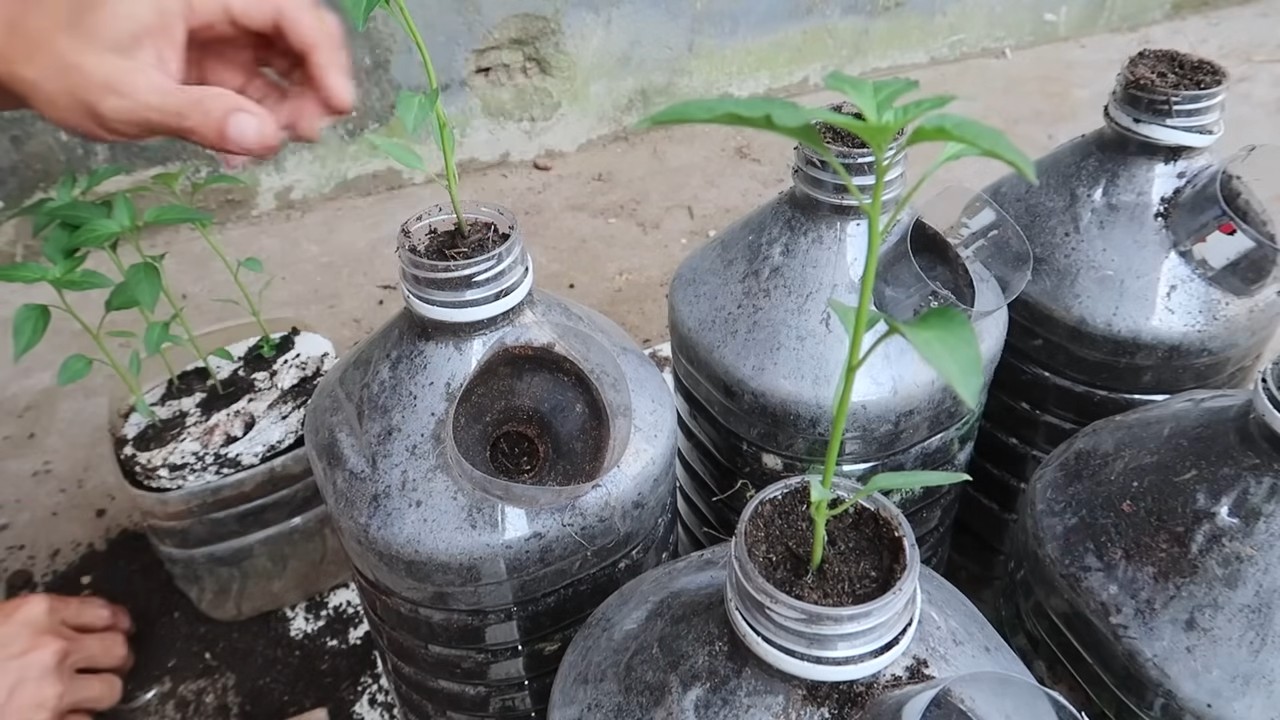
2. Prepare the New Bottles: Prepare additional bottles as described in the “Preparing the Bottles” section.
3. Gently Remove the Seedlings: Carefully remove the seedlings from their original bottles. Be gentle to avoid damaging the roots. You can use a spoon or small trowel to help loosen the soil around the seedlings.
4. Transplant the Seedlings: Make a hole in the potting mix in the new bottles, large enough to accommodate the roots of the seedlings. Place the seedlings in the holes and gently cover the roots with potting mix.
5. Water Thoroughly: Water the transplanted seedlings thoroughly.
6. Provide Support (Optional): As your pepper plants grow, they may need some support to prevent them from toppling over. You can use small stakes or bamboo skewers to provide support.
Caring for Your Pepper Plants: Nurturing the Spicy Goodness
Now that your pepper plants are settled in their new homes, it’s time to provide them with the care they need to thrive.
1. Sunlight: Pepper plants need at least 6-8 hours of sunlight per day. Place the bottles in a sunny location, such as a south-facing windowsill or balcony. If you don’t have enough natural light, you can supplement with grow lights.
2. Watering: Water your pepper plants regularly, especially during hot weather. Check the moisture level of the soil daily and water when the top inch of soil feels dry to the touch. Avoid overwatering, as this can lead to root rot. If you are using the self-watering method, make sure to refill the water reservoir in the bottom portion of the bottle as needed.
3. Fertilizing: Pepper plants are heavy feeders and benefit from regular fertilization. Use a liquid fertilizer specifically formulated for vegetables, following the instructions on the label. I usually fertilize my pepper plants every 2-3 weeks.
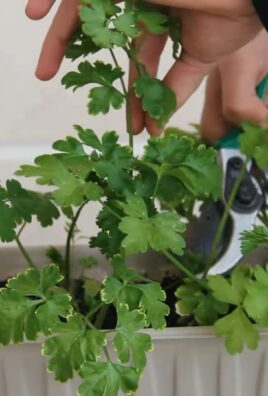
4. Pruning: Pruning can help encourage bushier growth and more pepper production. Pinch off the tips of the branches to encourage side growth. You can also remove any yellowing or dead leaves.
5. Pest Control: Keep an eye out for pests, such as aphids, spider mites, and whiteflies. If you notice any pests, treat them with an insecticidal soap or neem oil.
6. Pollination: Pepper plants are self-pollinating, but you can help them along by gently shaking the plants or using a small brush to transfer pollen from one flower to another. This is especially important if you’re growing your plants indoors, where there are fewer pollinators.
Harvesting Your Peppers: The Fruits (or Vegetables!) of Your Labor
The moment you’ve been waiting for – harvesting your peppers! The time to harvest depends on the pepper variety and your personal preference.
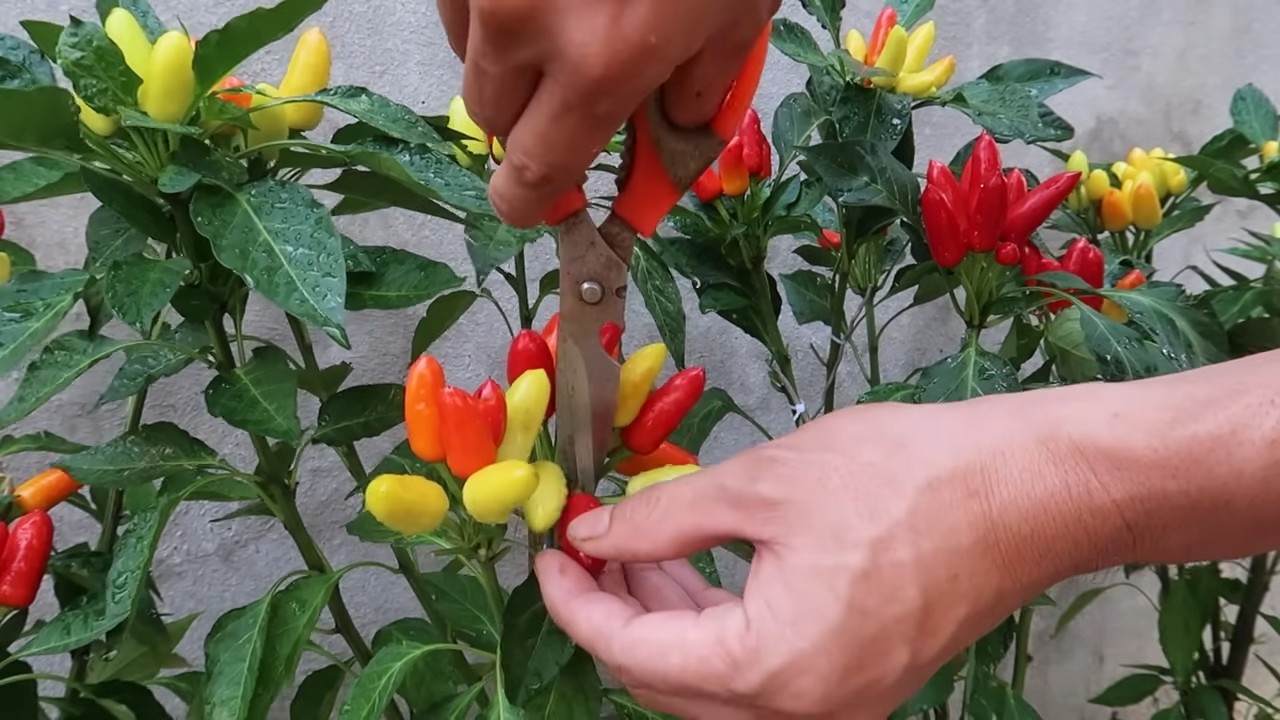
1. Check for Ripeness: Peppers are typically ready to harvest when they have reached their mature color and size. The color will vary depending on the variety. For example, jalapeños turn from green to red when ripe, while bell peppers can be green, red, yellow, or orange.
2. Harvest Carefully: Use scissors or pruning shears to cut the peppers from the plant. Be careful not to damage the plant.
3. Enjoy Your Harvest: Now it’s time to enjoy the fruits (or vegetables!) of your labor. Use your fresh peppers in your favorite recipes, or preserve them by pickling, drying, or freezing.
Troubleshooting: Addressing Common Pepper Problems
Even with the best care, you may encounter some
Conclusion
So, there you have it! Growing peppers in bottles isn’t just a quirky gardening experiment; it’s a surprisingly effective and rewarding method for anyone, regardless of their gardening experience or space limitations. We’ve explored how this simple DIY trick can transform ordinary plastic bottles into thriving mini-pepper gardens, offering a sustainable and space-saving solution for fresh, homegrown produce.
But why is this a must-try? Beyond the sheer novelty of it, growing peppers in bottles offers several compelling advantages. Firstly, it’s incredibly space-efficient. Whether you have a sprawling backyard or a tiny balcony, you can easily accommodate several bottle gardens. This makes it perfect for apartment dwellers, urban gardeners, or anyone looking to maximize their growing potential in a limited area. Secondly, it’s a fantastic way to recycle and repurpose plastic bottles, reducing waste and contributing to a more sustainable lifestyle. You’re not just growing peppers; you’re also doing your part for the environment. Thirdly, the controlled environment of a bottle can provide better protection against pests and diseases, leading to healthier and more productive pepper plants. Finally, it’s a fun and engaging project that can be enjoyed by the whole family, especially children, who will love watching their pepper plants grow from seed to harvest.
Don’t be afraid to experiment with different varieties of peppers. While bell peppers are a great starting point, you can also try growing smaller varieties like chili peppers, jalapeños, or even ornamental peppers for a splash of color. Consider using different types of soil mixes to see which one works best for your specific climate and pepper variety. You can also add a layer of mulch to the top of the soil to help retain moisture and suppress weeds. For those in colder climates, consider bringing your bottle gardens indoors during the winter months to extend the growing season. You can even use grow lights to supplement natural sunlight and ensure your peppers continue to thrive.
We encourage you to embrace this simple yet effective DIY trick and experience the joy of growing your own peppers in bottles. It’s a rewarding and sustainable way to enjoy fresh, homegrown produce, regardless of your gardening experience or space limitations. So, gather your bottles, grab some seeds, and get ready to embark on a pepper-growing adventure!
We’re confident that you’ll be amazed by the results. But don’t just take our word for it. Try it out for yourself and see the difference it makes. And most importantly, share your experiences with us! We’d love to hear about your successes, challenges, and any variations you’ve tried. Share your photos and stories on social media using #BottlePepperGarden and let’s create a community of bottle-gardening enthusiasts. Let’s all learn from each other and discover new and innovative ways to grow our own food sustainably.
Ready to Grow Your Own Peppers?
Don’t delay! Start your bottle pepper garden today and enjoy the satisfaction of harvesting your own delicious peppers. It’s easier than you think, and the rewards are well worth the effort. Happy gardening!
Frequently Asked Questions (FAQ)
What type of bottles are best for growing peppers?
The ideal bottles are clear, plastic bottles that have previously contained water, soda, or juice. Avoid using bottles that have contained harsh chemicals or cleaning products, as these could contaminate the soil and harm your plants. The size of the bottle will depend on the variety of pepper you’re growing. Smaller peppers like chili peppers can thrive in smaller bottles (1-2 liters), while larger peppers like bell peppers will need larger bottles (2-3 liters). Make sure the bottles are clean and have drainage holes at the bottom.
What kind of soil should I use for growing peppers in bottles?
A well-draining potting mix is essential for growing healthy peppers in bottles. Avoid using garden soil, as it can be too heavy and compact, leading to poor drainage and root rot. A good potting mix will typically contain a blend of peat moss, perlite, and vermiculite. You can also add compost or other organic matter to enrich the soil and provide essential nutrients for your pepper plants. Consider using a potting mix specifically formulated for vegetables or tomatoes, as these often contain added nutrients that are beneficial for pepper growth.
How often should I water my pepper plants in bottles?
The frequency of watering will depend on several factors, including the size of the bottle, the type of soil, the climate, and the stage of growth of your pepper plants. As a general rule, water your pepper plants when the top inch of soil feels dry to the touch. Avoid overwatering, as this can lead to root rot. When watering, water thoroughly until water drains out of the drainage holes at the bottom of the bottle. During hot weather, you may need to water your pepper plants more frequently.
How much sunlight do pepper plants need when grown in bottles?
Pepper plants need at least 6-8 hours of direct sunlight per day to thrive. Place your bottle gardens in a sunny location where they will receive plenty of sunlight. If you don’t have a sunny location, you can supplement natural sunlight with grow lights. Rotate your bottle gardens regularly to ensure that all sides of the plants receive equal sunlight.
Do I need to fertilize my pepper plants in bottles?
Yes, pepper plants need regular fertilization to produce healthy growth and abundant fruit. Use a balanced fertilizer that is specifically formulated for vegetables or tomatoes. Follow the instructions on the fertilizer packaging for application rates and frequency. You can also use organic fertilizers like compost tea or fish emulsion. Fertilize your pepper plants every 2-3 weeks during the growing season.
How do I protect my pepper plants from pests and diseases when growing them in bottles?
The controlled environment of a bottle can help to protect your pepper plants from pests and diseases, but it’s still important to take preventative measures. Inspect your plants regularly for signs of pests or diseases. If you find any pests, you can try removing them by hand or using insecticidal soap or neem oil. To prevent diseases, ensure good air circulation around your plants and avoid overwatering. You can also use a fungicide if necessary.
How long does it take for peppers to grow in bottles?
The time it takes for peppers to grow in bottles will depend on the variety of pepper, the growing conditions, and the care you provide. Generally, it takes about 60-90 days from transplanting seedlings to harvesting mature peppers. Some varieties may take longer, while others may mature more quickly. Be patient and provide your pepper plants with the care they need, and you’ll be rewarded with a bountiful harvest.
Can I grow peppers in bottles indoors?
Yes, you can grow peppers in bottles indoors, especially if you live in a climate with cold winters. Place your bottle gardens near a sunny window or use grow lights to provide adequate light. Ensure good air circulation and maintain a consistent temperature. You may also need to pollinate the flowers by hand, as there will be no bees or other pollinators indoors.
What are some common problems when growing peppers in bottles and how can I fix them?
Some common problems include:
* **Yellowing leaves:** This can be caused by overwatering, underwatering, nutrient deficiencies, or pests. Adjust your watering schedule, fertilize your plants, and inspect them for pests.
* **Blossom end rot:** This is caused by a calcium deficiency. Add calcium to the soil or use a calcium-rich fertilizer.
* **Pests:** Common pests include aphids, spider mites, and whiteflies. Remove pests by hand or use insecticidal soap or neem oil.
* **Diseases:** Common diseases include fungal infections and bacterial diseases. Ensure good air circulation and avoid overwatering. Use a fungicide or bactericide if necessary.
Can I reuse the bottles for growing peppers again next year?
Yes, you can reuse the bottles for growing peppers again next year. Clean the bottles thoroughly with soap and water to remove any dirt or debris. Disinfect the bottles with a solution of bleach and water to kill any remaining pathogens. Allow the bottles to dry completely before reusing them. You may also want to replace the soil with fresh potting mix to ensure that your pepper plants have access to the nutrients they need.

Leave a Comment