
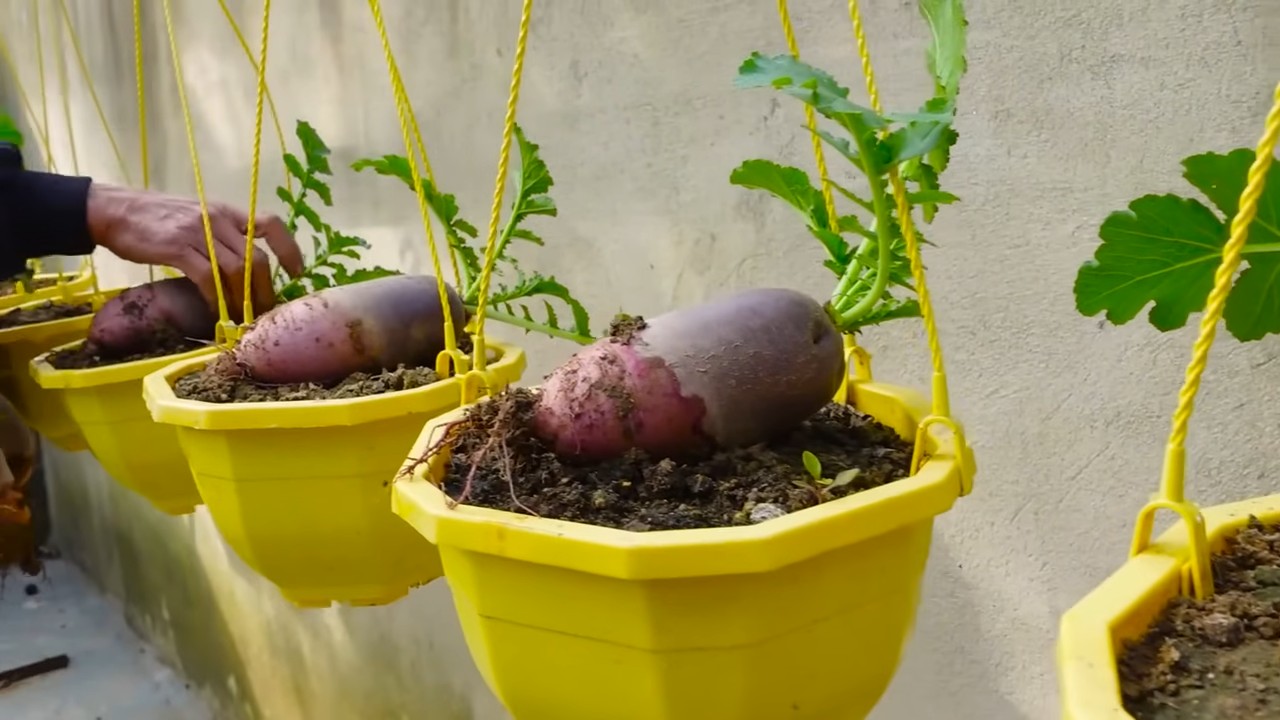
Growing Pink Radishes might sound like a whimsical dream, but I’m here to tell you it’s an achievable reality, even if you’re a complete beginner! Forget those bland, store-bought radishes; imagine pulling vibrant, peppery pink gems straight from your own backyard. This isn’t just about adding a pop of color to your salads; it’s about connecting with nature, enjoying fresh, homegrown produce, and experiencing the sheer joy of watching something you planted thrive.
Radishes, in general, have a surprisingly rich history. They’ve been cultivated for thousands of years, with evidence suggesting they were enjoyed in ancient Egypt and Greece. While the classic red radish is well-known, exploring the world of pink radishes opens up a whole new dimension of flavor and visual appeal. Think Watermelon Radishes with their striking pink interiors or the milder, subtly sweet Pink Beauty variety.
Why should you bother with this DIY project? Well, for starters, growing pink radishes is incredibly easy and fast! They’re perfect for impatient gardeners (like me!) who want to see results quickly. Plus, knowing exactly where your food comes from and that it’s free from harmful pesticides is a huge peace of mind. This article will provide you with simple, step-by-step instructions and clever hacks to ensure your pink radish adventure is a resounding success. Get ready to impress your friends and family with your colorful harvest!
Growing Pink Radishes Yourself: A DIY Guide for Beginners
Hello garden friends! I love harvesting fresh, crisp radishes directly from my garden. And pink radishes are not only delicious but also a real eye-catcher! In this article, I’ll show you how to easily grow your own pink radishes – even if you are an absolute gardening novice. Don’t worry, it’s really child’s play!
What you need to grow pink radishes
Before we get started, here’s a list of everything you’ll need:
- Radish seeds (pink variety): Make sure you buy fresh seeds to ensure a good germination rate. There are various pink varieties, such as ‘French Breakfast’ or ‘Pink Beauty’.
- Garden soil: Radishes prefer loose, well-draining soil. You can use regular garden soil, but it is advisable to improve it with compost or sand.
- Compost or other organic fertilizer: For a good supply of nutrients.
- Watering can or garden hose: For regular watering.
- Garden tools: A small trowel or a dibber for sowing.
- A sunny location: Radishes need at least 6 hours of sun per day.
- (Optional) Row marker: Helps to make straight rows.
- (Optional) Slug protection: Especially important if you live in an area with many slugs.
The Right Time for Sowing
Radishes are early bloomers and can be sown early in the year.
- Spring Sowing: As soon as the soil has thawed and warmed up a bit (from around March/April), you can start sowing.
- Summer Sowing: You can also sow radishes in the summer, but make sure the soil doesn’t get too hot. It’s best to choose a partially shaded location.
- Autumn Sowing: Sowing in late summer or early autumn is also possible. This way, you can still harvest fresh radishes in the fall.
Important: It’s best to sow radishes every two to three weeks to ensure a continuous harvest.
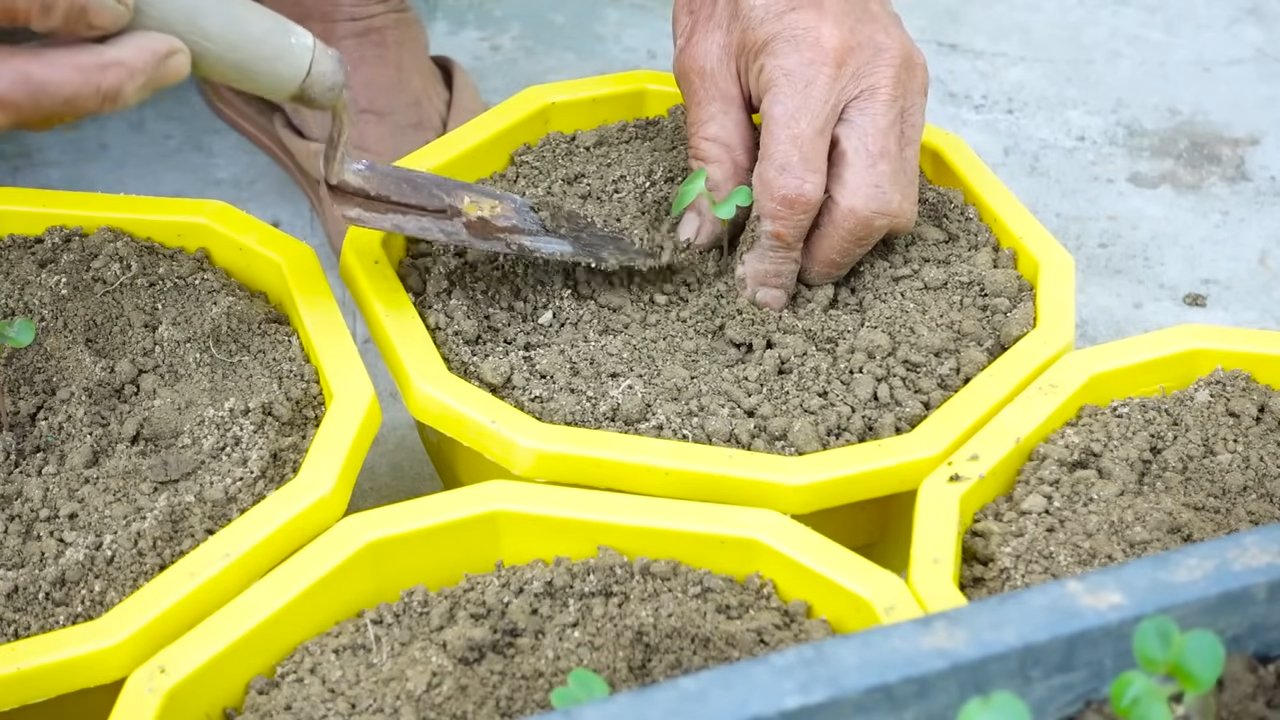
Step-by-Step Guide: How to Sow Pink Radishes
1. Soil Preparation:
- Loosen the soil with a shovel or a cultivator.
- Remove stones, roots, and weeds.
- Improve the soil with compost or other organic fertilizer. Work the fertilizer well into the soil.
- Smooth the surface with a rake.
2. Making Rows:
- Make rows in the soil with a row marker or a stick. The rows should be about 15-20 cm apart.
- The sowing depth should be about 1-2 cm.
3. Sowing:
- Place the radish seeds in the rows. Make sure the seeds are not too close together. A distance of 2-3 cm between the seeds is ideal.
- Cover the seeds with soil and press down lightly.
4. Watering:
- Water the rows carefully with a watering can or a garden hose. The soil should be well moistened, but not too wet.
5. Marking:
- Label the rows with a tag so you know where you have sown radishes.
Caring for Your Radishes
After sowing, proper care is crucial for a successful harvest.
1. Watering:
- Keep the soil evenly moist. Radishes need regular water, especially during germination and growth.
- It’s best to water in the morning or evening to avoid evaporation.
2. Weed Control:
- Regularly remove weeds that grow around the radishes. Weeds compete with the radishes for nutrients and water.
- Loosen the soil between the rows regularly to improve aeration.
3. Thinning:
- If the radish plants are too close together, you should thin them out. Remove the weakest plants so that the remaining plants have enough space to grow.
- The distance between the plants should be about 2-3 cm.
4. Pest Protection:
- Radishes can be infested by various pests, such as flea beetles or slugs.
- To deter flea beetles, you can cover the radishes with fleece.
- You can combat slugs with slug pellets or other natural methods.
Harvest Time!
Radishes grow very quickly and can often be harvested after just 3-4 weeks.
1. Harvest Time:
- The radishes are ready to harvest when they have reached a size of about 2-3 cm.
- You can check the size of the radishes by carefully exposing the bulb.
2. Harvesting:
- Carefully pull the radishes out of the soil.
- Remove the leaves and wash the radishes thoroughly.
3. Storage:
- Radishes do not keep for long. It is best to eat them immediately after harvesting.
- However, you can also store the radishes in the refrigerator. Wrap them in a damp cloth or place them in a plastic container.
Common Problems and Solutions
Problems can also arise when growing radishes. Here are some common problems and how you can solve them:
- Radishes are not getting plump:
- Cause: Too little sun, soil too dry, planted too closely.
- Solution: Provide enough sun, water regularly, and thin out the plants.
- Radishes are spicy/hot:
- Cause: Too little water, growing for too long.
- Solution: Water regularly and harvest the radishes on time.
- Radishes are hollow:
- Cause: Growing for too long, irregular watering.
- Solution: Harvest the radishes on time and water regularly.
- Pests:
- Cause: Infestation by flea beetles, slugs, or other pests.
- Solution: Use fleece, slug pellets, or other natural methods for pest control.
Extra Tips for Successful Cultivation
- Observe crop rotation: Do not plant radishes in the same location every year. Rotate the planting area to prevent diseases and pests.
- Companion planting: Radishes get along well with other vegetables, such as lettuce, carrots, or spinach.
- Prevent bolting: When radishes flower (bolt), they become woody and no longer taste good. To prevent bolting, you should harvest the radishes on time.
- Saving your own seeds: If you wish, you can also save seeds from your radishes. To do this, let some plants flower and the seeds ripen.
Delicious Recipe Ideas with Pink Radishes
Pink radishes are not only beautiful to look at but also very versatile in the kitchen. Here are a few ideas of what you can do with them:
On bread: With butter or cream cheese and a little
Raw as a snack: Simply plain with a little salt or dip.
In a salad: Add a fresh note and a beautiful color to any salad.
Conclusion
So, there you have it! Growing pink radishes at home is not only surprisingly simple but also incredibly rewarding. Forget those bland, store-bought radishes that lack that vibrant color and peppery bite. With this easy DIY trick, you can cultivate your own crop of crisp, beautiful pink radishes that will elevate your salads, snacks, and side dishes to a whole new level.
Why is this a must-try? Because it puts you in control. You know exactly what goes into your food, from the soil to the sunlight. You avoid harmful pesticides and herbicides, ensuring a healthier and more flavorful radish. Plus, there’s a unique satisfaction in harvesting something you’ve nurtured from seed to table. The vibrant pink hue adds a touch of whimsy and visual appeal to any dish, making it a conversation starter and a feast for the eyes as well as the palate.
But the fun doesn’t stop there! Feel free to experiment with different radish varieties. While we focused on pink radishes, the same principles apply to growing red, white, or even black radishes. You can also try interplanting your radishes with other fast-growing vegetables like lettuce or spinach to maximize your garden space. Consider adding a touch of compost tea to your watering routine for an extra boost of nutrients.
For a spicier kick, try letting your radishes mature a little longer. Just be sure to harvest them before they become too woody or bitter. If you prefer a milder flavor, harvest them when they are smaller and more tender. You can even pickle your excess radishes for a tangy and refreshing treat that will last for weeks.
Don’t be intimidated if you’re a beginner gardener. Radishes are incredibly forgiving and quick to grow, making them the perfect starting point for anyone looking to get their hands dirty. This DIY trick is designed to be accessible to everyone, regardless of their gardening experience.
We wholeheartedly encourage you to give this DIY trick a try. It’s a fun, educational, and delicious way to connect with nature and enjoy the fruits (or rather, vegetables) of your labor. Once you’ve tasted the difference between homegrown and store-bought radishes, you’ll never go back.
And most importantly, we want to hear about your experience! Share your photos, tips, and stories in the comments below. Let us know what worked for you, what challenges you faced, and what delicious dishes you created with your homegrown pink radishes. Together, we can build a community of radish enthusiasts and inspire others to embrace the joy of gardening. So, grab your seeds, get your hands dirty, and get ready to enjoy the vibrant flavor of your very own pink radishes!
Frequently Asked Questions (FAQ)
What kind of soil is best for growing pink radishes?
Radishes thrive in loose, well-drained soil that is rich in organic matter. Amend your soil with compost or well-rotted manure before planting to improve drainage and fertility. Avoid heavy clay soils, as they can hinder root development and result in misshapen radishes. A slightly acidic to neutral pH (around 6.0 to 7.0) is ideal. If your soil is particularly poor, consider growing your radishes in raised beds or containers filled with a high-quality potting mix.
How much sunlight do pink radishes need?
Radishes need at least six hours of direct sunlight per day to grow properly. However, they can tolerate partial shade, especially in hotter climates. If you live in a region with intense summer heat, providing some afternoon shade can help prevent the radishes from bolting (going to seed prematurely).
How often should I water my radishes?
Consistent moisture is crucial for growing plump, juicy radishes. Water deeply and regularly, especially during dry spells. Aim to keep the soil consistently moist but not waterlogged. Overwatering can lead to root rot, while underwatering can cause the radishes to become tough and bitter. A good rule of thumb is to water when the top inch of soil feels dry to the touch.
How long does it take for pink radishes to mature?
One of the best things about radishes is their quick growth rate. Most varieties of pink radishes mature in just 20 to 30 days. This makes them a great option for impatient gardeners or those looking for a quick harvest. Check the seed packet for specific maturity times for your chosen variety.
Why are my radish greens growing but not the radish itself?
This is a common problem, and there are several possible causes. One reason could be that the soil is too rich in nitrogen. Nitrogen promotes leafy growth, so if your soil is overly fertile, the plant may focus on producing greens at the expense of the root. Another possibility is that the radishes are not getting enough sunlight. Insufficient sunlight can also lead to excessive foliage growth. Finally, overcrowding can also be a factor. Thin out your seedlings to ensure that each plant has enough space to develop properly.
What are some common pests and diseases that affect radishes?
Radishes are generally pest-resistant, but they can be susceptible to certain problems. Flea beetles are a common pest that can create small holes in the leaves. Covering your plants with row covers can help prevent flea beetle damage. Root maggots can also be a problem, especially in areas with poor drainage. Crop rotation and good soil drainage can help prevent root maggot infestations. Fungal diseases like damping-off can affect seedlings, so it’s important to use sterile potting mix and avoid overwatering.
Can I eat radish greens?
Absolutely! Radish greens are nutritious and delicious. They have a peppery flavor similar to the radish root itself. You can use them in salads, stir-fries, or soups. Just be sure to wash them thoroughly before eating.
How do I know when my radishes are ready to harvest?
The best way to determine if your radishes are ready to harvest is to check the seed packet for the expected size and maturity time. You can also gently brush away some of the soil around the base of the plant to check the size of the radish. They should be firm and plump. Don’t let them get too large, as they can become woody and bitter.
Can I grow radishes in containers?
Yes, radishes are well-suited for container gardening. Choose a container that is at least 6 inches deep and has good drainage. Use a high-quality potting mix and water regularly. Container-grown radishes may need more frequent watering than those grown in the ground.
What are some creative ways to use pink radishes?
Beyond salads, pink radishes can be used in a variety of creative ways. Slice them thinly and add them to sandwiches or tacos for a crunchy and peppery kick. Pickle them for a tangy and refreshing snack. Roast them with other root vegetables for a sweet and savory side dish. Or, blend them into a vibrant pink radish soup. The possibilities are endless!
Leave a Comment