
Growing Water Spinach, also known as Ong Choy or Kang Kong, might seem like an exotic endeavor reserved for seasoned gardeners, but trust me, it’s surprisingly easy and incredibly rewarding! Have you ever dreamt of snipping fresh, vibrant greens right from your backyard to add a delicious crunch to your stir-fries? This DIY guide will unlock the secrets to cultivating this nutritious and fast-growing vegetable right at home, even if you’re a complete beginner.
Water spinach has a rich history, deeply rooted in Southeast Asian cuisine. For centuries, it’s been a staple in dishes across the region, prized for its mild flavor and impressive nutritional profile. Beyond its culinary appeal, growing water spinach offers a sustainable way to access fresh produce, reducing your reliance on store-bought vegetables and minimizing your carbon footprint. Plus, it’s incredibly fun to watch it thrive!
Why should you learn this DIY trick? Well, in today’s world, knowing how to grow your own food is becoming increasingly important. Not only does it provide you with healthier, pesticide-free options, but it also connects you to the natural world in a meaningful way. Growing Water Spinach is a fantastic project for anyone looking to add a touch of green to their lives, save money on groceries, and enjoy the satisfaction of harvesting their own delicious vegetables. Let’s dive in and discover how simple it is to bring this vibrant green into your home garden!
Growing Water Spinach (Kangkong) at Home: A DIY Guide
Hey there, fellow gardening enthusiasts! I’m so excited to share my experience with growing water spinach, also known as kangkong, right at home. It’s surprisingly easy, incredibly rewarding, and you get to enjoy fresh, delicious greens in your meals. This guide will walk you through everything you need to know, from choosing the right setup to harvesting your bounty. Let’s get started!
Choosing Your Growing Method
Before we dive into the nitty-gritty, let’s talk about the different ways you can grow water spinach. I’ve tried a few methods, and here’s what I’ve learned:
* Water Culture (Hydroponics): This is my personal favorite! It’s clean, efficient, and the plants grow like crazy. You’ll need a container, some nutrient solution, and a way to support the plants.
* Soil Culture (Container Gardening): If you’re more comfortable with soil, this is a great option. You’ll need a large pot or container, well-draining soil, and a sunny spot.
* Direct Sowing (In-Ground): If you live in a warm climate with consistently moist soil, you can sow the seeds directly into the ground.
For this guide, I’ll focus primarily on water culture, as it’s what I’ve had the most success with and find the most fascinating. But I’ll also touch on soil culture for those who prefer that method.
Materials You’ll Need
Okay, let’s gather our supplies! Here’s a list of what you’ll need, depending on your chosen method:
For Water Culture:
* A large container (I use a plastic storage bin)
* Net pots or small plastic cups with holes
* Hydroponic nutrient solution (specifically formulated for leafy greens)
* Clay pebbles or rockwool cubes (for supporting the seedlings)
* An air pump and air stone (optional, but highly recommended for oxygenating the water)
* Water spinach seeds or cuttings
* pH testing kit (optional, but helpful for maintaining optimal nutrient levels)
* Grow lights (if you don’t have a sunny spot)
For Soil Culture:
* A large pot or container (at least 12 inches deep)
* Well-draining potting mix (a mix of compost, perlite, and vermiculite works well)
* Water spinach seeds or cuttings
* Fertilizer (balanced NPK fertilizer)
* Watering can or hose
Step-by-Step Instructions: Water Culture
Alright, let’s get our hands dirty (or rather, wet!). Here’s how to grow water spinach using water culture:
1. Prepare Your Container: Clean your container thoroughly with soap and water. This is crucial to prevent algae growth and other issues.
2. Set Up Your Net Pots: Place your net pots or plastic cups with holes into the lid of your container. Make sure they’re spaced evenly to allow the plants to grow without overcrowding. If your container doesn’t have a lid, you can use a piece of styrofoam or plastic to create one.
3. Germinate Your Seeds (Optional): You can directly sow the seeds into the net pots, but I prefer to germinate them first for better success. To germinate, wrap the seeds in a damp paper towel and place them in a plastic bag. Keep the paper towel moist and wait for the seeds to sprout (usually 2-3 days).
4. Plant Your Seeds or Cuttings: If you germinated your seeds, carefully transfer them to the net pots, placing them on top of the clay pebbles or rockwool cubes. If you’re using cuttings, simply insert the cut end into the clay pebbles or rockwool.
5. Prepare Your Nutrient Solution: Follow the instructions on your hydroponic nutrient solution to mix it with water. I usually start with a half-strength solution and gradually increase it as the plants grow.
6. Fill Your Container: Pour the nutrient solution into your container, making sure the bottom of the net pots are submerged. You don’t want the entire net pot to be underwater, just enough to keep the clay pebbles or rockwool moist.
7. Add Air Pump (Optional): If you’re using an air pump, place the air stone at the bottom of the container. This will help oxygenate the water and promote healthy root growth.
8. Provide Light: Water spinach needs plenty of light to thrive. If you have a sunny spot, place your container there. If not, use grow lights. I use LED grow lights and keep them on for about 12-14 hours a day.
9. Monitor and Adjust: Check the water level and nutrient solution regularly. Add more water as needed and replenish the nutrient solution every 1-2 weeks. Also, monitor the pH of the solution and adjust it if necessary. Water spinach prefers a pH of around 6.0-7.0.
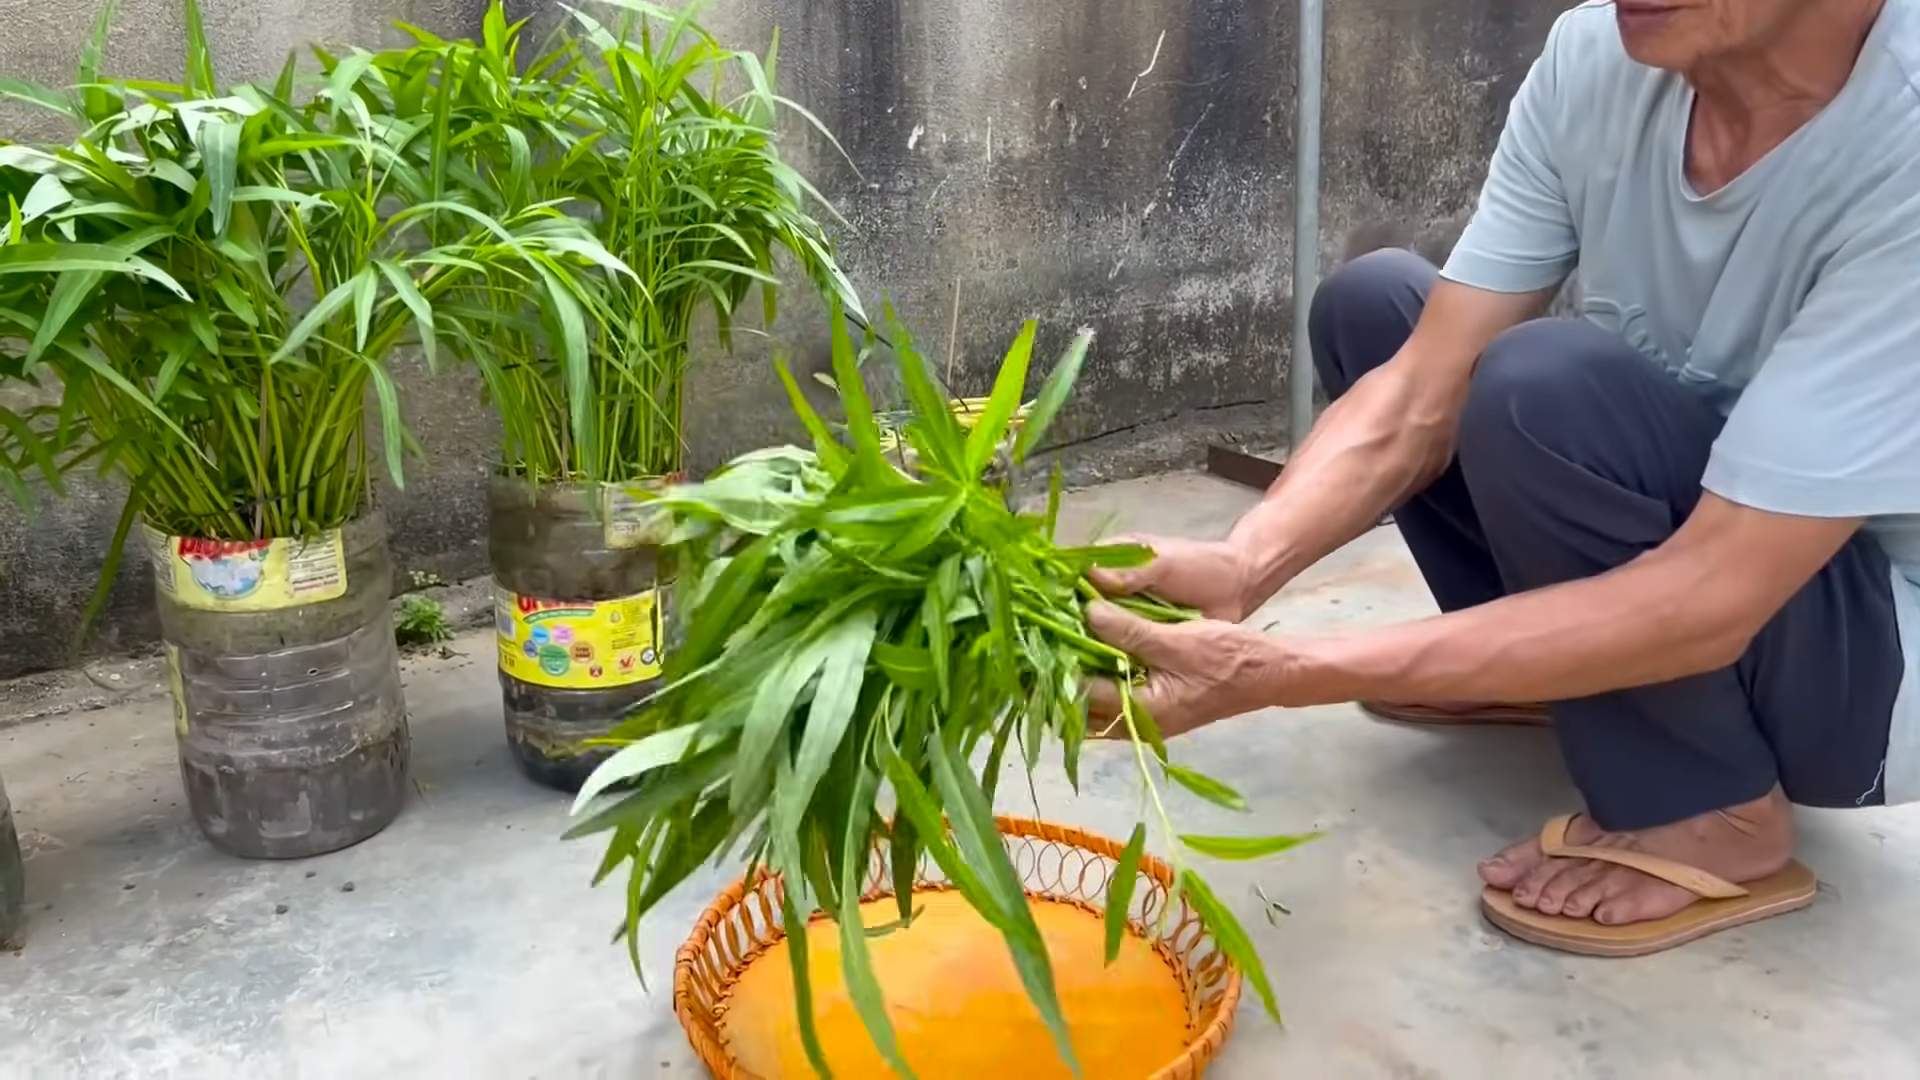
10. Harvest: You can start harvesting your water spinach when the stems are about 6-8 inches long. Simply cut the stems above the lowest node, and the plant will continue to grow and produce more leaves.
Step-by-Step Instructions: Soil Culture
For those who prefer growing in soil, here’s how to do it:
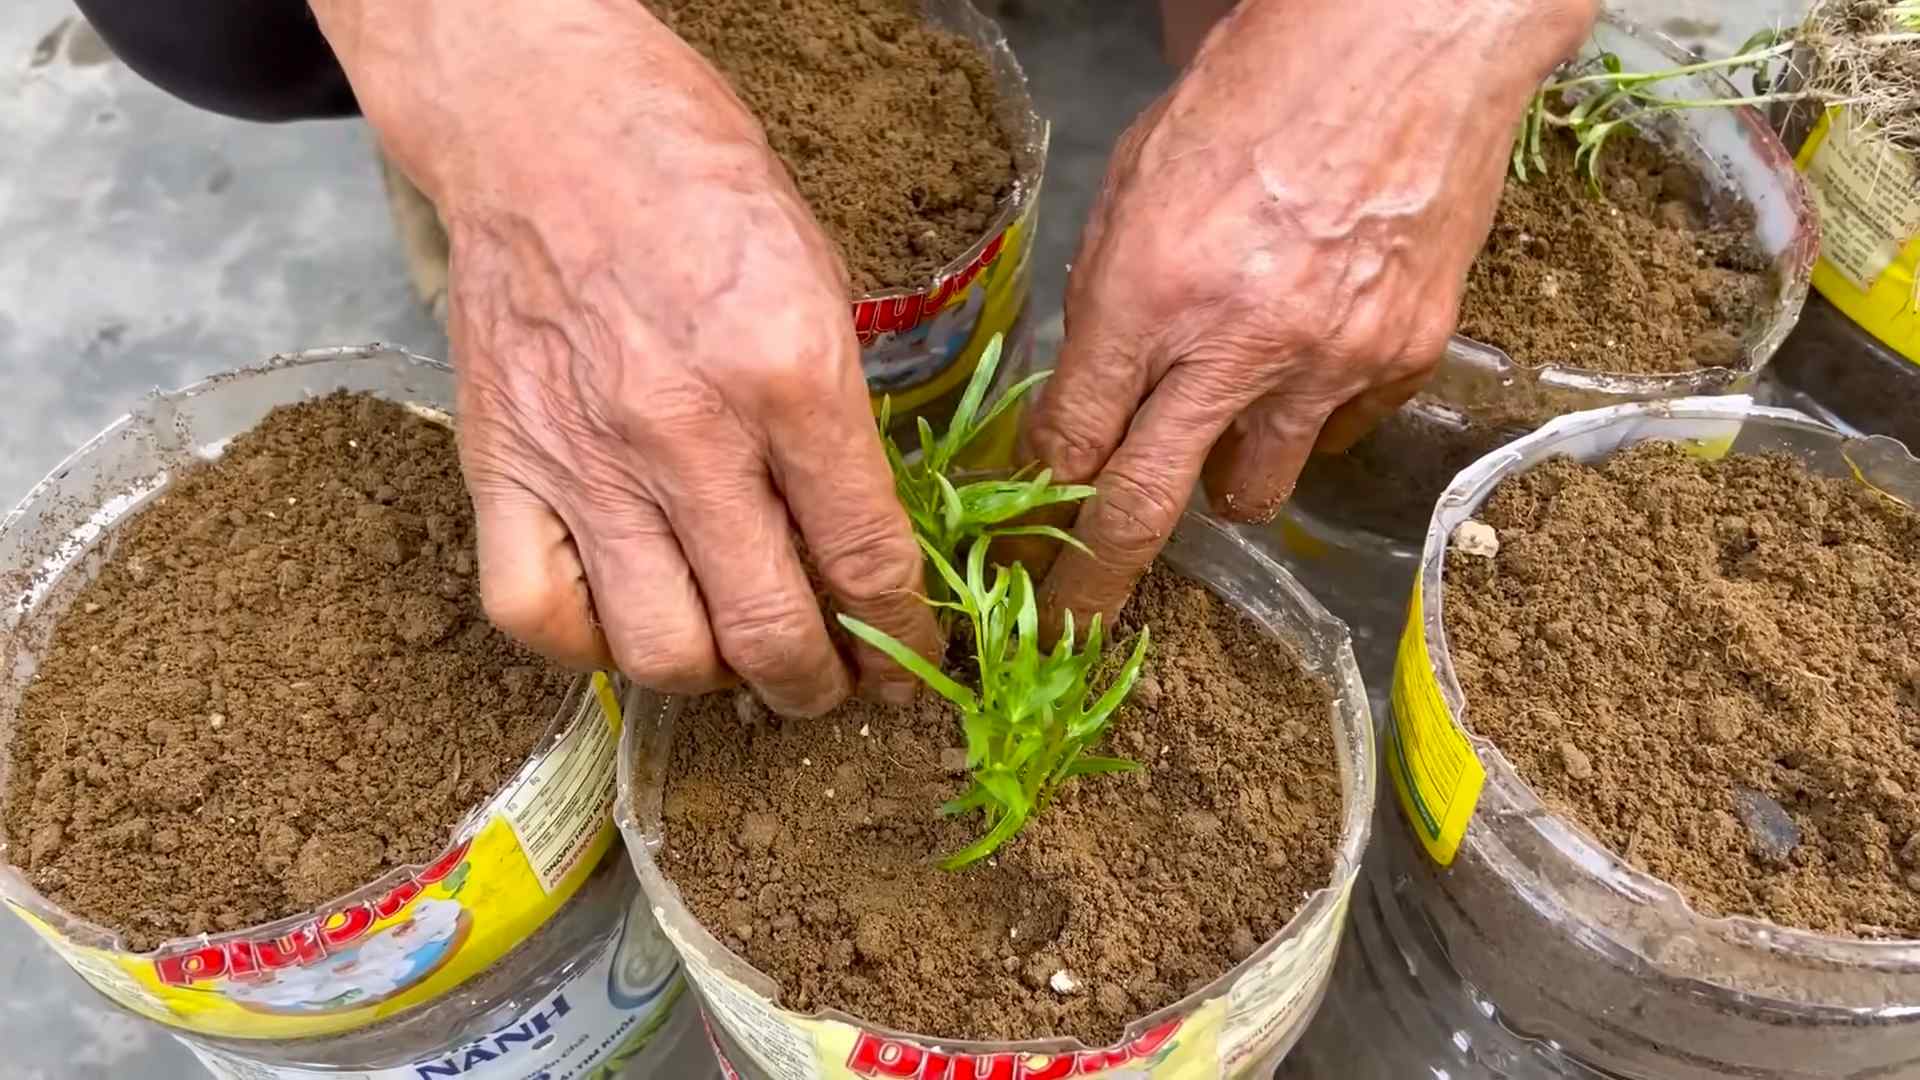
1. Prepare Your Container: Fill your large pot or container with well-draining potting mix.
2. Sow Your Seeds or Plant Cuttings: Sow the seeds about half an inch deep and space them a few inches apart. If you’re using cuttings, insert the cut end into the soil.
3. Water Thoroughly: Water the soil thoroughly after planting.
4. Provide Light: Place your container in a sunny spot that gets at least 6 hours of sunlight per day.
5. Water Regularly: Keep the soil consistently moist, but not waterlogged.
6. Fertilize: Fertilize your water spinach every 2-3 weeks with a balanced NPK fertilizer.
7. Harvest: You can start harvesting your water spinach when the stems are about 6-8 inches long. Simply cut the stems above the lowest node, and the plant will continue to grow and produce more leaves.
Troubleshooting Common Issues
Even with the best care, you might encounter some issues while growing water spinach. Here are a few common problems and how to fix them:
* Yellowing Leaves: This could be a sign of nutrient deficiency. Make sure you’re using a balanced nutrient solution or fertilizer.
* Slow Growth: This could be due to insufficient light or low temperatures. Provide more light and ensure the temperature is warm enough (ideally between 70-85°F).
* Algae Growth: Algae can be a problem in water culture. To prevent algae growth, keep your container clean, use opaque containers, and avoid exposing the nutrient solution to direct sunlight.
* Pests: Water spinach is generally pest-resistant, but you might encounter aphids or spider mites. You can control these pests with insecticidal soap or neem oil.
Harvesting and Enjoying Your Water Spinach
The best part of growing your own water spinach is, of course, enjoying the delicious harvest! As I mentioned earlier, you can start harvesting when the stems are about 6-8 inches long. Simply cut the stems above the lowest node, and the plant will continue to grow and produce more leaves.
Water spinach is incredibly versatile in the kitchen. You can stir-fry it with garlic and chili, add it to soups and stews, or even use it in salads. It has a slightly sweet and nutty flavor that I absolutely love.
Here are a few of my favorite ways to enjoy water spinach:
* Garlic Stir-Fry: This is a classic! Simply stir-fry water spinach with garlic, chili, and a splash of soy sauce.
* Water Spinach Soup: Add water spinach to your favorite soup or broth for a nutritious and flavorful boost.
* Water Spinach Salad: Toss water spinach with your favorite salad ingredients and a light vinaigrette.
Tips for Success
Here are a few extra tips to help you succeed in growing water spinach at home:
* Start with Quality Seeds or Cuttings: Choose seeds or cuttings from a reputable source to ensure you’re getting healthy plants.
* Provide Plenty of Light: Water spinach needs plenty of light to thrive. If you don’t have a sunny spot, use grow lights.
* Maintain Optimal Nutrient Levels: Regularly check and adjust the nutrient solution or fertilizer to ensure your plants are getting the nutrients they need.
* Keep the Water Clean: In water culture, it’s important to keep the water clean to prevent algae growth and other issues.
* Be Patient: Growing takes time and effort. Don’t get discouraged if you don’t see results immediately. Just keep learning and experimenting, and you’ll eventually get the hang of it
Conclusion
So, there you have it! Growing your own water spinach, also known as kangkong or ong choy, is not only incredibly rewarding but also surprisingly simple. This DIY trick transforms your kitchen scraps into a vibrant, delicious, and nutritious addition to your meals. Forget those wilted, overpriced bunches at the grocery store; with a little patience and this easy method, you can have a constant supply of fresh, crisp water spinach right at your fingertips.
Why is this a must-try? Because it’s sustainable, cost-effective, and undeniably satisfying. You’re reducing food waste, saving money, and gaining access to a superfood packed with vitamins and minerals. Plus, the sheer joy of watching something grow from a discarded stem is an experience in itself. It’s a fantastic project for families, a great way to introduce kids to gardening, and a perfect solution for anyone looking to add more fresh greens to their diet.
But the fun doesn’t stop there! Feel free to experiment with different growing mediums. While water works perfectly well, you can also try using a nutrient-rich hydroponic solution for even faster growth. Consider adding a small air pump to your water container to oxygenate the roots, promoting healthier and more vigorous plants. You can also try different varieties of water spinach. Some have broader leaves, while others have thinner stems, each offering a slightly different texture and flavor.
Once your water spinach is ready for harvest, the culinary possibilities are endless. Stir-fries are the classic choice, but don’t limit yourself! Add it to soups, salads, or even smoothies for a nutritional boost. The tender leaves and stems are delicious steamed, blanched, or even eaten raw. Remember to harvest regularly to encourage continued growth and prevent the plants from becoming too leggy.
We wholeheartedly encourage you to give this DIY water spinach growing trick a try. It’s a simple, effective, and incredibly rewarding way to bring fresh, healthy greens into your life. And most importantly, we want to hear about your experience! Share your photos, tips, and stories in the comments below. Let us know what worked for you, what challenges you faced, and what delicious dishes you created with your homegrown water spinach. Together, we can build a community of urban gardeners and share the joy of growing our own food. So, grab those water spinach stems, get your containers ready, and let’s get growing! This method of growing water spinach is a game changer.
Frequently Asked Questions (FAQ)
What exactly is water spinach, and why should I grow it?
Water spinach (Ipomoea aquatica) is a semi-aquatic leafy green vegetable popular in Southeast Asian cuisine. It’s known for its mild, slightly sweet flavor and crisp texture. Growing it yourself ensures you have a fresh, readily available supply, free from pesticides and herbicides. It’s also a sustainable way to reduce food waste and save money. Water spinach is packed with vitamins A and C, iron, and antioxidants, making it a healthy addition to your diet.
How long does it take to grow water spinach from cuttings?
Typically, you can expect to see significant growth within 1-2 weeks. The roots will start to develop within a few days, and the stems and leaves will begin to grow rapidly. You can usually harvest your first batch of water spinach within 3-4 weeks of planting the cuttings. The exact timeframe will depend on factors like temperature, light exposure, and the quality of the water or growing medium.
What kind of container should I use for growing water spinach?
Any container that can hold water will work. Plastic tubs, buckets, glass jars, or even repurposed food containers are all suitable options. The size of the container will depend on how much water spinach you want to grow. A container that holds at least a gallon of water is a good starting point. Make sure the container is clean and free from any harmful chemicals. Opaque containers are preferable as they prevent algae growth.
How much sunlight does water spinach need?
Water spinach thrives in bright, indirect sunlight. Aim for at least 4-6 hours of sunlight per day. If you’re growing it indoors, place it near a sunny window or use a grow light to supplement natural light. Insufficient sunlight can lead to leggy growth and reduced yields.
What kind of water should I use?
Tap water is generally fine, but it’s best to let it sit for 24 hours to allow chlorine to evaporate. You can also use filtered water or rainwater. Avoid using water that is heavily chlorinated or contains high levels of minerals, as this can inhibit growth. Change the water every few days to prevent algae growth and maintain a healthy environment for the plants.
Do I need to add fertilizer?
While water spinach can grow in plain water, adding a diluted liquid fertilizer can boost growth and yields. Use a balanced fertilizer specifically formulated for leafy greens, and follow the instructions on the label. Avoid over-fertilizing, as this can burn the roots and damage the plants. A hydroponic solution is also a great option.
How do I harvest water spinach?
Harvest water spinach by cutting the stems a few inches above the water line. This will encourage new growth from the remaining stem. You can harvest regularly, as needed. The more you harvest, the more the plant will produce.
Can I grow water spinach outdoors?
Yes, water spinach can be grown outdoors in warm climates. It prefers temperatures between 70°F and 85°F (21°C and 29°C). Choose a sunny location with well-draining soil. You can grow it in containers or directly in the ground. Make sure to provide adequate water and fertilizer.
Is water spinach safe to eat?
Yes, water spinach is generally safe to eat when grown in clean water and soil. However, it’s important to wash it thoroughly before consumption to remove any dirt or debris. Avoid eating water spinach that has been grown in contaminated water, as it can absorb pollutants.
What are some common problems when growing water spinach, and how can I fix them?
Some common problems include algae growth, yellowing leaves, and slow growth. Algae growth can be prevented by using an opaque container and changing the water regularly. Yellowing leaves can be a sign of nutrient deficiency, which can be corrected by adding fertilizer. Slow growth can be caused by insufficient sunlight, low temperatures, or poor water quality. Make sure to provide adequate sunlight, maintain a warm temperature, and use clean water.
Can I grow water spinach from seeds?
Yes, you can grow water spinach from seeds, but starting from cuttings is generally faster and easier. If you choose to grow from seeds, soak them in water for 24 hours before planting them in a moist potting mix. Keep the soil moist and warm until the seeds germinate.
How can I prevent pests and diseases?
Water spinach is generally resistant to pests and diseases, but it can be susceptible to aphids and spider mites. These pests can be controlled with insecticidal soap or neem oil. To prevent diseases, ensure good air circulation and avoid overwatering.
What are some delicious ways to cook water spinach?
Water spinach is a versatile vegetable that can be used in a variety of dishes. It’s commonly stir-fried with garlic, chili peppers, and soy sauce. It can also be added to soups, salads, and curries. The tender leaves and stems are delicious steamed, blanched, or even eaten raw.
Can I grow water spinach indoors year-round?
Yes, you can grow water spinach indoors year-round if you provide adequate light and warmth. Use a grow light to supplement natural light during the winter months. Maintain a consistent temperature between 70°F and 85°F (21°C and 29°C).
How do I store harvested water spinach?
Store harvested water spinach in the refrigerator in a plastic bag or container. It will stay fresh for several days. Wash it thoroughly before using.


Leave a Comment