
Household time saving ideas – who doesn’t crave more time in their day? I know I do! We’re all juggling work, family, hobbies, and trying to squeeze in a little relaxation. That’s why I’m so excited to share some brilliant DIY tricks and hacks that will genuinely free up your precious time around the house. Forget spending hours on tedious chores; these clever solutions are designed to streamline your routine and give you back those stolen moments.
Throughout history, people have sought ways to make their lives easier. From ancient inventions like the wheel to modern conveniences like the washing machine, the pursuit of efficiency is deeply ingrained in our culture. These household time saving ideas build upon that tradition, offering simple yet effective ways to optimize your home management.
Let’s face it, nobody enjoys spending their entire weekend cleaning or doing laundry. These DIY tricks are essential because they empower you to reclaim your weekends and evenings. Imagine having more time to pursue your passions, spend quality time with loved ones, or simply relax and recharge. These hacks are not just about saving time; they’re about improving your overall quality of life. So, let’s dive in and discover how to transform your home into a haven of efficiency!

DIY Time-Saving Household Hacks: Reclaim Your Day!
Okay, let’s face it, life is busy! Between work, family, and trying to squeeze in some semblance of a social life, who has time for endless chores? I’m constantly on the lookout for ways to streamline my household tasks and free up precious minutes (or even hours!). So, I’m sharing some of my favorite DIY time-saving hacks that have genuinely made a difference in my daily routine. Get ready to reclaim your day!
Hack 1: The “Prep-Ahead” Pantry Power-Up
This is all about minimizing cooking time during the week. Trust me, a little weekend prep goes a long way!
- Goal: Reduce weeknight cooking time by prepping ingredients in advance.
- Benefits: Healthier meals, less stress, and more time for relaxation.
- Materials: Cutting boards, knives, storage containers (glass or BPA-free plastic), labels, and your favorite recipes.
Step-by-Step Instructions:
- Plan Your Meals: Before you even think about chopping, sit down and plan your meals for the week. This prevents those last-minute “what’s for dinner?” panics that lead to takeout. Write down a list of ingredients you’ll need.
- Grocery Shopping: Armed with your list, head to the grocery store and grab everything you need. Try to shop on a day when the store isn’t too crowded.
- Wash and Chop Veggies: This is the big one! Wash all your vegetables thoroughly. Then, chop them according to your recipes. Onions, peppers, carrots, celery – get them all diced and ready to go.
- Portion and Store: Divide the chopped veggies into individual containers or bags, labeled with the meal they’re intended for. For example, “Taco Tuesday Veggies” or “Stir-Fry Mix.”
- Prep Protein: If you’re using meat, you can also prep it in advance. Marinate chicken, portion out ground beef, or even cook a batch of quinoa or rice. Store these separately in labeled containers.
- Assemble Salad Jars: For quick lunches, layer salad ingredients in jars. Start with dressing at the bottom, followed by hard vegetables like carrots and cucumbers, then softer vegetables like tomatoes, and finally, leafy greens on top. This prevents the greens from getting soggy.
- Freeze for Later: If you have extra prepped ingredients, don’t hesitate to freeze them! Frozen veggies are great for soups, stews, and smoothies.
Hack 2: The “One-Touch” Cleaning Caddy
This hack is all about having your cleaning supplies readily available, so you’re more likely to tackle small messes before they become big problems.
- Goal: Make cleaning more convenient and efficient.
- Benefits: A cleaner home with less effort, reduced clutter, and a sense of accomplishment.
- Materials: A sturdy caddy (plastic or metal), spray bottles, cleaning cloths (microfiber is best!), your favorite cleaning solutions (all-purpose cleaner, glass cleaner, bathroom cleaner), sponges, gloves, and a small brush.
Step-by-Step Instructions:
- Choose Your Caddy: Select a caddy that’s the right size for your needs. It should be large enough to hold all your essential cleaning supplies, but not so large that it’s difficult to carry around.
- Gather Your Supplies: Collect all your cleaning supplies and lay them out on a table. This will help you see what you have and what you might need to purchase.
- Fill Spray Bottles: Fill your spray bottles with your favorite cleaning solutions. Label each bottle clearly so you know what’s inside. I like to use a permanent marker or a label maker.
- Organize Your Caddy: Arrange your cleaning supplies in the caddy in a way that makes sense to you. Keep frequently used items within easy reach. I usually put spray bottles in one section, cloths and sponges in another, and gloves and brushes in a third.
- Strategic Placement: Place your cleaning caddy in a central location, such as under the kitchen sink or in a hallway closet. This will make it easy to grab whenever you need it.
- Mini Caddies: Consider creating smaller, specialized caddies for specific tasks, such as a bathroom cleaning caddy or a dusting caddy.
Hack 3: The “Decluttering Dash” System
This is a quick and easy way to declutter your home in just 15 minutes a day. It’s amazing how much you can accomplish in short bursts!
- Goal: Reduce clutter and create a more organized living space.
- Benefits: A less stressful environment, improved focus, and a sense of control.
- Materials: Three boxes or bags labeled “Donate,” “Trash,” and “Relocate.” A timer.
Step-by-Step Instructions:
- Set the Timer: Set a timer for 15 minutes. This will help you stay focused and prevent you from getting overwhelmed.
- Choose a Zone: Select a small area to declutter, such as a drawer, a shelf, or a corner of a room.
- Sort and Categorize: Quickly go through the items in your chosen zone and decide what to do with each one. Place items in the appropriate box or bag:
- Donate: Items that are in good condition but you no longer need or use.
- Trash: Items that are broken, damaged, or no longer usable.
- Relocate: Items that belong in a different location in your home.
- Don’t Overthink It: The key to this method is to make quick decisions and avoid getting bogged down in sentimentality. If you haven’t used something in a year, chances are you don’t need it.
- Repeat Daily: Repeat this process every day for 15 minutes. You’ll be amazed at how much clutter you can eliminate over time.
- Process the Boxes: Once the “Donate” and “Trash” boxes are full, take them to the donation center and the trash can. Put the “Relocate” items away in their proper places.
Hack 4: The “Laundry Load Launcher” Routine
Laundry can feel like a never-ending chore. This routine helps you stay on top of it without feeling overwhelmed.
- Goal: Minimize laundry buildup and make the process more manageable.
- Benefits: Fewer mountains of laundry, less stress, and more free time.
- Materials: Laundry baskets, detergent, stain remover, dryer sheets, and a laundry schedule.
Step-by-Step Instructions:
- Establish a Laundry Schedule: Determine how often you need to do laundry based on your household’s needs. I find that doing one load every day or every other day works best for me.
- Sort as You Go: Place separate laundry baskets in each bedroom or bathroom for lights, darks, and delicates. This will save you time sorting laundry later.
- Pre-Treat Stains Immediately: As soon as you notice a stain, treat it with stain remover. The sooner you treat a stain, the easier it will be to remove.
- Load and Go: When a laundry basket is full, load the washing machine and start a load. Don’t let laundry pile up!
- Fold and Put Away Immediately: As soon as the laundry is dry, fold it and put it away. Don’t let clean laundry sit in baskets for days.
- Delegate: If you have children, assign them age-appropriate laundry tasks, such as folding towels or putting away their own clothes.
Hack 5: The “Digital Detox” Downtime
This isn’t exactly a chore-related hack, but it’s crucial for saving time and improving your overall well-being. We spend so much time glued to our screens that we often neglect other important tasks and activities.
- Goal: Reduce screen time and create more time for other activities.
- Benefits: Improved focus, reduced stress, better sleep, and more time for hobbies and relationships.
- Materials: A timer, a book, a hobby, or a relaxing activity.
Step-by-Step Instructions:
- Set Boundaries: Establish specific times when you will disconnect from your devices. This could be during meals, before bed, or for a set period each day.

Conclusion
So, there you have it! This simple yet incredibly effective DIY trick is a game-changer for anyone looking to reclaim precious minutes (or even hours!) in their day. We’ve shown you how to transform a common household item into a powerful tool for streamlining your routine and boosting your productivity. Forget spending a fortune on specialized gadgets or complicated systems. This method is accessible, affordable, and, most importantly, it works!
Why is this a must-try? Because time is our most valuable resource. We all juggle countless responsibilities, from work and family to hobbies and personal well-being. Feeling overwhelmed is practically the norm. This DIY trick offers a tangible way to alleviate that pressure by simplifying a task that you likely perform regularly. Imagine the feeling of accomplishment and the extra time you’ll have to dedicate to the things you truly enjoy.
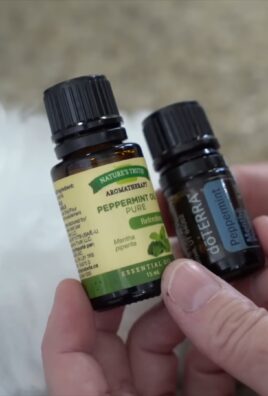
But the beauty of this DIY approach lies in its adaptability. Feel free to experiment with variations to suit your specific needs and preferences. For example, if you’re dealing with particularly stubborn messes, consider adding a few drops of essential oil with degreasing properties, like lemon or tea tree. Or, if you prefer a more eco-friendly approach, explore using vinegar or baking soda as alternative cleaning agents. The possibilities are endless!
Don’t be afraid to get creative and personalize this method to make it your own. The key is to find what works best for you and your lifestyle. This isn’t just about saving time; it’s about empowering yourself to take control of your day and create a more efficient and enjoyable living space.
We are confident that once you try this DIY trick, you’ll wonder how you ever lived without it. It’s a small change that can make a big difference in your overall well-being and productivity.
So, what are you waiting for? Gather your supplies, follow the simple steps outlined above, and prepare to be amazed by the results. We encourage you to embrace this simple way to implement household time saving ideas.
And most importantly, we want to hear about your experience! Share your tips, tricks, and variations in the comments below. Let us know how this DIY trick has helped you save time and simplify your life. Your feedback is invaluable and will help others discover the power of this simple yet effective method. Let’s create a community of time-saving enthusiasts and help each other live more fulfilling and productive lives!
Frequently Asked Questions (FAQ)
What exactly makes this DIY trick so effective for saving time?
The effectiveness of this DIY trick stems from its ability to streamline a repetitive task, reducing the time and effort required to complete it. By simplifying the process and eliminating unnecessary steps, you can free up valuable minutes that can be redirected to other, more important activities. It’s about working smarter, not harder. The beauty of this trick is that it leverages readily available household items, making it accessible and cost-effective for everyone. It’s a practical solution to a common problem, offering a tangible way to reclaim your time and boost your productivity.
Can this DIY trick be adapted for different types of tasks or situations?
Absolutely! The core principle behind this DIY trick – simplification and efficiency – can be applied to a wide range of tasks and situations. While the specific steps may need to be adjusted depending on the context, the underlying concept remains the same. For example, if you’re looking to save time on meal preparation, you could adapt this trick by pre-chopping vegetables or preparing ingredients in advance. Or, if you’re struggling to stay organized, you could use this trick to create a designated space for frequently used items. The key is to identify areas in your life where you’re spending excessive time and then brainstorm ways to simplify the process using readily available resources.
Are there any potential drawbacks or limitations to this DIY trick?
While this DIY trick is generally safe and effective, it’s important to be aware of potential drawbacks or limitations. For example, if you’re using harsh chemicals or abrasive materials, you’ll need to take precautions to protect your skin and eyes. It’s also important to test the trick on a small, inconspicuous area first to ensure that it doesn’t damage or discolor the surface. Additionally, this trick may not be suitable for all types of tasks or situations. For example, if you’re dealing with a complex or delicate task, you may need to consult with a professional. However, in most cases, this DIY trick is a safe and effective way to save time and simplify your life.
What are some alternative methods for achieving similar time-saving results?
There are many alternative methods for achieving similar time-saving results, depending on the specific task or situation. For example, if you’re looking to save time on cleaning, you could invest in a robotic vacuum cleaner or hire a cleaning service. Or, if you’re struggling to stay organized, you could use a digital calendar or task management app. Other options include delegating tasks to others, outsourcing work to freelancers, or simply saying no to commitments that don’t align with your priorities. The best approach will depend on your individual needs, preferences, and budget.
How can I ensure that this DIY trick remains effective over the long term?
To ensure that this DIY trick remains effective over the long term, it’s important to make it a habit. Incorporate it into your daily or weekly routine and stick with it, even when you’re feeling busy or overwhelmed. It’s also important to regularly evaluate the effectiveness of the trick and make adjustments as needed. As your needs and circumstances change, you may need to modify the steps or explore alternative methods. The key is to remain flexible and adaptable and to continuously seek out ways to improve your efficiency and productivity. Remember that implementing household time saving ideas is an ongoing process, not a one-time fix.
What if I don’t have all the recommended supplies on hand? Can I substitute them?
In many cases, you can substitute the recommended supplies with readily available alternatives. The key is to understand the purpose of each ingredient or tool and then find a suitable replacement that serves the same function. For example, if you don’t have a specific type of cleaning solution, you could use a mixture of vinegar and water instead. Or, if you don’t have a particular type of brush, you could use a sponge or cloth. The important thing is to be creative and resourceful and to experiment with different options until you find what works best for you. Just be sure to test any substitutions on a small, inconspicuous area first to ensure that they don’t damage or discolor the surface.
How can I share my own variations or improvements to this DIY trick with others?
We encourage you to share your own variations or improvements to this DIY trick with others in the comments section below. Your feedback is invaluable and will help others discover new and innovative ways to save time and simplify their lives. You can also share your experiences on social media using relevant hashtags, such as #DIYTimeSaver or #HouseholdHacks. By sharing your knowledge and insights, you can help create a community of time-saving enthusiasts and inspire others to take control of their day and live more fulfilling lives.


Leave a Comment