
Indoor Radish Growing: Ever dreamt of plucking crisp, peppery radishes straight from your windowsill, even when the snow is falling outside? I know I have! Forget those bland, store-bought radishes – imagine the vibrant flavor and satisfying crunch of homegrown ones, ready to add a zesty kick to your salads and snacks. This isn’t just a pipe dream; it’s entirely achievable with a few simple tricks and a little DIY spirit.
Radishes, surprisingly, have a rich history, dating back to ancient Egypt where they were a staple food. They were even used as currency to pay laborers building the pyramids! While we might not be paying our gardeners in radishes today, their ease of cultivation and rapid growth make them a rewarding crop for even the most novice gardener.
In today’s fast-paced world, finding moments of connection with nature can be a challenge. That’s where indoor radish growing comes in. It’s a fantastic way to bring a touch of the outdoors inside, offering a therapeutic and fulfilling hobby. Plus, who wouldn’t want a readily available supply of fresh, organic radishes? This DIY guide will walk you through everything you need to know, from choosing the right container to harvesting your delicious, homegrown bounty. Get ready to unleash your inner gardener and enjoy the simple pleasure of growing your own food!
Grow Your Own Radishes Indoors: A Beginner’s Guide
Hey there, fellow gardening enthusiasts! Ever crave that peppery crunch of a fresh radish but don’t have outdoor space, or maybe the weather just isn’t cooperating? Well, I’ve got some good news for you: you can totally grow radishes indoors! It’s easier than you might think, and I’m going to walk you through every step of the process. Get ready to enjoy homegrown radishes all year round!
What You’ll Need
Before we dive in, let’s gather our supplies. Here’s a checklist of everything you’ll need to successfully grow radishes indoors:
* **Radish Seeds:** Choose a variety that matures quickly. ‘Cherry Belle’ and ‘French Breakfast’ are excellent choices for indoor growing.
* **Containers:** You’ll need containers that are at least 6 inches deep. Plastic pots, repurposed containers (like yogurt tubs – just make sure to clean them well!), or even window boxes will work.
* **Potting Mix:** Use a well-draining potting mix. Avoid using garden soil, as it can compact and hinder root growth.
* **Grow Lights (Optional but Recommended):** Radishes need plenty of light. If you don’t have a sunny windowsill, grow lights are a must.
* **Watering Can or Spray Bottle:** For gentle watering.
* **Small Trowel or Spoon:** For planting seeds.
* **Fertilizer (Optional):** A balanced liquid fertilizer can help boost growth.
* **Seed Starting Tray (Optional):** If you want to start your seeds indoors before transplanting.
Step-by-Step Instructions: Planting and Growing
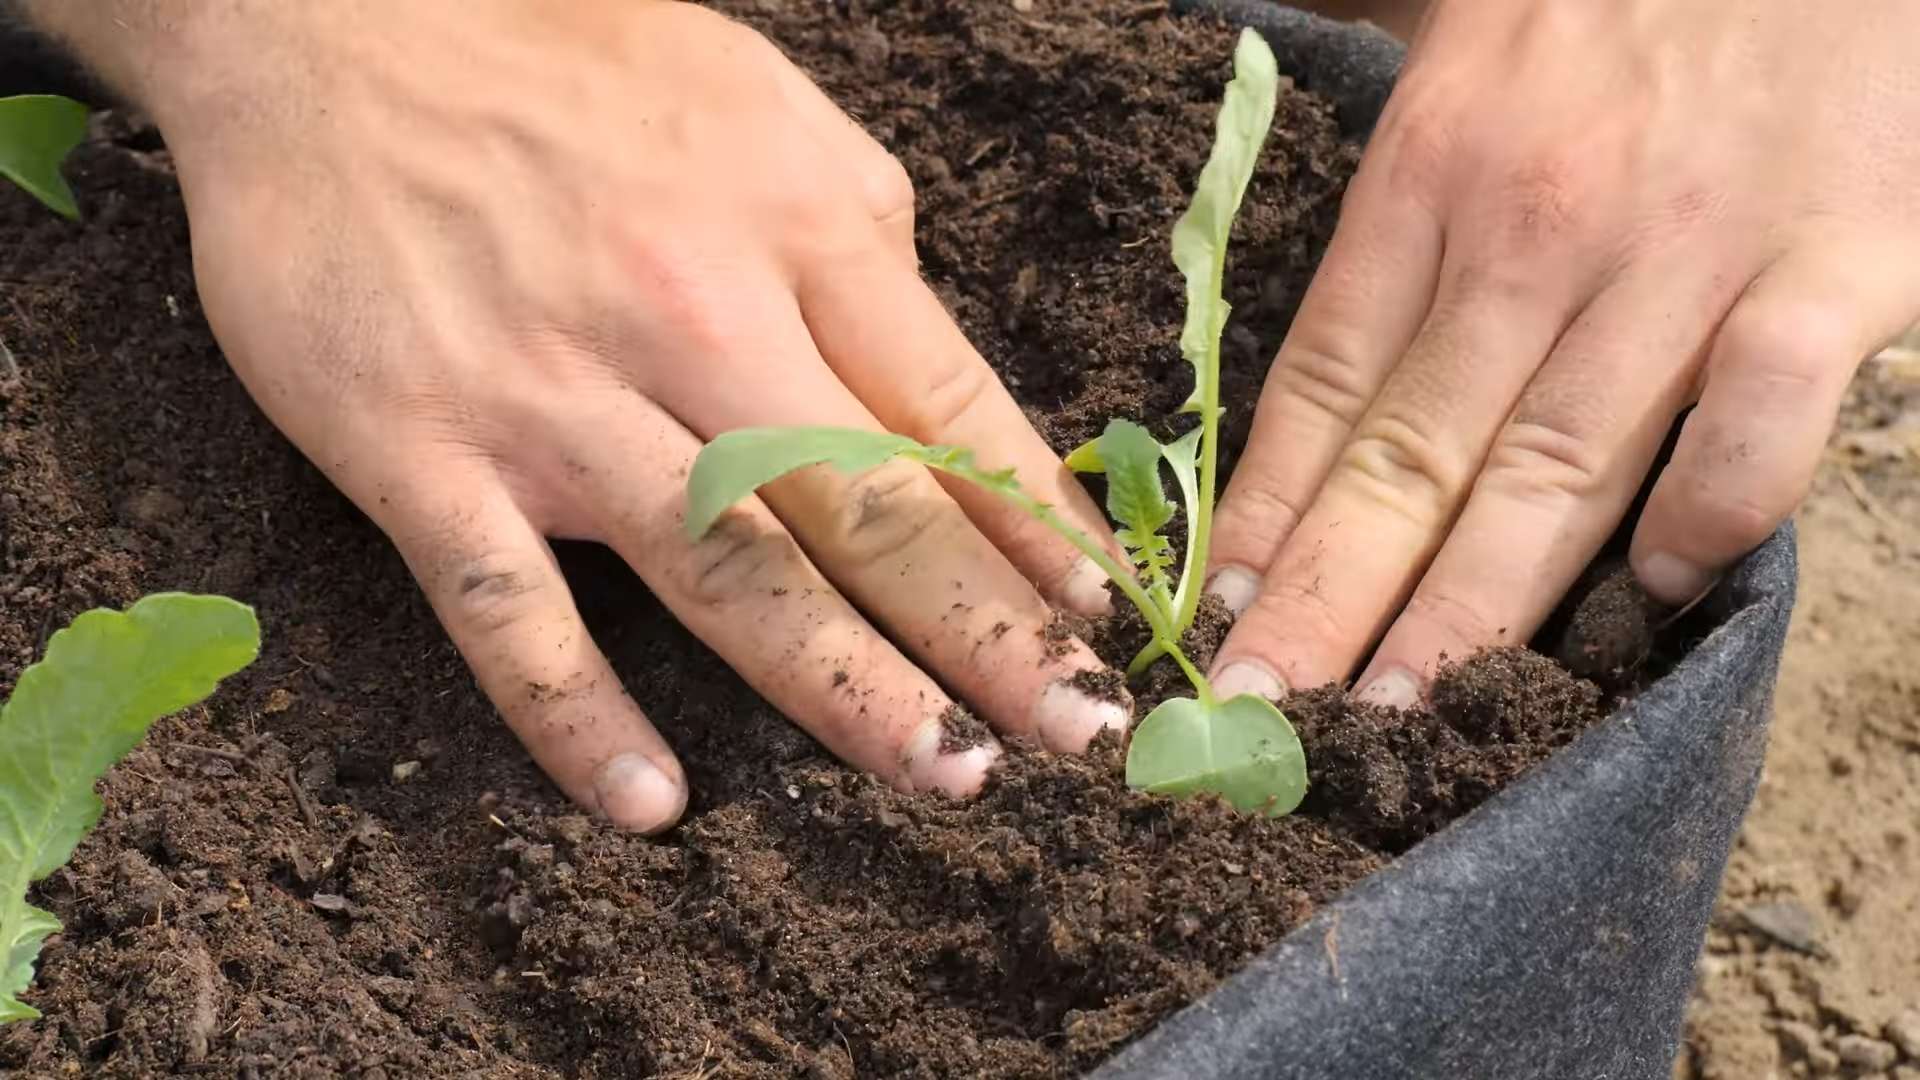
Okay, let’s get our hands dirty! Here’s how to plant and grow radishes indoors:
1. **Prepare Your Containers:**
* First, make sure your containers have drainage holes. Radishes don’t like soggy soil. If your container doesn’t have holes, you’ll need to drill some.
* Fill your containers with the potting mix, leaving about an inch of space at the top. Gently pat down the soil.
2. **Sow the Seeds:**
* Radishes need space to grow, so don’t overcrowd them. Sow the seeds about ½ inch deep and 1 inch apart.
* If you’re using a larger container, you can plant in rows, spacing the rows about 2 inches apart.
* I like to use a small spoon to make little indentations in the soil for each seed.
3. **Cover and Water:**
* Gently cover the seeds with a thin layer of potting mix.
* Water the soil thoroughly but gently. You don’t want to wash away the seeds. A spray bottle is great for this. The soil should be moist but not waterlogged.
4. **Provide Light:**
* Place your containers in a sunny windowsill that receives at least 6 hours of direct sunlight per day.
* If you don’t have enough natural light, use grow lights. Position the lights a few inches above the seedlings. I usually keep my grow lights on for about 12-14 hours a day.
5. **Maintain Moisture:**
* Keep the soil consistently moist, but not soggy. Check the soil moisture daily by sticking your finger about an inch into the soil. If it feels dry, water it.
* Overwatering can lead to root rot, so be careful!
6. **Thin the Seedlings (If Necessary):**
* Once the seedlings emerge (usually within 3-7 days), you might need to thin them out if they’re too close together.
* Carefully snip off the weaker seedlings at the soil line, leaving about 1 inch of space between the remaining plants. This will give them enough room to develop properly.
7. **Fertilize (Optional):**
* If you want to give your radishes an extra boost, you can fertilize them with a balanced liquid fertilizer diluted to half strength.
* I usually fertilize mine every two weeks, starting about two weeks after the seedlings emerge. But honestly, with good potting mix, they often do just fine without it.
Troubleshooting: Common Issues and Solutions
Even with the best intentions, things can sometimes go wrong. Here are some common problems you might encounter and how to fix them:
* **Leggy Seedlings:** This means your seedlings are stretching towards the light because they’re not getting enough. Move them to a sunnier location or use grow lights.
* **Yellowing Leaves:** This could be a sign of overwatering, underwatering, or nutrient deficiency. Check the soil moisture and adjust your watering accordingly. If you suspect a nutrient deficiency, try fertilizing.
* **Slow Growth:** This could be due to insufficient light, poor soil, or temperature fluctuations. Make sure your radishes are getting enough light and that the soil is well-draining. Radishes prefer cooler temperatures (60-70°F).
* **Root Rot:** This is caused by overwatering and poor drainage. Make sure your containers have drainage holes and avoid overwatering. If you suspect root rot, you might need to repot your radishes in fresh, dry potting mix.
* **Pests:** While less common indoors, pests like aphids can sometimes be a problem. Inspect your plants regularly and treat any infestations with insecticidal soap or neem oil.
Harvesting Your Radishes
This is the fun part! Radishes are fast growers, so you won’t have to wait long to enjoy your harvest.
1. **Check for Maturity:**
* Radishes are typically ready to harvest in about 3-4 weeks, depending on the variety.
* Gently brush away some of the soil around the base of the radish to check its size. They should be about 1 inch in diameter.
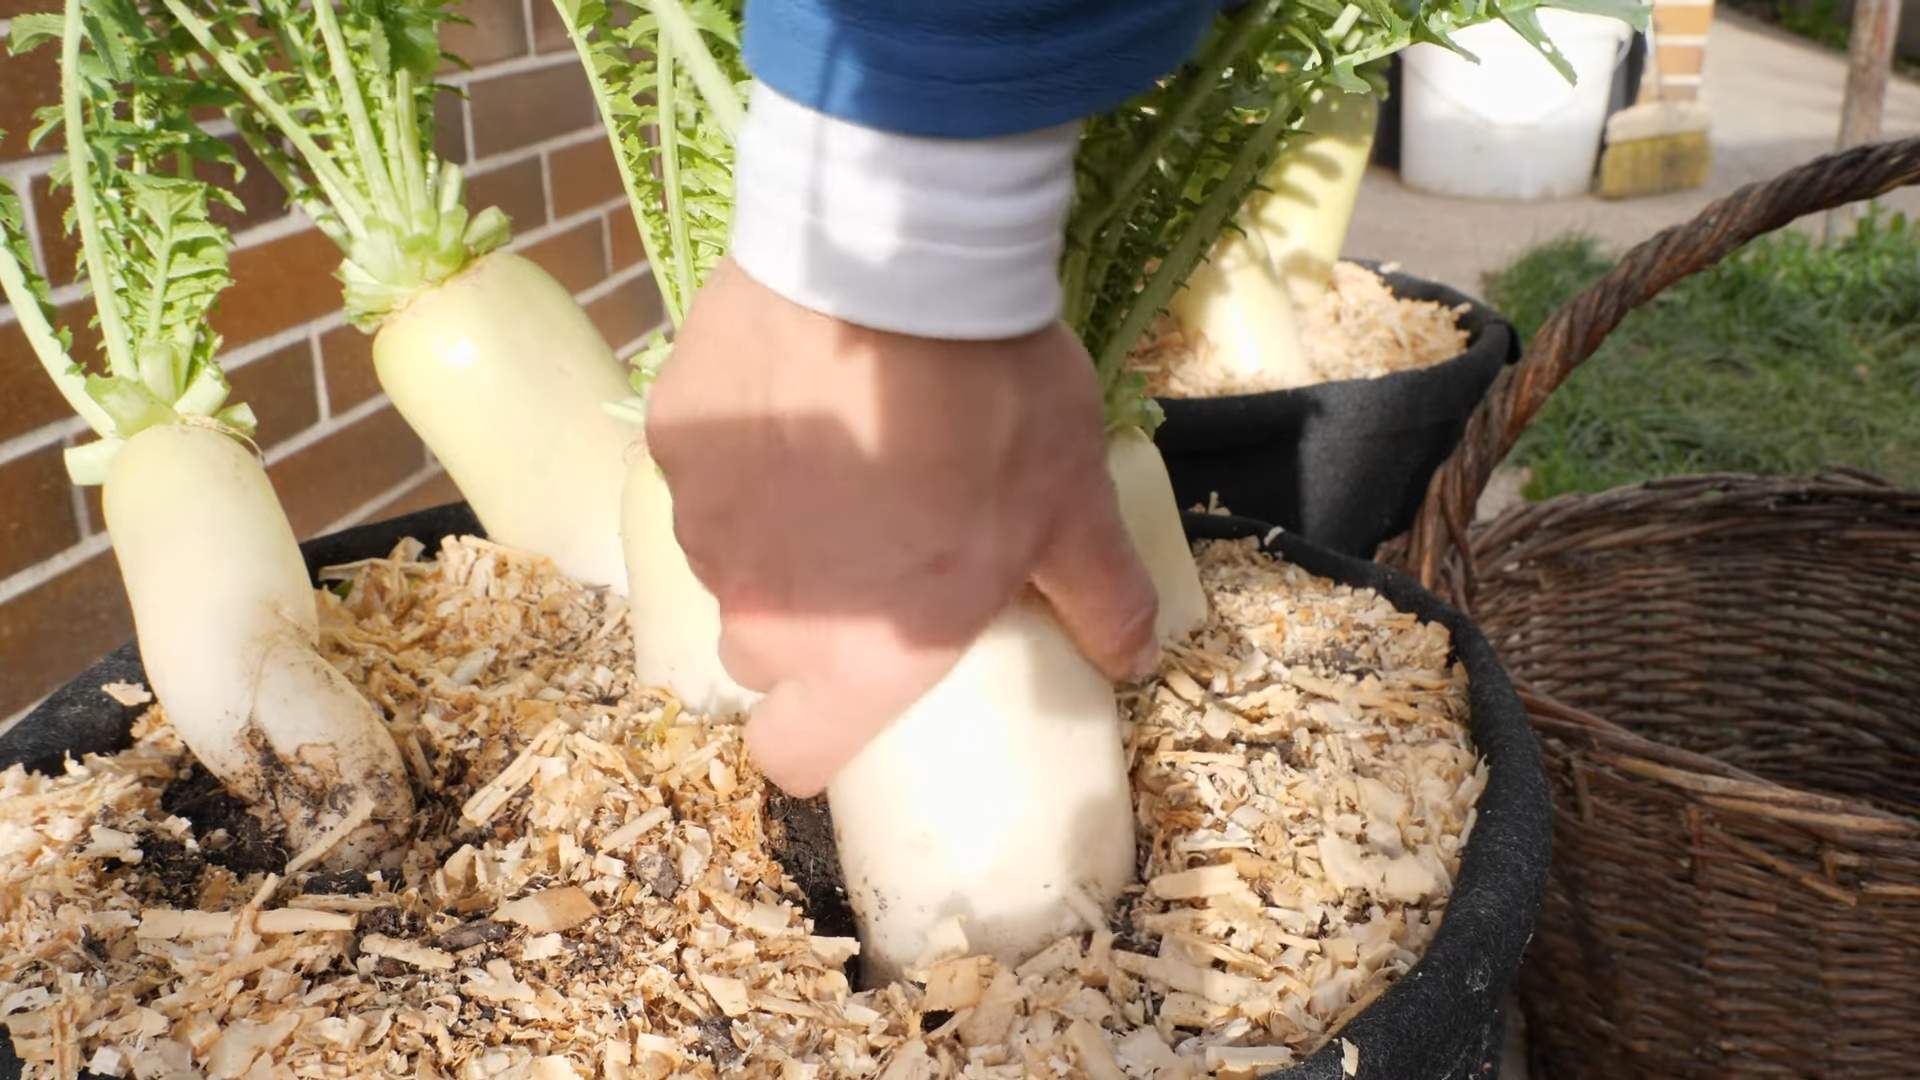
2. **Harvest Carefully:**
* Grasp the radish leaves near the base and gently pull the radish out of the soil.
* If the soil is dry, you might need to loosen it first with a small trowel.
3. **Wash and Enjoy:**
* Wash your freshly harvested radishes thoroughly to remove any dirt.
* Trim off the leaves and root tips.
* Enjoy them raw in salads, sandwiches, or as a crunchy snack. You can also roast or sauté them for a milder flavor. The greens are edible too!
Tips for Success
Here are a few extra tips to help you succeed with indoor radish growing:
* **Succession Planting:** To enjoy a continuous harvest, sow a new batch of seeds every week or two.
* **Rotate Your Crops:** After harvesting a batch of radishes, consider planting a different crop in the same container to prevent nutrient depletion.
* **Choose the Right Variety:** Some radish varieties are better suited for indoor growing than others. ‘Cherry Belle’ and ‘French Breakfast’ are good choices because they mature quickly and don’t require a lot of space.
* Don’t Overcrowd: Radishes need space to develop properly. Thin your seedlings as needed to ensure they have enough room to grow.
* Monitor for Pests: Even indoors, pests can sometimes be a problem. Inspect your plants regularly and take action if you see any signs of infestation.
* Have Fun!: Gardening should be enjoyable. Don’t be afraid to experiment and learn from your mistakes.
Maximizing Your Harvest: Advanced Techniques
Want to take your indoor radish growing to the next level? Here are a few advanced techniques to consider:
* **Hydroponics:** Growing radishes hydroponically can result in faster growth and higher yields. This involves growing the plants in a nutrient-rich water solution without soil.
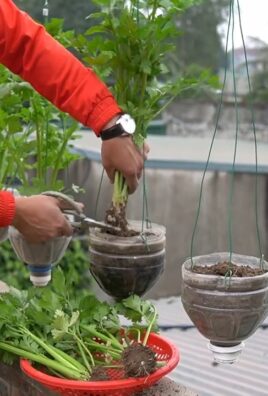
* **Vertical Gardening:** If you’re short on space, consider using a vertical gardening system to grow your radishes. This involves growing the plants in stacked containers or hanging planters.
* **Companion Planting:** Planting radishes alongside other plants can help improve their growth and protect them from pests. Good companion plants for radishes include carrots, lettuce, and spinach.
* **Soil Testing:** Testing your soil can help you determine if it’s lacking any essential nutrients. This can help you choose the right fertilizer to promote healthy growth.
* **Temperature Control:** Radishes prefer cooler temperatures (60-70°F). If your home is too warm, consider using a fan or air conditioner to keep the temperature down.
Radish Varieties to Try Indoors
While ‘Cherry Belle’ and ‘French Breakfast’ are popular choices, there are other radish varieties that do well indoors:
* **Easter Egg:** A mix of red, pink, purple, and white radishes.
* **Sparkler:** A round, red radish with a white tip.
* **White Icicle:** A long, white radish with a mild flavor.
* **Champion:** A large, round, red radish with a crisp texture.
* **Black Spanish:** A round, black radish with a pungent flavor (takes longer to mature
Conclusion
So, there you have it! Growing radishes indoors is not only possible, but it’s surprisingly simple and incredibly rewarding. Forget those bland, store-bought radishes that lack that peppery punch. With this DIY indoor radish growing trick, you can cultivate a constant supply of crisp, flavorful radishes right in your own home, regardless of the season.
Why is this a must-try? Because it puts you in control. You control the soil, the light, the water, and ultimately, the taste. You know exactly what’s going into your food, and there’s a deep satisfaction that comes from nurturing something from seed to table. Plus, it’s a fantastic way to introduce children to the wonders of gardening and where their food comes from.
But the best part? The possibilities are endless! Once you’ve mastered the basics, you can experiment with different radish varieties. Try French Breakfast radishes for their mild flavor and elongated shape, or go bold with Black Spanish radishes for a spicy kick. You can even plant a mix of varieties in the same container for a colorful and flavorful harvest.
Consider adding companion plants to your indoor radish garden. Herbs like chives or dill can help deter pests and enhance the flavor of your radishes. Marigolds are also a great choice for their pest-repelling properties and cheerful blooms.
Don’t be afraid to get creative with your containers, too. While a standard planter works perfectly well, you can also use repurposed containers like old buckets, plastic tubs, or even fabric grow bags. Just make sure your chosen container has adequate drainage.
And speaking of drainage, remember that proper watering is key to successful indoor radish growing. Radishes need consistent moisture, but they don’t like to sit in soggy soil. Water thoroughly when the top inch of soil feels dry to the touch, and be sure to empty any excess water that collects in the saucer beneath the container.
This DIY indoor radish growing method is more than just a way to get fresh vegetables; it’s a way to connect with nature, to learn new skills, and to enjoy the simple pleasures of growing your own food. It’s a sustainable and rewarding hobby that can bring joy and deliciousness to your life.
We wholeheartedly encourage you to give this DIY trick a try. It’s easier than you think, and the results are well worth the effort. Once you’ve harvested your first batch of homegrown radishes, we’d love to hear about your experience! Share your photos, tips, and tricks in the comments below. Let’s build a community of indoor radish growers and inspire others to discover the joys of homegrown goodness. Happy gardening!
Frequently Asked Questions (FAQ)
Q: What kind of soil should I use for growing radishes indoors?
A: The best soil for indoor radish growing is a well-draining potting mix. Avoid using garden soil, as it can be too heavy and compact, which can hinder root development. Look for a potting mix that contains a blend of peat moss, perlite, and vermiculite. These ingredients help to improve drainage and aeration, which are essential for healthy radish growth. You can also amend your potting mix with compost to add nutrients and improve its water-holding capacity.
Q: How much light do radishes need when grown indoors?
A: Radishes need at least 6 hours of direct sunlight per day to thrive. If you don’t have a sunny windowsill, you can supplement with artificial light. A fluorescent grow light or an LED grow light will work well. Position the light a few inches above the plants and keep it on for 12-14 hours per day. Rotate the plants regularly to ensure that all sides receive adequate light. Insufficient light can result in leggy plants with small, underdeveloped radishes.
Q: How often should I water my indoor radish plants?
A: Radishes need consistent moisture, but they don’t like to sit in soggy soil. Water thoroughly when the top inch of soil feels dry to the touch. Be sure to water deeply enough so that the water drains out of the bottom of the container. Empty any excess water that collects in the saucer beneath the container to prevent root rot. The frequency of watering will depend on the temperature, humidity, and type of container you’re using. Check the soil moisture regularly and adjust your watering schedule accordingly.
Q: How long does it take for radishes to mature when grown indoors?
A: Radishes are one of the fastest-growing vegetables, and they typically mature in 3-4 weeks when grown indoors. The exact time will depend on the variety of radish you’re growing and the growing conditions. Check the seed packet for specific information on the maturity time for your chosen variety. You can start harvesting radishes when they reach the desired size.
Q: What are some common problems I might encounter when growing radishes indoors?
A: Some common problems you might encounter when growing radishes indoors include:
* **Leggy plants:** This is usually caused by insufficient light. Make sure your plants are getting enough sunlight or artificial light.
* **Small radishes:** This can be caused by overcrowding, poor soil, or insufficient watering. Thin out the seedlings to give them more space, use a well-draining potting mix, and water regularly.
* **Root rot:** This is caused by overwatering. Make sure your container has adequate drainage and avoid letting the plants sit in soggy soil.
* **Pests:** Aphids and flea beetles can sometimes infest indoor radish plants. Inspect your plants regularly and treat any infestations promptly with insecticidal soap or neem oil.
Q: Can I grow different varieties of radishes together in the same container?
A: Yes, you can grow different varieties of radishes together in the same container, but it’s important to choose varieties that have similar maturity times. This will ensure that all of the radishes are ready to harvest at the same time. You can also plant a mix of colors and shapes for a more visually appealing harvest.
Q: How do I know when my radishes are ready to harvest?
A: Radishes are ready to harvest when they reach the desired size. Check the seed packet for specific information on the size of your chosen variety. You can also gently brush away some of the soil around the top of the radish to check its size. Harvest radishes by gently pulling them out of the soil.
Q: Can I eat the radish greens?
A: Yes, radish greens are edible and nutritious. They have a peppery flavor similar to the radishes themselves. You can add them to salads, soups, or stir-fries. Be sure to wash the greens thoroughly before eating them.
Q: How do I store harvested radishes?
A: To store harvested radishes, remove the greens and store them separately. Place the radishes in a plastic bag or container and store them in the refrigerator. They will keep for up to a week. The greens should be stored in a separate plastic bag in the refrigerator and will keep for a few days.


Leave a Comment