
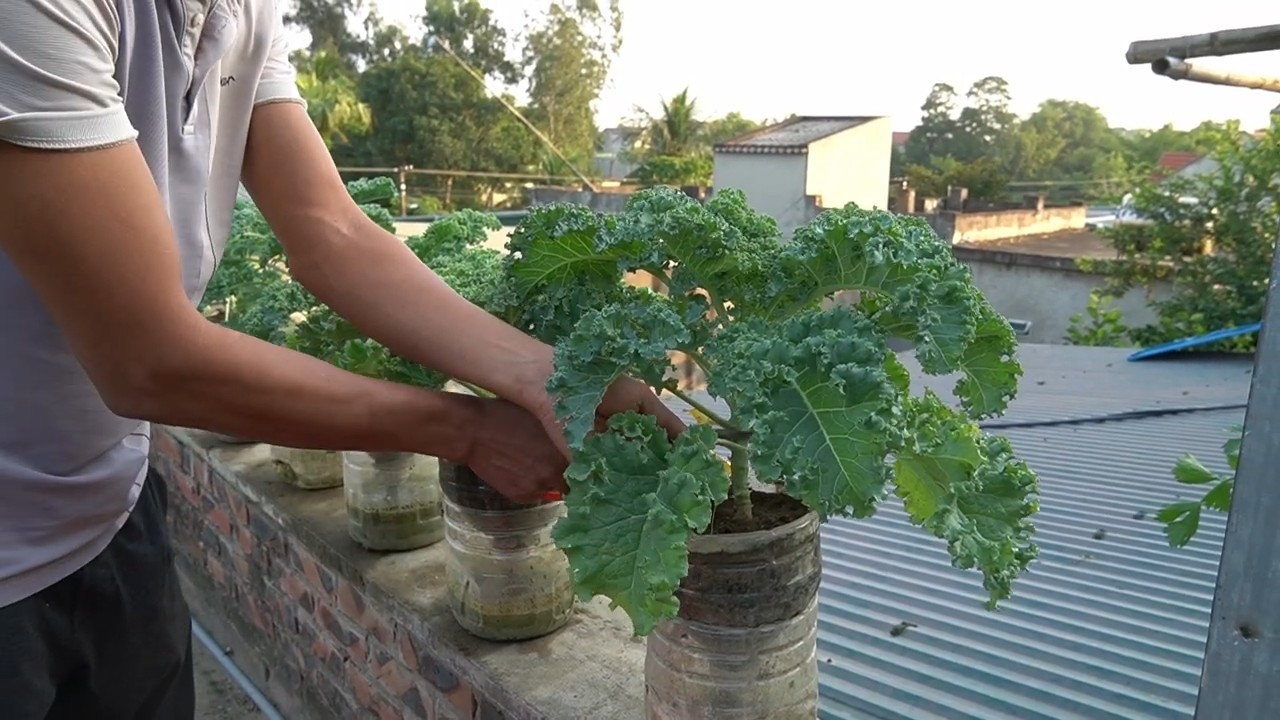
Kale plastic bottle gardening: sounds a bit quirky, right? But trust me, it’s a game-changer for anyone who dreams of fresh, homegrown kale without a sprawling garden! I’m so excited to share this incredibly simple and effective DIY trick with you. For centuries, humans have cultivated kale, from its humble beginnings as a wild leafy green to a nutritional powerhouse enjoyed worldwide. But let’s face it, not everyone has the space or ideal conditions for a traditional garden. That’s where this clever hack comes in!
Imagine harvesting crisp, vibrant kale leaves right from your windowsill or balcony, all thanks to a repurposed plastic bottle. It’s not just about convenience; it’s about sustainability, reducing waste, and connecting with nature, even in the smallest of spaces. This method is perfect for apartment dwellers, beginner gardeners, or anyone looking for a budget-friendly way to grow their own food. Plus, it’s a fantastic project to do with kids, teaching them about plant life and the importance of recycling. So, are you ready to transform those empty plastic bottles into mini kale gardens? Let’s dive into the wonderful world of kale plastic bottle gardening and unlock the secrets to a bountiful harvest!
Turn Plastic Bottles into a Vertical Kale Garden: A DIY Guide
Hey garden friends! Do you also feel like your garden just doesn’t have enough space for all your ideas? Or maybe you don’t have a garden at all, just a small balcony or a terrace? Don’t worry, I have a great solution for you: a vertical kale garden made from recycled plastic bottles! This is not only environmentally friendly but also space-saving and looks really cool. Let’s get started together!
What you need: The Material List
Before we start, here is a list of all the materials you will need for this project:
- Plastic bottles: Lots of them! PET bottles (from water, juice, or soda) are best. The more you have, the bigger your garden will be. Make sure they are clean and dry.
- Scissors or a utility knife: For cutting the bottles. Be careful!
- A drill or a nail and hammer: To make holes for hanging.
- Strong cord, wire, or cable ties: For hanging the bottles.
- Soil: High-quality potting soil or garden soil.
- Kale seedlings or seeds: Depending on how quickly you want to harvest.
- A watering can or spray bottle: To water your plants.
- Gloves: To keep your hands clean.
- Optional: Spray paint (to paint the bottles and give them a custom look).
- Optional: Fleece or jute (to keep the soil in the bottles and prevent it from washing out).
Step-by-Step Guide: How to Build Your Vertical Garden
Now let’s get down to it! Follow these steps to build your own vertical kale garden:
1. Prepare the bottles:
- Clean all plastic bottles thoroughly with water and dish soap. Remove all labels and let them dry completely. This is important to prevent the soil from molding later.
- If you wish, you can now paint the bottles with spray paint. This is optional, of course, but it makes your garden more visually appealing. Let the paint dry well before you continue.
- Cut each bottle horizontally. You can either divide the bottle in the middle or leave the top part a little shorter. The bottom part will be the actual plant container.
- If you are using fleece or jute, cut small pieces large enough to line the bottom of the bottle. This prevents the soil from being washed out during watering.
2. Drill holes:
- Drill holes in the sides of the bottles with the drill (or with a nail and hammer). These holes are for hanging the bottles later.
- Position the holes so that the bottles hang stably later and do not tip over. I recommend drilling two holes opposite each other on each side.
- Make sure the holes are large enough to thread your cord, wire, or cable ties through.
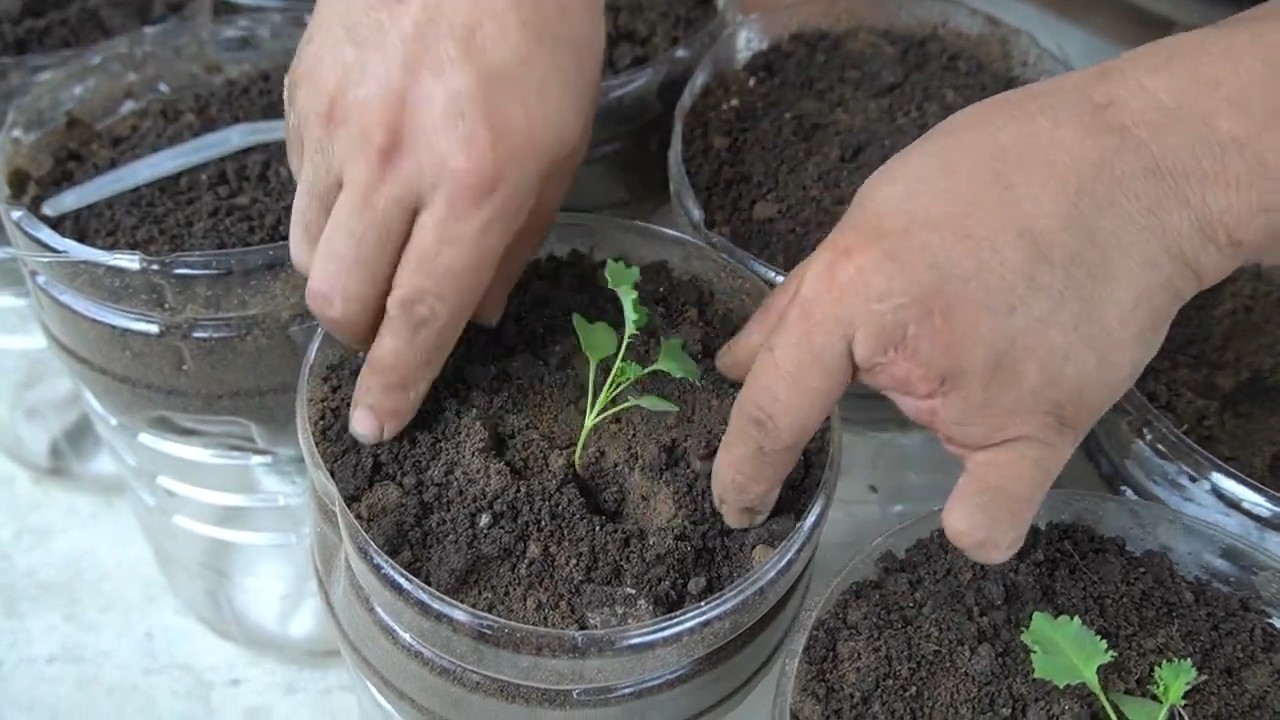
3. Plant in the bottles:
- Place the fleece or jute at the bottom of the lower half of the bottle.
- Fill the bottles with soil. Make sure the soil is loose and airy so that the roots of the kale can grow well.
- Plant your kale seedlings in the soil. If you are using seeds, follow the instructions on the seed packet.
- Water the plants gently. Make sure the soil is moist, but not wet.
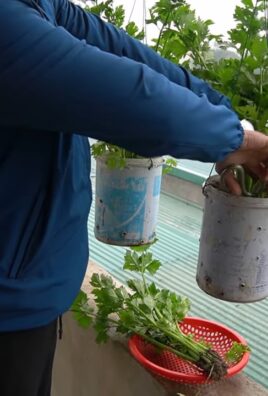
4. Hang the bottles:
- Thread the cord, wire, or cable ties through the holes in the bottles.
- Connect the bottles to each other to create a vertical chain. You can either hang the bottles directly one above the other or arrange them slightly offset.
- Make sure the chain is stable and the bottles cannot fall down.
- Hang the chain in a suitable place. This could be a balcony railing, a wall, or a sturdy branch.
5. Care for your kale garden:
- Water your kale plants regularly. Make sure the soil is always moist, but not wet.
- Fertilize your plants regularly with an organic fertilizer. This ensures healthy growth and a bountiful harvest.
- Regularly remove wilted leaves and weeds.
- Protect your plants from pests.
Additional Tips and Tricks for Your Vertical Kale Garden
Here are a few more tips that can help make your vertical kale garden even more successful:
- Choose the right location: Kale needs a lot of sun, so choose a location that gets at least six hours of sunlight per day.
- Use the right soil: Kale prefers well-draining soil that is rich in organic matter. You can mix your own soil by combining compost, peat moss, and perlite.
- Water correctly: Water your kale plants regularly, but avoid waterlogging. Waterlogging can lead to root rot.
- Fertilize regularly: Kale is a heavy feeder, which means it needs a lot of nutrients. Fertilize your plants regularly with an organic fertilizer to promote healthy growth.
- Protect from pests: Kale can be infested by various pests, such as aphids, cabbage whites, and snails. Check your plants regularly and combat pests with natural remedies if necessary.
- Harvest correctly: You can harvest kale as soon as the leaves are large enough. Cut off the outer leaves and let the inner leaves continue to grow. This allows you to harvest over a longer period.
- Experiment with different bottle sizes: You can use different bottle sizes to make your garden more interesting. Smaller bottles are well-suited for herbs or smaller vegetable varieties.
- Use different hanging methods: There are many different ways to hang your bottles. Experiment with different methods to find the best solution for your location.
- Continue recycling: Keep collecting plastic bottles to expand your garden or start new projects.
Avoiding Common Mistakes: What You Should Watch Out For
To ensure your vertical kale garden is a complete success, you should avoid these common mistakes:
- Wrong soil: Do not use cheap potting soil that dries out quickly and contains few nutrients. Invest in high-quality potting soil or mix your own.
- Too little sun: Kale needs a lot of sun, so choose a location that gets at least six hours of sunlight per day.
- Overwatering: Avoid waterlogging, as this can lead to root rot. Only water your plants when the soil is dry.
- Neglect: Your vertical garden needs regular care. Water, fertilize, and check your plants regularly to prevent pests and diseases.
- Unstable suspension: Make sure your bottles are hung securely and cannot fall down. Use sturdy cord, wire, or cable ties and check the suspension regularly.
Conclusion: Your Own Vertical Kale Garden
I hope this guide has helped you to build your own vertical kale garden.
Conclusion
So, there you have it! Transforming a simple plastic bottle into a thriving kale garden is not just a fun project; it’s a sustainable, space-saving, and incredibly rewarding way to enjoy fresh, homegrown greens. We’ve walked you through the process, highlighting the ease and accessibility of this DIY trick. But why is this method a must-try?
Firstly, it’s an eco-conscious choice. Repurposing plastic bottles reduces waste and gives these materials a new lease on life, preventing them from ending up in landfills or polluting our environment. Secondly, it’s incredibly space-efficient. Whether you have a sprawling backyard or a tiny balcony, this vertical gardening solution allows you to cultivate kale even in the most limited spaces. Imagine fresh, organic kale just steps from your kitchen, ready to be harvested whenever you need it.
Beyond the practical benefits, this project offers a unique connection to your food. Watching your kale seedlings sprout and flourish, knowing you nurtured them from the very beginning, is an incredibly satisfying experience. It’s a tangible reminder of the power of nature and the joy of growing your own food.
But don’t stop at just one bottle! Experiment with different sizes and arrangements to create a cascading kale garden. Try using different types of soil or adding organic fertilizers to boost growth. You can even explore growing other leafy greens like spinach or lettuce alongside your kale. The possibilities are endless!
Consider these variations to personalize your kale plastic bottle gardening experience:
* Hanging Gardens: Instead of placing the bottles on a surface, hang them from a balcony railing or a sturdy hook to create a visually stunning and space-saving display.
* Tiered Systems: Stack multiple bottles on top of each other, creating a tiered system that maximizes vertical space and allows for even more kale production.
* Hydroponic Adaptation: For a more advanced approach, explore adapting the plastic bottle system for hydroponic kale growing, using nutrient-rich water instead of soil.
* Companion Planting: Plant herbs like basil or chives alongside your kale to deter pests and enhance flavor.
We are confident that this DIY project will not only provide you with a bountiful harvest of fresh kale but also inspire you to explore other sustainable gardening practices. It’s a simple yet powerful way to connect with nature, reduce your environmental impact, and enjoy the delicious rewards of homegrown food.
So, grab a plastic bottle, some soil, and kale seeds, and get ready to embark on this exciting gardening adventure! We encourage you to try this DIY trick and share your experiences with us. Post pictures of your kale gardens on social media using #KaleBottleGarden and let us know what worked best for you. We can’t wait to see your creations and learn from your experiences! Let’s grow together!
Frequently Asked Questions (FAQ)
What kind of plastic bottle is best for kale plastic bottle gardening?
Ideally, you should use food-grade plastic bottles, such as those used for water, juice, or soda. Avoid bottles that have contained harsh chemicals or cleaning products. The size of the bottle will depend on the variety of kale you’re growing and the amount of space you have available. Larger bottles (2-3 liters) are generally better for mature kale plants, while smaller bottles (500ml-1 liter) are suitable for starting seedlings or growing smaller varieties. Make sure the bottle is clean and free of any residue before using it.
What type of soil should I use for growing kale in plastic bottles?
A well-draining potting mix is essential for successful kale plastic bottle gardening. Avoid using garden soil, as it can be too heavy and compact, hindering root growth. Look for a potting mix that contains a blend of peat moss, perlite, and vermiculite. You can also add compost to enrich the soil and provide essential nutrients for your kale plants. Ensure the soil is slightly acidic to neutral (pH 6.0-7.0) for optimal kale growth.
How often should I water my kale plants in plastic bottles?
The frequency of watering will depend on the weather conditions, the size of the bottle, and the type of soil you’re using. Generally, you should water your kale plants when the top inch of soil feels dry to the touch. Avoid overwatering, as this can lead to root rot. Ensure the bottle has adequate drainage holes to prevent water from accumulating at the bottom. During hot and dry weather, you may need to water your kale plants daily, while during cooler and wetter periods, you can reduce the watering frequency.
How much sunlight does kale need when grown in plastic bottles?
Kale thrives in full sun, requiring at least 6-8 hours of direct sunlight per day. However, it can also tolerate partial shade, especially during the hottest part of the day. When growing kale in plastic bottles, position them in a location that receives ample sunlight. If you’re growing kale indoors, you may need to supplement with artificial grow lights to ensure adequate light exposure. Rotate the bottles regularly to ensure even growth on all sides of the plant.
How do I fertilize kale plants grown in plastic bottles?
Kale is a heavy feeder and benefits from regular fertilization. You can use a balanced liquid fertilizer diluted to half strength every 2-3 weeks. Alternatively, you can incorporate slow-release fertilizer granules into the potting mix at planting time. Organic fertilizers, such as compost tea or fish emulsion, are also excellent options for feeding your kale plants. Avoid over-fertilizing, as this can lead to excessive foliage growth and reduced flavor.
How do I protect my kale plants from pests and diseases when grown in plastic bottles?
While kale grown in plastic bottles is generally less susceptible to pests and diseases than kale grown in the ground, it’s still important to take preventative measures. Regularly inspect your plants for signs of pests, such as aphids, cabbage worms, or flea beetles. You can remove these pests by hand or spray the plants with insecticidal soap or neem oil. To prevent fungal diseases, ensure good air circulation around the plants and avoid overwatering. If you notice any signs of disease, remove the affected leaves immediately.
When is the best time to harvest kale from my plastic bottle garden?
You can start harvesting kale leaves when they are about 4-6 inches long. Harvest the outer leaves first, leaving the inner leaves to continue growing. Avoid harvesting more than one-third of the plant at a time, as this can stress the plant and reduce its overall yield. Kale leaves are most tender and flavorful when harvested in the morning. You can harvest kale throughout the growing season, even after a light frost.
Can I grow different varieties of kale in plastic bottles?
Yes, you can grow different varieties of kale in plastic bottles. Some popular varieties include Curly Kale, Lacinato Kale (also known as Dinosaur Kale), and Red Russian Kale. Consider the size and growth habit of each variety when choosing which ones to grow in plastic bottles. Smaller varieties are generally better suited for smaller bottles, while larger varieties may require larger bottles or more frequent transplanting.
How do I overwinter kale plants grown in plastic bottles?
Kale is a cold-hardy vegetable and can tolerate light frosts. In colder climates, you can overwinter kale plants grown in plastic bottles by bringing them indoors or providing them with protection from the elements. Place the bottles in a sunny location indoors or cover them with a cold frame or row cover. Water sparingly during the winter months and avoid fertilizing until spring.
What are some creative ways to display my kale plastic bottle garden?
There are many creative ways to display your kale plastic bottle garden. You can hang the bottles from a balcony railing, arrange them on a tiered shelf, or create a vertical garden wall. You can also paint the bottles or decorate them with colorful designs to add a personal touch. Get creative and have fun with it! Your kale plastic bottle garden can be both functional and aesthetically pleasing.
Leave a Comment