
Mung Bean Sprouts DIY: Ever dreamt of having fresh, crunchy sprouts at your fingertips, ready to add a burst of flavor and nutrition to your meals? Forget those pricey supermarket containers – I’m about to show you how incredibly easy and rewarding it is to grow your own mung bean sprouts right in your kitchen!
Sprouting beans, including mung beans, has a rich history, dating back thousands of years in Asian cultures. They were, and still are, a vital source of nutrients, especially during times of scarcity. Think of it as a miniature, edible garden, bringing a touch of ancient wisdom to your modern kitchen.
Why should you embark on this Mung Bean Sprouts DIY adventure? Well, for starters, it’s incredibly cost-effective. A small bag of mung beans yields a surprising amount of sprouts. Plus, you control the entire process, ensuring they’re free from unwanted additives and perfectly fresh. In a world where we’re increasingly conscious of what we eat, knowing exactly where your food comes from is a huge win. I’ve found that growing my own sprouts not only adds a healthy boost to my diet but also provides a satisfying connection to the food I’m eating. So, let’s ditch the store-bought sprouts and get sprouting!

Growing Your Own Mung Bean Sprouts: A Simple DIY Guide
Hey there, fellow food enthusiasts! Ever wanted to have fresh, crunchy mung bean sprouts on hand whenever you crave them? Well, you’re in luck! Growing your own mung bean sprouts at home is surprisingly easy, incredibly rewarding, and way cheaper than buying them at the store. Plus, you know exactly what’s going into them – just pure, wholesome goodness. I’m going to walk you through the whole process, step-by-step, so you can enjoy these little nutritional powerhouses in your salads, stir-fries, and more.
What You’ll Need
Before we dive in, let’s gather our supplies. The beauty of this project is that you probably already have most of these things lying around:
* Mung Beans: Obviously! Choose organic mung beans if possible. You can find them at most grocery stores, Asian markets, or online. Start with about 1/4 to 1/2 cup of dried beans – they’ll expand significantly.
* A Wide-Mouth Jar: A quart-sized mason jar works perfectly. Make sure it’s clean!
* Sprouting Lid or Cheesecloth & Rubber Band: A sprouting lid is ideal because it allows for easy rinsing and drainage. If you don’t have one, a piece of cheesecloth secured with a rubber band will do the trick.
* Water: Filtered water is best, but tap water that’s been sitting out for a while to allow chlorine to dissipate is also fine.
* A Bowl: For soaking the beans.
* A Dark Place: A cupboard, pantry, or even a covered bowl will work. Darkness is key for optimal sprouting.
* Optional: A small plate or rack to angle the jar for better drainage.
The Sprouting Process: Step-by-Step
Okay, let’s get sprouting! This process takes about 3-5 days, so patience is key. But trust me, the fresh sprouts are worth the wait.
1. Rinse the Mung Beans: Pour your mung beans into the bowl and rinse them thoroughly with cool water. Remove any debris, broken beans, or anything that looks off. This step is important for hygiene and preventing mold.
2. Soak the Mung Beans: Add fresh, cool water to the bowl, ensuring the beans are completely submerged. They’ll absorb a lot of water, so don’t be shy. Let them soak for 8-12 hours, or even overnight. This rehydrates the beans and starts the germination process. I usually soak mine before I go to bed, so they’re ready to go in the morning.
3. Transfer to the Jar: After soaking, drain the beans completely and transfer them to your clean wide-mouth jar.
4. Cover with Sprouting Lid or Cheesecloth: Secure the sprouting lid or cheesecloth with a rubber band. Make sure the cheesecloth is taut enough to prevent beans from falling out.
5. Rinse and Drain (Twice a Day): This is the most crucial step! Rinse the beans with cool water twice a day – once in the morning and once in the evening. To rinse, simply run water through the sprouting lid or cheesecloth, ensuring all the beans get wet. Then, drain the water completely. This prevents mold and keeps the sprouts hydrated.
6. Darkness is Your Friend: After rinsing and draining, place the jar in a dark place. You can put it in a cupboard, pantry, or even cover it with a towel. The darkness encourages the sprouts to grow long and white.
7. Angle for Drainage (Optional): To ensure proper drainage, you can place the jar upside down at an angle in a bowl or on a small rack. This helps prevent water from pooling at the bottom, which can lead to mold.
8. Repeat Rinse and Drain: Continue rinsing and draining twice a day for 3-5 days. You’ll start to see tiny sprouts emerging within the first day or two.
9. Observe the Growth: Watch your sprouts grow! They’ll get longer and thicker each day. The ideal length is usually around 1-2 inches, but you can harvest them whenever they reach your desired size.
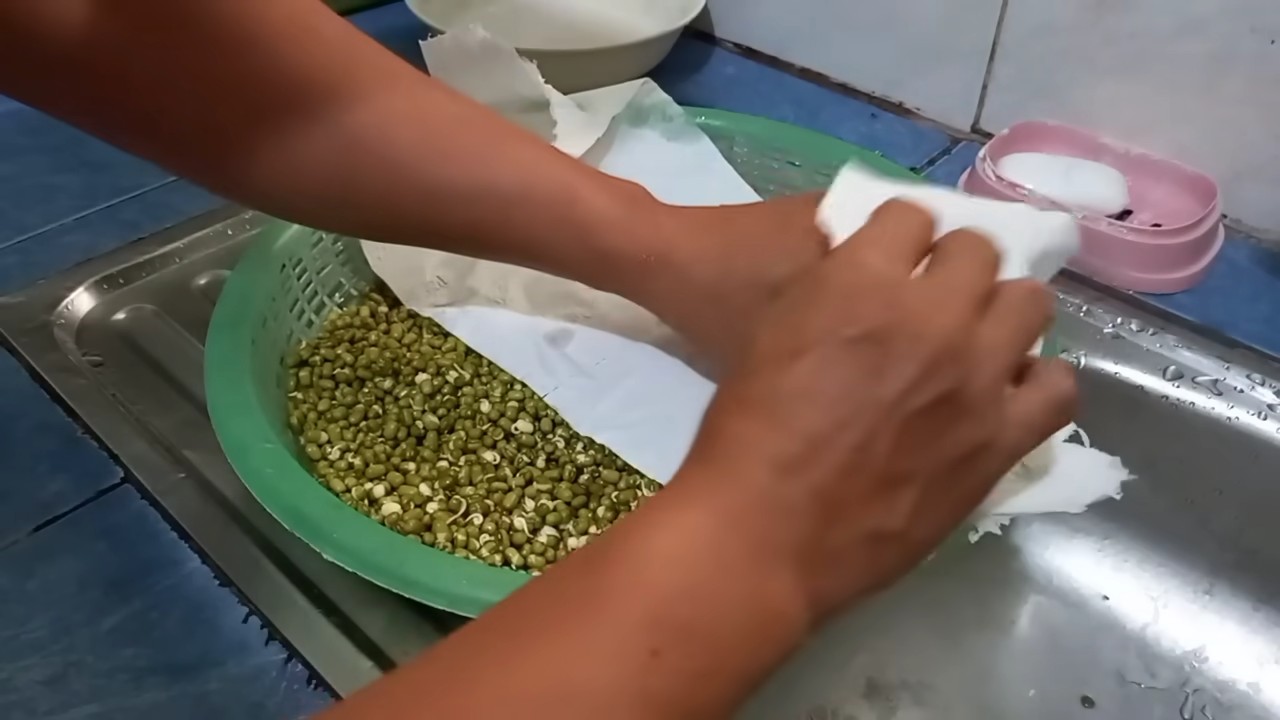
10. Harvest and Rinse: Once your sprouts are ready, give them a final thorough rinse. This will remove any loose hulls (the outer skins of the beans).
11. Sunlight for Green Tips (Optional): If you want your sprouts to have slightly green tips (which some people prefer), expose them to indirect sunlight for a few hours before harvesting. This will stimulate chlorophyll production. Be careful not to expose them to direct sunlight, as this can overheat them.
12. Dry Thoroughly: This is important for storage. Spread the sprouts out on a clean kitchen towel or paper towels and gently pat them dry. You can also use a salad spinner to remove excess water.
13. Store in the Refrigerator: Store your freshly grown mung bean sprouts in an airtight container in the refrigerator. They should last for about a week. I usually line the container with a paper towel to absorb any excess moisture.
Troubleshooting: Common Issues and Solutions
Even with the best intentions, sometimes things don’t go exactly as planned. Here are a few common issues you might encounter and how to fix them:
* Mold: Mold is the biggest enemy of sprouting. It usually appears as fuzzy white or gray patches. If you see mold, discard the entire batch immediately. To prevent mold, make sure you’re rinsing and draining the beans thoroughly twice a day. Good ventilation is also important.
* Smelly Sprouts: A foul odor is another sign of spoilage. This usually indicates that the sprouts haven’t been rinsed properly or that they’re overcrowded. Discard the batch and start again, being more diligent with rinsing and using a larger jar if necessary.
* Slow Growth: If your sprouts are growing slowly, it could be due to a few factors. Make sure they’re in a dark place and that the temperature is relatively consistent (around 70-75°F is ideal). Also, ensure you’re using fresh, high-quality mung beans.
* Dry Sprouts: If the sprouts look dry and shriveled, you’re probably not rinsing them often enough. Increase the frequency of rinsing to three times a day, especially in warmer weather.
Using Your Homegrown Mung Bean Sprouts
Now for the fun part – eating your sprouts! Mung bean sprouts are incredibly versatile and can be used in a variety of dishes. Here are a few of my favorite ways to enjoy them:
* Salads: Add them to salads for a crunchy and refreshing element. They pair well with Asian-inspired dressings.
* Stir-fries: Toss them into stir-fries during the last minute of cooking to retain their crispness.
* Spring Rolls: Use them as a filling in fresh spring rolls.
* Sandwiches and Wraps: Add them to sandwiches and wraps for extra texture and nutrients.
* Soups: Sprinkle them on top of soups as a garnish.
* On Their Own: I sometimes just eat a handful of them raw as a healthy snack!
Why Grow Your Own?
Besides the cost savings and the satisfaction of growing your own food, there are several other benefits to sprouting your own mung beans:
* Freshness: You can’t beat the freshness of homegrown sprouts. They’re much more flavorful and nutritious than store-bought ones.
* Control: You have complete control over the growing process, ensuring that your sprouts are free from pesticides and other harmful chemicals.
* Nutritional Value: Sprouting increases the nutritional value of mung beans. They become richer in vitamins, minerals, and enzymes.
* Sustainability: Growing your own sprouts is a sustainable way to reduce your carbon footprint. You’re not relying on transportation or packaging.
* It’s Fun! Honestly, it’s just a really cool and rewarding experience to watch these little beans transform into crunchy, delicious sprouts.
So, there you have it! Everything you need to know to grow your own mung bean sprouts at home. Give it a try – I promise you’ll be hooked! Happy sprouting!
Conclusion
So, there you have it! Cultivating your own mung bean sprouts at home is not only incredibly easy and cost-effective, but it also guarantees you’re consuming the freshest, most nutritious sprouts possible. Forget those limp, often questionable sprouts from the grocery store. With this simple DIY trick, you’re in complete control of the process, from bean to bowl.
Why is this a must-try? Because it’s a game-changer for anyone who loves fresh, crunchy sprouts in their salads, stir-fries, sandwiches, or even as a healthy snack. Think about the possibilities! You can add them to your Vietnamese spring rolls for an extra layer of texture, toss them into your morning omelet for a boost of vitamins, or simply enjoy them raw with a sprinkle of sea salt. The versatility of mung bean sprouts is truly remarkable.
Beyond the freshness and flavor, growing your own sprouts is also an incredibly rewarding experience. There’s something deeply satisfying about nurturing these tiny seeds into vibrant, edible greens. It’s a mini-gardening project that anyone can accomplish, regardless of their experience level or living space.
Looking for variations? Consider experimenting with different types of beans. While this guide focuses on mung bean sprouts, you can easily adapt the same method to grow other types of sprouts, such as alfalfa, radish, or broccoli sprouts. Each type offers a unique flavor and nutritional profile, so feel free to explore and discover your favorites. You can also play around with the sprouting container. While a jar works perfectly well, you could also use a sprouting bag or a multi-tiered sprouting system for larger batches.
Another fun variation is to experiment with different seasonings. Try adding a pinch of chili flakes to the soaking water for a spicy kick, or a few drops of lemon juice to enhance the flavor. You can even add a small piece of ginger to the sprouting container for a subtle, aromatic touch.
But the most important thing is to just give it a try! Don’t be intimidated by the process. It’s much simpler than you might think. And once you taste the difference between store-bought and homegrown mung bean sprouts, you’ll never go back.
We’re confident that you’ll love this DIY trick as much as we do. So, grab a jar, some mung beans, and get sprouting! And don’t forget to share your experience with us. We’d love to hear about your successes, your challenges, and any creative variations you come up with. Share your photos and stories on social media using #DIYMungBeanSprouts. Let’s spread the word about this easy and delicious way to enjoy fresh, healthy sprouts at home. Happy sprouting!
Frequently Asked Questions (FAQ)
What are the nutritional benefits of mung bean sprouts?
Mung bean sprouts are a nutritional powerhouse, packed with vitamins, minerals, and antioxidants. They are an excellent source of vitamin C, vitamin K, folate, and various B vitamins. They also contain essential minerals like iron, potassium, and magnesium. Furthermore, mung bean sprouts are a good source of protein and fiber, making them a filling and healthy addition to any diet. The sprouting process itself increases the bioavailability of these nutrients, making them even easier for your body to absorb.
How long do mung bean sprouts last?
Properly stored, homemade mung bean sprouts can last for up to a week in the refrigerator. To maximize their shelf life, rinse them thoroughly with cold water and drain them well before storing them in an airtight container lined with a paper towel. The paper towel will help absorb excess moisture and prevent the sprouts from becoming soggy. Check them daily for any signs of spoilage, such as a slimy texture or a foul odor. If you notice any of these signs, discard the sprouts immediately.
Can I eat mung bean sprouts raw?
Yes, mung bean sprouts can be eaten raw, and many people prefer them that way for their crisp texture and fresh flavor. However, it’s important to rinse them thoroughly before consuming them to remove any potential bacteria. If you’re concerned about food safety, you can blanch them briefly in boiling water for a few seconds to kill any harmful microorganisms. This will slightly soften the sprouts but will also help ensure their safety.
What if my mung bean sprouts don’t sprout?
There are several reasons why your mung bean sprouts might not be sprouting. First, make sure you’re using fresh, high-quality mung beans. Old or damaged beans may not germinate properly. Second, ensure that the beans are being soaked and rinsed regularly. They need moisture to sprout, but they also need to be drained well to prevent them from rotting. Third, check the temperature of your sprouting environment. Mung beans sprout best in a warm, humid environment. If your kitchen is too cold, try placing the sprouting jar in a slightly warmer location. Finally, be patient! Sprouting can take a few days, so don’t give up too soon.
How do I prevent mold from growing on my mung bean sprouts?
Mold growth is a common concern when sprouting beans, but it can be easily prevented with proper hygiene and ventilation. Always start with clean equipment, including the jar, lid, and beans. Rinse the beans thoroughly before soaking and sprouting, and rinse them at least twice a day during the sprouting process. Make sure to drain the beans well after each rinse to prevent excess moisture from accumulating. Provide adequate ventilation by using a mesh lid or cheesecloth instead of a solid lid. If you notice any signs of mold growth, discard the entire batch of sprouts immediately.
Can I use any type of jar for sprouting?
While a standard mason jar is a popular choice for sprouting, you can use any clean, food-grade jar with a wide mouth. The key is to ensure that the jar is thoroughly cleaned and sanitized before use. You’ll also need a lid that allows for proper drainage and ventilation. A mesh lid, cheesecloth secured with a rubber band, or even a repurposed plastic lid with holes punched in it will work well. Avoid using jars with narrow mouths, as they can make it difficult to rinse and drain the sprouts properly.
How much mung bean sprouts will I get from one cup of dry beans?
As a general rule, one cup of dry mung beans will yield approximately three to four cups of sprouts. The exact yield will depend on the quality of the beans, the sprouting conditions, and the length of the sprouting process. Keep in mind that sprouts expand significantly as they absorb water and grow, so it’s best to start with a smaller amount of beans if you’re unsure how much you’ll need.
Are there any risks associated with eating homemade sprouts?
While homemade sprouts are generally safe to eat, there is a small risk of foodborne illness if they are not handled properly. Bacteria, such as Salmonella and E. coli, can thrive in the warm, humid conditions required for sprouting. To minimize this risk, always start with clean equipment and fresh beans, rinse the sprouts thoroughly before consuming them, and store them properly in the refrigerator. If you’re pregnant, elderly, or have a weakened immune system, it’s best to cook the sprouts before eating them to kill any potential bacteria.
What is the best way to store mung bean sprouts?
The best way to store mung bean sprouts is in an airtight container lined with a paper towel in the refrigerator. Before storing, rinse the sprouts thoroughly with cold water and drain them well. The paper towel will help absorb excess moisture and prevent the sprouts from becoming soggy. Change the paper towel every day or two to keep the sprouts fresh. Stored properly, mung bean sprouts can last for up to a week in the refrigerator.
Can I freeze mung bean sprouts?
While you can freeze mung bean sprouts, it’s not recommended as it significantly alters their texture. Freezing causes the sprouts to become mushy and lose their crispness. If you must freeze them, blanch them briefly in boiling water for a minute or two before freezing to help preserve their color and flavor. However, be aware that the texture will still be compromised. It’s always best to consume mung bean sprouts fresh for the best flavor and texture.

Leave a Comment