
Quick oven degreasing ideas are a lifesaver, aren’t they? I know I’ve been there – staring into a greasy oven, dreading the hours of scrubbing ahead. But what if I told you that you could reclaim your weekend (and your sanity) with some simple, DIY oven degreasing tricks?
For generations, keeping a clean oven was a symbol of a well-maintained home. Think about it: in the days of wood-fired ovens, a clean hearth meant efficient cooking and a happy family. While our modern ovens are a bit more sophisticated, the need for degreasing remains the same. Nobody wants to bake cookies in a smoky, greasy environment!
Let’s face it, oven cleaning is one of those chores we all put off. The harsh chemicals, the endless scrubbing… it’s no wonder we procrastinate! But a greasy oven isn’t just unsightly; it can affect the taste of your food, increase the risk of fire, and even shorten the lifespan of your appliance. That’s why I’m so excited to share these quick oven degreasing ideas with you. These DIY hacks are not only effective but also use ingredients you probably already have in your pantry. Get ready to say goodbye to oven grime and hello to sparkling clean results – without breaking a sweat!
DIY Oven Degreasing: A Sparkling Clean Oven Without Harsh Chemicals
Okay, let’s face it, oven cleaning is nobody’s favorite chore. But a greasy oven not only smells bad, it can also affect the taste of your food and even be a fire hazard! So, let’s tackle that grime with some easy, DIY methods that won’t leave you gasping for air from harsh chemicals. I’m going to walk you through a few different approaches, so you can choose the one that best suits your needs and the level of grime in your oven.
Method 1: Baking Soda and Vinegar Powerhouse
This is my go-to method for general oven cleaning. It’s cheap, effective, and uses ingredients you probably already have in your pantry.
What You’ll Need:
* Baking soda
* White vinegar
* Water
* Spray bottle
* Sponge or scrub brush
* Rubber gloves (optional, but recommended)
* Old cloths or paper towels
* Scraper (optional, for stubborn spots)
Step-by-Step Instructions:
1. Prepare the Oven: First things first, remove everything from your oven – racks, baking stones, thermometers, anything that isn’t permanently attached. Give the inside a quick wipe with a dry cloth to remove any loose crumbs or debris. This will make the cleaning process much easier.
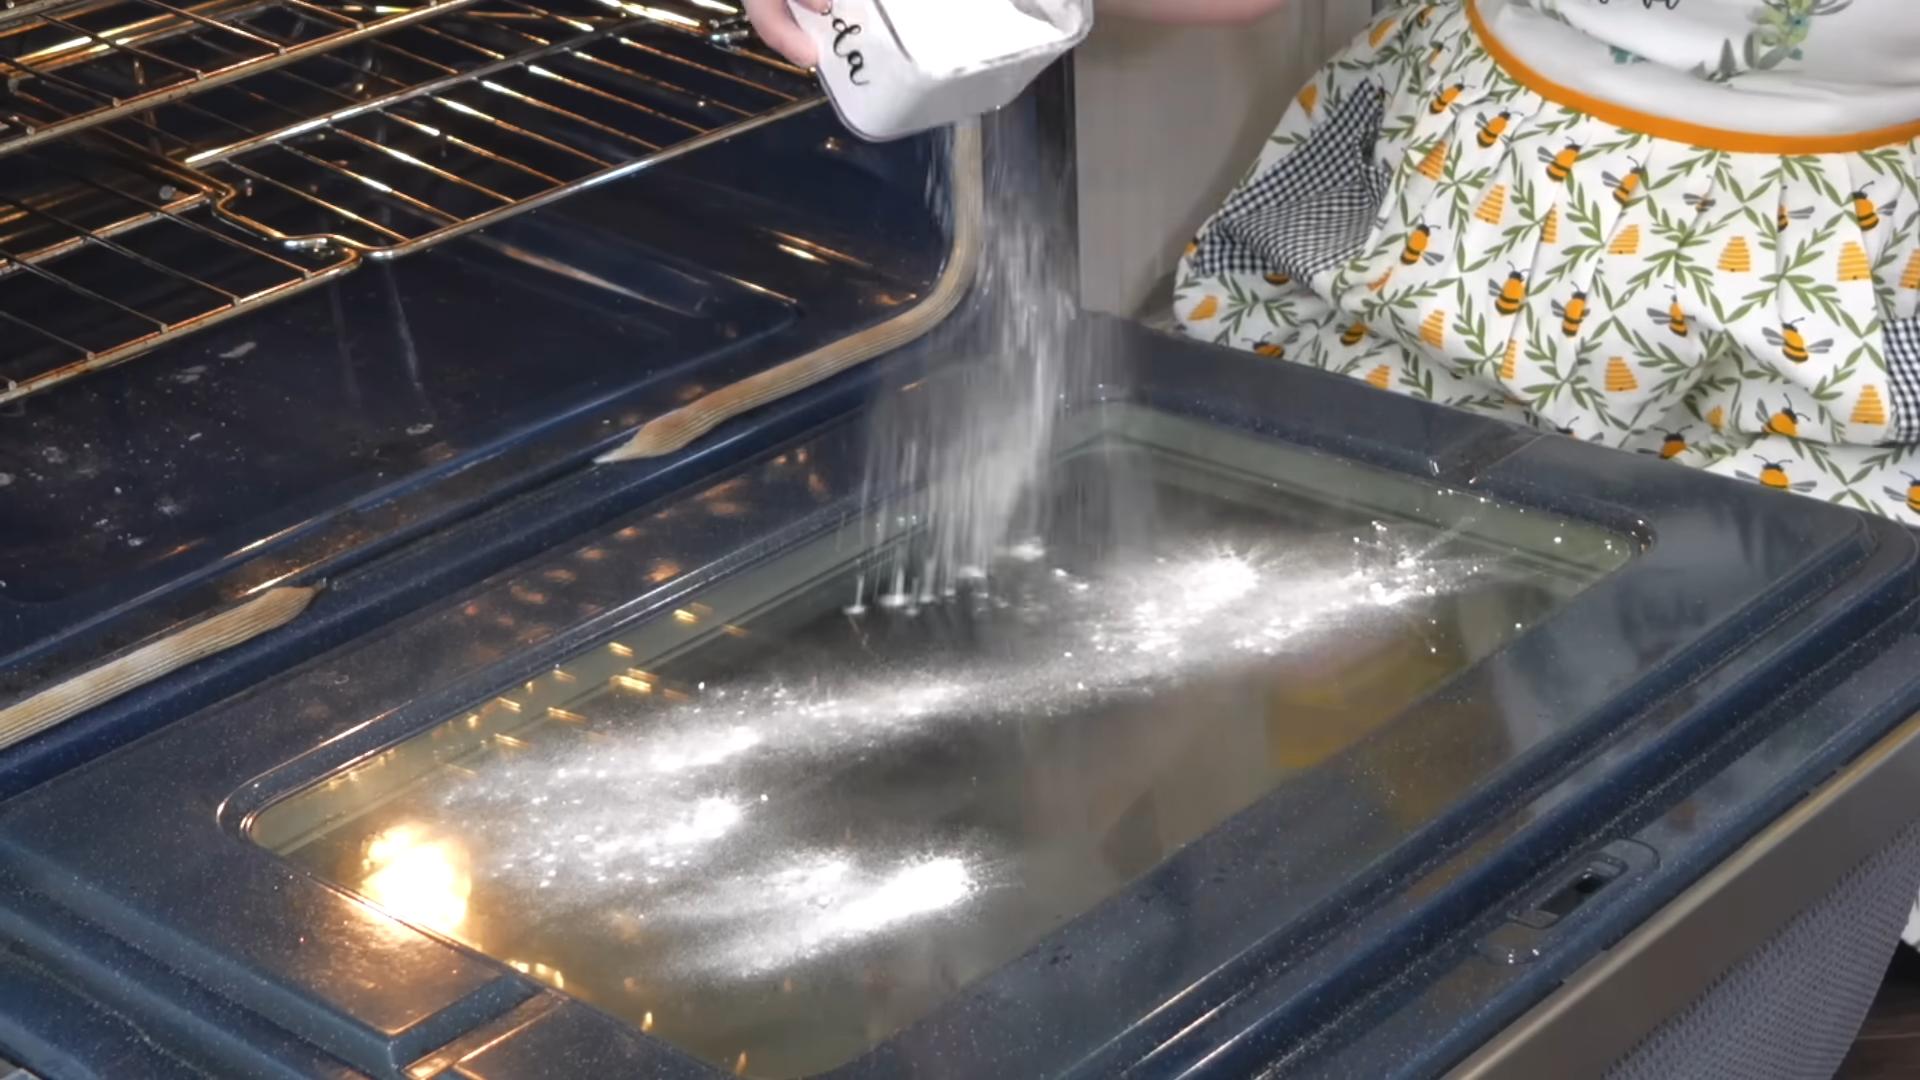
2. Create the Baking Soda Paste: In a bowl, mix about ½ cup of baking soda with enough water to form a thick, spreadable paste. The consistency should be similar to frosting. You might need to add a little more water or baking soda to get it just right.
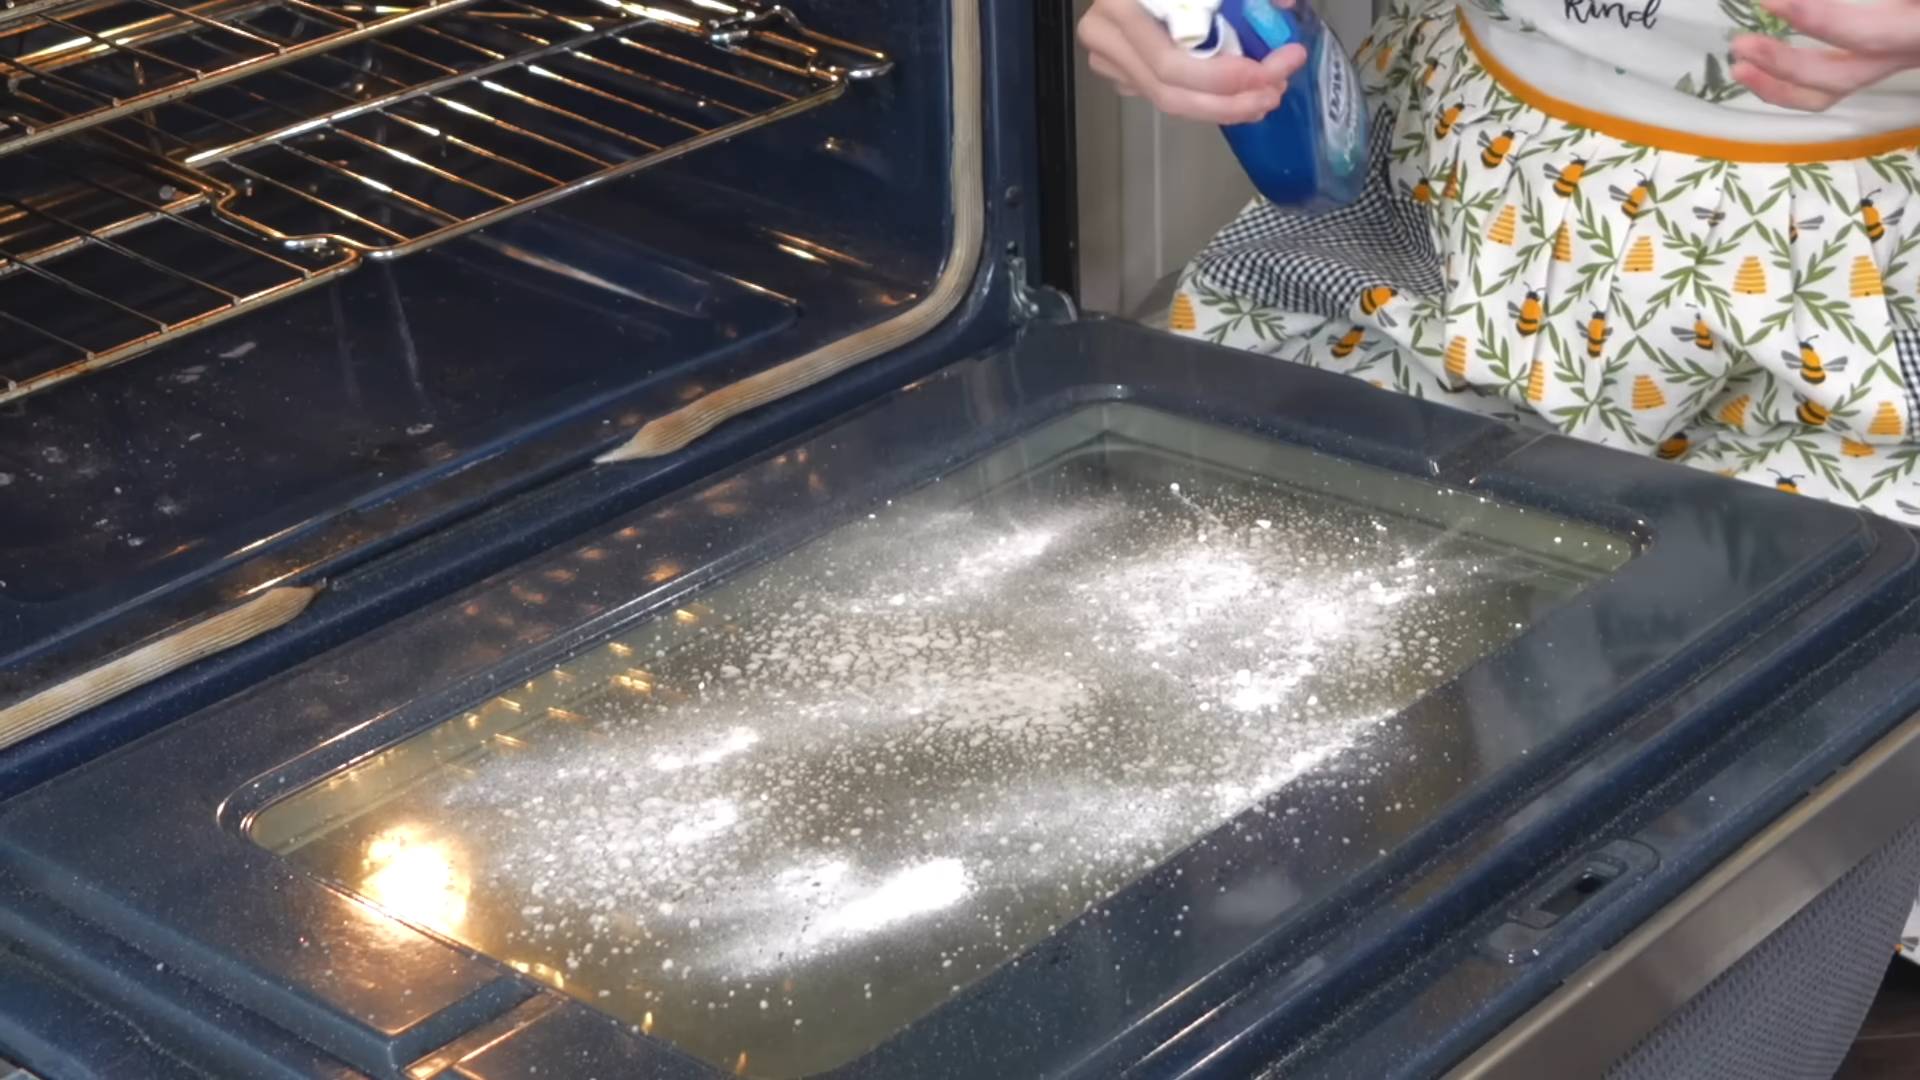
3. Coat the Oven: Using your hands (with gloves on, if you prefer), spread the baking soda paste all over the inside of your oven. Don’t be shy! Cover every surface, including the walls, floor, door, and even the glass window. Avoid the heating elements, though. I usually leave a slightly thicker layer on the really greasy areas.
4. Let it Sit (and Work its Magic!): This is the most important part – patience! Let the baking soda paste sit for at least 12 hours, or even overnight. The longer it sits, the more time it has to break down the grease and grime. I usually do this before I go to bed so it can work its magic while I sleep.
5. Vinegar Time: After the baking soda has had its time to work, fill a spray bottle with white vinegar. Spritz the baking soda paste generously with vinegar. You’ll see it start to fizz and bubble – that’s the chemical reaction happening, breaking down the grease even further. It’s kind of satisfying to watch!
6. Wipe it All Away: Now, grab your sponge or scrub brush and start wiping away the baking soda and vinegar mixture. You might need to use a little elbow grease, especially on those stubborn spots. A scraper can be helpful for really baked-on grime. Rinse your sponge or brush frequently with clean water.
7. Rinse and Repeat (If Necessary): Once you’ve wiped away all the baking soda and vinegar, rinse the inside of your oven thoroughly with a clean, damp cloth. You might need to do this several times to remove all traces of the baking soda. If there are still some stubborn spots, repeat steps 5 and 6.
8. Replace the Racks: Once the oven is completely clean and dry, replace the racks and any other items you removed earlier.
Method 2: Lemon Power for Lighter Grease
If your oven isn’t too heavily soiled, you can use the power of lemon to degrease it. This method is great for a quick refresh and leaves your oven smelling wonderfully citrusy.
What You’ll Need:
* 2-3 lemons
* Water
* Oven-safe dish or bowl
* Sponge or cloth
Step-by-Step Instructions:
1. Prepare the Lemons: Slice the lemons in half. Squeeze the juice from the lemons into an oven-safe dish or bowl. Add the squeezed lemon halves to the dish as well.
2. Add Water: Fill the dish with water, about halfway full.
3. Bake the Lemon Mixture: Place the dish in your oven and bake at 250°F (120°C) for about 30 minutes to an hour. The steam from the lemon water will loosen the grease and grime.
4. Let it Cool Slightly: Turn off the oven and let it cool slightly before opening the door. Be careful of the steam!
5. Wipe it Down: Once the oven is cool enough to handle, use a sponge or cloth to wipe down the interior. The grease should come off much easier now.
6. Rinse and Dry: Rinse the oven with a clean, damp cloth and then dry it thoroughly.
Method 3: Borax and Water for Tough Stains
Borax is a natural mineral that can be very effective at removing tough stains and grease. However, it’s important to use it safely and avoid contact with skin and eyes.
What You’ll Need:
* Borax
* Water
* Spray bottle
* Sponge or scrub brush
* Rubber gloves (essential!)
* Old cloths or paper towels
Step-by-Step Instructions:
1. Prepare the Borax Solution: In a spray bottle, mix about 1 tablespoon of Borax with 1 cup of warm water. Shake well to dissolve the Borax completely.
2. Spray the Oven: Spray the Borax solution liberally onto the inside of your oven, avoiding the heating elements.
3. Let it Sit: Let the solution sit for about 15-20 minutes to allow it to penetrate the grease and grime.
4. Scrub and Wipe: Using a sponge or scrub brush, scrub the inside of the oven to remove the loosened grease.
5. Rinse Thoroughly: Rinse the oven thoroughly with clean water to remove all traces of the Borax solution. This is crucial, as Borax can leave a residue.
6. Dry the Oven: Dry the oven completely with a clean cloth or paper towels.
Cleaning Oven Racks: A Separate Battle
Don’t forget about those oven racks! They often accumulate just as much grease as the inside of the oven. Here’s how I tackle them:
Method 1: Dish Soap Soak
This is the easiest method for lightly soiled racks.
1. Fill the Tub: Fill your bathtub with hot water and add a generous amount of dish soap.
2. Soak the Racks: Place the oven racks in the tub and let them soak for several hours, or even overnight.
3. Scrub and Rinse: After soaking, scrub the racks with a scrub brush to remove any remaining grease and grime. Rinse them thoroughly with clean water.
4. Dry the Racks: Dry the racks completely before placing them back in the oven.
Method 2: Baking Soda Paste (Again!)
Just like with the oven interior, baking soda paste works wonders on oven racks.
1. Apply the Paste: Make a baking soda paste as described in Method 1 for the oven interior.
2. Coat the Racks: Spread the paste all over the oven racks.
3. Let it Sit: Let the paste sit for several hours, or overnight.
4. Scrub and Rinse: Scrub the racks with a scrub brush and rinse them thoroughly with clean water.
5. Dry the Racks: Dry the racks completely before placing them back in the oven.
Preventative Measures: Keeping Your Oven Cleaner Longer
Okay, now that you’ve got a sparkling clean oven, let’s talk about how to keep it that way! A little prevention goes a long way.
* Line the Bottom: Consider lining the bottom of your oven with aluminum foil or an oven liner. This will catch any drips or spills and make cleanup much easier. Just be sure to check your oven’s manual to ensure that using a liner is safe for your specific model.
* Clean Up Spills Immediately: Don’t let spills bake onto the bottom of your oven. Wipe them up as soon as they happen.
* Regular Cleaning: Don’t wait until your oven is completely caked in grease to clean it. A quick wipe-down every few weeks can prevent buildup and make the cleaning process much easier in the long run.
* Self-Cleaning Cycle (Use Sparingly): If your oven has a self-cleaning cycle, use it sparingly. These cycles can generate extremely high temperatures, which can damage your oven over time. Plus, they often produce a lot of smoke and odors.
So there you have it! Several ways to get your oven sparkling clean without resorting to harsh chemicals. Choose the method that works best for you and your oven, and remember, a little preventative
Conclusion
So, there you have it! Mastering the art of quick oven degreasing doesn’t require harsh chemicals or hours of scrubbing. This simple, DIY trick, utilizing readily available household ingredients, is a game-changer for anyone who dreads oven cleaning. It’s not just about aesthetics; a clean oven operates more efficiently, ensuring your food cooks evenly and tastes its best. Plus, removing built-up grease reduces the risk of smoke and potential fire hazards.
Why is this a must-try? Because it’s effective, economical, and environmentally friendly. You’re avoiding the fumes and residue of commercial oven cleaners, opting for a natural solution that’s gentle on your oven and your health. The combination of baking soda and vinegar creates a powerful cleaning action that loosens even the most stubborn baked-on grime.
But don’t stop there! Feel free to experiment with variations to suit your specific needs. For particularly tough spots, create a thicker paste of baking soda and water and let it sit for an extended period before scrubbing. You can also add a few drops of essential oils, like lemon or tea tree, to the baking soda paste for an extra boost of cleaning power and a fresh, clean scent. If you prefer a more liquid solution, try diluting the vinegar with water in a spray bottle for easier application. Remember to always test any cleaning solution on a small, inconspicuous area of your oven first to ensure it doesn’t damage the surface.
This method is also fantastic for cleaning oven racks. Simply soak them in a bathtub filled with hot water and baking soda overnight, then scrub them clean the next day. You’ll be amazed at how easily the grease and grime come off.
We’re confident that this quick oven degreasing method will become your go-to solution for maintaining a sparkling clean oven. It’s a simple yet effective way to keep your kitchen appliance in top condition, ensuring delicious meals and a safer cooking environment.
Now, it’s your turn! Give this DIY trick a try and see the amazing results for yourself. We’re eager to hear about your experience. Share your before-and-after photos, tips, and variations in the comments below. Let’s create a community of clean oven enthusiasts and make oven cleaning a breeze for everyone! Your insights could help others discover the joy of a sparkling clean oven without the hassle of harsh chemicals. Let us know if you have any other quick oven degreasing tips!
Frequently Asked Questions (FAQ)
1. How often should I degrease my oven using this method?
The frequency of oven degreasing depends on how often you use your oven and the types of food you typically cook. If you cook frequently and often prepare dishes that splatter or create a lot of grease, you may need to degrease your oven every month or two. If you use your oven less often, you can probably get away with degreasing it every three to six months. A good rule of thumb is to inspect your oven regularly and degrease it whenever you notice a significant buildup of grease or grime. Regular maintenance will prevent the buildup from becoming too difficult to remove and will keep your oven operating efficiently.
2. Can I use this method on a self-cleaning oven?
While this method is generally safe for most ovens, it’s always best to consult your oven’s manufacturer’s instructions before using any cleaning products, even natural ones. Some self-cleaning ovens have specific coatings or finishes that could be damaged by baking soda or vinegar. If your oven’s manual advises against using these ingredients, it’s best to err on the side of caution and follow the manufacturer’s recommendations. However, many people successfully use this method on self-cleaning ovens, especially for light cleaning between self-cleaning cycles. If you choose to use it, be sure to thoroughly rinse the oven afterward to remove any residue.
3. What if the grease is really stubborn and doesn’t come off easily?
For particularly stubborn grease, you may need to repeat the process or make a few adjustments. First, ensure that the baking soda paste is thick enough to adhere to the grease. You can also try letting the paste sit for a longer period, even overnight, to allow it to penetrate and loosen the grime. If the grease is still difficult to remove, try using a non-abrasive scrubbing pad or an old toothbrush to scrub the affected areas. Avoid using steel wool or abrasive cleaners, as these can scratch the oven’s surface. You can also try heating the oven slightly (to a low temperature, like 200°F) for a short period before applying the baking soda paste. The heat can help to soften the grease and make it easier to remove.
4. Is it safe to use vinegar on all oven surfaces?
Vinegar is generally safe for most oven surfaces, but it’s always a good idea to test it on a small, inconspicuous area first, especially if you have a newer oven with a special coating or finish. Avoid using vinegar on heating elements or electrical components. If you’re concerned about damaging a particular surface, you can dilute the vinegar with water before applying it. Also, be sure to thoroughly rinse the oven after using vinegar to remove any residue.
5. Can I use this method to clean the oven door glass?
Yes, this method is excellent for cleaning oven door glass. The baking soda and vinegar combination can effectively remove baked-on grease and grime from the glass, leaving it sparkling clean. Simply apply the baking soda paste to the glass, let it sit for a few minutes, then scrub with a non-abrasive sponge or cloth. Wipe away the residue with a damp cloth and then spray with vinegar. Wipe clean with a dry cloth for a streak-free finish. For particularly stubborn spots, you can use a razor blade scraper (carefully!) to remove the grime.
6. What are some alternative ingredients I can use if I don’t have baking soda or vinegar?
While baking soda and vinegar are the most effective and readily available ingredients for this DIY oven degreasing method, there are a few alternatives you can try. Lemon juice is a natural degreaser and can be used in place of vinegar. Simply mix lemon juice with water and spray it onto the oven surfaces. You can also use dish soap, but be sure to rinse thoroughly to remove any residue. Another option is to use a paste made from cream of tartar and water. Apply the paste to the oven surfaces, let it sit for a few minutes, then scrub and rinse. However, baking soda and vinegar remain the most effective and recommended ingredients for this method.
7. How can I prevent grease buildup in my oven in the first place?
Prevention is key to minimizing the need for frequent oven degreasing. Here are a few tips to help prevent grease buildup:
* Use oven liners or baking sheets to catch drips and spills.
* Cover dishes with lids or foil to prevent splattering.
* Clean up spills immediately.
* Ventilate your kitchen while cooking to reduce grease buildup in the air.
* Consider using a splatter screen when frying or sautéing on the stovetop.
* Wipe down the oven interior regularly with a damp cloth to remove any loose grease or food particles.
By following these tips, you can significantly reduce the amount of grease that accumulates in your oven and make cleaning much easier.

Leave a Comment