
Recycled tire gardening for butternut squash? Absolutely! I know it might sound a little unconventional, but trust me, it’s a fantastic way to grow these delicious winter squashes, and it’s incredibly eco-friendly too. Have you ever thought about giving your old tires a new lease on life? Instead of them ending up in a landfill, we can transform them into thriving mini-gardens!
The idea of repurposing materials for gardening isn’t new. Throughout history, resourceful gardeners have used everything from old boots to broken pottery to cultivate their plants. In many cultures, this resourcefulness is deeply ingrained, reflecting a connection to the land and a commitment to sustainability. Think about the “wattle and daub” raised beds of medieval gardens, or the use of repurposed containers in urban gardening movements today. It’s all about making the most of what you have!
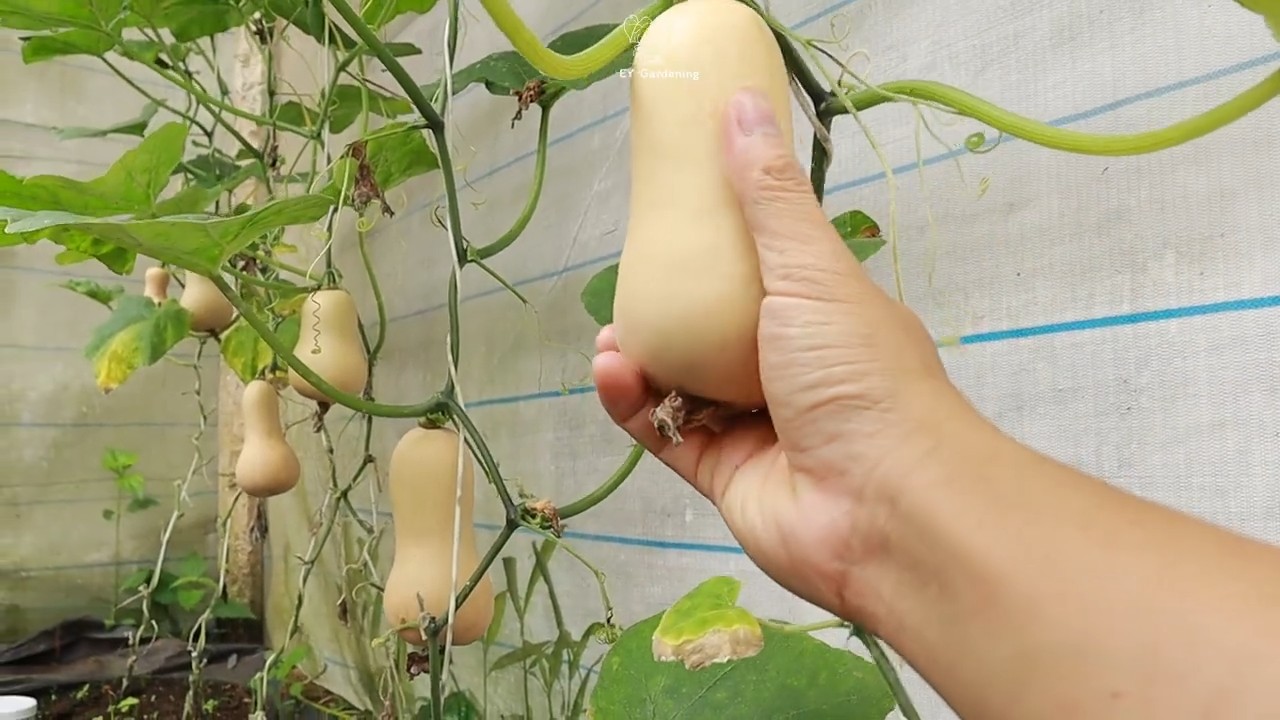
But why recycled tire gardening specifically for butternut squash? Well, butternut squash are heavy feeders and need plenty of space to sprawl. Tires provide a contained area that warms up quickly in the sun, giving your squash a head start. Plus, they offer excellent drainage, preventing root rot. And let’s be honest, who doesn’t love the satisfaction of turning something old into something beautiful and productive? This DIY project is not only good for your garden but also good for the planet. So, let’s dive in and learn how to create your own tire garden for a bountiful butternut squash harvest!
DIY Tire Garden for Butternut Squash: Upcycling and Growing!
Hey there, fellow gardeners! I’m super excited to share a fun and eco-friendly project with you: creating a tire garden specifically designed for growing butternut squash. Not only is this a great way to recycle old tires, but it also provides a warm, contained space that butternut squash plants absolutely love. Let’s get started!
Materials You’ll Need:
* Old tires (2-3 per plant, depending on how high you want your garden bed)
* Utility knife or jigsaw
* Gloves (essential for handling tires)
* Safety glasses (also essential!)
* Heavy-duty landscape fabric or thick plastic sheeting
* Staple gun and staples (if using landscape fabric)
* Well-draining soil mix (compost, topsoil, and perlite/vermiculite)
* Butternut squash seeds or seedlings
* Watering can or hose
* Optional: Paint and primer (for decorating the tires)
* Optional: Drill and screws (for securing tires together)
Why Tires for Butternut Squash?
Butternut squash are heat-loving plants, and the black rubber of the tires absorbs and retains heat, creating a warmer microclimate that encourages faster growth and higher yields. The tires also provide excellent drainage when properly prepared, preventing root rot, a common problem with squash. Plus, it’s a fantastic way to keep those tires out of landfills!
Preparing the Tires: Safety First!
Before we even think about planting, we need to prep those tires. This is the most important part, so pay close attention.
1. Clean the Tires: Give those tires a good scrub with soap and water. You want to remove any dirt, grime, or debris that might be clinging to them. A stiff brush will be your best friend here. Let them dry completely before moving on.
2. Optional: Cutting the Sidewall (For Better Drainage and Aesthetics): This step is optional, but I highly recommend it. Cutting out the inner sidewall of the top tire allows for better drainage and makes planting easier. It also gives the garden a more open look.
* Safety First: Put on your gloves and safety glasses. This is crucial!
* Mark the Cut Line: Use a marker to draw a line around the inner sidewall of the tire, where you want to cut.
* Cutting: Using a utility knife or jigsaw, carefully cut along the marked line. A utility knife will require more effort and multiple passes. A jigsaw is faster but requires more caution. If using a utility knife, make sure the blade is sharp and replace it frequently.
* Important Note: Cutting tires can be tough. Take your time and be extremely careful. If you’re not comfortable with this step, you can skip it.
3. Optional: Painting the Tires: If you want to add some personality to your tire garden, now’s the time to paint them!
* Priming: Apply a coat of primer specifically designed for rubber or plastic. This will help the paint adhere better and prevent it from peeling. Let the primer dry completely according to the manufacturer’s instructions.
* Painting: Choose your favorite outdoor paint colors and get creative! You can paint the tires solid colors, create patterns, or even add some fun designs. Let the paint dry completely before moving on.
Building Your Tire Garden Bed:
Now for the fun part – assembling our garden bed!
1. Choose Your Location: Select a sunny spot in your yard that gets at least 6-8 hours of direct sunlight per day. Butternut squash needs plenty of sunshine to thrive.
2. Prepare the Ground: Clear the area of any grass, weeds, or rocks. Level the ground as much as possible to ensure the tires sit evenly.
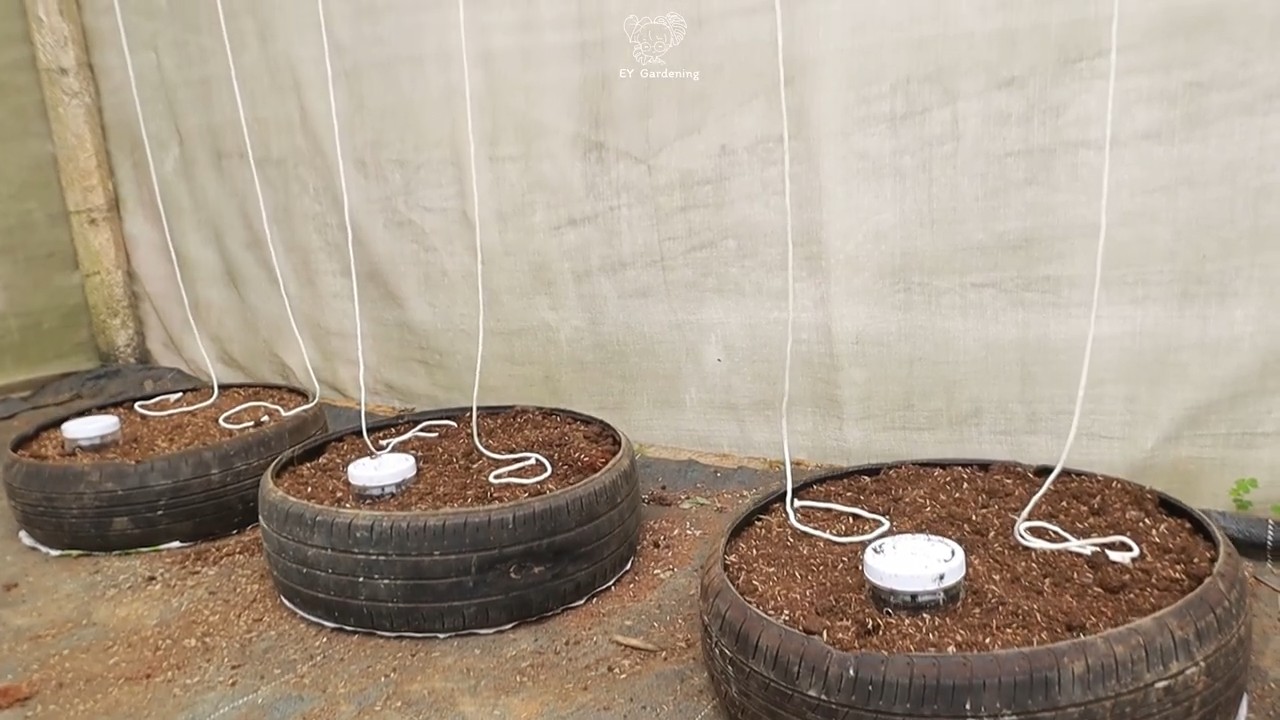
3. Stack the Tires: Place the first tire on the prepared ground. If you’re using multiple tires, stack them on top of each other.
4. Optional: Securing the Tires: For added stability, especially if you’re using multiple tires, you can secure them together using a drill and screws. Drill pilot holes through the sidewalls of the tires and then insert the screws.
5. Lining the Tires: This is crucial for drainage and preventing soil contamination. Line the inside of the tires with heavy-duty landscape fabric or thick plastic sheeting.
* Landscape Fabric: Cut the fabric to fit the inside of the tire, leaving enough overlap to staple it to the inside walls. Use a staple gun to secure the fabric in place.
* Plastic Sheeting: Cut the plastic to fit the inside of the tire, leaving enough overlap to fold over the top edge. You can secure it with duct tape or staples.
* Drainage Holes: If using plastic sheeting, be sure to poke several drainage holes in the bottom to prevent water from pooling.
Filling the Tire Garden with Soil:
Now it’s time to fill our tire garden with the good stuff!
1. Choose Your Soil Mix: Butternut squash needs well-draining soil that’s rich in organic matter. I recommend a mix of equal parts compost, topsoil, and perlite or vermiculite. The compost provides nutrients, the topsoil provides structure, and the perlite/vermiculite improves drainage.
2. Fill the Tires: Gradually fill the tires with your soil mix, leaving a few inches of space at the top. Gently compact the soil as you go to remove any air pockets.
3. Water the Soil: Thoroughly water the soil to settle it and ensure it’s evenly moist.
Planting Your Butternut Squash:
Finally, the moment we’ve been waiting for – planting our butternut squash!
1. Starting from Seed: You can start butternut squash seeds directly in the tire garden, but I prefer to start them indoors a few weeks before the last expected frost. This gives them a head start and increases their chances of success.
* Sowing Seeds: Sow the seeds about 1 inch deep and 2-3 inches apart.
* Watering: Keep the soil consistently moist but not waterlogged.
* Thinning: Once the seedlings emerge, thin them to one plant per 12-18 inches.
2. Transplanting Seedlings: If you’re using seedlings, gently remove them from their containers and plant them in the tire garden, spacing them about 12-18 inches apart.
3. Watering: Water the newly planted seedlings thoroughly.
Caring for Your Butternut Squash:
Now that your butternut squash is planted, it’s important to provide them with the care they need to thrive.
1. Watering: Water your butternut squash regularly, especially during dry spells. Aim to keep the soil consistently moist but not waterlogged. Water at the base of the plants to avoid wetting the foliage, which can lead to fungal diseases.
2. Fertilizing: Butternut squash are heavy feeders, so they need regular fertilization. Use a balanced fertilizer or compost tea every 2-3 weeks.
3. Weeding: Keep the tire garden free of weeds, which can compete with your butternut squash for nutrients and water.
4. Pest Control: Keep an eye out for common squash pests like squash bugs, squash vine borers, and cucumber beetles. Use organic pest control methods like handpicking, insecticidal soap, or neem oil to control these pests.
5. Pollination: Butternut squash are pollinated by bees and other insects. If you’re not seeing a lot of bees in your garden, you may need to hand-pollinate the flowers.
* Hand-Pollination: Identify the male and female flowers. The male flowers have a long, thin stem, while the female flowers have a small fruit at the base. Use a small paintbrush to transfer pollen from the male flower to the female flower.
Harvesting Your Butternut Squash:
After about 90-100 days, your butternut squash will be ready to harvest.
1. Signs of Ripeness: The squash should be a deep tan color and the skin should be hard. The stem should also be dry and brown.
2. Harvesting: Use a sharp knife or pruners to cut the squash from the vine, leaving about 2 inches of stem attached.
3. Curing: Cure the squash in a warm, dry place for 10-14 days. This will help to harden the skin and improve the flavor.
4. Storage: Store the cured squash in a cool, dry place for several months.
Troubleshooting:
Even with the best care, you may encounter some problems while growing butternut squash. Here are a few common issues and how to address them:
* Powdery Mildew: This fungal disease can cause a white, powdery coating on the leaves. To prevent powdery mildew, water at the base
Conclusion
So, there you have it! Transforming old tires into thriving butternut squash planters is not just a quirky DIY project; it’s a sustainable, cost-effective, and surprisingly efficient way to cultivate a bountiful harvest. We’ve walked you through the steps, highlighting the benefits of this upcycling approach. From providing excellent drainage and insulation to offering a contained space for your butternut squash to flourish, recycled tire gardening offers a unique advantage over traditional methods.
But why is this DIY trick a must-try? Beyond the environmental benefits of repurposing old tires, it’s about creating a warmer microclimate for your butternut squash, leading to earlier and potentially larger yields. The black rubber absorbs heat from the sun, warming the soil and extending the growing season, especially beneficial in cooler climates. Plus, the tires act as a barrier against pests and weeds, simplifying garden maintenance.
Looking to personalize your tire planters? Consider these variations:
* Stacking Tires: Create tiered planters by stacking multiple tires on top of each other. This is ideal for maximizing vertical space and adding visual interest to your garden.
* Painting and Decorating: Unleash your creativity by painting the tires with vibrant colors or intricate designs. This not only enhances the aesthetic appeal but also protects the rubber from UV degradation. Use non-toxic, weather-resistant paints specifically designed for outdoor use.
* Adding Trellises: For vining varieties of butternut squash, incorporate a trellis system within or around the tire. This provides support for the growing vines and encourages air circulation, reducing the risk of fungal diseases.
* Companion Planting: Plant companion plants like marigolds or nasturtiums around the base of the tires to deter pests and attract beneficial insects.
* Different Tire Sizes: Experiment with different tire sizes to accommodate varying butternut squash varieties. Larger tires are suitable for larger, more sprawling plants.
We firmly believe that this recycled tire gardening method is a game-changer for butternut squash enthusiasts. It’s a simple, rewarding, and environmentally conscious way to grow your own delicious and nutritious produce.
Now, it’s your turn! We encourage you to give this DIY trick a try and experience the joy of growing butternut squash in recycled tire planters. Don’t be afraid to experiment with different techniques and variations to find what works best for your garden and climate.
Most importantly, we want to hear about your experience! Share your photos, tips, and stories with us in the comments section below. Let’s build a community of passionate gardeners who are committed to sustainable and innovative growing practices. Your feedback will not only inspire others but also help us refine and improve this DIY trick for future generations of butternut squash lovers. Happy gardening!
FAQ
Frequently Asked Questions About Recycled Tire Gardening for Butternut Squash
Q: Is it safe to grow food in recycled tires? Are there any harmful chemicals that could leach into the soil?
A: This is a valid and important concern. While there’s been debate about the safety of growing food in recycled tires, the consensus is that the risk of harmful chemicals leaching into the soil is minimal, especially with proper precautions. Modern tires are manufactured with significantly fewer harmful chemicals than older tires. However, to further mitigate any potential risk, we strongly recommend lining the inside of the tire with a thick layer of landscape fabric or plastic sheeting before adding soil. This creates a barrier between the tire and the soil, preventing any direct contact. Additionally, ensure you are using tires that are in relatively good condition and avoid using tires that are visibly damaged or deteriorating. You can also opt for using tires from reputable sources that guarantee they are free from harmful contaminants. Finally, consider focusing on growing butternut squash, as they are fruiting vegetables and less likely to absorb contaminants from the soil compared to leafy greens or root vegetables.
Q: What type of soil should I use in my recycled tire butternut squash planter?
A: Butternut squash thrives in well-draining, nutrient-rich soil. We recommend using a mix of equal parts compost, topsoil, and potting mix. The compost provides essential nutrients, the topsoil provides structure, and the potting mix ensures good drainage. You can also amend the soil with organic fertilizers like bone meal or blood meal to further boost nutrient levels. Before planting, test the soil pH to ensure it’s within the optimal range of 6.0 to 7.0. If the soil is too acidic, you can add lime to raise the pH. If it’s too alkaline, you can add sulfur to lower the pH.
Q: How often should I water my butternut squash plants in recycled tire planters?
A: Watering frequency depends on several factors, including the climate, soil type, and stage of plant growth. Generally, you should water your butternut squash plants deeply whenever the top inch of soil feels dry to the touch. Avoid overwatering, as this can lead to root rot. Recycled tires tend to retain heat, so monitor the soil moisture levels closely, especially during hot and dry weather. Consider using a soaker hose or drip irrigation system to deliver water directly to the roots, minimizing water loss through evaporation.
Q: How much sunlight do butternut squash plants need in recycled tire planters?
A: Butternut squash plants require at least 6-8 hours of direct sunlight per day to thrive. Choose a location for your recycled tire planters that receives ample sunlight throughout the day. If you live in a particularly hot climate, you may need to provide some afternoon shade to prevent the plants from overheating.
Q: How do I prevent pests and diseases from affecting my butternut squash plants in recycled tire planters?
A: Prevention is key when it comes to pests and diseases. Start by choosing disease-resistant varieties of butternut squash. Regularly inspect your plants for signs of pests or diseases, such as aphids, squash bugs, or powdery mildew. Remove any infected leaves or plants immediately. You can also use organic pest control methods, such as insecticidal soap or neem oil, to control pests. To prevent fungal diseases, ensure good air circulation around the plants and avoid overhead watering. Consider companion planting with herbs like basil or rosemary, which can help deter pests.
Q: How do I prepare the recycled tires before using them as planters?
A: Thoroughly clean the tires with soap and water to remove any dirt, debris, or oil residue. Inspect the tires for any sharp edges or protruding wires and remove them carefully. If desired, paint the tires with non-toxic, weather-resistant paint to enhance their appearance and protect them from UV degradation. Drill drainage holes in the bottom of the tires to prevent waterlogging.
Q: Can I use any size of tire for this project?
A: While you can use various tire sizes, larger tires are generally better suited for butternut squash, as they provide more space for the roots to grow. Smaller tires may be suitable for smaller varieties of butternut squash or for starting seedlings. Consider the mature size of the butternut squash variety you are growing when choosing the tire size.
Q: What do I do with the tires at the end of the growing season?
A: At the end of the growing season, you can either leave the tires in place for the following year or remove them and store them in a dry place. If you choose to leave them in place, consider adding a layer of compost or manure to the soil to replenish nutrients. If you remove them, clean them thoroughly and store them in a shed or garage to protect them from the elements. You can also reuse the tires for other gardening projects or donate them to a local community garden.
Q: Can I grow other vegetables in recycled tires besides butternut squash?
A: Absolutely! Recycled tires can be used to grow a wide variety of vegetables, herbs, and flowers. Some popular choices include tomatoes, peppers, eggplants, cucumbers, zucchini, and various leafy greens. Just be sure to choose plants that are appropriate for the size of the tire and the amount of sunlight available.
Q: Where can I find recycled tires for this project?
A: You can often find recycled tires at local tire shops, auto repair shops, or recycling centers. Some tire retailers may even offer them for free or at a discounted price. You can also check online marketplaces or community forums for people who are giving away used tires. Always ensure that the tires you obtain are in relatively good condition and free from any hazardous materials.

Leave a Comment