
Rooftop kale planter DIY projects are taking the gardening world by storm, and for good reason! Imagine stepping out onto your roof and harvesting fresh, vibrant kale, ready to be tossed into a salad or blended into a healthy smoothie. Sounds dreamy, right? Well, it’s more achievable than you might think, and I’m here to show you how!
For centuries, humans have cultivated food in limited spaces, from window boxes in bustling cities to terraced gardens clinging to hillsides. This resourcefulness reflects a deep connection to nature and a desire for self-sufficiency. Today, with urban populations growing and access to fresh produce sometimes limited, the need for innovative gardening solutions is greater than ever. That’s where a rooftop kale planter DIY comes in!
Let’s face it, not everyone has a sprawling backyard. But that doesn’t mean you can’t enjoy the benefits of homegrown goodness. A rooftop garden, especially one dedicated to nutrient-rich kale, can transform an unused space into a thriving source of healthy food. Plus, it’s a fantastic way to reduce your carbon footprint, beautify your surroundings, and even get a little exercise. This DIY project is perfect for anyone looking to maximize their space, eat healthier, and add a touch of green to their urban landscape. So, grab your tools, and let’s get started on building your very own rooftop kale oasis!
Your Own Rooftop Cabbage Garden: A DIY Guide
Hello dear garden friends! Do you also have the problem that you’d love to have fresh cabbage, but have no space in the garden? Don’t worry, I have the solution: a rooftop cabbage patch! Sound crazy? Maybe a little, but it’s also super effective and fun! I’ll show you how to build your own small cabbage rooftop garden with simple materials and a little bit of handiwork.
What you need: The Material List
Before we get started, here is a list of all the things you’ll need for your rooftop cabbage patch project:
- Containers: Large, sturdy plastic containers (e.g., mortar tubs, large planters, or recycled rain barrels). Make sure they are food-safe if you are recycling them!
- Drill with a drill bit: For the drainage holes.
- Drainage material: Gravel, expanded clay, or broken pottery shards. This prevents waterlogging.
- Garden fleece/landscape fabric: To separate the soil from the drainage material.
- High-quality potting soil: Organic vegetable soil is best. Cabbage is a heavy feeder, so it needs good soil.
- Compost or organic fertilizer: For that extra portion of nutrients.
- Cabbage plants: Depending on your taste: kale, Brussels sprouts, white cabbage, red cabbage… the choice is huge!
- Watering can or garden hose: For watering.
- Gloves: To protect your hands.
- Measuring tape or folding ruler: For measuring.
- Optional: A snail fence or copper tape to protect your cabbage plants from snails.
- Optional: A trellis, in case you want to plant climbing cabbage varieties.
Safety First: Preparing the Roof
Important: Before you start building, you must check if your roof is suitable for the additional load. When in doubt, ask a structural engineer! Safety comes first! You should also check with your local municipality to see if you need a permit for a rooftop garden.
Step-by-Step Guide: How to Build Your Cabbage Patch
Now let’s get down to it! Follow these steps to grow your own rooftop cabbage:
1. Prepare the containers:
- Clean the containers thoroughly with water and possibly a little dish soap.
- Drill several holes in the bottom of the containers with the drill. These holes are important for drainage and prevent waterlogging, which cabbage plants do not like at all. The holes should be about 1-2 cm (0.4-0.8 inches) in diameter and spaced about 15-20 cm (6-8 inches) apart.
- Make sure the holes are not too large, so the soil doesn’t wash out.
2. Add a drainage layer:
- Fill a layer of drainage material (gravel, expanded clay, or broken pottery shards) into the containers. The layer should be about 10-15 cm (4-6 inches) high.
- The drainage material ensures that excess water can drain away and the roots of the cabbage plants are not left standing in water.
3. Lay out the garden fleece:
- Place a piece of garden fleece over the drainage layer. The fleece prevents the soil from washing into the drainage layer and clogging it.
- Cut the fleece so that it covers the entire drainage layer and overlaps slightly at the edges.
4. Fill with soil:
- Fill the containers with high-quality potting soil. Make sure the soil is loose and airy.
- Mix some compost or organic fertilizer into the soil to give the cabbage plants a good start. Cabbage is a heavy feeder and needs a lot of nutrients.
- Leave about 5-10 cm (2-4 inches) of space to the rim of the containers so you don’t overflow the soil when watering.
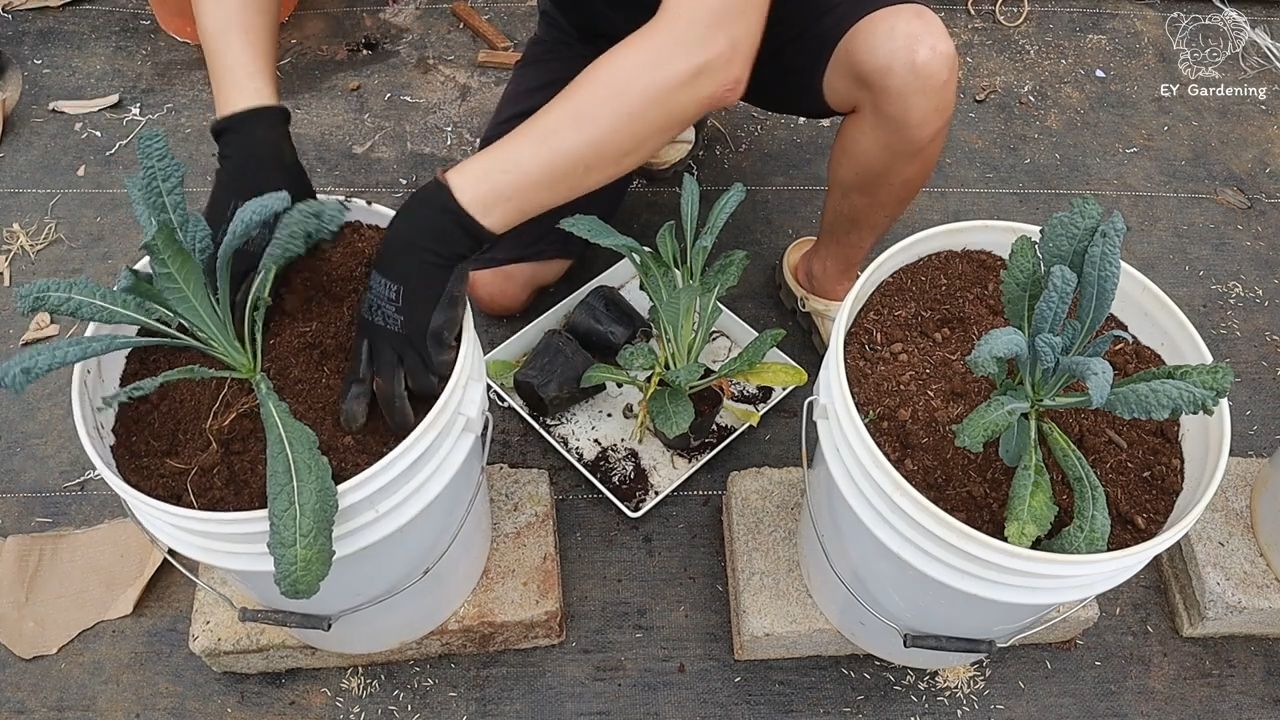
5. Plant the cabbage plants:
- Dig small holes in the soil that are large enough to accommodate the root balls of the cabbage plants.
- Carefully place the cabbage plants in the holes and fill the holes with soil.
- Press the soil down lightly.
- Make sure the cabbage plants have enough space between them. Depending on the cabbage variety, you should maintain a distance of 40-60 cm (16-24 inches).
6. Watering:
- Water the cabbage plants thoroughly after planting.
- Make sure the soil is always moist, but not wet.
- It’s best to water in the morning or evening to avoid evaporation.
7. Protective measures:
- Install a snail fence or copper tape around the containers to protect your cabbage plants from snails. Snails love cabbage!
- Regularly check the cabbage plants for pests like cabbage white butterflies or aphids. If necessary, you can use biological pesticides.
Care Tips for Your Rooftop Cabbage
To ensure your rooftop cabbage thrives, here are a few more important care tips:
- Watering: Cabbage plants need regular water, especially during their growth phase. Make sure the soil is always moist, but avoid waterlogging.
- Fertilizing: Cabbage is a heavy feeder and needs a lot of nutrients. Fertilize your cabbage plants regularly with compost, organic fertilizer, or a special cabbage fertilizer.
- Pests: Regularly check your cabbage plants for pests like cabbage white butterflies, aphids, or flea beetles. If necessary, you can use biological pesticides.
- Sun protection: On very hot days, it can be beneficial to protect your cabbage plants from direct sunlight with a sun sail or shade cloth.
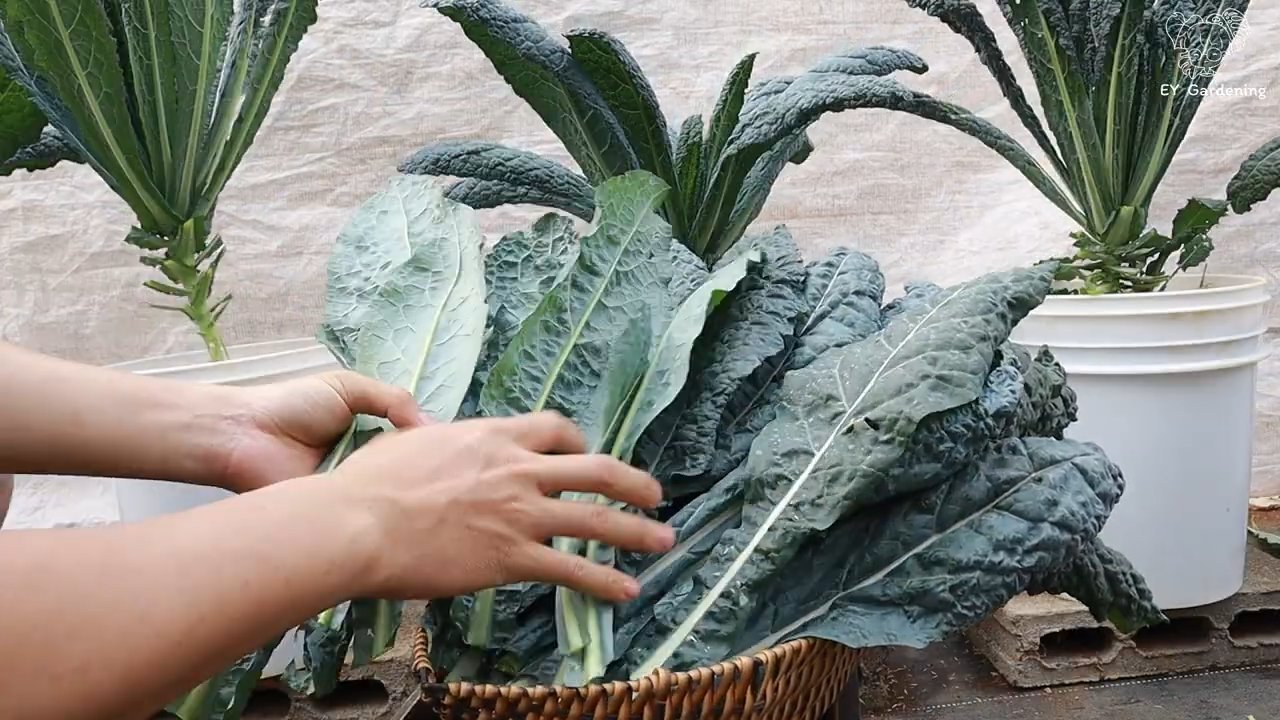
- Harvesting: Depending on the cabbage variety, you can harvest your cabbage after a few weeks or months. Make sure the cabbage is ripe before you harvest it.
Special Tips for Different Cabbage Varieties
Each type of cabbage has its own needs. Here are a few special tips for the most popular cabbage varieties:
- Kale: Kale is very robust and can also tolerate frost. It can be harvested throughout the winter.
- Brussels Sprouts: Brussels sprouts need a lot of sun and nutrient-rich soil. The sprouts should be firm and closed when you harvest them.
- White Cabbage: White cabbage is relatively undemanding and grows well in almost any soil. It stores well.
- Red Cabbage: Red cabbage needs acidic soil. You can acidify the soil with a little peat or rhododendron soil.
Avoiding Common Mistakes: Do’s and Don’ts
Here are a few common mistakes you should avoid when growing cabbage in a rooftop garden:
Do: Use high-quality soil! Cabbage plants need nutrient-rich soil.
Don’t: Waterlogging! Cabbage plants do not tolerate waterlogged soil. Ensure good drainage.
Don’t: Too little sun! Cabbage plants need a lot of sun to grow well.
Don’t: Too little fertilizer! Cabbage is a heavy feeder and needs a lot of nutrients.
Don’t: Ignore pests! Regularly check your cabbage plants for pests and combat them if necessary.
Do: Water regularly! Cabbage plants need regular water, especially during their growth phase.
Conclusion
So, there you have it! Creating your own rooftop kale planter isn’t just a fun weekend project; it’s a gateway to fresh, organic produce right outside your door. Imagine stepping onto your roof and harvesting vibrant, nutrient-rich kale for your salads, smoothies, or even a delicious kale chip snack. This DIY project empowers you to take control of your food source, reduce your carbon footprint, and add a touch of green to your urban landscape.
Why is this a must-try? Because it’s more than just growing kale; it’s about embracing sustainability, fostering a connection with nature, and enjoying the unparalleled flavor of homegrown vegetables. Store-bought kale simply can’t compare to the crispness and vitality of kale harvested moments before it graces your plate. Plus, you’ll know exactly what went into growing it – no mystery pesticides or questionable farming practices.
But the beauty of this project lies in its adaptability. Feel free to experiment with different container sizes and materials. Upcycle old crates, repurpose plastic bins, or even build a custom planter box to perfectly fit your rooftop space. Consider adding companion plants like marigolds or nasturtiums to deter pests and attract beneficial insects. You could even incorporate a small trellis for climbing varieties of kale, adding vertical interest to your rooftop garden.
Don’t limit yourself to just kale! Once you’ve mastered the art of rooftop gardening with kale, branch out and try growing other leafy greens like spinach, lettuce, or even herbs like basil and parsley. The possibilities are endless!
We understand that embarking on a DIY project can sometimes feel daunting, but trust us, this one is incredibly rewarding. The satisfaction of nurturing a plant from seed to harvest is truly unmatched. And the best part? You’ll be contributing to a healthier lifestyle for yourself and a greener planet for everyone.
We wholeheartedly encourage you to give this rooftop kale planter DIY a try. It’s a simple, cost-effective, and incredibly fulfilling project that will transform your rooftop into a thriving oasis. Don’t be afraid to get your hands dirty, experiment with different techniques, and most importantly, have fun!
Once you’ve built your rooftop kale garden, we’d love to hear about your experience! Share your photos, tips, and challenges in the comments below. Let’s create a community of rooftop gardeners and inspire others to embrace the joys of homegrown produce. What varieties of kale did you choose? What challenges did you face, and how did you overcome them? Your insights could be invaluable to other aspiring rooftop gardeners. Let’s grow together!
Frequently Asked Questions (FAQ)
What kind of kale is best for rooftop planters?
The best kale varieties for rooftop planters are those that are relatively compact and resilient. Dwarf Blue Curled Vates is a popular choice due to its manageable size and cold hardiness. Lacinato kale (also known as dinosaur kale or Tuscan kale) is another excellent option, offering a unique texture and flavor. Red Russian kale is also a good choice, adding a splash of color to your rooftop garden. Consider the amount of sunlight your rooftop receives and choose varieties that are well-suited to those conditions. Experimenting with different varieties is part of the fun!
How much sunlight does my rooftop kale planter need?
Kale thrives in full sun, which means at least six hours of direct sunlight per day. However, it can tolerate partial shade, especially in hotter climates. If your rooftop receives less than six hours of sunlight, consider using grow lights to supplement the natural light. Observe your kale plants closely and adjust their position as needed to ensure they are receiving adequate sunlight. Leggy growth or pale leaves can indicate insufficient sunlight.
What kind of soil should I use for my rooftop kale planter?
Use a high-quality potting mix specifically formulated for container gardening. Avoid using garden soil, as it can become compacted in containers and impede drainage. Look for a potting mix that contains a blend of peat moss, perlite, and vermiculite. These ingredients provide good drainage, aeration, and water retention. You can also amend your potting mix with compost to add nutrients and improve soil structure.
How often should I water my rooftop kale planter?
Water your kale plants regularly, especially during hot, dry weather. The frequency of watering will depend on the weather conditions, the size of your container, and the type of potting mix you are using. Check the soil moisture regularly by sticking your finger into the soil. If the top inch of soil feels dry, it’s time to water. Water deeply, until water drains out of the bottom of the container. Avoid overwatering, as this can lead to root rot.
How do I fertilize my rooftop kale planter?
Kale is a heavy feeder and requires regular fertilization. Use a balanced, slow-release fertilizer at planting time. You can also supplement with liquid fertilizer every two to three weeks during the growing season. Look for a fertilizer that is specifically formulated for leafy greens. Follow the instructions on the fertilizer package carefully. Avoid over-fertilizing, as this can burn the roots of your plants.
How do I protect my rooftop kale planter from pests?
Kale is susceptible to a variety of pests, including aphids, cabbage worms, and flea beetles. Inspect your plants regularly for signs of infestation. Handpick any pests that you find. You can also use insecticidal soap or neem oil to control pests. Companion planting with marigolds or nasturtiums can also help deter pests. Covering your plants with row covers can provide a physical barrier against pests.
How do I harvest kale from my rooftop planter?
Harvest kale leaves as needed, starting with the outer leaves. Avoid harvesting more than one-third of the plant at a time. Cut the leaves off at the base of the stem. The plant will continue to produce new leaves throughout the growing season. Regular harvesting encourages new growth.
Can I grow kale in a rooftop planter during the winter?
Yes, kale is a cold-hardy vegetable and can be grown in a rooftop planter during the winter in many climates. However, you may need to provide some protection from frost and snow. Covering your plants with row covers or moving them to a sheltered location can help protect them from the elements. Choose cold-hardy varieties of kale for winter growing.
What if my rooftop has weight restrictions?
This is a crucial consideration. Before embarking on your rooftop kale planter DIY, consult with a structural engineer or building professional to determine the weight-bearing capacity of your roof. Choose lightweight containers and potting mixes to minimize the weight load. Consider using smaller containers or distributing the weight evenly across the roof. Safety first!
How do I ensure proper drainage in my rooftop kale planter?
Proper drainage is essential for healthy kale growth. Make sure your containers have drainage holes. You can also add a layer of gravel or pebbles to the bottom of the container to improve drainage. Avoid using saucers under your containers, as this can trap water and lead to root rot. Elevate your containers slightly to allow for better air circulation and drainage.
Leave a Comment