
Growing Garlic from Cloves is easier than you might think, and I’m here to show you how! Forget those expensive supermarket bulbs – imagine harvesting your own pungent, flavorful garlic right from your backyard. For centuries, garlic has been revered not just for its culinary uses, but also for its medicinal properties. From ancient Egypt, where it fueled the pyramid builders, to traditional Chinese medicine, garlic has a rich and fascinating history.
But beyond its historical significance, why should you bother growing your own garlic? Well, for starters, the taste is simply unparalleled. Homegrown garlic boasts a depth of flavor that store-bought varieties often lack. Plus, you have complete control over the growing process, ensuring your garlic is free from harmful pesticides and chemicals.
This DIY guide will walk you through every step of the process, from selecting the right cloves to harvesting your bountiful crop. I’ll share my favorite tips and tricks for maximizing your yield and ensuring your garlic thrives. Whether you’re a seasoned gardener or a complete beginner, you’ll be amazed at how rewarding growing garlic from cloves can be. So, grab your gardening gloves, and let’s get started!
Growing Garlic from Cloves: A Beginner’s Guide
Hey there, fellow garden enthusiasts! I’m so excited to share my experience with growing garlic from cloves. It’s surprisingly easy and incredibly rewarding. Imagine harvesting your own flavorful garlic, knowing exactly where it came from and how it was grown. Trust me, the taste is unmatched! This guide will walk you through every step, from selecting the right cloves to harvesting your beautiful bulbs. Let’s get started!
Choosing the Right Garlic
Before we even think about planting, we need to talk about garlic selection. Not all garlic is created equal, and choosing the right type is crucial for success.
* Hardneck vs. Softneck: This is the big one. Hardneck garlic is generally more flavorful and cold-hardy, making it ideal for colder climates. It produces a flower stalk called a scape, which you can harvest and eat (more on that later!). Softneck garlic, on the other hand, is better suited for warmer climates and stores longer. It doesn’t typically produce a scape.
* Variety Matters: Within hardneck and softneck, there are tons of varieties. Research which ones thrive in your specific region. Local nurseries are a great resource for this! Some popular hardneck varieties include ‘German Extra Hardy,’ ‘Music,’ and ‘Chesnok Red.’ For softneck, ‘California Early’ and ‘Silverskin’ are common choices.
* Source Your Garlic Wisely: This is super important! Don’t just grab a bulb from the grocery store. Grocery store garlic is often treated to prevent sprouting, and it might not be suited for your climate. Instead, buy your garlic from a reputable seed company, a local farmer’s market, or a nursery. Look for certified disease-free garlic.
* Pick the Best Bulbs: When selecting your garlic, choose large, firm bulbs with plump, healthy cloves. Avoid any bulbs that are soft, moldy, or show signs of damage. The bigger the clove, the bigger the bulb it will produce!
Preparing for Planting
Okay, you’ve got your garlic. Now it’s time to get ready to plant!
* Timing is Key: Garlic is typically planted in the fall, about 4-6 weeks before the ground freezes. This gives the cloves time to establish roots before winter sets in. In most regions, that’s around October or November. Check your local frost dates to determine the best time for your area.
* Sunlight: Garlic needs at least 6 hours of sunlight per day. Choose a location in your garden that gets plenty of sun.
* Soil Preparation: Garlic loves well-drained, fertile soil. Amend your soil with plenty of compost or well-rotted manure before planting. This will provide the garlic with the nutrients it needs to thrive. Avoid heavy clay soils, as they can lead to rot. If you have clay soil, consider planting in raised beds.
* Soil pH: Garlic prefers a soil pH between 6.0 and 7.0. You can test your soil pH with a simple soil testing kit. If your soil is too acidic, you can add lime to raise the pH.
Planting Your Garlic Cloves
Alright, the moment we’ve been waiting for! Let’s get those cloves in the ground.
1. Separate the Cloves: Gently separate the cloves from the bulb just before planting. Leave the papery skin on each clove intact. Don’t separate them too early, as this can dry them out.
2. Dig Holes: Dig holes that are about 2-3 inches deep and 6 inches apart. If you’re planting multiple rows, space the rows about 12 inches apart.
3. Plant the Cloves: Place each clove in a hole, pointy side up. This is important! The pointy end is where the leaves will emerge.
4. Cover with Soil: Cover the cloves with soil and gently pat it down.
5. Water Thoroughly: Water the planting area thoroughly. This will help settle the soil and encourage root growth.
6. Mulch: Apply a thick layer of mulch, such as straw or shredded leaves, over the planting area. This will help insulate the soil, retain moisture, and suppress weeds.
Caring for Your Garlic
Now that your garlic is planted, it’s time to provide it with the care it needs to grow strong and healthy.
* Watering: Garlic needs consistent moisture, especially in the spring when it’s actively growing. Water deeply whenever the soil feels dry to the touch. Avoid overwatering, as this can lead to rot.
* Weeding: Keep the planting area free of weeds. Weeds compete with garlic for nutrients and water. Hand-pull weeds carefully to avoid disturbing the garlic roots.
* Fertilizing: In the spring, fertilize your garlic with a balanced fertilizer or compost tea. This will provide it with the extra nutrients it needs to produce large bulbs.
* Scapes (Hardneck Garlic): If you’re growing hardneck garlic, you’ll notice a flower stalk (scape) emerging in the spring. Cut off the scapes when they start to curl. This will encourage the plant to put more energy into bulb development. Don’t throw the scapes away! They’re delicious and can be used in pesto, stir-fries, or grilled.
Harvesting Your Garlic
The most exciting part! Harvesting your own garlic is incredibly satisfying.
* When to Harvest: Garlic is typically ready to harvest in mid-summer, about 8-9 months after planting. A good indicator is when the lower leaves start to turn yellow and brown. Don’t wait until all the leaves have died back, as this can lead to the bulbs splitting.
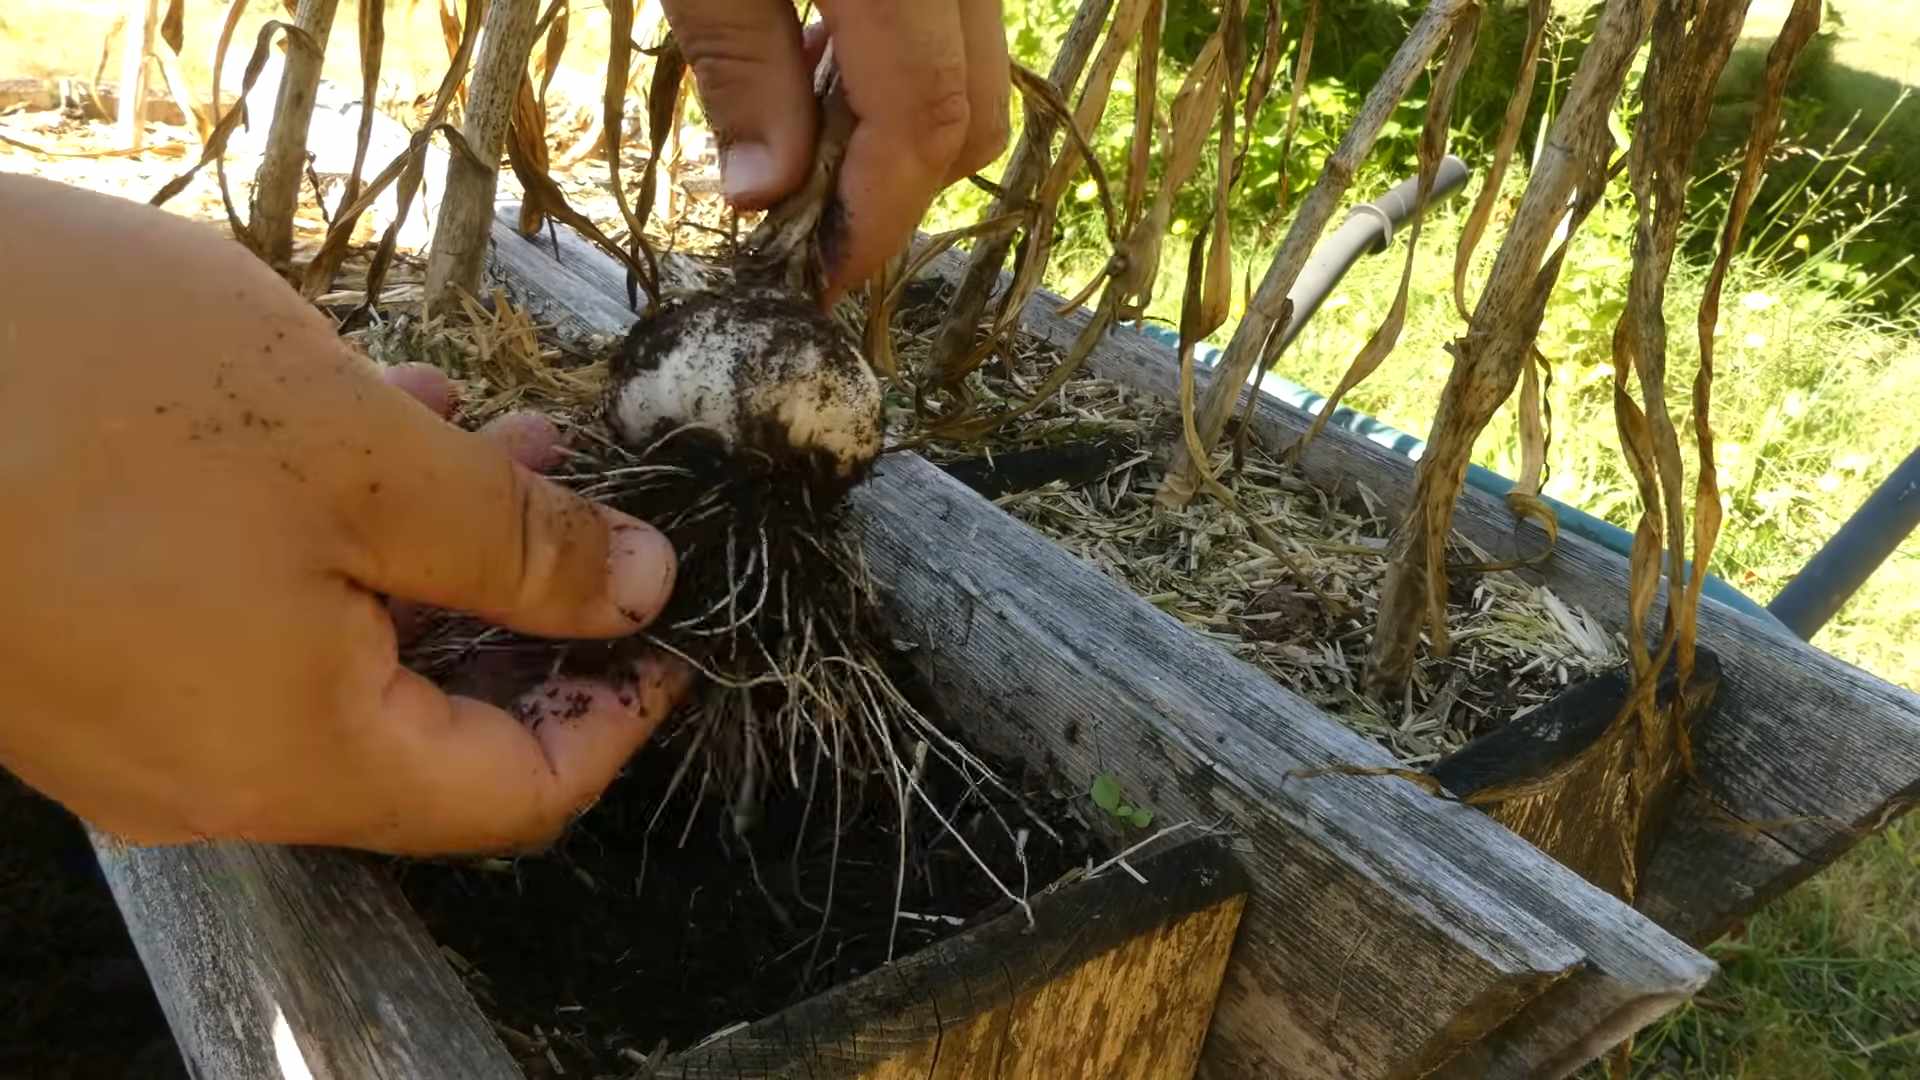
* How to Harvest: Loosen the soil around the bulbs with a garden fork or trowel. Gently lift the bulbs from the soil. Be careful not to damage them.
* Curing: Curing is essential for long-term storage. Brush off any excess soil from the bulbs, but don’t wash them. Tie the garlic plants together in bundles of 4-6 bulbs and hang them in a well-ventilated, dry, and shady place for 2-4 weeks.
* Storing: Once the garlic is cured, cut off the roots and stems, leaving about an inch of stem attached to the bulb. Store the bulbs in a cool, dry, and dark place. Properly cured garlic can last for several months.
Troubleshooting
Even with the best care, you might encounter some problems. Here are a few common issues and how to deal with them:
* Garlic Rot: This is usually caused by overwatering or poorly drained soil. Make sure your soil is well-draining and avoid overwatering.
* Pests: Garlic is relatively pest-resistant, but you might encounter onion thrips or nematodes. Use organic pest control methods, such as insecticidal soap or neem oil.
* Nutrient Deficiencies: Yellowing leaves can indicate a nutrient deficiency. Fertilize your garlic with a balanced fertilizer or compost tea.
Enjoying Your Homegrown Garlic
Congratulations! You’ve successfully grown your own garlic. Now it’s time to enjoy the fruits (or rather, bulbs) of your labor. Use your homegrown garlic in all your favorite recipes. The flavor is so much better than store-bought garlic. You can also save some of your best bulbs to plant next year.
Growing garlic is a rewarding experience that anyone can do. With a little planning and care, you can enjoy a bountiful harvest of delicious, homegrown garlic. Happy gardening!
Conclusion
So, there you have it! Growing garlic from cloves is not only surprisingly simple, but it’s also incredibly rewarding. Imagine the satisfaction of harvesting plump, flavorful bulbs that you nurtured from a single clove. Forget those bland, imported garlic heads from the supermarket; with this DIY trick, you’ll be enjoying the robust, pungent taste of homegrown garlic in all your favorite dishes.
Why is this a must-try? Because it puts you in control. You choose the variety, ensuring you get the flavor profile you crave. You control the growing environment, minimizing exposure to harmful chemicals. And, perhaps most importantly, you connect with the natural world in a tangible and delicious way. This isn’t just about saving a few dollars; it’s about experiencing the magic of gardening and savoring the fruits (or rather, bulbs!) of your labor.
Don’t be afraid to experiment! Try different varieties of garlic to discover your personal favorite. Hardneck varieties, with their beautiful scapes (which are also edible!), are great for colder climates, while softneck varieties are better suited for warmer regions. You can also play around with planting times to see how it affects the size and flavor of your harvest. Consider companion planting – garlic is known to deter pests from other plants like roses and tomatoes.
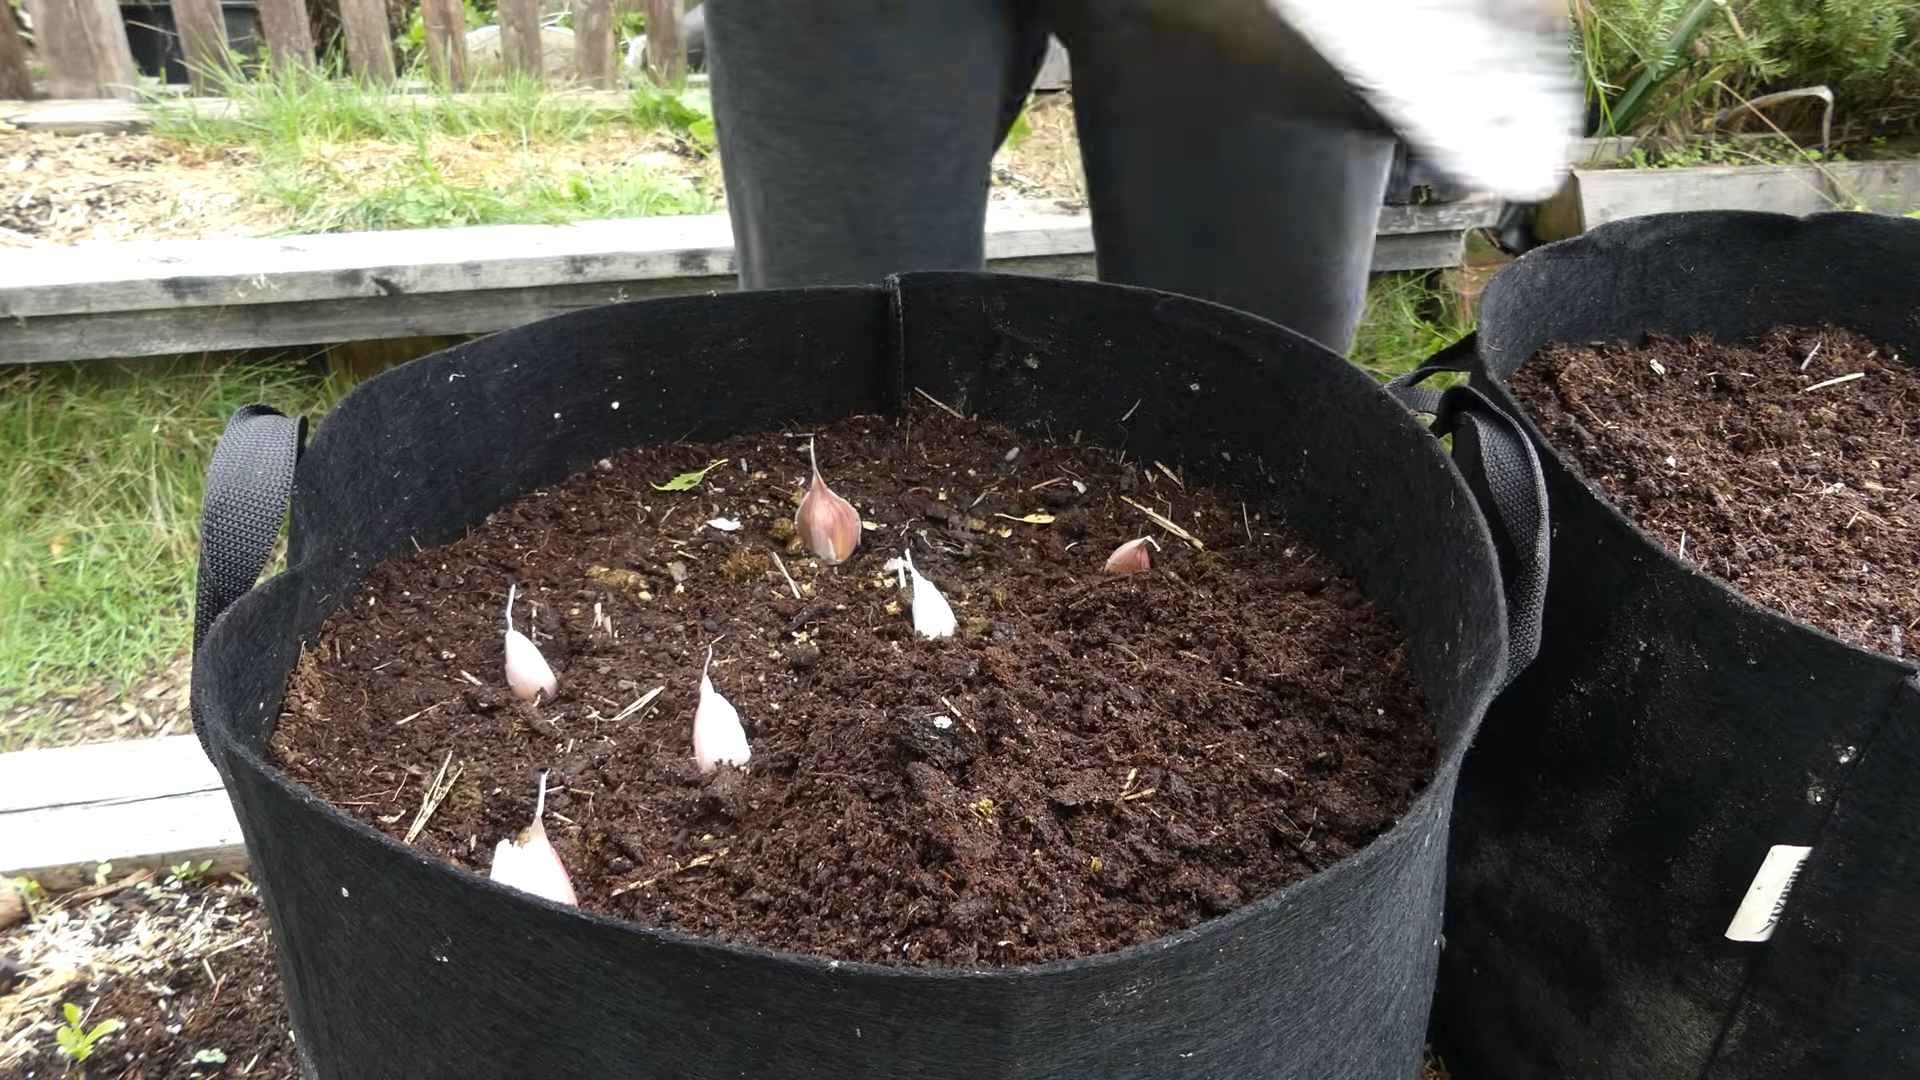
For a fun variation, try growing garlic in containers. This is perfect if you have limited space or want to keep your garlic closer at hand. Just make sure to choose a large pot with good drainage and use a high-quality potting mix.
We wholeheartedly encourage you to give this DIY trick a try. It’s an easy and fulfilling project that will transform your cooking and connect you with the earth. And once you’ve harvested your first crop of homegrown garlic, we’d love to hear about your experience! Share your photos, tips, and stories in the comments below. Let’s build a community of garlic growers and spread the love of this amazing plant. Embrace the process of growing garlic from cloves and unlock a world of flavor and satisfaction. You won’t regret it!
Frequently Asked Questions (FAQ)
Q: What kind of garlic should I plant?
A: The best type of garlic to plant depends on your climate. Hardneck varieties are more cold-hardy and produce scapes (edible flower stalks), making them ideal for colder regions. Softneck varieties are better suited for warmer climates and tend to store longer. Elephant garlic, while technically a type of leek, is also commonly grown and produces very large, mild-flavored cloves. Research which varieties thrive in your local area for the best results. Local nurseries and agricultural extension offices are excellent resources for this information.
Q: When is the best time to plant garlic?
A: The ideal time to plant garlic is in the fall, typically 4-6 weeks before the ground freezes. This allows the cloves to establish roots before winter sets in. In colder climates, this is usually around October or November. In warmer climates, you can plant later, around November or December. Planting in the fall gives the garlic a head start, resulting in larger bulbs the following summer.
Q: How deep should I plant the garlic cloves?
A: Plant garlic cloves about 2 inches deep, with the pointed end facing up. Space them about 6 inches apart in rows that are 12 inches apart. This spacing allows for adequate air circulation and room for the bulbs to grow.
Q: What kind of soil is best for growing garlic?
A: Garlic prefers well-drained, fertile soil that is rich in organic matter. Amend your soil with compost or well-rotted manure before planting to improve drainage and fertility. A slightly acidic to neutral pH (around 6.0 to 7.0) is ideal. Avoid planting in heavy clay soil, as this can lead to rot. If you have clay soil, consider growing garlic in raised beds or containers.
Q: How much water does garlic need?
A: Garlic needs consistent moisture, especially during the spring when the bulbs are actively growing. Water deeply whenever the top inch of soil feels dry. Avoid overwatering, as this can lead to rot. Reduce watering as the bulbs mature in the summer.
Q: Does garlic need fertilizer?
A: Yes, garlic benefits from fertilization, especially during the spring. Apply a balanced fertilizer or a fertilizer high in nitrogen when the plants are actively growing. You can also side-dress with compost or well-rotted manure. Avoid over-fertilizing, as this can lead to excessive foliage growth at the expense of bulb development.
Q: How do I know when the garlic is ready to harvest?
A: Garlic is typically ready to harvest in mid-summer, when the lower leaves start to turn yellow and brown. The tops may also begin to fall over. Don’t wait until all the leaves are completely brown, as this can indicate that the bulbs are overripe and may not store well. Gently dig up a bulb to check its size and maturity.
Q: How do I cure garlic after harvesting?
A: Curing garlic is essential for proper storage. After harvesting, gently brush off any excess soil and allow the bulbs to dry in a well-ventilated, shaded area for 2-3 weeks. You can hang the bulbs in bunches or spread them out on screens or racks. The bulbs are cured when the necks are dry and the outer skins are papery.
Q: How should I store garlic?
A: Store cured garlic in a cool, dry, and dark place. Braiding the garlic and hanging it is a traditional method of storage. You can also store the bulbs in mesh bags or loosely in a basket. Avoid storing garlic in the refrigerator, as this can cause it to sprout. Properly cured and stored garlic can last for several months.
Q: Can I eat the garlic scapes?
A: Yes, garlic scapes are edible and delicious! They have a mild garlic flavor and can be used in a variety of dishes. Harvest the scapes when they are still young and tender, before they start to curl too tightly. You can sauté them, grill them, or use them to make pesto. Removing the scapes also encourages the plant to put more energy into bulb development.
Q: What are some common problems when growing garlic?
A: Common problems when growing garlic include rot, pests, and nutrient deficiencies. Rot can be prevented by planting in well-drained soil and avoiding overwatering. Pests, such as aphids and thrips, can be controlled with insecticidal soap or neem oil. Nutrient deficiencies can be addressed by amending the soil with compost or fertilizer. Regularly inspect your plants for signs of problems and take action promptly.
Q: Can I grow garlic in containers?
A: Yes, you can successfully grow garlic in containers. Choose a large pot with good drainage and use a high-quality potting mix. Plant the cloves about 2 inches deep and 6 inches apart. Water regularly and fertilize as needed. Container-grown garlic may not produce bulbs as large as those grown in the ground, but it’s still a rewarding experience.
Q: Is it true that growing garlic from cloves can deter pests in my garden?
A: Yes, garlic is known to be a natural pest deterrent. Its strong scent can repel various insects, including aphids, Japanese beetles, and cabbage moths. Planting garlic near other plants, such as roses, tomatoes, and strawberries, can help protect them from pests. It’s a great way to use growing garlic from cloves as a natural and organic pest control method in your garden.

Leave a Comment