
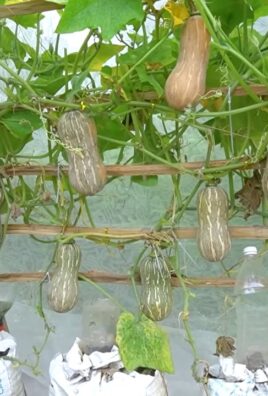
Styrofoam box mint growing – ever thought about turning that seemingly useless packaging material into a thriving herb garden? I know, it sounds a little crazy, right? But trust me, this DIY project is not only incredibly rewarding but also a fantastic way to recycle and bring fresh, fragrant mint right to your kitchen!
Mint, with its vibrant history stretching back to ancient Egypt where it was used for medicinal purposes and in religious ceremonies, has always been a beloved herb. From flavoring teas and desserts to adding a refreshing touch to savory dishes, mint is a culinary staple. But let’s be honest, sometimes growing mint in a traditional garden can be a bit…aggressive. It tends to take over everything!
That’s where the genius of styrofoam box mint growing comes in. By using a styrofoam box, you’re creating a contained environment that prevents mint from spreading uncontrollably. Plus, styrofoam provides excellent insulation, helping to regulate soil temperature and moisture, which is especially beneficial in extreme climates. Imagine stepping outside and snipping fresh mint leaves for your morning tea, all thanks to a repurposed styrofoam box. This DIY project is not only eco-friendly and cost-effective but also a super simple way to enjoy the benefits of homegrown herbs, even if you have limited space or a less-than-green thumb. So, let’s dive in and transform that styrofoam box into a minty paradise!
DIY Planting Mint in a Styrofoam Box: A Comprehensive Guide
Hello dear garden friends! Today I’m going to show you how you can easily and inexpensively plant your own mint in a Styrofoam box. Mint is not only super versatile in the kitchen (Mojitos, anyone?), but it’s also low-maintenance and grows almost anywhere. And with this method, you can harvest fresh mint even on the smallest balcony or windowsill. Let’s get started!
Why a Styrofoam Box?
Styrofoam boxes are ideal for growing plants because they:
- Act as insulators: They protect the roots from extreme temperatures, both heat and cold.
- Are lightweight: Easy to transport, even when filled with soil.
- Are cheap or even free: They are often byproducts of packaging material and can be recycled.
- Retain moisture: They help to keep the soil moist, which is especially important for mint.
What You Need: The Materials List
Before we start, here is a list of all the materials you will need for your mint project:
- A Styrofoam box (preferably one that has transported food, as these are often cleaner)
- A drill or a screwdriver
- Potting soil (preferably a high-quality herb soil)
- Drainage material (e.g., expanded clay, gravel, or clay shards)
- Mint seedlings or mint seeds (preferably organic quality)
- Watering can
- Optional: Scissors or a knife
- Optional: Fleece or weed control fabric
- Optional: Gloves (to keep your hands clean)
Step-by-Step Guide: How to Plant Your Mint
Now let’s get down to it! Follow these steps to successfully plant your mint in the Styrofoam box:
1. Preparing the Styrofoam Box
- Cleaning: Clean the Styrofoam box thoroughly with water and possibly a little dish soap. Make sure to remove all residues.
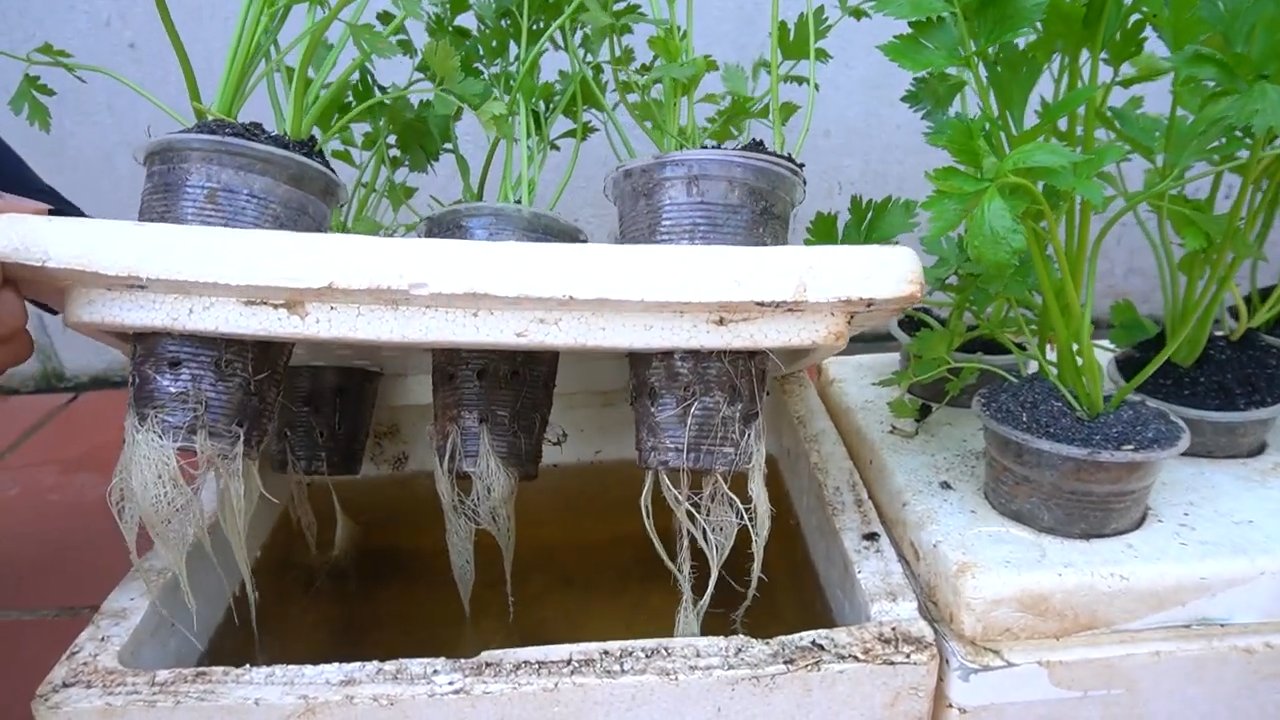
- Drilling drainage holes: Use the drill or screwdriver to make several holes in the bottom of the box. These holes are important so that excess water can drain away and waterlogging is avoided. Waterlogging is poison for mint! I recommend distributing about 5-6 holes evenly across the bottom.
- Optional: Lining with fleece: If you wish, you can line the inside of the box with fleece or weed control fabric. This prevents soil from being washed out through the drainage holes and keeps the box cleaner. Simply cut the fleece to size and place it in the box.
2. Adding Drainage and Soil
- Drainage layer: Fill a layer of drainage material (expanded clay, gravel, or clay shards) on the bottom of the box. This layer should be about 3-5 cm high. The drainage layer ensures that the water can drain well and the roots are not sitting in water.
- Filling with soil: Fill the box with potting soil. Leave about 5-10 cm of space to the top edge of the box. Press the soil down lightly.
3. Planting the Mint
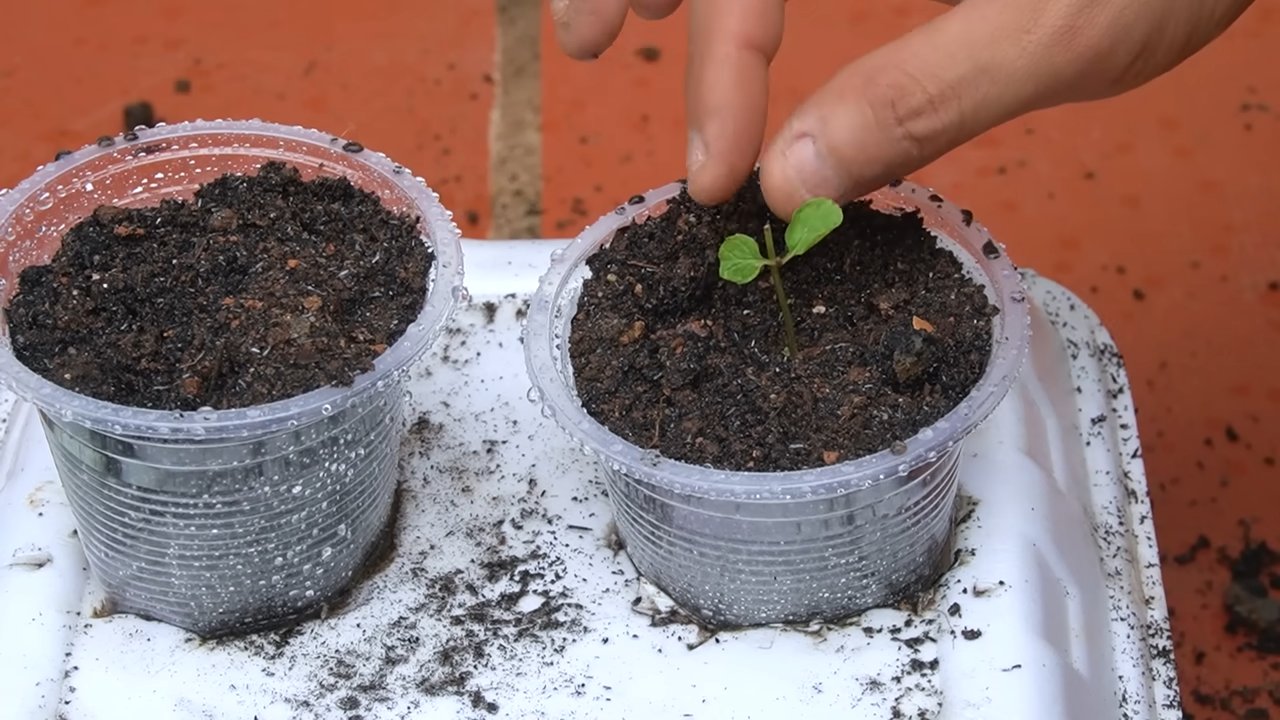
- Preparing seedlings (if used): If you are using mint seedlings, carefully take them out of their pots and loosen the roots a bit. This helps the roots to establish themselves better in the new soil.
- Digging planting holes: Dig small holes in the soil, large enough to accommodate the root balls of the mint seedlings. If you are using seeds, follow the instructions on the seed packet.
- Placing the mint: Place the mint seedlings in the holes and fill the holes with soil. Press the soil down lightly. If you are using seeds, sprinkle them evenly over the soil and cover them lightly with soil.
- Watering: Water the mint thoroughly. Make sure the soil is well moistened, but not waterlogged.
4. Caring for Your Mint
- Location: Place the Styrofoam box in a sunny to partially shaded location. Mint loves light, but direct midday sun can burn it.
- Watering: Water the mint regularly, especially on hot days. The soil should always be slightly moist, but not wet. Avoid waterlogging. I always check the moisture with my finger. If the top layer of soil feels dry, it’s time to water.
- Fertilizing: Fertilize the mint regularly with an organic herb fertilizer. Follow the instructions on the fertilizer package.
- Pruning: Prune the mint regularly to stimulate growth and prevent it from flowering. When mint flowers, it loses its aroma. You can use the cut leaves for cooking, for tea, or for drying.
- Overwintering: Mint is hardy, but in a Styrofoam box, it is somewhat more susceptible to frost. In winter, place the box in a sheltered location, e.g., against a house wall or in a shed. You can also cover the box with fleece to protect the roots from frost.
Common Problems and Solutions
Problems can also arise when planting mint. Here are some common problems and how you can solve them:
- Yellow leaves: Yellow leaves can be a sign of overwatering or nutrient deficiency. Check the moisture of the soil and fertilize the mint if necessary.
- Brown leaves: Brown leaves can be a sign of sunburn or dryness. Move the box to a shadier location and water the mint regularly.
- Pests: Mint can be infested by aphids or spider mites. Spray the mint with a solution of water and a little dish soap or use an organic pesticide.
- Fungal diseases: Fungal diseases can occur if the humidity is too high. Ensure good ventilation and remove affected leaves.
Extra Tips for a Rich Mint Harvest
- Different mint varieties: Try different mint varieties, e.g., peppermint, chocolate mint, or lemon mint. Each variety has its own taste and scent.
- Mint in a pot: Mint tends to spread aggressively. If you want to prevent this, you can place the mint in a pot inside the Styrofoam box.
- Drying mint: If you have too much mint, you can dry it and use it for tea or cooking. Tie the mint into small bouquets and hang them in a dry, airy place.
Conclusion
With this simple guide, you can easily plant your own mint in a Styrofoam box. It’s an inexpensive and environmentally friendly way to enjoy fresh herbs. Have fun gardening and enjoy your meal! I hope this guide helps you to achieve a bountiful mint harvest. If you have any questions, just leave a comment!
Conclusion
So, there you have it! Transforming a simple styrofoam box into a thriving mint garden is not just a clever upcycling project; it’s a game-changer for anyone who loves fresh herbs. We’ve walked you through the process, highlighting the benefits of this method – from temperature regulation and moisture retention to portability and cost-effectiveness. But why is this DIY trick a must-try?
Firstly, it democratizes gardening. You don’t need a sprawling backyard or expensive equipment to enjoy the vibrant flavor of homegrown mint. Whether you live in an apartment, have limited mobility, or simply want a convenient way to keep your mint close at hand, this styrofoam box solution is incredibly accessible.
Secondly, it’s sustainable. Reusing styrofoam boxes reduces waste and gives these materials a new lease on life. You’re not just growing mint; you’re contributing to a more eco-conscious lifestyle.
Thirdly, it’s incredibly rewarding. There’s something deeply satisfying about nurturing a plant from seed or seedling to a flourishing herb. The aroma of fresh mint, the vibrant green leaves, and the knowledge that you grew it yourself – it’s an experience that elevates everyday cooking and adds a touch of joy to your life.
But don’t stop there! This method is incredibly versatile. Consider these variations to personalize your mint-growing experience:
* **Mint Varieties:** Experiment with different types of mint, such as peppermint, spearmint, chocolate mint, or even orange mint. Each variety offers a unique flavor profile that can enhance your culinary creations.
* **Companion Planting:** While mint is best grown in isolation to prevent it from taking over, you can still add companion plants like marigolds around the outside of the box to deter pests.
* **Vertical Gardening:** Stack multiple styrofoam boxes to create a vertical mint garden, maximizing space and adding visual appeal.
* **Indoor Growing:** If you live in a colder climate, you can easily bring your styrofoam box mint garden indoors during the winter months. Just ensure it receives adequate sunlight or supplement with a grow light.
* **Watering System:** For those who travel frequently or tend to forget to water their plants, consider adding a self-watering system to your styrofoam box. This can be as simple as placing a water reservoir at the bottom of the box with a wicking system to draw moisture up to the soil.
Ultimately, the best way to discover the magic of this DIY trick is to try it yourself. Gather your supplies, follow our simple instructions, and prepare to be amazed by the results. We’re confident that you’ll find this method to be both practical and enjoyable.
So, what are you waiting for? Embrace the joy of homegrown mint and transform your styrofoam box into a thriving herb garden today! We encourage you to share your experiences with us. Post photos of your styrofoam box mint gardens on social media using #StyrofoamMintGarden and let us know what variations you’ve tried. We can’t wait to see your creations! This **styrofoam box mint growing** method is a simple, effective, and sustainable way to enjoy fresh mint year-round.
Frequently Asked Questions (FAQ)
1. What kind of styrofoam box is best for growing mint?
Ideally, you want a clean, food-grade styrofoam box that’s at least 6 inches deep. Boxes that have been used for shipping produce or seafood are excellent choices. Make sure to thoroughly wash the box with soap and water to remove any residue before planting. Avoid using boxes that have contained chemicals or hazardous materials. The thicker the styrofoam, the better the insulation it will provide for your mint.
2. How do I prepare the styrofoam box for planting?
First, ensure the box has drainage holes. Drill several holes (about 1/4 inch in diameter) in the bottom of the box to allow excess water to escape. This is crucial to prevent root rot. Next, line the inside of the box with a layer of landscape fabric or a thick plastic liner. This will help to retain moisture and prevent the soil from eroding the styrofoam. Finally, fill the box with a high-quality potting mix that’s well-draining and rich in organic matter.
3. What type of soil is best for growing mint in a styrofoam box?
Mint thrives in well-draining soil that’s rich in organic matter. A good potting mix specifically formulated for herbs is ideal. You can also create your own mix by combining equal parts of potting soil, compost, and perlite or vermiculite. The compost will provide essential nutrients, while the perlite or vermiculite will improve drainage and aeration. Avoid using garden soil, as it can be too heavy and compact, leading to drainage problems.
4. How often should I water my mint in a styrofoam box?
Water your mint regularly, keeping the soil consistently moist but not waterlogged. The frequency of watering will depend on the weather conditions and the type of soil you’re using. In hot, dry weather, you may need to water daily, while in cooler, wetter weather, you can water less frequently. Check the soil moisture by sticking your finger about an inch into the soil. If it feels dry, it’s time to water. Be sure to water thoroughly, allowing the excess water to drain out of the drainage holes.
5. How much sunlight does mint need when grown in a styrofoam box?
Mint prefers partial shade to full sun. Ideally, it should receive at least 4-6 hours of sunlight per day. If you’re growing your mint indoors, place it near a sunny window or supplement with a grow light. If you’re growing it outdoors, choose a location that receives morning sun and afternoon shade, especially in hot climates. Too much direct sunlight can scorch the leaves.
6. How do I fertilize my mint in a styrofoam box?
Mint is a relatively heavy feeder, so it benefits from regular fertilization. Use a balanced liquid fertilizer diluted to half strength every 2-4 weeks during the growing season. You can also amend the soil with compost or aged manure to provide a slow-release source of nutrients. Avoid over-fertilizing, as this can lead to leggy growth and a less intense flavor.
7. How do I prevent mint from spreading too much in a styrofoam box?
One of the biggest advantages of growing mint in a styrofoam box is that it contains the plant and prevents it from spreading aggressively. Mint is notorious for its invasive tendencies, so growing it in a container is a great way to keep it under control. To further prevent spreading, you can prune the plant regularly and remove any runners that emerge from the soil.
8. How do I harvest mint from my styrofoam box?
Harvest mint by snipping off stems with scissors or pruning shears. You can harvest leaves at any time, but the flavor is most intense just before the plant flowers. To encourage bushier growth, pinch back the tips of the stems regularly. Avoid harvesting more than one-third of the plant at a time.
9. Can I grow other herbs besides mint in a styrofoam box?
While mint is best grown on its own due to its invasive nature, you can certainly use the styrofoam box method to grow other herbs. Herbs that thrive in similar conditions to mint, such as parsley, cilantro, and chives, can be grown in separate styrofoam boxes. Just be sure to provide each herb with the appropriate soil, sunlight, and watering requirements.
10. How do I overwinter my mint in a styrofoam box?
In colder climates, you can overwinter your mint in a styrofoam box by bringing it indoors before the first frost. Place the box in a cool, sunny location and water sparingly. You can also cut back the plant to a few inches above the soil level to encourage new growth in the spring. Alternatively, you can leave the box outdoors in a sheltered location and cover it with mulch or straw to protect the roots from freezing.
Leave a Comment