
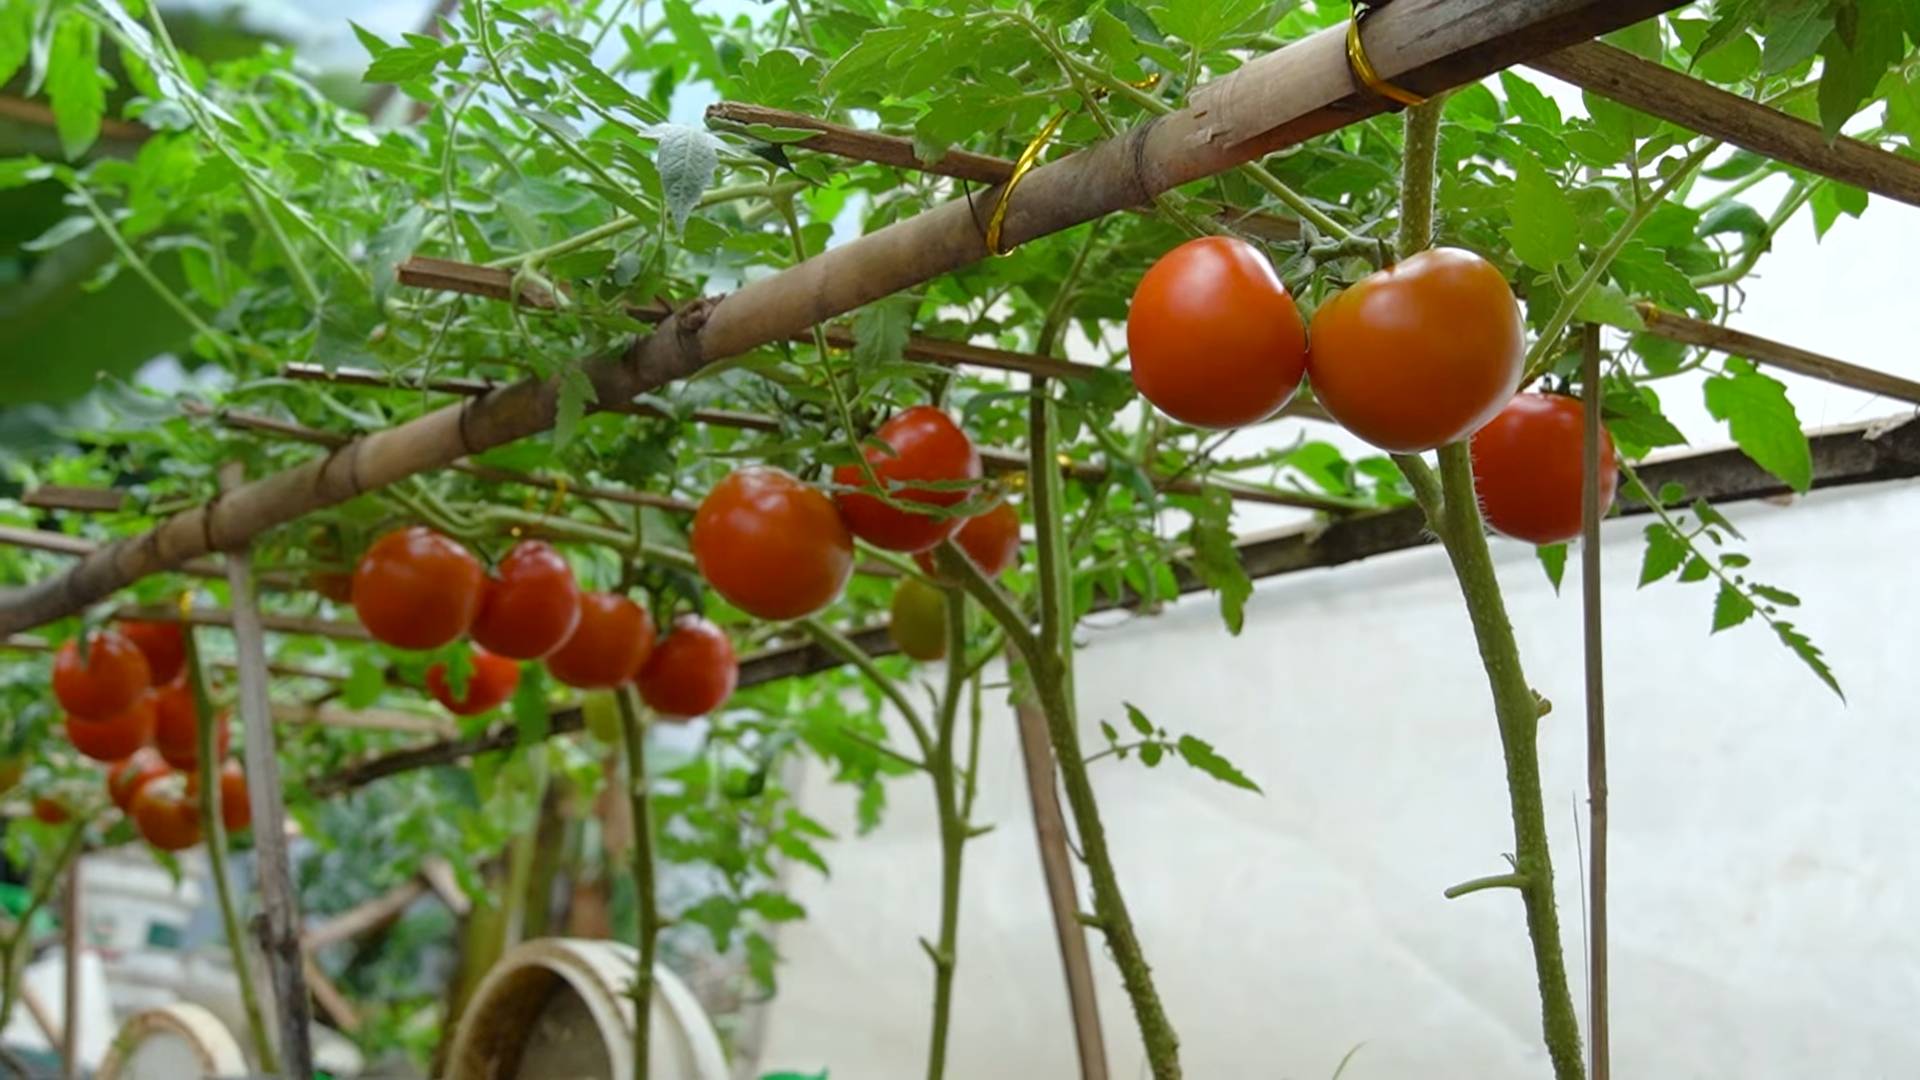
Tomato growing hack: are you dreaming of juicy, sun-ripened tomatoes bursting with flavor, fresh from your own garden? But perhaps you’re facing challenges like limited space, pesky pests, or just not getting the yields you hoped for? Don’t worry, I’ve been there! For centuries, cultivating tomatoes has been a cherished tradition, dating back to the Aztecs and Incas who first domesticated these vibrant fruits. Today, growing your own tomatoes connects us to that rich history and provides a delicious, healthy reward.
However, modern life often leaves us short on time and resources. That’s where clever DIY tricks come in! This article is packed with simple, effective tomato growing hacks that will transform your gardening experience. Imagine harvesting baskets overflowing with plump, red tomatoes, all thanks to a few easy-to-implement strategies. We’ll explore everything from maximizing sunlight to creating nutrient-rich soil, ensuring even beginner gardeners can achieve impressive results. Get ready to unlock the secrets to a thriving tomato garden and enjoy the unparalleled taste of homegrown goodness!
DIY Tomato Growing Hack: Upside-Down Tomato Planters from Buckets!
Hey there, fellow gardening enthusiasts! Are you dreaming of juicy, sun-ripened tomatoes but short on space, or maybe just looking for a fun and unique way to grow them? Well, you’ve come to the right place! I’m going to walk you through a super cool DIY project: creating upside-down tomato planters from ordinary buckets. This method is not only space-saving but also helps protect your precious tomatoes from soil-borne diseases and pests. Plus, it looks pretty darn cool hanging from your porch or balcony!
What You’ll Need:
Before we dive in, let’s gather our supplies. Here’s a list of everything you’ll need to create your upside-down tomato planters:
* 5-gallon buckets: One bucket per tomato plant. Make sure they’re clean! You can often find these at hardware stores, home improvement centers, or even restaurants that might be discarding them.
* Tomato seedlings: Choose your favorite variety! I recommend determinate (bush) varieties for this method, as they tend to be more compact. Indeterminate (vining) varieties can work too, but you’ll need to prune them more frequently.
* Potting mix: A good quality potting mix is crucial for healthy tomato growth. Avoid using garden soil, as it can compact and not drain well in a container.
* Drill with a hole saw attachment (2-3 inches in diameter): This is for creating the hole in the bottom of the bucket.
* Utility knife or sturdy scissors: For making drainage holes.
* Landscape fabric or burlap: To prevent soil from falling out of the bottom hole.
* Heavy-duty chain or rope: For hanging the buckets.
* S-hooks or carabiners: To attach the chain or rope to the bucket.
* Gloves: To protect your hands.
* Watering can or hose: For watering your tomatoes.
* Optional: Slow-release fertilizer pellets for added nutrients.
Preparing the Buckets:
Okay, let’s get our hands dirty! The first step is to prepare the buckets for planting.
1. Drill the Hole: Using your drill and hole saw attachment, carefully drill a hole in the center of the bottom of each bucket. The hole should be large enough to accommodate the tomato seedling’s stem and root ball, but not so large that the soil will fall out easily. A 2-3 inch diameter hole usually works well. Go slow and steady to avoid cracking the plastic.
2. Add Drainage Holes: Now, we need to ensure proper drainage. Use your utility knife or sturdy scissors to poke several small drainage holes in the bottom of the bucket, around the larger hole you just drilled. About 4-6 holes should be sufficient.
3. Secure the Landscape Fabric: To prevent soil from escaping through the bottom hole, we’ll use landscape fabric or burlap. Cut a square of fabric that’s slightly larger than the hole. Then, carefully push the fabric through the hole from the inside of the bucket, leaving enough fabric to cover the hole on the outside. You can secure it with a bit of hot glue if you want, but it’s usually not necessary. The soil will hold it in place once you fill the bucket.
4. Attach the Hanging Mechanism: This is where the chain or rope comes in. Drill four evenly spaced holes around the top rim of the bucket. These holes should be large enough to accommodate your chain or rope. Thread the chain or rope through the holes, creating a secure loop for hanging. Use S-hooks or carabiners to connect the chain or rope to the bucket. Make sure the hanging mechanism is strong enough to support the weight of the bucket filled with soil and a mature tomato plant. I always double-check this step!
Planting Your Tomato Seedlings:
Now for the fun part – planting our tomato babies!
1. Prepare the Seedling: Gently remove the tomato seedling from its container. Loosen the root ball slightly to encourage root growth.
2. Insert the Seedling: Carefully turn the bucket upside down (yes, upside down!). Gently guide the tomato seedling through the hole in the bottom of the bucket, with the leaves facing downwards. Be extra careful not to damage the stem. You might need to gently wiggle the seedling to get it through the hole.
3. Secure the Seedling: Once the seedling is in place, gently pack some potting mix around the stem from the inside of the bucket to hold it in place. This will prevent the seedling from falling out when you turn the bucket right-side up.
4. Fill the Bucket: Now, carefully turn the bucket right-side up and begin filling it with potting mix. Gently tap the sides of the bucket to settle the soil and eliminate air pockets. Leave about an inch or two of space at the top of the bucket.
5. Water Thoroughly: Once the bucket is filled, water the tomato plant thoroughly until water drains out of the drainage holes. This will help settle the soil and ensure the roots are well-hydrated.
6. Add Slow-Release Fertilizer (Optional): If you’re using slow-release fertilizer pellets, now is the time to add them to the top of the soil, following the instructions on the package. This will provide your tomato plant with a steady supply of nutrients throughout the growing season.
Hanging and Caring for Your Upside-Down Tomato Planters:
Almost there! Now it’s time to hang your planters and give your tomatoes the TLC they deserve.
1. Choose a Sunny Location: Tomatoes need at least 6-8 hours of sunlight per day to thrive. Choose a location that receives plenty of sunshine, such as a porch, balcony, or patio.
2. Hang the Planters: Carefully hang the planters from a sturdy support, such as a beam, rafter, or strong hook. Make sure the support can handle the weight of the filled bucket.
3. Water Regularly: Check the soil moisture regularly and water when the top inch of soil feels dry to the touch. Water deeply, until water drains out of the drainage holes. Avoid overwatering, as this can lead to root rot.
4. Fertilize as Needed: Even if you used slow-release fertilizer, you may need to supplement with liquid fertilizer every few weeks, especially during the peak growing season. Follow the instructions on the fertilizer package.
5. Prune as Needed: If you’re growing indeterminate tomato varieties, you’ll need to prune them regularly to remove suckers (the small shoots that grow between the main stem and the branches). This will help direct the plant’s energy towards producing fruit.
6. Protect from Pests and Diseases: Keep an eye out for common tomato pests and diseases, such as aphids, whiteflies, and blight. Take action promptly if you notice any problems. Organic pest control methods, such as insecticidal soap or neem oil, can be effective.
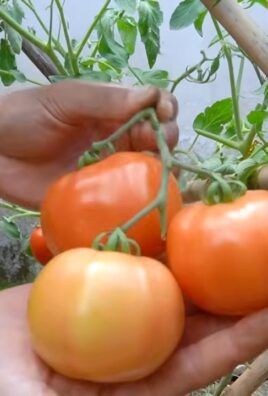
7. Harvest Your Tomatoes: Once your tomatoes are ripe and red (or whatever color your variety is supposed to be!), gently twist them off the vine. Enjoy the fruits of your labor!
Troubleshooting Tips:
Sometimes, things don’t go exactly as planned. Here are a few troubleshooting tips to help you overcome common challenges:
* Seedling Falling Out: If your seedling keeps falling out of the bottom hole, try using a small piece of foam or sponge to cushion the stem and hold it in place. You can also use a plant clip to secure the stem to the bucket.
* Soil Drying Out Too Quickly: If the soil is drying out too quickly, try adding some moisture-retaining granules to the potting mix. You can also mulch the top of the soil with straw or wood chips to help retain moisture.
* Yellowing Leaves: Yellowing leaves can be a sign of nutrient deficiency. Try fertilizing with a balanced liquid fertilizer.
* Blossom End Rot: Blossom end rot is a common problem in tomatoes, caused by calcium deficiency. Make sure your potting mix contains enough calcium, and water regularly to prevent the soil from drying out. You can also add calcium to the soil by mixing in some crushed eggshells or bone meal.
* Plant Not Producing Fruit: If your tomato plant is growing well but not producing fruit, it may not be getting enough sunlight. Make sure it’s in a location that receives at least 6-8 hours of sunlight per day. You can also try hand-pollinating the flowers by gently shaking the plant or using a small paintbrush to transfer pollen from one flower to another.
And there you have it! Your very own upside-down tomato planters, ready to produce a bountiful harvest. This project is not only fun and rewarding but also a great way to add a touch of green to your outdoor space. Happy gardening!
Conclusion
So, there you have it! This simple, yet incredibly effective tomato growing hack is a game-changer for both novice and experienced gardeners alike. We’ve walked you through the process, highlighting how burying your tomato seedlings deeper than usual can unlock a world of robust root growth, leading to healthier, more productive plants and a bountiful harvest of delicious tomatoes.
Why is this a must-try? Because it’s easy, cost-effective, and delivers tangible results. You don’t need fancy equipment or specialized knowledge. Just a little extra effort during planting can translate into a significant increase in your tomato yield. Imagine baskets overflowing with juicy, sun-ripened tomatoes, all thanks to this simple trick.
But the beauty of gardening lies in experimentation! Feel free to adapt this tomato growing hack to your specific needs and preferences. For instance, if you’re dealing with particularly leggy seedlings, you can even lay the stem horizontally in the trench before covering it with soil, ensuring maximum root development along the entire buried stem. Another variation involves adding a handful of compost or bone meal to the planting hole to provide an extra boost of nutrients to the developing roots. You could also try this technique with different varieties of tomatoes to see which ones respond best in your garden. Cherry tomatoes, beefsteak tomatoes, Roma tomatoes – the possibilities are endless!
Don’t be afraid to experiment with different soil amendments as well. Some gardeners swear by adding crushed eggshells for calcium, while others prefer a sprinkle of Epsom salts for magnesium. The key is to observe your plants closely and adjust your approach based on their individual needs.
This tomato growing hack isn’t just about increasing yield; it’s about fostering healthier, more resilient plants. By encouraging a strong root system, you’re equipping your tomatoes to better withstand drought, disease, and nutrient deficiencies. This means less stress for you and more delicious tomatoes for your table.
We are confident that this method will transform your tomato growing experience. It’s a small change that yields big rewards. We urge you to give this tomato growing hack a try this season. Plant a few seedlings using the traditional method and a few using our recommended technique. Observe the difference in growth, health, and yield. We’re certain you’ll be amazed by the results.
Most importantly, we want to hear about your experiences! Share your successes, your challenges, and your variations in the comments below. Let’s create a community of tomato enthusiasts who are constantly learning and improving their gardening skills. Tell us what tomato varieties you tried, what soil amendments you used, and what kind of results you achieved. Your insights could help other gardeners achieve their tomato-growing dreams.
So, grab your seedlings, your shovel, and get ready to unlock the full potential of your tomato plants. Happy gardening!
Frequently Asked Questions (FAQ)
What type of soil is best for this tomato growing hack?
The best soil for this tomato growing hack is well-draining, nutrient-rich soil. Tomatoes thrive in soil with a slightly acidic pH, ideally between 6.0 and 6.8. Amend your soil with compost, aged manure, or other organic matter to improve its fertility and drainage. If your soil is heavy clay, consider adding sand or perlite to improve drainage. If you’re unsure about your soil’s pH, you can purchase a soil testing kit at your local garden center. Remember, healthy soil is the foundation for healthy tomato plants, so investing in good soil preparation is crucial for success with this tomato growing hack.
How deep should I bury the tomato seedlings?
The key to this tomato growing hack is burying the seedling deeper than you normally would. You should bury the stem up to the first set of leaves. Remove the lower leaves that will be buried to prevent them from rotting. The buried stem will then develop into a robust root system, providing the plant with more access to water and nutrients. Don’t be afraid to bury a significant portion of the stem; the more stem you bury, the more roots will develop.
Will burying the stem cause the tomato plant to rot?
No, burying the stem will not cause the tomato plant to rot, as long as you remove the leaves that will be buried. The stem will actually develop into roots. The key is to ensure that the soil is well-draining and that you’re not overwatering the plant. If the soil is constantly waterlogged, it can create an environment that promotes rot. However, with proper drainage and watering practices, the buried stem will quickly transform into a strong and healthy root system.
How often should I water the tomato plants after planting them using this method?
Water the tomato plants thoroughly after planting them using this method. Then, water deeply but infrequently, allowing the soil to dry out slightly between waterings. Overwatering can lead to root rot, so it’s important to let the soil breathe. Check the soil moisture by sticking your finger about an inch into the soil. If it feels dry, it’s time to water. Adjust your watering schedule based on the weather conditions and the type of soil you have. In hot, dry weather, you may need to water more frequently.
Can I use this tomato growing hack for all types of tomatoes?
Yes, you can use this tomato growing hack for all types of tomatoes, including determinate and indeterminate varieties. Determinate tomatoes are bush-type tomatoes that grow to a certain size and then stop, while indeterminate tomatoes continue to grow and produce fruit throughout the season. This method is particularly beneficial for indeterminate tomatoes, as it helps them develop a strong root system that can support their continuous growth and fruit production.
What if my tomato seedlings are very leggy?
If your tomato seedlings are very leggy (tall and spindly), this tomato growing hack is even more beneficial. You can lay the stem horizontally in a trench before covering it with soil. This will allow the entire buried stem to develop roots, creating an even more extensive root system. Be sure to remove any leaves that will be buried before covering the stem with soil. This technique is a great way to rescue leggy seedlings and give them a strong start.
When is the best time to plant tomatoes using this method?
The best time to plant tomatoes using this method is after the last frost in your area. Tomatoes are warm-season plants and are sensitive to frost. Wait until the soil has warmed up to at least 60 degrees Fahrenheit before planting. You can also start your tomato seedlings indoors 6-8 weeks before the last frost and then transplant them outdoors using this method once the weather is warm enough.
What kind of fertilizer should I use after planting?
After planting, you can use a balanced fertilizer to promote healthy growth. Look for a fertilizer with an NPK ratio (nitrogen, phosphorus, potassium) of around 10-10-10 or 14-14-14. You can also use a fertilizer specifically formulated for tomatoes. Follow the instructions on the fertilizer package for application rates. Avoid over-fertilizing, as this can lead to excessive foliage growth and reduced fruit production. Consider adding compost tea or other organic fertilizers throughout the growing season to provide a steady supply of nutrients.
How long does it take for the buried stem to develop roots?
The buried stem will typically start to develop roots within a week or two, depending on the soil temperature and moisture levels. You’ll notice that the plant starts to grow more vigorously and that the leaves become a deeper green color. This is a sign that the roots are developing and that the plant is taking up nutrients from the soil.
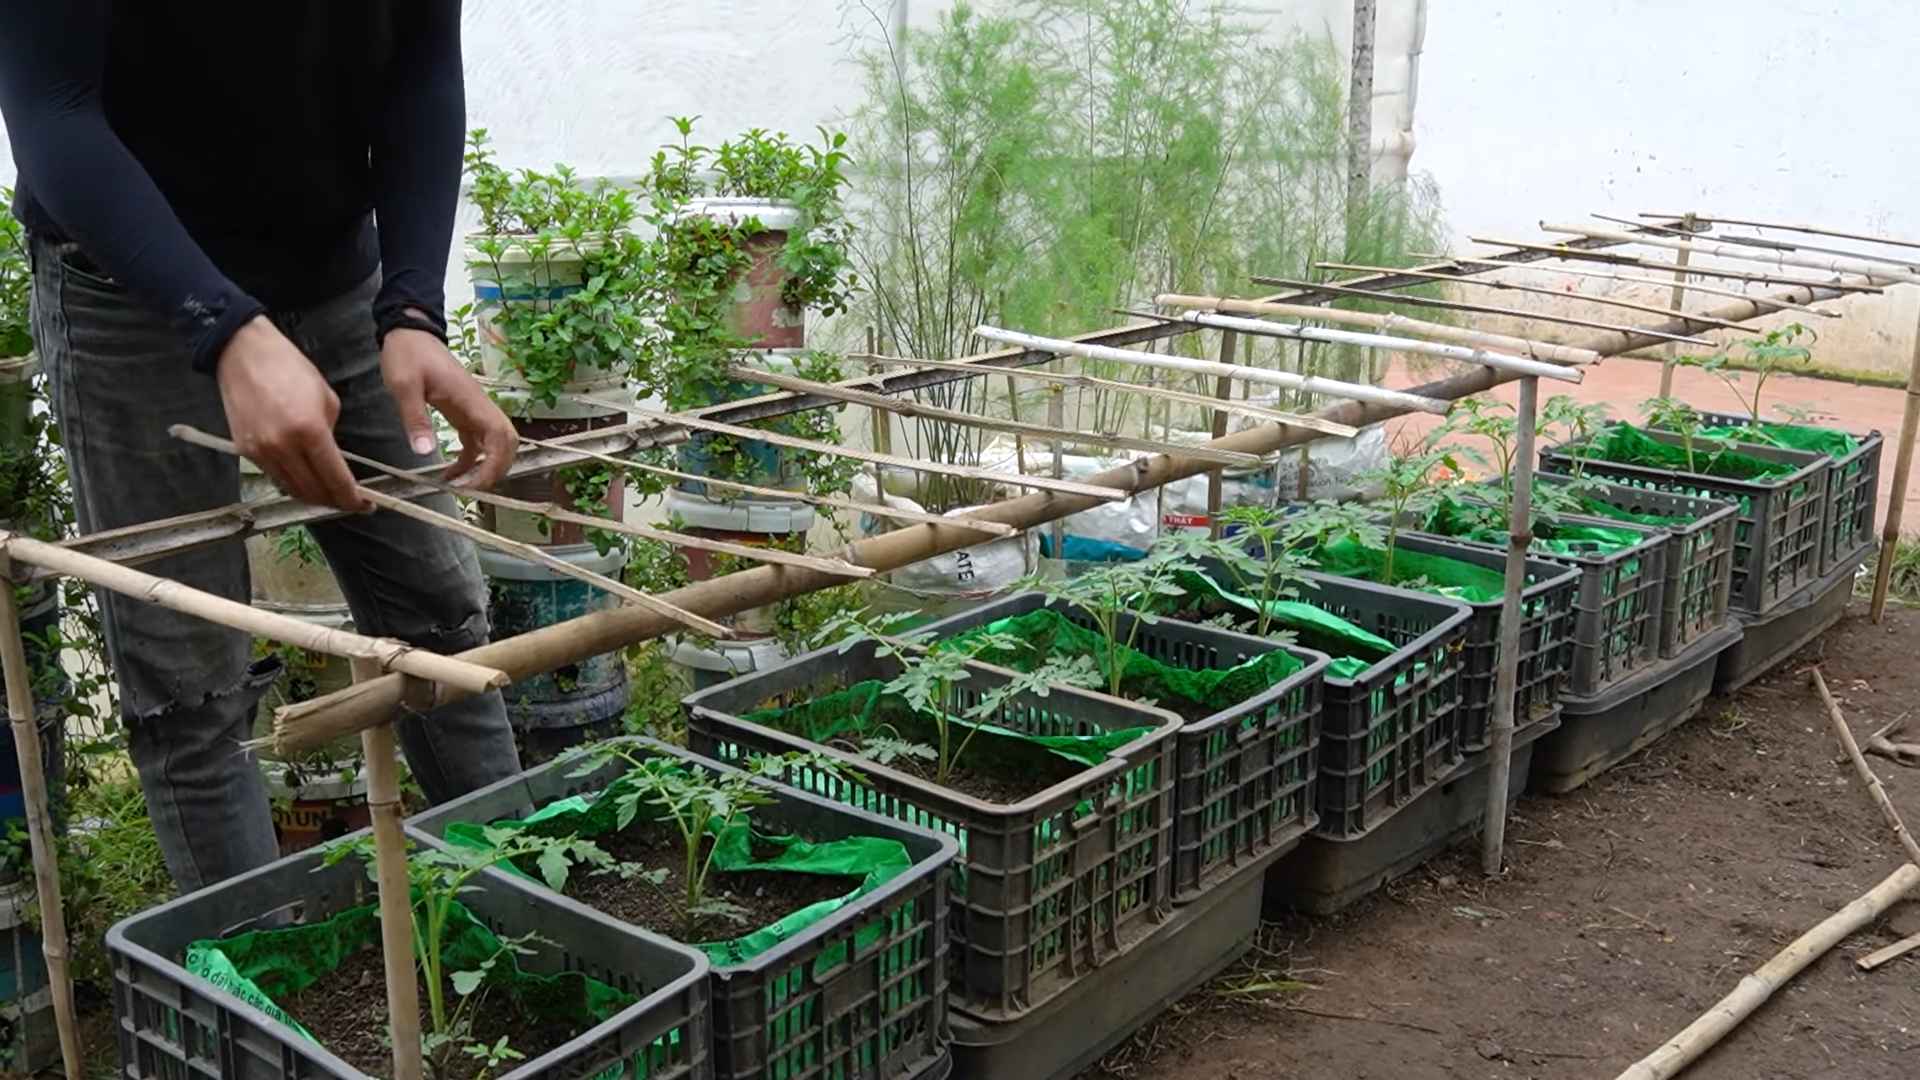
Can I use this method in containers?
Yes, you can use this method in containers, but you’ll need to choose a container that is large enough to accommodate the buried stem and the developing root system. A 5-gallon container or larger is recommended. Make sure the container has drainage holes to prevent waterlogging. Use a high-quality potting mix that is well-draining and amended with compost or other organic matter.

Leave a Comment