
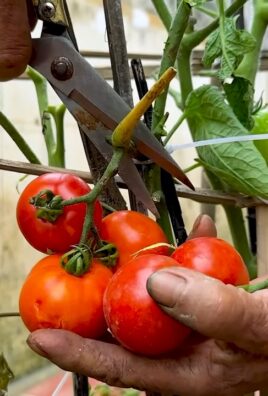
Tomato plant fruiting method – ever dreamt of baskets overflowing with juicy, sun-ripened tomatoes, bursting with flavor from your very own garden? I know I have! But sometimes, despite our best efforts, those precious green tomatoes just stubbornly refuse to turn red. It can be incredibly frustrating, right?
Growing tomatoes has been a beloved pastime for centuries, with roots tracing back to South America. From humble beginnings, they’ve become a staple in cuisines worldwide. But even seasoned gardeners face challenges in coaxing their tomato plants to produce a bountiful harvest. That’s where a few clever tricks come in handy!
This DIY article is your secret weapon to unlocking the full potential of your tomato plants. We’ll dive into simple, yet effective techniques that will encourage your plants to set more fruit and ripen them faster. Imagine the satisfaction of serving up homemade salsa, fresh tomato salads, and delicious pasta sauces, all made with tomatoes you nurtured yourself.
Why do you need these tricks? Because sometimes, nature needs a little nudge! Factors like temperature fluctuations, improper watering, and nutrient deficiencies can hinder fruit production. But don’t worry, I’m here to guide you through the process. With these easy-to-follow tips on tomato plant fruiting method, you’ll be well on your way to enjoying a bumper crop of delicious tomatoes in no time. Let’s get started!
Supercharge Your Tomato Harvest: My Foolproof Fruiting Secrets!
Hey fellow gardeners! Are you dreaming of juicy, red tomatoes bursting from your plants, but finding yourself with more leaves than fruit? Don’t worry, I’ve been there! Getting tomatoes to fruit can sometimes feel like a battle, but I’ve learned some amazing DIY tricks over the years that have seriously boosted my harvests. I’m excited to share them with you so you can enjoy a bumper crop of delicious tomatoes too!
Here’s my comprehensive guide to getting your tomato plants to fruit like crazy:
Understanding Tomato Fruiting
Before we dive into the DIY hacks, let’s quickly cover the basics of tomato fruiting. Understanding what your plants need will make these techniques even more effective.
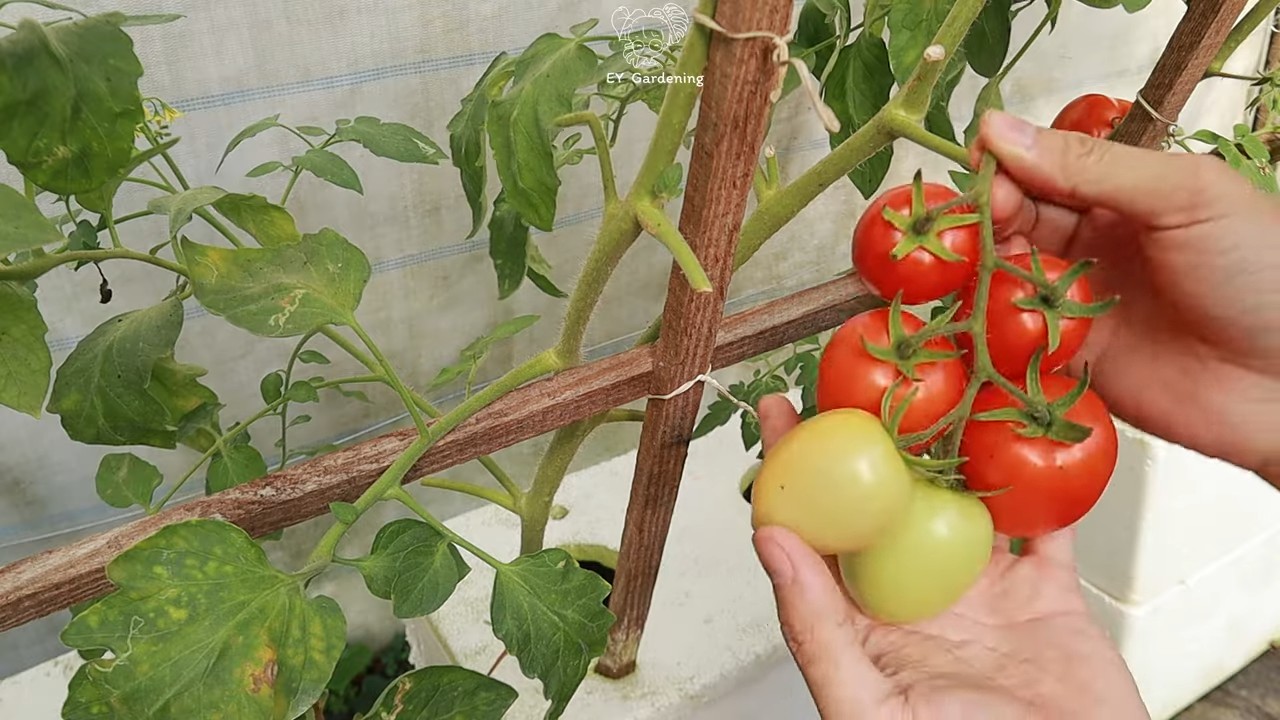
* **Pollination is Key:** Tomatoes are self-pollinating, meaning they have both male and female parts in the same flower. However, they still need help from wind or insects (or us!) to transfer pollen.
* **Temperature Matters:** Tomatoes prefer daytime temperatures between 70-85°F (21-29°C) for optimal fruiting. Extreme heat or cold can inhibit pollination and fruit set.
* **Nutrient Balance is Crucial:** Tomatoes are heavy feeders, needing plenty of nutrients, especially phosphorus and potassium, to produce fruit. Nitrogen is important for leafy growth, but too much can hinder fruiting.
* **Watering is Essential:** Consistent watering is vital, especially during flowering and fruit development. Avoid overwatering, which can lead to root rot.
* **Sunlight is Non-Negotiable:** Tomatoes need at least 6-8 hours of direct sunlight per day to thrive and produce abundant fruit.
DIY Hack #1: The Gentle Shake (Hand Pollination)
Sometimes, Mother Nature needs a little nudge. If you’re not seeing a lot of bees buzzing around your tomato plants, or if you’re experiencing periods of still air, hand pollination can be a game-changer. It’s super easy and takes just a few minutes each day.
What you’ll need:
* Your tomato plants
* Your hands (or an electric toothbrush – more on that later!)
Step-by-step instructions:
1. **Choose the Right Time:** The best time to hand-pollinate is mid-morning, after the dew has dried, when the pollen is driest and most easily released.
2. **The Gentle Shake Method:** Gently grasp the stem of each flower cluster and give it a light shake. You’re trying to dislodge the pollen and allow it to fall onto the pistil (the female part of the flower). I usually do this for a few seconds per cluster.
3. **The Electric Toothbrush Method (Optional):** This is my secret weapon! Turn on an electric toothbrush (without toothpaste, of course!) and gently touch the back of each flower for a second or two. The vibrations will release the pollen. Be careful not to damage the flowers. I use an old toothbrush head specifically for this purpose.
4. **Repeat Daily:** Repeat this process every day or every other day, especially during periods of low bee activity or still air.
DIY Hack #2: Epsom Salt Magic (Magnesium Boost)
Epsom salt (magnesium sulfate) is a gardener’s best friend! Magnesium is essential for chlorophyll production (which helps plants photosynthesize) and nutrient uptake. A magnesium deficiency can lead to yellowing leaves and reduced fruiting.
What you’ll need:
* Epsom salt
* Watering can or spray bottle
Step-by-step instructions:
1. **Dissolve the Epsom Salt:** Mix 1 tablespoon of Epsom salt per gallon of water. Make sure the Epsom salt is fully dissolved before applying.
2. **Foliar Spray (My Preferred Method):** Pour the solution into a spray bottle and thoroughly mist the leaves of your tomato plants, especially the undersides. I do this in the early morning or late evening to avoid leaf burn.
3. **Soil Drench (Alternative Method):** You can also pour the solution directly into the soil around the base of the plant. Use about 1 cup of solution per plant.
4. **Repeat Every 2-3 Weeks:** Apply Epsom salt every 2-3 weeks throughout the growing season.
DIY Hack #3: Bone Meal Bonanza (Phosphorus Power)
Phosphorus is crucial for root development, flowering, and fruit production. Bone meal is a slow-release organic fertilizer that’s rich in phosphorus. Adding bone meal to your soil can give your tomato plants a significant boost.
What you’ll need:
* Bone meal
* Gardening gloves
* Trowel or small shovel
Step-by-step instructions:
1. **Apply at Planting Time:** When you’re planting your tomato seedlings, add about 1/4 cup of bone meal to the planting hole. Mix it well with the soil before placing the seedling in the hole.
2. **Side-Dress Established Plants:** For established plants, gently work 1/4 cup of bone meal into the soil around the base of the plant, being careful not to damage the roots.
3. **Water Thoroughly:** After applying bone meal, water the plants thoroughly to help the nutrients soak into the soil.
4. **Repeat Every 4-6 Weeks:** Reapply bone meal every 4-6 weeks throughout the growing season.
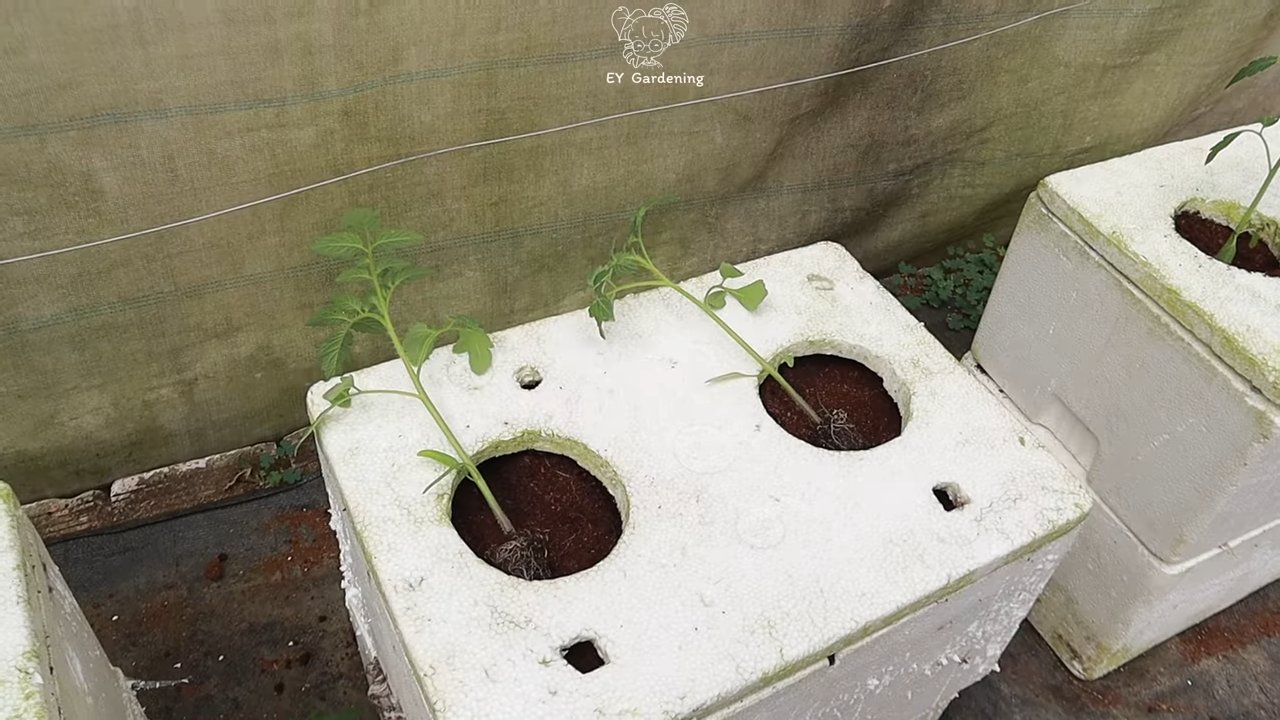
DIY Hack #4: Pruning for Productivity (Sucker Removal)
Pruning your tomato plants can seem counterintuitive, but it can actually increase fruit production. Removing “suckers” (the small shoots that grow in the “V” between the main stem and the branches) directs the plant’s energy towards fruit development rather than leafy growth.
What you’ll need:
* Gardening gloves
* Pruning shears (optional)
Step-by-step instructions:
1. **Identify the Suckers:** Look for small shoots growing in the “V” between the main stem and the branches. These are the suckers.
2. **Remove the Suckers:** Pinch off the suckers with your fingers when they are small (less than 4 inches long). If they are larger, use pruning shears to cut them off cleanly.
3. **Focus on Determinate Varieties:** This technique is especially important for determinate tomato varieties (bush tomatoes), as they tend to produce a large amount of suckers.
4. **Don’t Over-Prune Indeterminate Varieties:** For indeterminate varieties (vining tomatoes), you can remove some suckers to improve airflow and sunlight penetration, but don’t remove too many, as they will continue to produce new growth throughout the season.
5. **Prune Regularly:** Check your tomato plants regularly and remove suckers as they appear.
DIY Hack #5: Blossom-End Rot Prevention (Calcium Boost)
Blossom-end rot is a common problem in tomatoes, characterized by a dark, leathery spot on the bottom of the fruit. It’s caused by a calcium deficiency, often due to inconsistent watering or poor soil conditions.
What you’ll need:
* Crushed eggshells (or calcium supplement)
* Watering can
Step-by-step instructions:
1. **Prepare the Eggshells:** Save your eggshells, rinse them thoroughly, and let them dry completely. Then, crush them into small pieces.
2. **Add to the Planting Hole:** When you’re planting your tomato seedlings, add about 1/4 cup of crushed eggshells to the planting hole. Mix it well with the soil.
3. **Side-Dress Established Plants:** For established plants, gently work 1/4 cup of crushed eggshells into the soil around the base of the plant.
4. **Water Consistently:** The most important thing is to water your tomato plants consistently, especially during fruit development. Avoid letting the soil dry out completely.
5. **Consider a Calcium Supplement:** If you’re still experiencing blossom-end rot, you can use a calcium supplement, such as calcium nitrate, following the instructions on the label.
DIY Hack #6: Coffee Grounds for Growth (Nitrogen Boost)
Coffee grounds are a great source of nitrogen, which is essential for healthy plant growth. They also help to improve soil drainage and aeration.
What you’ll need:
* Used coffee grounds
* Gardening gloves
Step-by-step instructions:
1. **Collect Used Coffee Grounds:** Save your used coffee grounds after brewing your morning coffee.
2. **Apply to the Soil:** Sprinkle a thin layer of coffee grounds around the base of your tomato plants.
3. **Work into the Soil:** Gently work the coffee grounds into the top layer of soil.
4. **Water Thoroughly:** Water the plants thoroughly after applying the coffee grounds.
5. **Repeat Every 2-3 Weeks:** Reapply coffee grounds every 2-3 weeks throughout the growing season.
DIY Hack #7: Companion Planting Power (Natural Pest Control & Growth Boost)
Companion planting is the practice of planting different plants together that benefit each
Conclusion
So, there you have it! This simple yet effective DIY trick for boosting tomato production is a game-changer for any gardener, regardless of experience level. We’ve explored how a little strategic pruning and support can lead to a significantly larger and healthier tomato harvest. It’s not just about getting more tomatoes; it’s about getting *better* tomatoes – bursting with flavor and packed with nutrients.
Why is this a must-try? Because it addresses the fundamental needs of your tomato plants: improved airflow, increased sunlight penetration, and efficient energy allocation. By removing suckers and providing sturdy support, you’re essentially optimizing your plant’s resources to focus on fruit development rather than vegetative growth. Think of it as giving your tomato plant a targeted workout plan designed for maximum tomato-producing power!
But don’t stop there! Experiment with different variations to find what works best for your specific tomato variety and growing conditions. For example, if you’re growing indeterminate tomatoes (those that keep growing and producing all season), you might want to consider the “Florida weave” method for support, which involves weaving twine between stakes to create a living trellis. Or, if you live in a particularly humid climate, you might want to be extra vigilant about pruning to ensure adequate airflow and prevent fungal diseases. You can also try different types of fertilizer, focusing on those rich in phosphorus and potassium, which are essential for fruit development. Consider adding Epsom salts to the soil; the magnesium can help with nutrient uptake and overall plant health.
Remember, gardening is all about learning and adapting. What works for one person might not work for another, so don’t be afraid to tweak the technique to suit your needs. The key is to observe your plants closely and respond to their individual needs. Are the leaves yellowing? Are the fruits ripening unevenly? These are all clues that can help you fine-tune your approach.
And most importantly, don’t be afraid to get your hands dirty! There’s something incredibly satisfying about nurturing a plant from seedling to harvest, and this DIY trick is just one small step you can take to maximize your success.
We are confident that this method will significantly improve your tomato yield. We encourage you to try this **tomato plant fruiting method** and witness the difference for yourself. Once you’ve given it a go, we’d love to hear about your experience! Share your photos, tips, and any variations you’ve tried in the comments below. Let’s create a community of tomato-growing enthusiasts and learn from each other’s successes (and failures!). Happy gardening!
Frequently Asked Questions (FAQ)
Q: What exactly are “suckers” on a tomato plant, and why should I remove them?
A: Suckers are small shoots that grow in the “armpit” (the space between the main stem and a branch) of the tomato plant. They are essentially new stems that will eventually produce their own leaves, flowers, and fruit. While this might sound like a good thing, allowing suckers to grow unchecked can actually hinder overall tomato production. They divert energy away from the main stem and existing fruit, leading to smaller, fewer tomatoes. Removing suckers, especially those below the first flower cluster, encourages the plant to focus its energy on developing the existing fruit, resulting in a larger and earlier harvest. Think of it as streamlining the plant’s energy flow for maximum tomato output.
Q: When is the best time to start pruning my tomato plants?
A: You can start pruning your tomato plants as soon as they are large enough to handle, typically when they are about 12-18 inches tall. Look for those small suckers developing in the leaf axils. It’s best to prune early in the morning on a dry day. This allows the cuts to dry quickly and reduces the risk of disease. Regular pruning, every week or two, is more effective than letting the suckers grow large and then removing them. Smaller cuts heal faster and cause less stress to the plant.
Q: What’s the best way to support my tomato plants? I’ve heard of different methods.
A: There are several effective methods for supporting tomato plants, and the best choice depends on the type of tomato you’re growing and your personal preference.
* **Staking:** This is a simple and common method, especially for determinate tomato varieties (those that grow to a certain size and then stop). Drive a sturdy stake (wood, metal, or bamboo) into the ground near the plant and tie the main stem to the stake with soft twine or plant ties. Make sure the ties are loose enough to allow for growth but tight enough to provide support.
* **Caging:** Tomato cages are wire structures that surround the plant and provide support as it grows. They are particularly well-suited for bushy, indeterminate varieties. Choose a cage that is tall and wide enough to accommodate the mature size of your plant.
* **Trellising:** Trellising involves training the tomato plant to grow along a vertical structure, such as a fence or a homemade trellis. This method is ideal for indeterminate varieties and can help to maximize space in your garden. The “Florida weave” mentioned earlier is a type of trellising.
* **Florida Weave:** This method uses stakes and twine to create a support system. Drive stakes into the ground between every other plant. Then, weave twine along one side of the row, looping it around each stake to support the plants. Repeat on the other side of the row, creating a “weave” that holds the plants upright.
Q: My tomato plants are already quite large and bushy. Is it too late to start pruning and supporting them?
A: No, it’s not too late! While it’s ideal to start early, you can still benefit from pruning and supporting even mature tomato plants. Carefully remove any large suckers, focusing on those near the bottom of the plant. Be gentle to avoid damaging the main stem. Install stakes, cages, or a trellis to provide support and prevent the plant from collapsing under the weight of the fruit. You might experience a slight setback in fruit production initially, but the long-term benefits of improved airflow, sunlight penetration, and energy allocation will outweigh the short-term disruption.
Q: What if I accidentally break off a main stem while pruning?
A: Accidents happen! If you accidentally break off a main stem, don’t panic. If the break is clean and not too severe, you can try taping the stem back together with grafting tape or electrical tape. Provide extra support to the stem while it heals. If the break is more severe, you might be better off removing the damaged stem entirely. The plant will likely recover and continue to produce fruit on the remaining stems.
Q: How often should I water my tomato plants after implementing this DIY trick?
A: The watering frequency depends on several factors, including the weather, soil type, and the size of your plants. Generally, tomato plants need about 1-2 inches of water per week. Water deeply and less frequently, rather than shallowly and often. This encourages the roots to grow deeper, making the plant more drought-tolerant. Check the soil moisture before watering. If the top inch of soil feels dry, it’s time to water. Avoid overhead watering, as this can increase the risk of fungal diseases. Instead, water at the base of the plant, using a soaker hose or drip irrigation system. Mulching around the base of the plant can also help to retain moisture and suppress weeds.
Q: What kind of fertilizer should I use for my tomato plants?
A: Tomato plants are heavy feeders and benefit from regular fertilization. Choose a fertilizer that is specifically formulated for tomatoes or vegetables. Look for a fertilizer with a balanced NPK ratio (nitrogen, phosphorus, and potassium), such as 5-10-5 or 10-10-10. Phosphorus is particularly important for fruit development. You can also supplement with organic fertilizers, such as compost, bone meal, or fish emulsion. Follow the instructions on the fertilizer package carefully, and avoid over-fertilizing, as this can damage the plants.
Q: My tomato plants are getting yellow leaves. What could be the problem?
A: Yellowing leaves can be a sign of several problems, including nutrient deficiencies, overwatering, underwatering, or disease. Check the soil moisture to ensure that you are watering correctly. If the soil is consistently wet, you may be overwatering. If the soil is dry, you may be underwatering. If the yellowing is accompanied by other symptoms, such as spots or lesions, it could be a sign of disease. Consult a gardening expert or your local extension office for help diagnosing and treating the problem. A soil test can also help to identify any nutrient deficiencies.
Q: Can this method be used for all types of tomatoes?
A: Yes, this **tomato plant fruiting method** can be adapted for most types of tomatoes. However, the specific pruning and support techniques may vary depending on whether you are growing determinate or indeterminate varieties. Determinate tomatoes require less pruning and can be supported with stakes or cages. Indeterminate tomatoes require more extensive pruning and benefit from trellising or the Florida weave method. Cherry tomatoes, which are often indeterminate, also benefit from this method.
Leave a Comment