
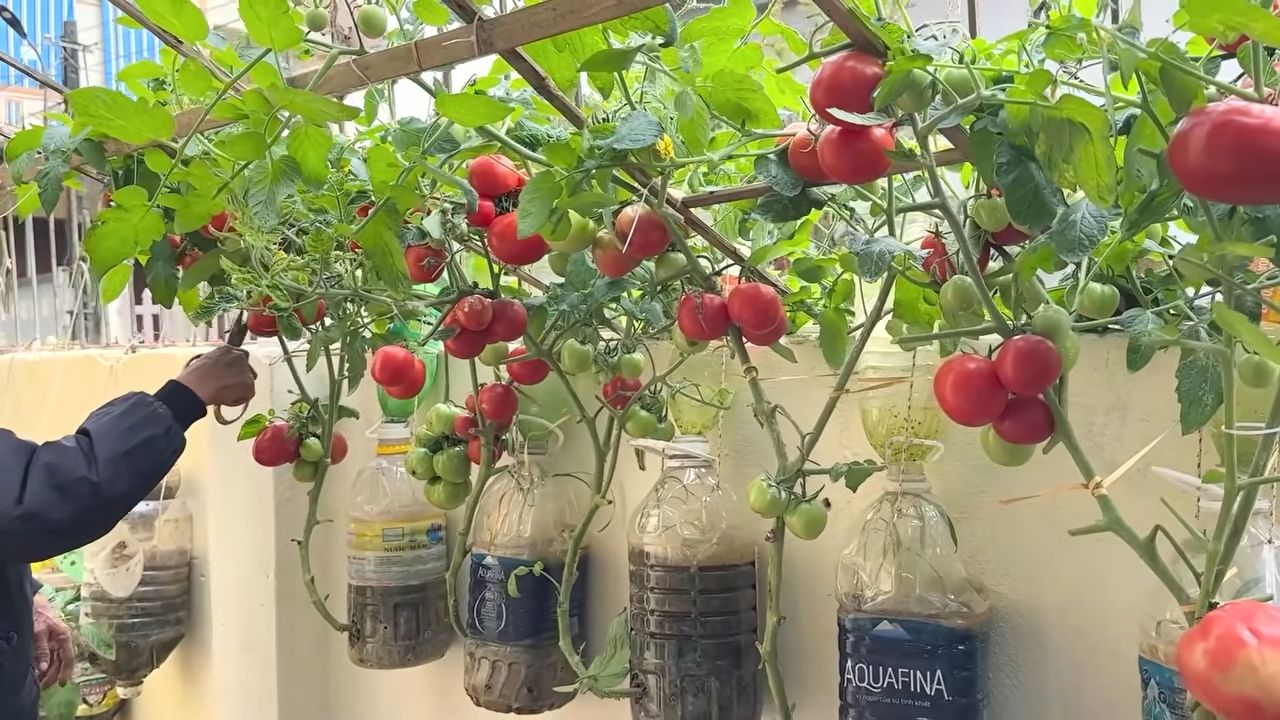
Tomato plant productivity tips are the secret weapon every home gardener needs to unlock a bountiful harvest! Are you dreaming of juicy, sun-ripened tomatoes bursting with flavor, but your plants are stubbornly refusing to cooperate? I understand the frustration! There’s nothing quite as disappointing as tending to your garden with love and care, only to be met with a meager yield.
For centuries, cultivating tomatoes has been a cherished tradition, dating back to the Aztecs and Incas who first domesticated these vibrant fruits. From humble beginnings in South America, tomatoes have journeyed across the globe, becoming a staple in cuisines worldwide. But even with centuries of cultivation under our belts, maximizing tomato plant productivity can still feel like a mystery.
That’s where these DIY tricks and hacks come in! I’m going to share some simple yet effective strategies to boost your tomato harvest, regardless of your gardening experience. Whether you’re a seasoned green thumb or just starting out, these tips will help you understand the needs of your tomato plants and provide them with the optimal conditions to thrive. Say goodbye to sparse harvests and hello to a summer filled with delicious, homegrown tomatoes! You’ll be amazed at how much of a difference these tomato plant productivity tips can make.
Boosting Your Tomato Harvest: A DIY Guide to Tomato Plant Productivity
Hey fellow gardeners! Are you dreaming of juicy, red tomatoes bursting from your plants, but finding your harvest a little… lackluster? Don’t worry, I’ve been there! Over the years, I’ve learned a few tricks to seriously boost tomato plant productivity, and I’m excited to share them with you. This guide is all about maximizing your tomato yield through simple, DIY techniques. Let’s get started!
Understanding Tomato Needs: The Foundation for Success
Before we dive into the hacks, it’s crucial to understand what tomatoes need to thrive. Think of it as laying the groundwork for a bountiful harvest.
* Sunlight: Tomatoes are sun-worshippers! They need at least 6-8 hours of direct sunlight per day. Less sunlight means fewer flowers and, consequently, fewer tomatoes.
* Water: Consistent watering is key, especially during fruit development. Aim for deep watering a few times a week, rather than shallow watering every day.
* Nutrients: Tomatoes are heavy feeders, meaning they need a lot of nutrients to produce those delicious fruits. A balanced fertilizer specifically formulated for tomatoes is essential.
* Support: As your tomato plants grow, they’ll need support to prevent them from sprawling on the ground. Staking, caging, or trellising are all great options.
* Pruning: Pruning suckers (the small shoots that grow between the main stem and branches) can improve airflow and direct the plant’s energy towards fruit production.
* Pollination: While tomatoes are self-pollinating, sometimes they need a little help, especially in humid or still conditions.
DIY Hack #1: Supercharging Your Soil with Compost Tea
Compost tea is like a magic potion for your tomato plants! It’s packed with beneficial microbes and nutrients that will invigorate your soil and promote healthy growth.
What you’ll need:
* A 5-gallon bucket
* An air pump and air stone (like those used for aquariums)
* A mesh bag or old pillowcase
* High-quality compost (worm castings are fantastic!)
* Unchlorinated water (let tap water sit out for 24 hours to dechlorinate)
* Molasses (optional, but it feeds the microbes)
Step-by-step instructions:
1. Fill the bucket: Fill the 5-gallon bucket with unchlorinated water, leaving a few inches at the top.
2. Add the compost: Place about 1-2 cups of compost into the mesh bag or pillowcase. Tie it securely.
3. Submerge the compost: Place the bag of compost into the bucket of water. Make sure it’s fully submerged.
4. Aerate the mixture: Place the air stone at the bottom of the bucket and connect it to the air pump. Turn on the air pump. This is crucial because the beneficial microbes need oxygen to thrive.
5. Add molasses (optional): If you’re using molasses, add about 1 tablespoon to the bucket. This will provide food for the microbes and help them multiply.
6. Brew the tea: Let the compost tea brew for 24-48 hours. The water should become a dark, tea-like color.
7. Dilute the tea: Dilute the compost tea with water before using it. A good ratio is 1 part compost tea to 10 parts water.
8. Apply the tea: Water your tomato plants with the diluted compost tea, making sure to soak the soil around the base of the plants. You can also use a spray bottle to apply the tea to the leaves (foliar feeding).
9. Repeat: Apply compost tea every 2-3 weeks throughout the growing season.
DIY Hack #2: Epsom Salt for Blossom End Rot Prevention and Magnesium Boost
Blossom end rot (BER) is a common problem in tomatoes, characterized by a dark, leathery spot on the bottom of the fruit. It’s often caused by a calcium deficiency, but sometimes it’s due to the plant’s inability to absorb calcium properly. Epsom salt (magnesium sulfate) can help with this! Magnesium aids in calcium uptake, preventing BER and promoting overall plant health.
What you’ll need:
* Epsom salt
* Water
* A watering can or spray bottle
Step-by-step instructions:
1. Mix the solution: Dissolve 1 tablespoon of Epsom salt in 1 gallon of water.
2. Apply to the soil: Water your tomato plants with the Epsom salt solution, making sure to soak the soil around the base of the plants.
3. Foliar spray (optional): You can also use a spray bottle to apply the Epsom salt solution to the leaves. This is a quicker way for the plant to absorb the magnesium.
4. Repeat: Apply Epsom salt every 2-3 weeks throughout the growing season, especially when the first fruits start to develop.
Important Note: Don’t overdo it with the Epsom salt! Too much magnesium can interfere with the uptake of other nutrients.
DIY Hack #3: Eggshells for Calcium Enrichment
Eggshells are a fantastic source of calcium, which is essential for strong cell walls and healthy fruit development. Instead of tossing them in the trash, turn them into a valuable soil amendment for your tomato plants!
What you’ll need:
* Eggshells
* A blender or food processor (optional)
* A mortar and pestle (optional)
Step-by-step instructions:
1. Collect and clean the eggshells: Rinse the eggshells thoroughly to remove any remaining egg white.
2. Dry the eggshells: Spread the eggshells out on a baking sheet and let them dry completely. This will make them easier to crush. You can also bake them in a low oven (200°F) for about 10 minutes to speed up the drying process.
3. Crush the eggshells: Crush the eggshells into a fine powder. You can use a blender, food processor, or mortar and pestle for this. The finer the powder, the easier it will be for the plants to absorb the calcium.
4. Add to the soil: There are a few ways to add the eggshell powder to the soil:
* At planting time: Mix a handful of eggshell powder into the planting hole before you plant your tomato seedlings.
* Side-dressing: Sprinkle eggshell powder around the base of your tomato plants and gently work it into the soil.
* Composting: Add eggshells to your compost pile. They will break down over time and enrich your compost with calcium.
5. Repeat: Add eggshell powder to the soil every few weeks throughout the growing season.
DIY Hack #4: Pruning for Increased Airflow and Fruit Production
Pruning tomato plants can seem intimidating, but it’s a crucial step in maximizing fruit production. By removing suckers and excess foliage, you’ll improve airflow, reduce the risk of disease, and direct the plant’s energy towards developing larger, more flavorful tomatoes.
What you’ll need:
* Clean pruning shears or scissors
Step-by-step instructions:
1. Identify the suckers: Suckers are the small shoots that grow between the main stem and the branches. They typically emerge at a 45-degree angle.
2. Prune the suckers: Using your clean pruning shears or scissors, carefully snip off the suckers close to the main stem. It’s best to prune suckers when they are small (2-3 inches long) to minimize stress on the plant.
3. Remove yellowing or diseased leaves: Remove any yellowing, brown, or diseased leaves from the plant. This will improve airflow and prevent the spread of disease.
4. Prune for airflow: If your tomato plants are very dense, you can also prune some of the inner leaves to improve airflow.
5. Repeat: Prune your tomato plants regularly throughout the growing season, removing suckers and any yellowing or diseased leaves as needed.
Determinate vs. Indeterminate Tomatoes:
* Determinate tomatoes (bush tomatoes) grow to a certain size and then stop. They typically produce all their fruit at once. You don’t need to prune determinate tomatoes as heavily as indeterminate tomatoes. Focus on removing yellowing or diseased leaves.
* Indeterminate tomatoes (vining tomatoes) continue to grow and produce fruit throughout the growing season. They require more pruning to maintain good airflow and direct energy towards fruit production.
DIY Hack #5: Hand Pollination for a Guaranteed Harvest
While tomatoes are self-pollinating, sometimes they need a little help, especially in humid or still conditions. Hand pollination is a simple way to ensure that your tomato flowers are properly pollinated, leading to a more abundant harvest.

Conclusion
So, there you have it! Transforming your tomato yield isn’t about expensive fertilizers or complicated gardening techniques. It’s about understanding the plant’s needs and implementing simple, yet effective, strategies. These tomato plant productivity tips are more than just suggestions; they’re a pathway to a bountiful harvest that will leave you swimming in delicious, homegrown tomatoes.
Why is this a must-try? Because it empowers you to take control of your garden’s success. Imagine the satisfaction of biting into a juicy, sun-ripened tomato that you nurtured from seedling to fruit-bearing glory. Think of the delicious sauces, salads, and salsas you can create with your abundant harvest. And consider the money you’ll save by reducing your reliance on store-bought tomatoes, which often lack the flavor and freshness of homegrown varieties.
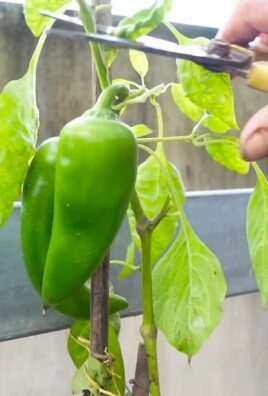
But don’t stop there! Experiment with these techniques and discover what works best for your specific climate and soil conditions. For example, if you live in a particularly hot climate, consider providing your tomato plants with afternoon shade to prevent sunscald. If your soil is heavy clay, amend it with compost and other organic matter to improve drainage. You can also explore different varieties of tomatoes to find those that are best suited to your region and taste preferences. Try heirloom varieties for unique flavors and colors, or opt for disease-resistant hybrids for a more reliable harvest.
Consider companion planting. Basil is a classic companion for tomatoes, known to improve their flavor and deter pests. Marigolds are another excellent choice, as they repel nematodes and other harmful insects. Carrots, onions, and garlic can also be beneficial companions for tomatoes.
Don’t be afraid to get your hands dirty and experiment. Gardening is a journey of learning and discovery, and there’s no better way to learn than by doing. And most importantly, don’t forget to document your progress. Keep a gardening journal to track your successes and failures, and to learn from your mistakes.
We are confident that by implementing these tomato plant productivity tips, you’ll see a significant improvement in your tomato yield. But we also want to hear about your experiences! Share your successes, your challenges, and your own unique tips in the comments below. Let’s create a community of tomato-growing enthusiasts who are passionate about sharing their knowledge and helping each other succeed.
So, what are you waiting for? Grab your gardening gloves, head out to your garden, and start implementing these tips today. We can’t wait to hear about your bountiful harvest! Remember, a little effort can go a long way in transforming your tomato plants into prolific producers. Happy gardening!
Frequently Asked Questions (FAQ)
1. How often should I water my tomato plants for optimal productivity?
Watering frequency depends on several factors, including your climate, soil type, and the size of your plants. As a general rule, water deeply and infrequently, allowing the soil to dry out slightly between waterings. Aim for about 1-2 inches of water per week, either through rainfall or irrigation. Check the soil moisture by sticking your finger about an inch into the soil. If it feels dry, it’s time to water. Avoid overhead watering, as this can promote fungal diseases. Instead, water at the base of the plant, using a soaker hose or drip irrigation system. During hot, dry weather, you may need to water more frequently. Mulching around your tomato plants can help to retain moisture and reduce the need for frequent watering.
2. What’s the best type of fertilizer to use for increasing tomato yield?
Tomatoes are heavy feeders, so they require a fertilizer that is rich in nutrients, particularly phosphorus and potassium. A balanced fertilizer with an NPK ratio of 5-10-10 or 10-10-10 is a good starting point. However, you may need to adjust the fertilizer based on your soil test results. Organic fertilizers, such as compost, bone meal, and fish emulsion, are also excellent choices. They release nutrients slowly and improve soil health. Avoid over-fertilizing, as this can lead to excessive foliage growth and reduced fruit production. Side-dress your tomato plants with fertilizer every 4-6 weeks throughout the growing season.
3. How important is pruning for tomato plant productivity?
Pruning is essential for maximizing tomato yield, especially for indeterminate varieties, which continue to grow throughout the season. Pruning helps to improve air circulation, reduce disease risk, and direct the plant’s energy towards fruit production. Remove suckers, which are the small shoots that grow between the main stem and the branches. These suckers will eventually develop into new stems, but they will also compete with the main stem for resources. Prune the lower leaves of the plant as they begin to yellow or brown. This will improve air circulation and prevent soil-borne diseases from splashing onto the leaves.
4. What are some common pests and diseases that can affect tomato productivity, and how can I prevent them?
Tomato plants are susceptible to a variety of pests and diseases, including aphids, whiteflies, tomato hornworms, early blight, late blight, and blossom end rot. To prevent these problems, start with healthy seedlings, provide good air circulation, and water at the base of the plant. Inspect your plants regularly for signs of pests or diseases. If you find any problems, take action immediately. Use insecticidal soap or neem oil to control pests. Apply a fungicide to prevent or treat fungal diseases. Blossom end rot is caused by a calcium deficiency, so make sure your soil is rich in calcium and that you are watering consistently.
5. How can I ensure proper pollination for my tomato plants?
Tomatoes are self-pollinating, meaning that they don’t require insects to transfer pollen from one flower to another. However, they do need some assistance to release the pollen. Gently shake the plants or tap the flower clusters to help release the pollen. You can also use a small brush to transfer pollen from one flower to another. In hot weather, pollen can become sticky and less likely to be released. To improve pollination in hot weather, water your plants in the morning and provide them with afternoon shade.
6. What are some good companion plants for tomatoes to boost productivity?
Companion planting can significantly enhance tomato plant productivity. Basil is a classic companion, known to improve tomato flavor and repel pests. Marigolds deter nematodes and other harmful insects. Other beneficial companions include carrots, onions, garlic, and parsley. Avoid planting tomatoes near brassicas (cabbage, broccoli, cauliflower), as they can inhibit tomato growth.
7. How do I deal with blossom end rot on my tomatoes?
Blossom end rot, a common issue where the bottom of the tomato turns black and leathery, is primarily caused by calcium deficiency or inconsistent watering. Ensure your soil has adequate calcium levels by amending it with bone meal or crushed eggshells before planting. Maintain consistent watering to prevent fluctuations in soil moisture, which can hinder calcium uptake. Mulching around the plants helps retain moisture. Foliar sprays of calcium chloride can provide a temporary fix, but addressing the underlying soil and watering issues is crucial for long-term prevention.
8. How do I know when my tomatoes are ripe and ready to harvest?
The color of the tomato is the best indicator of ripeness. Most tomato varieties will turn from green to red, yellow, or orange when they are ripe. The tomato should also feel slightly soft to the touch. Gently twist the tomato off the vine. If it comes off easily, it’s ripe. If you have to tug on it, it’s not quite ready. The flavor of the tomato will also be more intense when it is fully ripe.
9. Can I grow tomatoes in containers, and if so, what size container is best?
Yes, tomatoes can be successfully grown in containers. Choose a container that is at least 20 gallons in size for determinate varieties and 25 gallons or larger for indeterminate varieties. Make sure the container has drainage holes to prevent waterlogging. Use a high-quality potting mix that is well-draining. Provide your container tomatoes with plenty of sunlight and water regularly. Fertilize them every 2-3 weeks with a balanced fertilizer.
10. How can I extend the tomato growing season?
To extend the tomato growing season, start your seeds indoors 6-8 weeks before the last expected frost. Harden off the seedlings before transplanting them outdoors. Use row covers or cloches to protect your plants from frost. Choose early-maturing tomato varieties. At the end of the season, harvest any green tomatoes and ripen them indoors. You can also try growing tomatoes in a greenhouse or high tunnel.
Leave a Comment