
Water Only Garlic Bottle Growing: Sounds like something out of a sci-fi movie, right? But trust me, it’s a real, and surprisingly simple, way to cultivate fresh garlic right in your own home! Forget about sprawling gardens and back-breaking digging; this DIY project brings the earthy goodness of garlic to even the smallest apartments.
Garlic, a staple in cuisines worldwide, has a rich history stretching back thousands of years. From ancient Egypt, where it fueled the pyramid builders, to its use in traditional medicine across cultures, garlic has always been valued for its potent flavor and health benefits. Now, you can tap into that legacy with a modern, space-saving twist.
Why should you try water only garlic bottle growing? Well, imagine having fresh garlic readily available whenever you need it, without the hassle of traditional gardening. No soil, no weeding, just pure, unadulterated garlic goodness. This method is perfect for urban dwellers, beginner gardeners, or anyone looking for a fun and sustainable way to grow their own food. Plus, it’s a fantastic conversation starter! I’m excited to share this easy and rewarding technique with you, so let’s dive in and discover how to grow your own garlic using just a bottle and some water!
Growing Garlic in Water: A Fun and Easy DIY Project
Hey there, fellow plant enthusiasts! Ever thought about growing garlic without soil? It’s totally doable, and it’s a super fun way to add a little green to your kitchen windowsill. Plus, you get delicious garlic greens to snip and use in your cooking! I’m going to walk you through the whole process, step-by-step, so you can have your own little garlic garden in no time.
What You’ll Need
Before we dive in, let’s gather our supplies. This is a pretty low-key project, so you probably already have most of this stuff lying around.
* Garlic Cloves: Choose organic garlic if possible. Look for plump, healthy cloves that haven’t started to sprout yet (although a little sprouting is okay!). I usually grab a head from the grocery store or farmer’s market.
* A Glass Jar or Bottle: An empty jam jar, a mason jar, or even a recycled glass bottle will work perfectly. Just make sure it’s clean! The size depends on how many cloves you want to grow.
* Water: Tap water is fine, but filtered water is even better.
* Toothpicks (Optional): These are helpful for suspending the garlic clove if your jar opening is too wide.
* A Sunny Spot: Garlic loves light, so find a windowsill or countertop that gets plenty of sunshine.
Preparing Your Garlic Cloves
Okay, let’s get our garlic ready for its water bath!
1. Separate the Cloves: Gently separate the cloves from the garlic head. Be careful not to damage them. We want them to be as intact as possible.
2. Leave the Paper On: Don’t peel the papery skin off the cloves! This helps protect them from rotting and provides a little extra support.
3. Inspect for Damage: Give each clove a good once-over. Discard any that are bruised, moldy, or feel soft. We only want the healthiest cloves for this project.
Setting Up Your Water Garden
Now for the fun part – creating the perfect environment for our garlic to thrive!
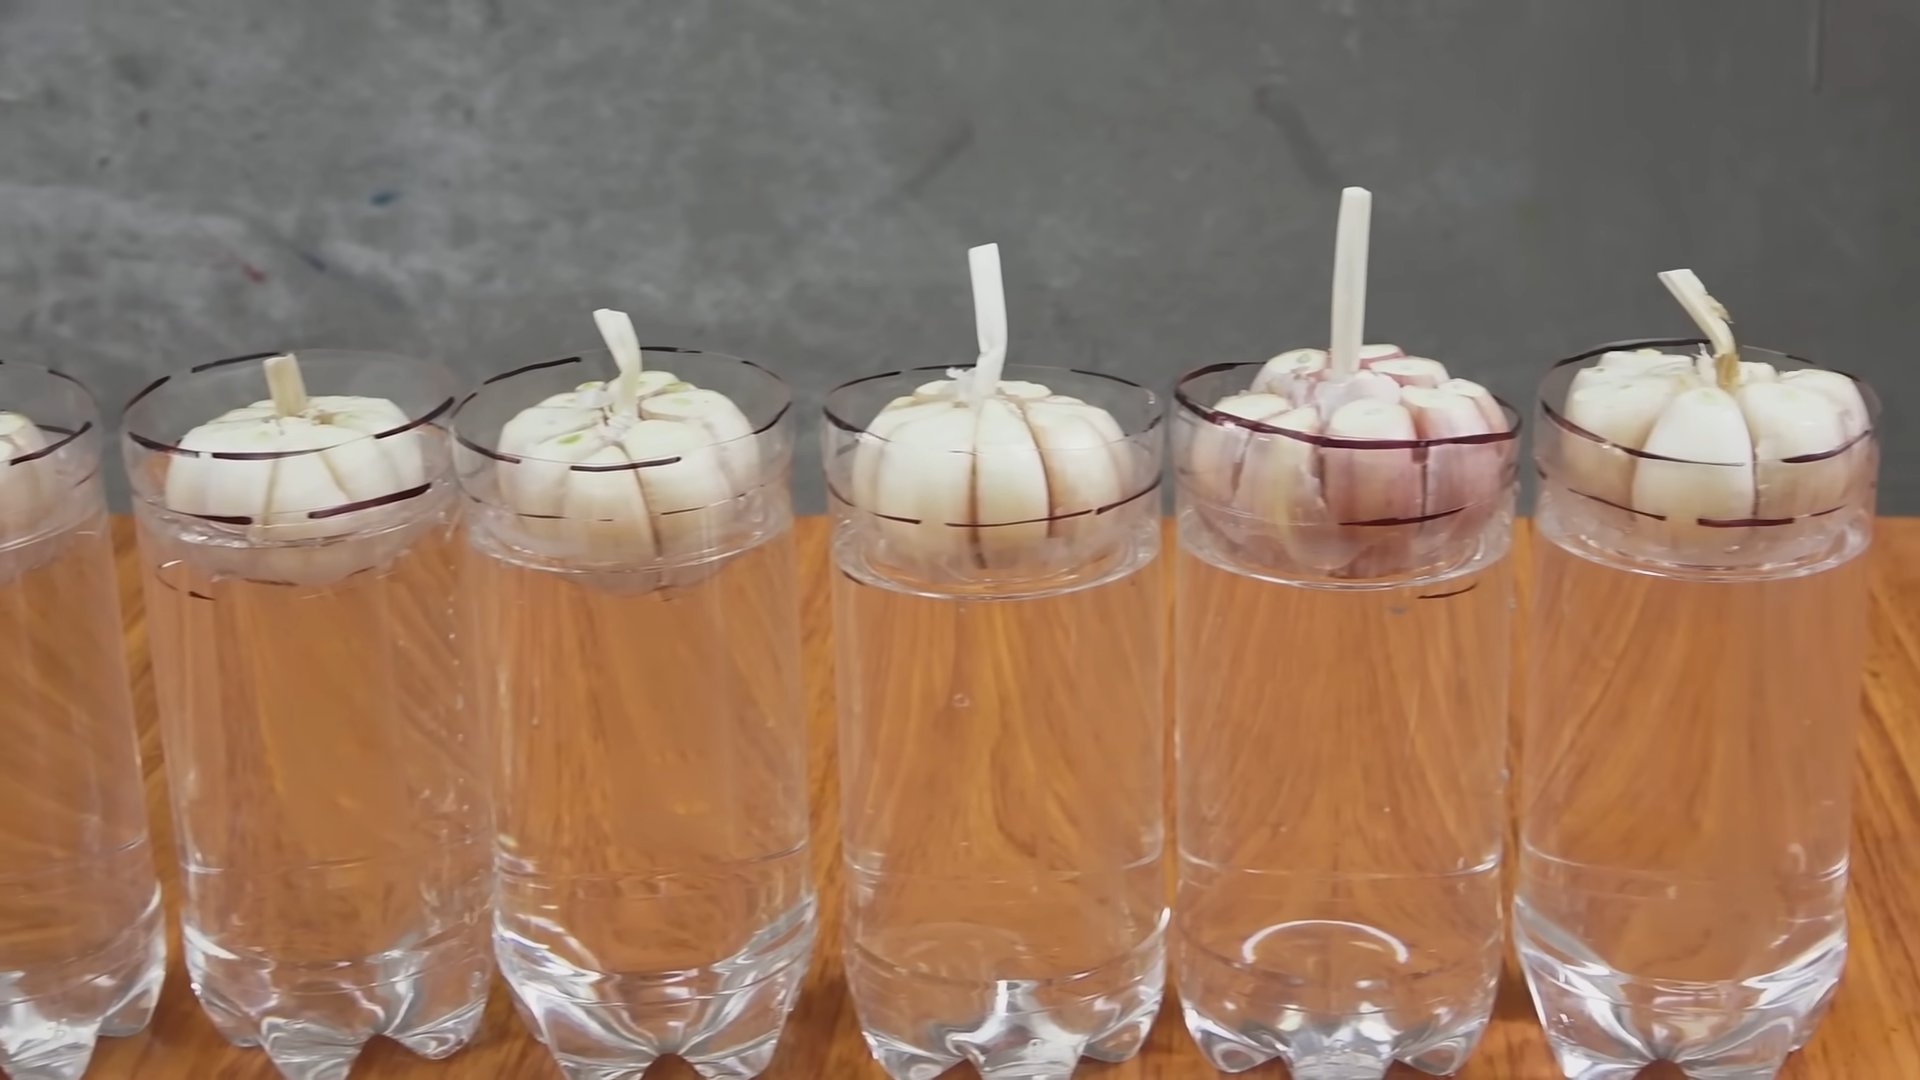
1. Fill the Jar with Water: Pour water into your jar or bottle, leaving about an inch of space at the top.
2. Position the Garlic Cloves: This is where the toothpicks might come in handy. The goal is to have the bottom of the clove (the root end) submerged in water, but the rest of the clove should be above the waterline.
* Using Toothpicks: If your jar opening is wide, insert three or four toothpicks around the middle of the clove, creating a little “platform” that rests on the rim of the jar. This will hold the clove in place.
* Without Toothpicks: If your jar opening is narrow enough, you might be able to simply rest the clove on the rim, with the bottom touching the water.
3. Arrange for Stability: Make sure the cloves are stable and won’t tip over. You might need to adjust the toothpicks or the amount of water in the jar.
4. Place in a Sunny Location: Find a bright, sunny spot for your garlic garden. A south-facing windowsill is ideal.
Maintaining Your Garlic Garden
This is the easiest part! Just a little bit of maintenance will keep your garlic happy and healthy.
1. Change the Water Regularly: Every two to three days, pour out the old water and replace it with fresh water. This prevents the water from getting stagnant and keeps the garlic healthy.
2. Monitor Water Level: Make sure the bottom of the cloves is always submerged in water. Add more water as needed.
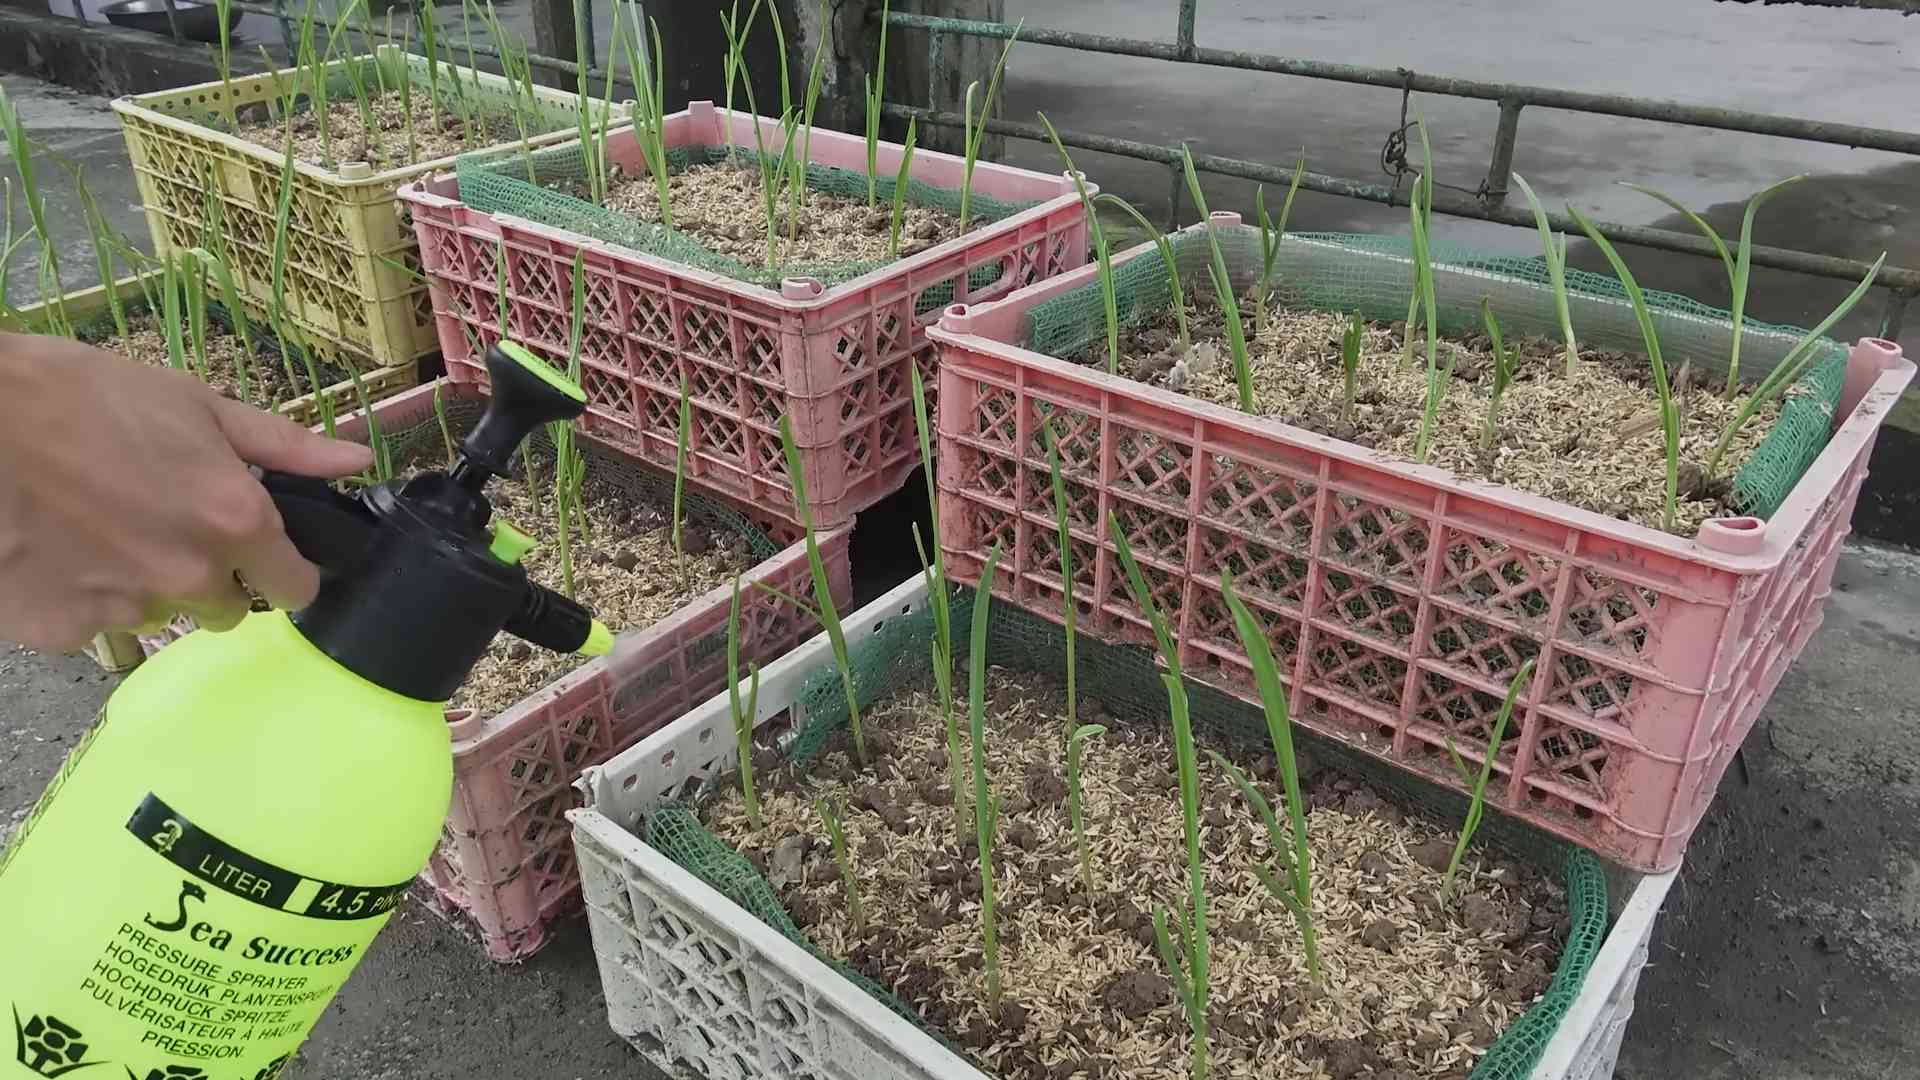
3. Watch for Growth: Within a few days, you should start to see roots sprouting from the bottom of the cloves and green shoots emerging from the top.
4. Rotate the Jar: To ensure even growth, rotate the jar every few days so that all sides of the garlic get equal sunlight.
5. Remove Any Mold: If you notice any mold growing on the cloves, gently wipe it off with a damp cloth.
Harvesting Your Garlic Greens
The best part! You can start harvesting your garlic greens as soon as they’re a few inches tall.
1. Snip the Greens: Use scissors to snip off the green shoots, leaving about an inch or two of growth. This will encourage the plant to produce more greens.
2. Use in Cooking: Garlic greens have a mild garlic flavor and can be used in salads, soups, stir-fries, or as a garnish. I love adding them to omelets!
3. Continue Harvesting: You can continue harvesting the greens as they grow. The cloves will eventually start to deteriorate, but you should be able to get several harvests before that happens.
Troubleshooting
Sometimes things don’t go exactly as planned. Here are a few common issues you might encounter and how to fix them.
* Rotting Cloves: If your cloves start to rot, it’s usually a sign that the water is not being changed frequently enough or that the cloves were not healthy to begin with. Remove the rotting cloves and start with fresh ones.
* Slow Growth: If your garlic is growing slowly, it might not be getting enough sunlight. Try moving it to a brighter location.
* Yellowing Leaves: Yellowing leaves can be a sign of overwatering or underwatering. Make sure the bottom of the cloves is always submerged in water, but don’t let the entire clove sit in water.
* Mold Growth: Mold growth is usually caused by stagnant water. Change the water more frequently and make sure the cloves are not overcrowded.
Beyond the Basics: Taking it to the Next Level
Want to get even more out of your water-grown garlic? Here are a few ideas:
* Experiment with Different Varieties: Try growing different varieties of garlic to see which ones you like best. Softneck garlic tends to produce more greens than hardneck garlic.
* Add Nutrients: You can add a diluted liquid fertilizer to the water every few weeks to give your garlic a boost. Just be sure to use a fertilizer that’s safe for edible plants.
* Plant in Soil: Once the roots are well-developed, you can transplant the garlic cloves into soil. This will allow them to grow into full-sized garlic bulbs.
* Grow Garlic Scapes: If you’re growing hardneck garlic, you’ll eventually get garlic scapes (the curly flower stalks). These are delicious and can be used in cooking just like the greens.
Why I Love This Project
Growing garlic in water is such a rewarding project. It’s easy, inexpensive, and it’s a great way to add a little bit of fresh flavor to your meals. Plus, it’s just plain fun to watch the garlic grow! I hope you give it a try and enjoy the process as much as I do. Happy growing!
Conclusion
So, there you have it! Growing garlic in a water bottle, using only water, might sound like a quirky experiment, but it’s a surprisingly effective and rewarding way to cultivate fresh garlic greens right in your own home. This method is a must-try for several compelling reasons. First, it’s incredibly space-efficient, making it perfect for apartment dwellers or anyone with limited gardening space. Second, it’s a fantastic way to repurpose plastic bottles, contributing to a more sustainable lifestyle. Third, and perhaps most importantly, it provides a continuous supply of fresh, flavorful garlic greens that you can use to enhance your culinary creations.
This water-only method simplifies the process, eliminating the need for soil and reducing the risk of soilborne diseases. The clear bottle allows you to monitor root development, providing a fascinating glimpse into the plant’s growth process. Plus, it’s a fun and educational project for kids, teaching them about plant life cycles and sustainable practices.
Beyond the basic method, there are several variations you can explore. For example, you can experiment with different types of garlic cloves to see which varieties thrive best in a water-only environment. You can also try adding a diluted liquid fertilizer to the water every few weeks to boost growth, although it’s not strictly necessary. Another variation is to use different types of containers, such as glass jars or repurposed plastic containers, as long as they are clean and allow for adequate drainage.
Consider using filtered water instead of tap water, especially if your tap water is heavily chlorinated. This can help to promote healthier root growth. You can also experiment with different lighting conditions to see how they affect the growth rate and flavor of the garlic greens. Some people find that placing the bottle near a sunny window provides the best results, while others prefer to use artificial grow lights.
The beauty of this DIY trick lies in its simplicity and adaptability. It’s a low-maintenance way to enjoy the fresh taste of garlic without the hassle of traditional gardening. And the best part? You can start harvesting your garlic greens in just a few weeks!
We strongly encourage you to give this water-only garlic bottle growing method a try. It’s a fun, easy, and rewarding project that will provide you with a continuous supply of fresh garlic greens. Once you’ve tried it, we’d love to hear about your experience. Share your photos, tips, and variations in the comments below. Let’s build a community of water-only garlic growers and learn from each other’s successes and challenges. Your insights could help others discover the joys of this simple yet effective gardening technique. Don’t forget to use the hashtag #WaterOnlyGarlic when sharing your results on social media! Let’s spread the word about this amazing DIY trick and inspire others to grow their own fresh garlic greens.
Frequently Asked Questions
What kind of garlic should I use?
You can use any type of garlic clove for this method. However, organic garlic is often recommended to avoid any potential pesticide residue. Softneck varieties tend to be more adaptable to different growing conditions, but hardneck varieties can also work well. Experiment with different types to see which ones thrive best in your environment. Remember that the larger the clove, the more energy it has to sprout and grow.
How much light does the garlic need?
Garlic greens need plenty of light to grow properly. A sunny windowsill that receives at least 6 hours of direct sunlight per day is ideal. If you don’t have access to a sunny windowsill, you can use artificial grow lights. Position the lights about 6-12 inches above the bottle and keep them on for 12-16 hours per day. Rotate the bottle regularly to ensure that all sides receive equal light exposure.
How often should I change the water?
It’s important to change the water regularly to prevent the growth of bacteria and algae. Change the water every 2-3 days, or more frequently if it becomes cloudy or discolored. When changing the water, be careful not to damage the roots. Gently lift the garlic clove out of the bottle and pour out the old water. Rinse the bottle thoroughly with clean water before refilling it.
Can I use tap water?
While tap water can be used, filtered water is generally recommended, especially if your tap water is heavily chlorinated. Chlorine can inhibit root growth and affect the flavor of the garlic greens. If you must use tap water, let it sit out for 24 hours to allow the chlorine to dissipate.
How long does it take for the garlic to sprout?
You should start to see sprouts within a week or two. The exact time will depend on the variety of garlic, the temperature, and the amount of light it receives. Be patient and continue to change the water regularly. Once the sprouts appear, they will grow quickly.
When can I start harvesting the garlic greens?
You can start harvesting the garlic greens when they are about 6-8 inches tall. Use scissors to snip off the greens near the base of the plant. Be careful not to cut off all of the greens at once, as this can weaken the plant. Harvest only what you need and allow the remaining greens to continue growing.
How do I use the garlic greens?
Garlic greens have a mild garlic flavor and can be used in a variety of dishes. They can be added to salads, soups, stir-fries, and omelets. They can also be used as a garnish or as a substitute for chives. Experiment with different ways to use them and find your favorite recipes.
Can I reuse the garlic clove after harvesting the greens?
The garlic clove will eventually exhaust its energy reserves and stop producing new greens. However, you can try planting the clove in soil after you have finished harvesting the greens. It may or may not produce a new bulb, but it’s worth a try.
What if the garlic starts to rot?
If the garlic starts to rot, it’s likely due to overwatering or poor drainage. Remove the rotten garlic clove immediately and discard it. Clean the bottle thoroughly with soap and water before starting again with a fresh clove. Make sure to change the water regularly and avoid overwatering.
Can I add fertilizer to the water?
While not strictly necessary, adding a diluted liquid fertilizer to the water every few weeks can help to boost growth. Use a balanced fertilizer that is specifically formulated for vegetables. Dilute the fertilizer according to the instructions on the label and add it to the water when you change it. Be careful not to over-fertilize, as this can damage the roots.
Is this method sustainable?
Yes, this method is a sustainable way to grow garlic greens. It uses minimal resources and reduces waste by repurposing plastic bottles. It also eliminates the need for soil, which can be a valuable resource in some areas. By growing your own garlic greens, you can reduce your reliance on commercially grown produce and support a more sustainable food system.
What are the benefits of growing garlic in water only?
Growing garlic in water only offers several benefits:
* Space-saving: Ideal for small spaces like apartments.
* Easy to monitor: The clear bottle allows you to see root development.
* Clean: No soil means less mess.
* Sustainable: Repurposes plastic bottles.
* Educational: A great project for kids to learn about plant growth.
Can I grow other herbs using this water-only method?
While this method is specifically tailored for garlic, you can experiment with other herbs that are known to propagate easily in water, such as mint, basil, and rosemary. However, keep in mind that the results may vary, and some herbs may require different conditions to thrive.
Leave a Comment