
Waterless Tomato Growing: Sounds like something out of a sci-fi movie, right? But trust me, it’s a very real and incredibly rewarding way to cultivate juicy, delicious tomatoes right in your own backyard! Forget lugging around heavy watering cans and constantly worrying about drought conditions. I’m about to let you in on a little secret that will revolutionize your gardening game.
For centuries, humans have toiled, watering their crops, relying on rainfall, and battling the elements to bring forth a bountiful harvest. While traditional methods certainly have their place, the increasing scarcity of water resources and the growing desire for sustainable living have sparked a surge in innovative techniques like waterless tomato growing. This method isn’t just a trend; it’s a practical solution for gardeners in arid climates or those simply looking to reduce their environmental footprint.
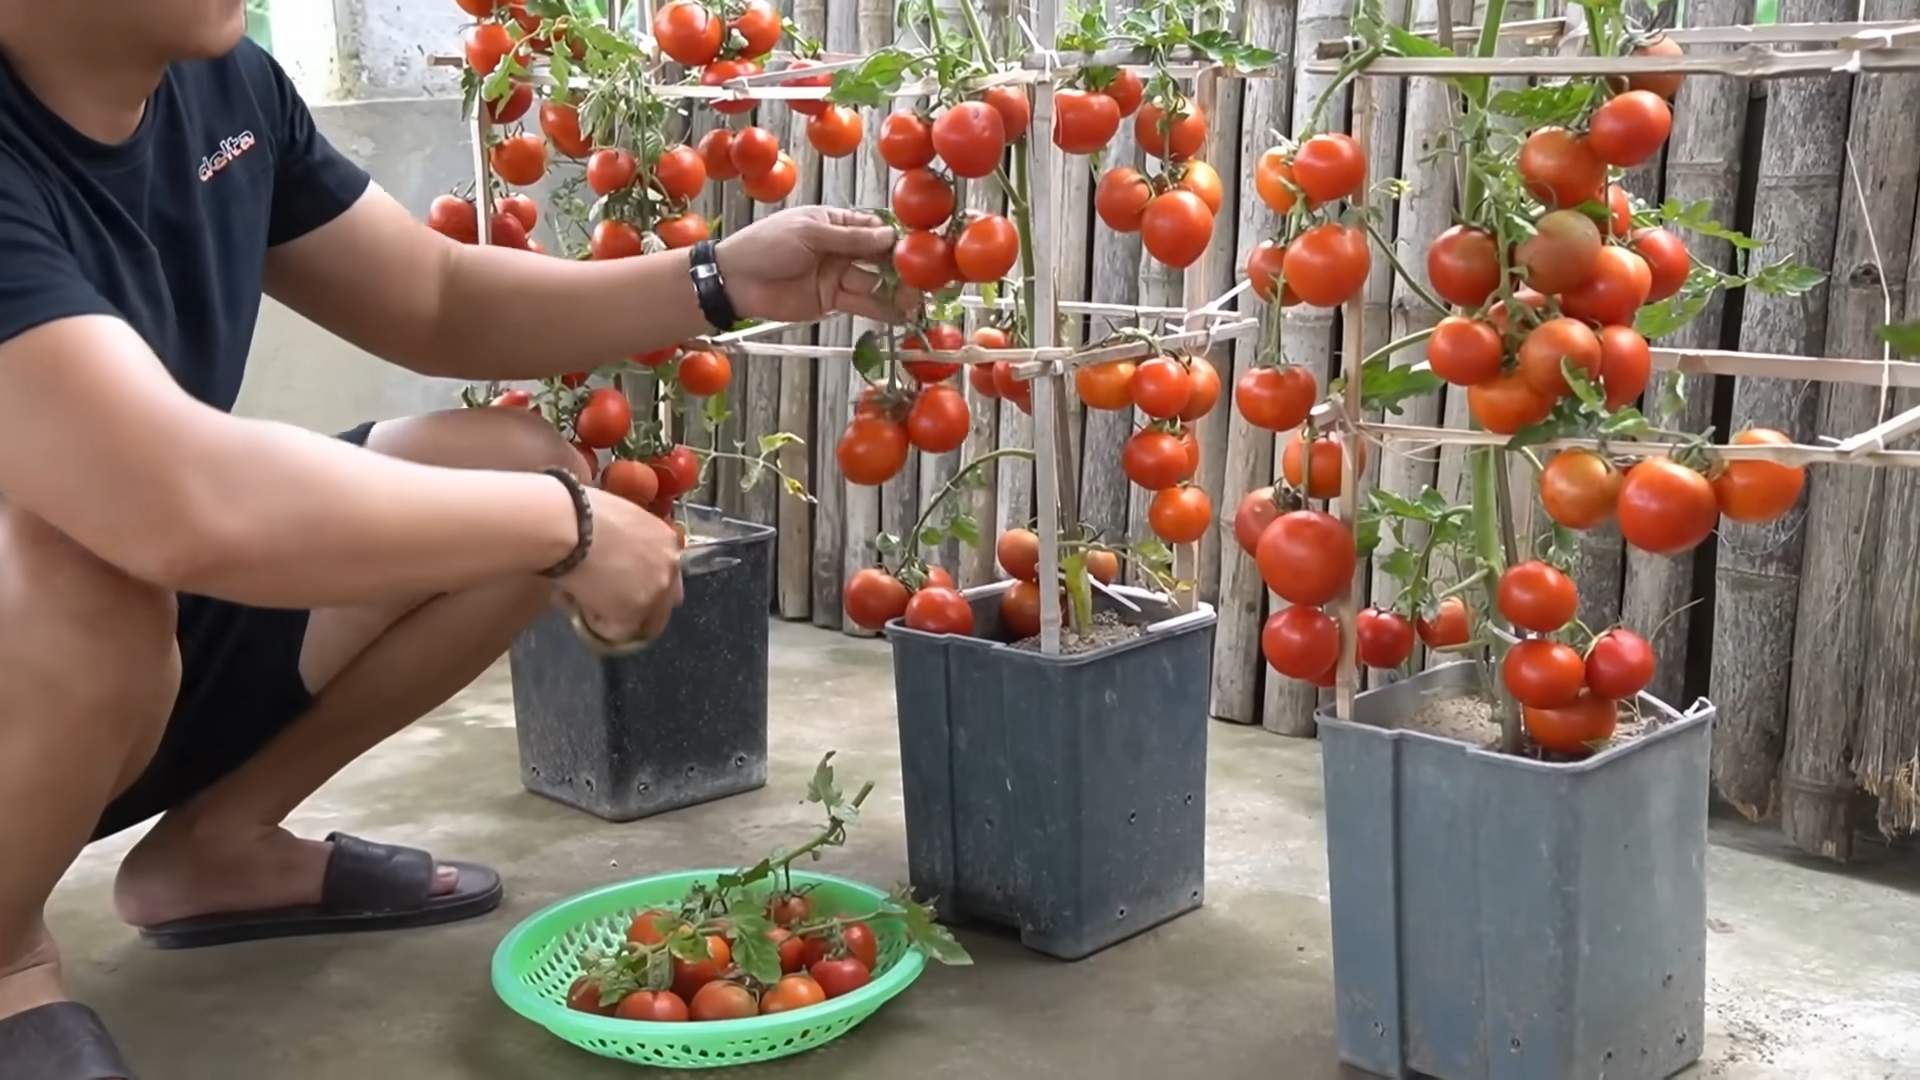
Let’s be honest, who *doesn’t* love a homegrown tomato? But the constant watering can be a real chore, not to mention a drain on your resources. This DIY guide will provide you with simple, effective tricks and hacks to achieve a thriving tomato crop with minimal water usage. Imagine the satisfaction of biting into a sun-ripened tomato, knowing you grew it yourself, sustainably and efficiently. So, ditch the watering can and get ready to unlock the secrets of waterless tomato growing! I’m excited to share these tips with you!
Waterless Tomato Growing: A DIY Guide to Self-Sufficient Tomatoes
Hey there, fellow gardening enthusiasts! Ever dreamed of growing juicy, delicious tomatoes without the constant worry of watering? Well, get ready to ditch the hose because I’m going to walk you through a fantastic DIY method for waterless tomato growing. This technique, often called “Olla Irrigation,” is a game-changer, especially if you live in a dry climate or just want to conserve water. It’s surprisingly simple and incredibly effective. Let’s get started!
What is Olla Irrigation?
Before we dive into the how-to, let’s quickly understand the “what.” An olla (pronounced “oy-yah”) is an unglazed clay pot that you bury in the soil. You fill it with water, and the porous clay slowly releases moisture directly to the roots of your plants. This eliminates surface evaporation and runoff, delivering water exactly where it’s needed. It’s an ancient technique that’s making a big comeback, and for good reason!
Why Choose Olla Irrigation for Tomatoes?
* Water Conservation: This is the biggest benefit! You’ll use significantly less water compared to traditional watering methods.
* Healthier Plants: Consistent moisture at the root zone promotes strong, healthy root development and reduces the risk of fungal diseases.
* Reduced Weeds: Since the surface soil stays relatively dry, weed seeds are less likely to germinate.
* Less Work: Once the olla is in place, you just need to refill it periodically. No more daily watering!
* Happier Tomatoes: Tomatoes thrive with consistent moisture, leading to bigger, juicier, and more flavorful fruits.
Materials You’ll Need
* Unglazed Clay Pot(s): This is the heart of the system. You can use terracotta pots, but make sure they are *unglazed*. Glazed pots won’t allow water to seep through. The size of the pot will depend on the size of your tomato plant and the area you want to irrigate. A 1-gallon olla is good for a single tomato plant, while a larger 2-3 gallon olla can support multiple plants.
* Clay Saucer or Rock: To cover the top of the olla and prevent evaporation and mosquito breeding.
* Drill with a Ceramic Drill Bit (Optional): If your pot doesn’t have a drainage hole, you’ll need to drill one. This helps with filling and prevents the pot from cracking if it freezes.
* Potting Soil or Garden Soil: To plant your tomato seedlings.
* Mulch (Optional): To further conserve moisture and suppress weeds. Straw, wood chips, or shredded leaves work well.
* Tomato Seedlings: Choose your favorite variety!
* Shovel or Trowel: For digging the hole for the olla.
* Water: Obviously!
Step-by-Step Instructions: Setting Up Your Waterless Tomato Garden
Okay, let’s get our hands dirty! Here’s how to set up your waterless tomato garden using olla irrigation:
1. Preparing the Olla
1. Check for a Drainage Hole: Most terracotta pots have a drainage hole at the bottom. If yours doesn’t, you’ll need to drill one. This is important for preventing the pot from cracking in freezing temperatures and for easier filling.
2. Drilling a Drainage Hole (If Necessary): Use a ceramic drill bit and drill slowly and carefully. Start with a small pilot hole and gradually increase the size. Submerge the pot in water while drilling to keep it cool and prevent cracking.
3. Seal the Drainage Hole (Optional): Some people prefer to seal the drainage hole to prevent water from escaping too quickly. You can use a cork, a small stone, or even a piece of clay. I personally don’t seal it completely, I just use a small stone to slow the drainage.
2. Preparing the Planting Site
1. Choose a Sunny Location: Tomatoes need at least 6-8 hours of sunlight per day.
2. Prepare the Soil: Dig a hole that’s large enough to accommodate the olla, plus some extra space for the tomato plant’s roots. Amend the soil with compost or other organic matter to improve drainage and fertility.
3. Position the Olla: Place the olla in the center of the planting area. The top of the olla should be a few inches below the soil surface.
4. Backfill Around the Olla: Fill the space around the olla with soil, packing it firmly to ensure good contact between the olla and the surrounding soil.
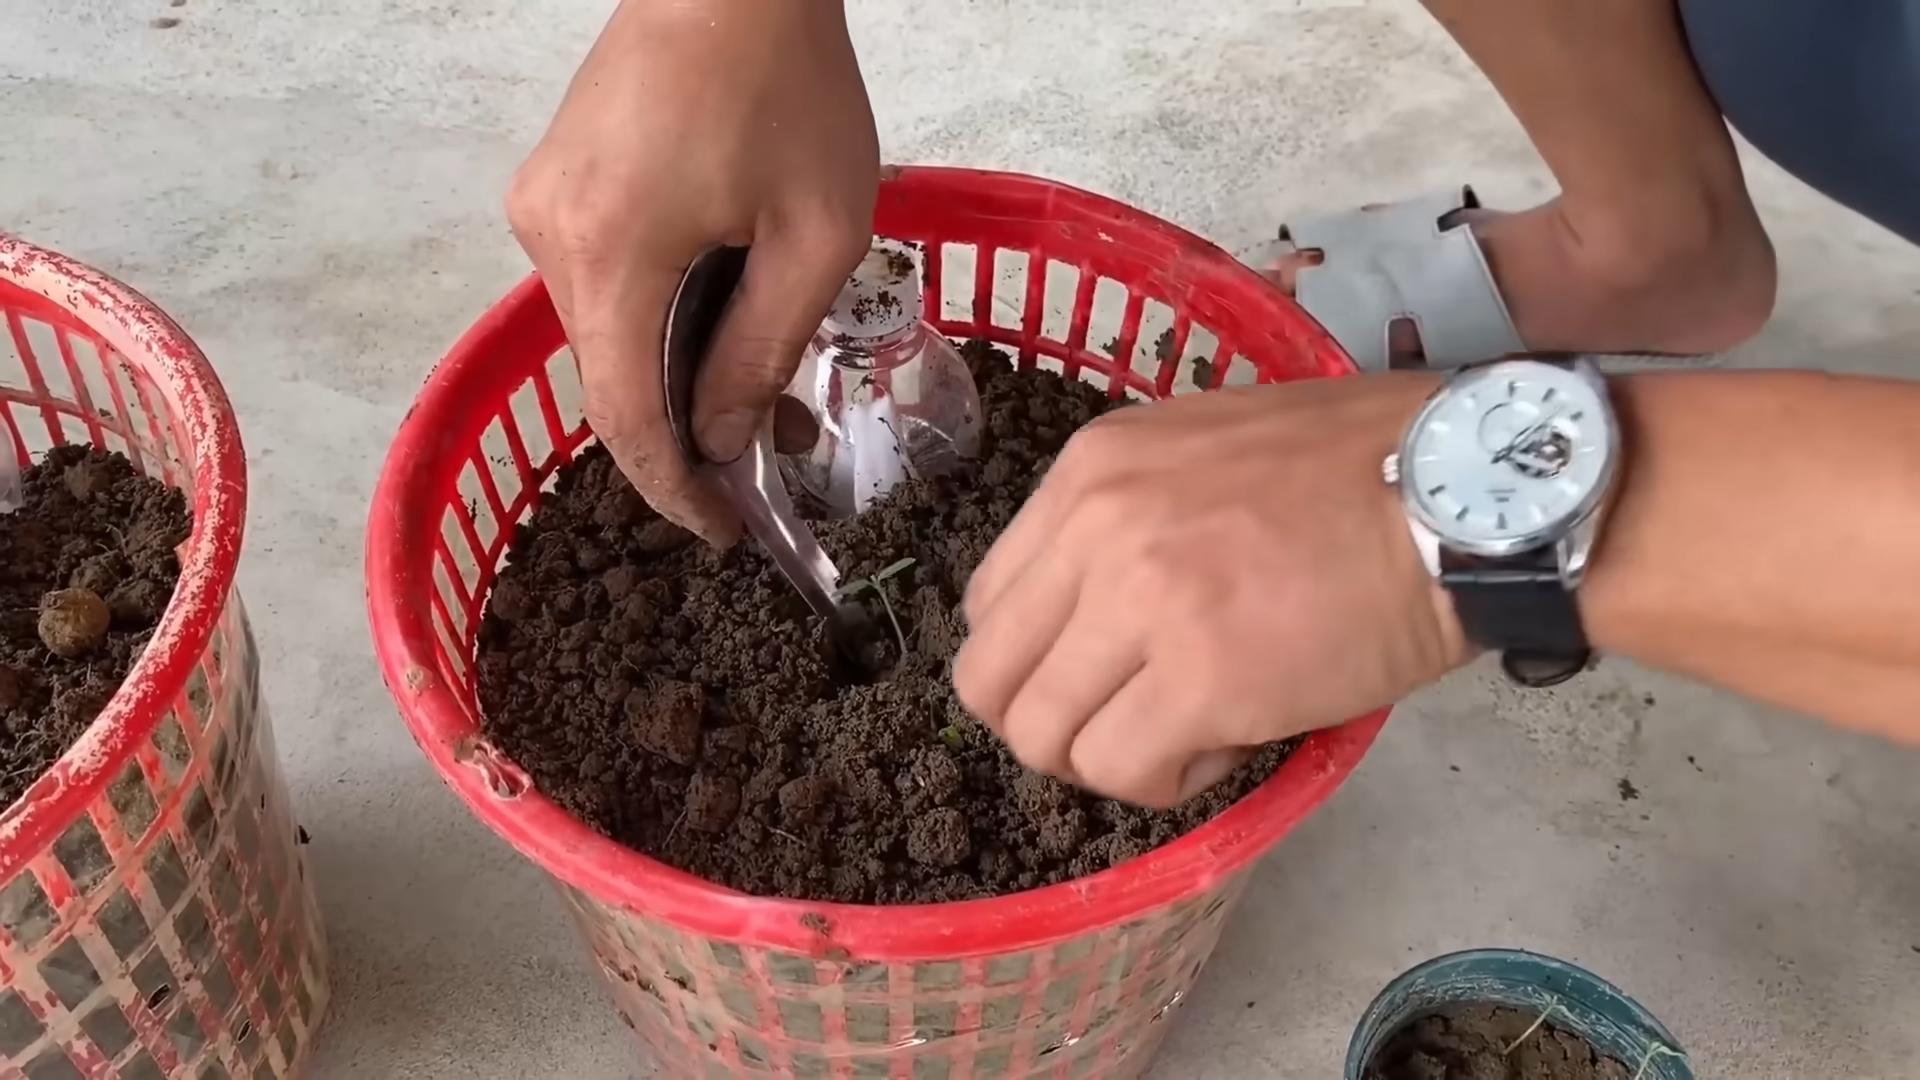
3. Planting Your Tomato Seedling
1. Dig a Hole for the Seedling: Dig a hole near the olla, large enough to accommodate the root ball of your tomato seedling. The distance from the olla will depend on the size of the olla and the mature size of your tomato plant. Generally, a few inches to a foot away is a good starting point.
2. Plant the Seedling: Gently remove the seedling from its container and place it in the hole. Make sure the top of the root ball is level with the surrounding soil.
3. Backfill and Water: Fill the hole with soil, gently packing it around the roots. Water the seedling thoroughly to help it settle in.
4. Filling and Maintaining the Olla
1. Fill the Olla with Water: Slowly pour water into the olla until it’s full.
2. Cover the Olla: Place a clay saucer or rock over the top of the olla to prevent evaporation and keep out mosquitoes.
3. Monitor the Water Level: Check the water level in the olla every few days, especially during hot, dry weather. Refill as needed. The frequency of refilling will depend on the size of the olla, the type of soil, and the weather conditions.
4. Mulch (Optional): Apply a layer of mulch around the base of the tomato plant to further conserve moisture and suppress weeds.
5. Fertilize: Even with olla irrigation, your tomatoes will still need nutrients. Fertilize regularly with a tomato-specific fertilizer according to the package directions. You can also add compost tea to the olla when you refill it for an extra boost of nutrients.
6. Prune and Support: Prune your tomato plants regularly to encourage air circulation and fruit production. Provide support with stakes or cages to prevent the plants from falling over.
Troubleshooting and Tips for Success
* Olla Cracking: If you live in an area with freezing temperatures, make sure to empty the olla before the first frost to prevent it from cracking. You can also wrap the olla with insulation to protect it.
* Slow Drainage: If the water in the olla is draining too slowly, the clay may be clogged with minerals. Try soaking the olla in a solution of vinegar and water to dissolve the mineral deposits.
* Mosquitoes: To prevent mosquitoes from breeding in the olla, make sure the cover is tightly sealed. You can also add a few drops of vegetable oil to the water to suffocate any mosquito larvae.
* Choosing the Right Size Olla: The size of the olla will depend on the size of your tomato plant and the type of soil. For a single tomato plant in well-draining soil, a 1-gallon olla is usually sufficient. For larger plants or plants in sandy soil, you may need a larger olla.
* Experiment: Don’t be afraid to experiment with different sizes and placements of ollas to find what works best for your garden.
* Consider Companion Planting: Plant basil or marigolds near your tomatoes. These plants can help deter pests and attract beneficial insects.
Adapting the Method for Container Gardening
Olla irrigation isn’t just for in-ground gardens! You can easily adapt this method for container gardening.
1. Choose a Large Container: Select a container that’s large enough to accommodate both the olla and the tomato plant.
2. Place the Olla in the Center: Place the olla in the center of the container before adding the potting mix.
3. Fill with Potting Mix: Fill the container with potting mix, packing it firmly around the olla.
4. Plant Your Tomato Seedling: Plant your tomato seedling near the olla, following the same steps as for in-ground planting.
5. Maintain as Usual: Fill and maintain the olla as described above.
Beyond Tomatoes: Other Plants That Benefit from Olla Irrigation
While we’ve focused on tomatoes, many other plants thrive with olla irrigation. Here are a few examples:
* Peppers
* Eggplant
* Squash
* Melons
* Herbs (like basil, rosemary, and thyme)
The key is to choose plants that prefer consistent moisture and are relatively drought-tolerant.
Final Thoughts
Waterless tomato growing with olla irrigation is a fantastic way to conserve water, grow healthier plants, and enjoy a more
Conclusion
So, there you have it! The waterless tomato growing method isn’t just a quirky experiment; it’s a game-changer for anyone looking to cultivate delicious, intensely flavored tomatoes with minimal water usage. In a world increasingly concerned about water conservation and sustainable gardening practices, this technique offers a powerful and practical solution. Think about it: vibrant, juicy tomatoes bursting with flavor, all while significantly reducing your environmental footprint. That’s a win-win!
The beauty of this method lies in its simplicity and adaptability. While we’ve outlined the core principles, don’t be afraid to experiment and tailor it to your specific environment and tomato varieties. For instance, if you live in a particularly arid climate, you might consider adding a layer of mulch around the base of your plants to further conserve moisture. Similarly, different tomato varieties may respond differently to the waterless approach. Heirlooms, known for their robust flavor, often thrive in these conditions, but don’t hesitate to try it with your favorite hybrids as well.
Consider these variations to enhance your waterless tomato growing experience:
* Companion Planting: Incorporate companion plants like basil, marigolds, or onions around your tomato plants. These not only deter pests but can also improve the overall health and flavor of your tomatoes.
* Soil Amendments: While the waterless method emphasizes minimal watering, enriching your soil with compost or well-rotted manure before planting is crucial. This provides essential nutrients and improves drainage, setting your plants up for success.
* Vertical Growing: If space is limited, explore vertical growing options like trellises or cages. This allows for better air circulation and sunlight exposure, further enhancing tomato production.
* Grafting: For even greater drought resistance and disease resistance, consider grafting your desired tomato variety onto a hardy rootstock specifically bred for dry conditions. This can significantly improve your chances of success, especially in challenging environments.
But the real magic happens when you put this method into practice. Imagine biting into a sun-ripened tomato, grown with minimal water, its flavor intensified by the controlled stress. It’s a taste experience unlike any other.
We wholeheartedly encourage you to give this waterless tomato growing technique a try. It’s not just about saving water; it’s about unlocking the full potential of your tomatoes and connecting with the natural world in a more sustainable way.
And most importantly, we want to hear about your experiences! Share your successes, your challenges, and your variations in the comments below. Let’s build a community of water-wise gardeners, sharing knowledge and inspiring each other to grow the most delicious and sustainable tomatoes possible. Your insights could be invaluable to others embarking on this journey. So, grab your seeds, prepare your soil, and get ready to experience the joy of waterless tomato growing!
Frequently Asked Questions (FAQs)
What exactly is “waterless” tomato growing? Does it mean absolutely no water at all?
No, “waterless” tomato growing is a bit of a misnomer. It doesn’t mean you never water your plants. It refers to a method where you significantly reduce the amount of water you provide to your tomato plants after they are established. The initial watering is crucial for root development. Once the plants are established, you rely on the plant’s ability to draw moisture from deeper in the soil, encouraging a stronger root system and more concentrated flavors in the tomatoes. The goal is to create a slightly stressed environment that forces the plant to focus on fruit production rather than vegetative growth.
What kind of soil is best for waterless tomato growing?
Well-draining soil is absolutely essential. You need soil that retains some moisture but doesn’t become waterlogged. A loamy soil amended with plenty of organic matter, such as compost or well-rotted manure, is ideal. The organic matter helps retain moisture and provides essential nutrients, while the loamy texture ensures good drainage. Avoid heavy clay soils, as they tend to retain too much water and can lead to root rot, especially in a water-restricted environment. Before planting, consider conducting a soil test to determine the pH level and nutrient content. Tomatoes prefer a slightly acidic soil with a pH between 6.0 and 6.8. Amend the soil accordingly based on the test results.
How often should I water the tomato plants initially, before switching to the “waterless” method?
During the initial establishment phase, water your tomato plants deeply and regularly, about every 2-3 days, depending on the weather conditions. The goal is to keep the soil consistently moist but not soggy. This encourages the roots to grow deep and strong. After about 2-3 weeks, or when the plants have established a good root system (you should see new growth), you can gradually reduce the watering frequency.
How do I know when to stop watering altogether?
This is where observation comes in. Look for signs that your plants are well-established and starting to produce fruit. The leaves should be a healthy green color, and the plants should be showing vigorous growth. Once you see these signs, you can begin to reduce watering. Start by extending the intervals between watering, and eventually, you can stop watering altogether, unless the plants show signs of severe stress, such as wilting leaves that don’t recover overnight. Remember, the goal is to create a slightly stressed environment, not to kill the plants.
What are the signs that my tomato plants are stressed from lack of water?
The most obvious sign is wilting leaves. However, mild wilting during the hottest part of the day is normal. The key is to observe whether the leaves recover overnight. If the leaves remain wilted in the morning, it’s a sign that the plants are stressed and need water. Other signs of water stress include yellowing leaves, stunted growth, and blossom end rot (a calcium deficiency caused by inconsistent watering).
Can I use this method for all types of tomatoes?
While the waterless method can work for many tomato varieties, some are better suited than others. Determinate varieties (bush tomatoes) tend to be more drought-tolerant than indeterminate varieties (vining tomatoes). Heirlooms, known for their robust flavor, often thrive in these conditions. Experiment with different varieties to see what works best in your specific climate and soil conditions.
What if I live in a very hot and dry climate? Will this method still work?
In extremely hot and dry climates, you may need to provide supplemental watering, even with the waterless method. Monitor your plants closely for signs of stress and water them sparingly when needed. You can also use techniques like mulching to help retain moisture in the soil. Consider using shade cloth during the hottest part of the day to reduce water loss through transpiration.
Does this method affect the size or yield of the tomatoes?
While the waterless method may result in slightly smaller tomatoes compared to conventionally watered plants, the flavor is often significantly enhanced. The yield may also be slightly lower, but the trade-off is a more sustainable and flavorful harvest.
Is there anything else I can do to help my tomato plants thrive in a water-restricted environment?
Yes! Mulching is crucial for retaining moisture in the soil and suppressing weeds. Use organic mulches like straw, wood chips, or shredded leaves. Companion planting can also help. Plants like basil, marigolds, and onions can deter pests and improve the overall health of your tomato plants. Finally, ensure that your plants receive adequate sunlight (at least 6-8 hours per day) for optimal growth and fruit production.
What about fertilizer? Should I fertilize my tomato plants differently when using the waterless method?
Yes, you should be mindful of fertilization. Over-fertilizing can lead to excessive vegetative growth, which defeats the purpose of the waterless method. Use a balanced fertilizer sparingly, and focus on providing nutrients through soil amendments like compost and well-rotted manure. Consider using a fertilizer specifically formulated for tomatoes, and follow the instructions carefully. Avoid fertilizers high in nitrogen, as they can promote leafy growth at the expense of fruit production.
Leave a Comment